Would you like to learn how to add a custom font to the Slider Revolution? Then read further now.
Every time when I customize a WP theme I start with creating homepage slides with the help of the Slider Revolution. However, sometimes it is too time-consuming to check all the fonts available in the standard font list of the revslider or sometimes I consider most of them to be inappropriate for my particular design concept. This is when a custom font comes in handy.
In my today’s guide, I will show you how to add a custom font in the Slider Revolution. Let’s start!
What to do first?
Of course, you should firstly choose the typeface you would like to use for your slide in the slider.
There are multiple sources out there offering a number of free and premium fonts for personal and commercial use. Please check this collection of resources where you can find the required fonts for your designs.
Most fonts come in OTF and TTF formats, but you can also find them in SVG, WOFF, and EOT format available.
When the font is chosen and downloaded, now it’s time to upload it to the wp-content/webfonts folder using FTP. See this guide to find the information on how to use FTP client.
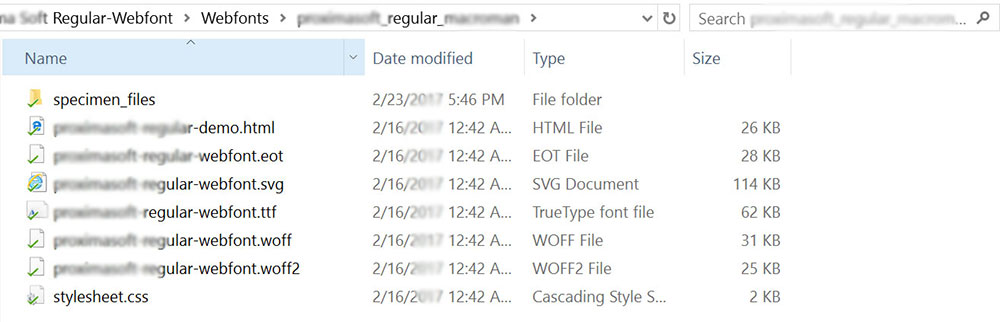
Here on your server, you’ll also find stylesheet.css file where all the CSS styles of your current theme are inserted. You’ll have to load the specific font files with CSS styles into it.
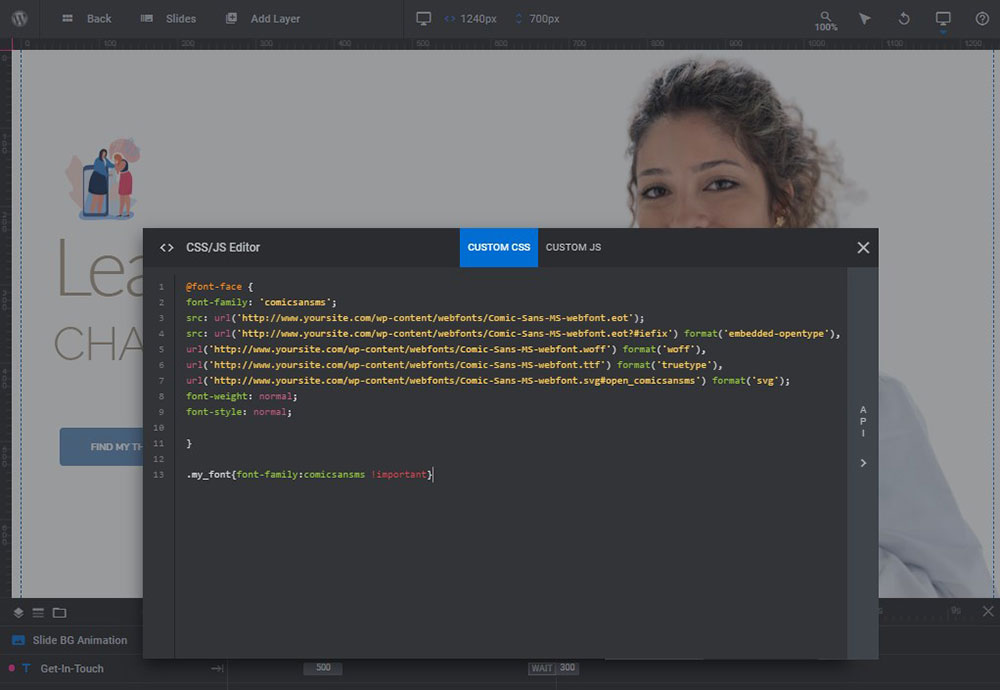
@font-face {
font-family: ‘comicsansms’;
src: url(‘http://www.yoursite.com/wp-content/webfonts/Comic-Sans-MS-webfont.eot’);
src: url(‘http://www.yoursite.com/wp-content/webfonts/Comic-Sans-MS-webfont.eot?#iefix’) format(’embedded-opentype’),
url(‘http://www.yoursite.com/wp-content/webfonts/Comic-Sans-MS-webfont.woff’) format(‘woff’),
url(‘http://www.yoursite.com/wp-content/webfonts/Comic-Sans-MS-webfont.ttf’) format(‘truetype’),
url(‘http://www.yoursite.com/wp-content/webfonts/Comic-Sans-MS-webfont.svg#open_comicsansms’) format(‘svg’);
font-weight: normal;
font-style: normal;
}
The Next Steps
After you’ve done everything with the help of FTP, you should add the CSS instructions into the Slider Revolution.
Go to your WordPress Dashboard -> Revolution Slider -> Settings -> CSS/jQuery and add the CSS lines there.
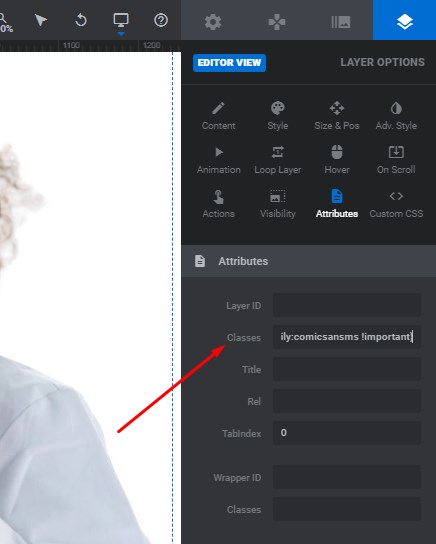
You should also add .my_font{font-family:comicsansms !important} class into the same field because it adds your chosen custom font family into the Slider Revolution text layer element.
After that, the mentioned above text layer should be added to the slide and into the Layer Options -> Attributes section.
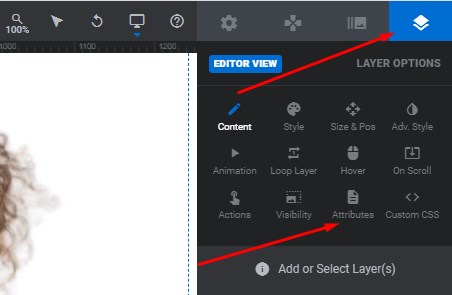
Choose the layer and insert the previously created ‘my_font’ class into the Classes field.
Save your changes to start using a new custom font.

You can do the same with any other layers of your particular slider.
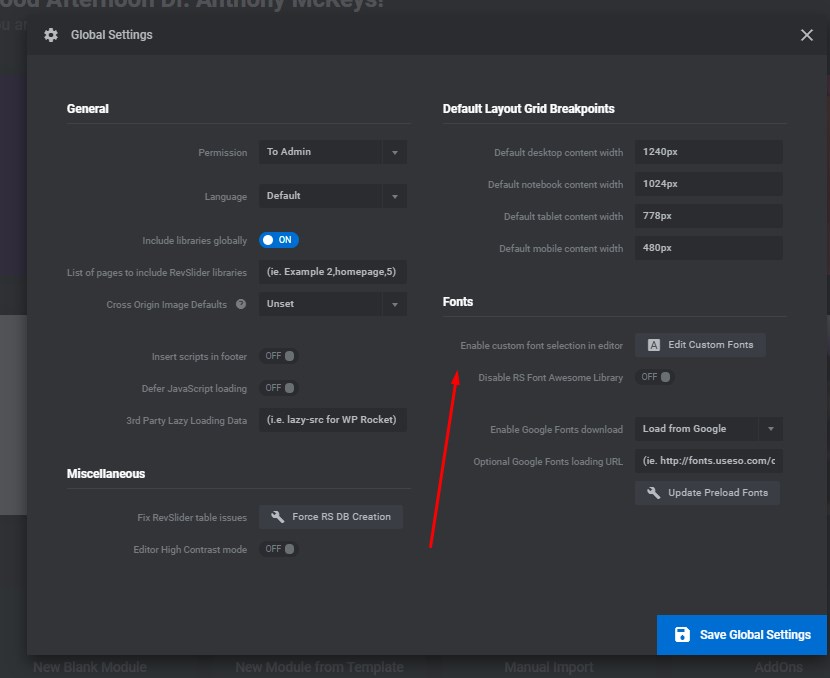
For Globals
Add a custom font to the Slider settings, go to the welcome page of a plugin, and find the Globals icon in the top bar.

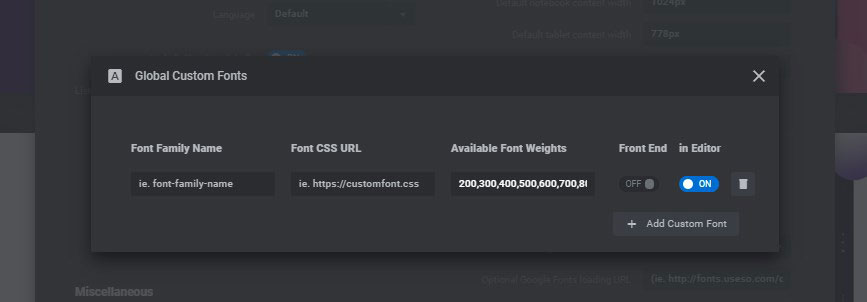
Add the name of the font family which you used in the stylesheet.css.
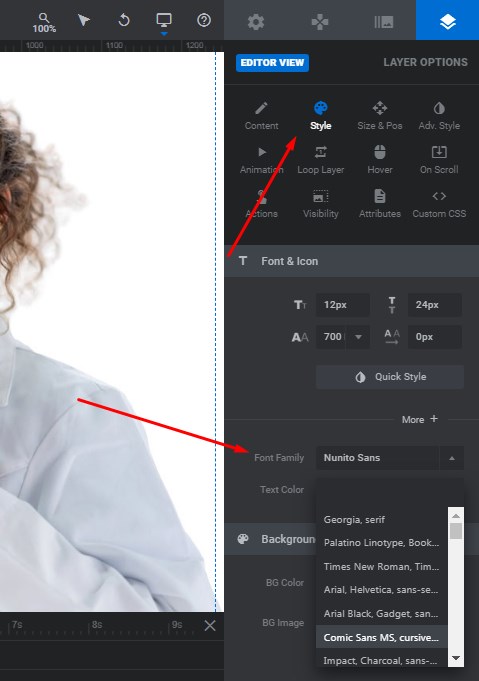
Now you can use your custom font family in the slide editor drop-down menu in the Style -> Font Family tab.
Well, I hope this small tut was helpful.
See you,
Melany H.