
If you use WordPress for running your online store with the help of WooCommerce, then you obviously use some additional opportunities provided by this online selling platform. Except for a lot of extensions available for WooCommerce, there are lots of additional WooCommerce plugins designed by modern developers and available both for free and on a paid-for basis.
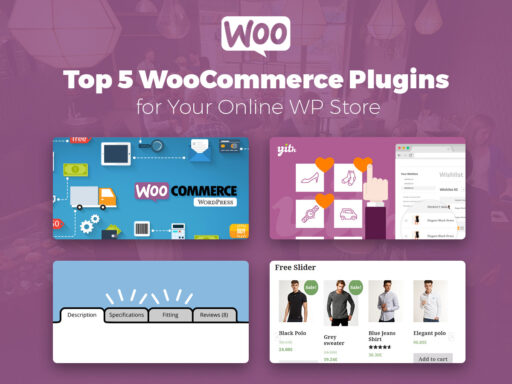
In this post we will speak on 5 best WooCommerce plugins that will be really helpful for extending the functionality of your store and providing new possibilities for representing your products to the potential buyers.
We will show how to use each of the following plugins, manage its settings and enjoy new opportunities it brings. So let’s start.
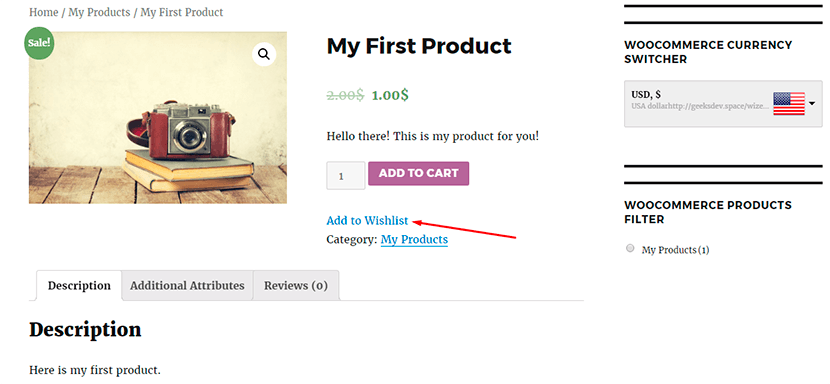
WooCommerce Currency Switcher
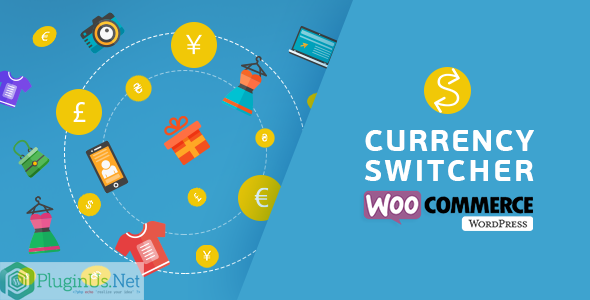
The first plugin we will talk about is WooCommerce Currency Switcher which is a good solution for your website visitors and buyers to be able to switch between available currencies. A customer will also be able to buy a product by paying for it in the selected currency. By the way, currency can be changed automatically according to visitors’ IP.
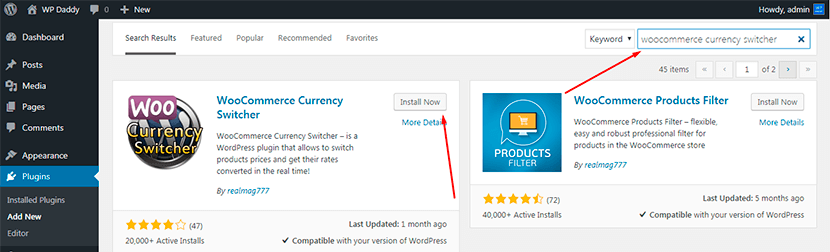
So first please install this plugin to start working with it.
Go to Plugins -> Add New.
Type the plugin’s name in the search field.
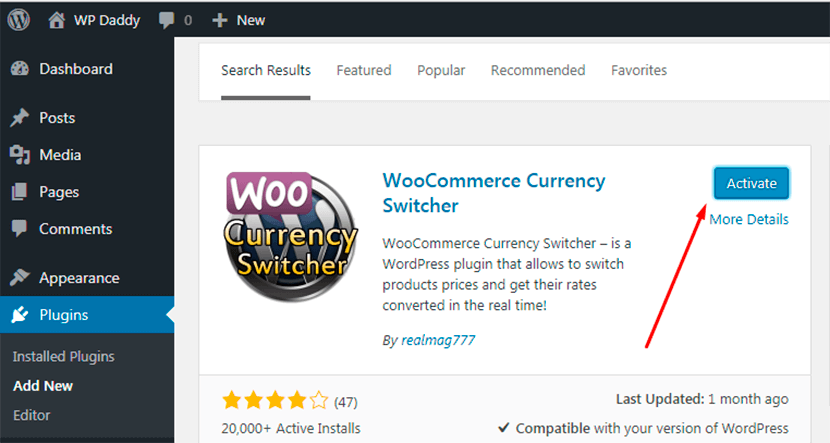
Click the Install Now button.
After the plugin is installed, click the Activate button.
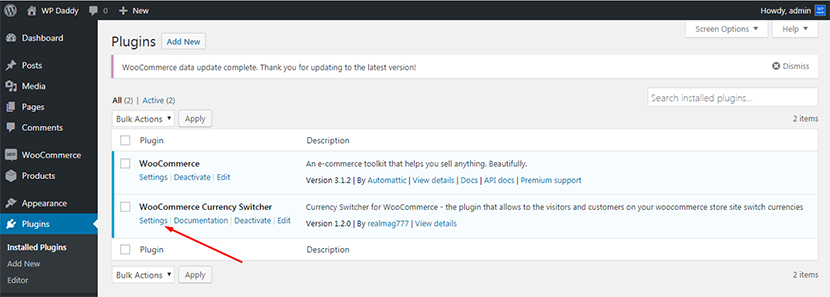
Go to Plugins -> Installed Plugins and you will see your recently activated plugin in the list. Click the Settings link under the plugin’s name and you will be redirected to the page with the settings.
Here you can add or remove currencies, drag-and-drop the currencies to change their order, select the currency symbol from the drop-down menu list, choose a flag for each currency, etc.
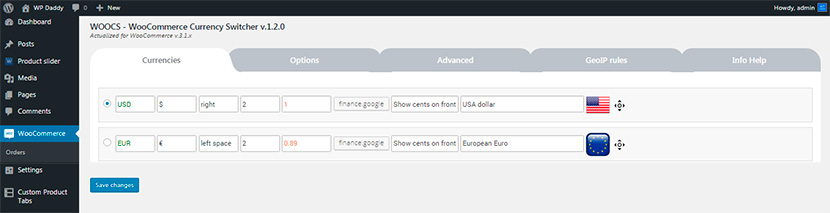
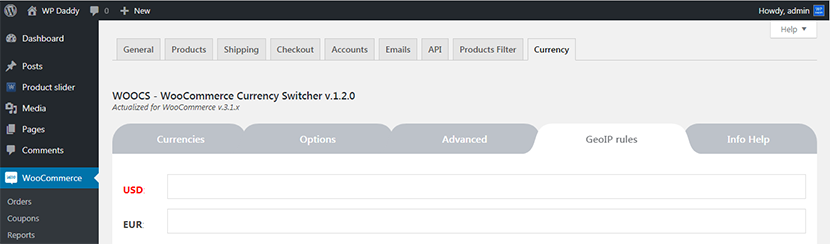
You can also manage the general and advanced options as well as set the GEOIP rules for your available currencies. If you’d like to get more options and possibilities for this plugin, you can also try its premium version.
After all the settings are managed, save all the changes you’ve just made and go on.
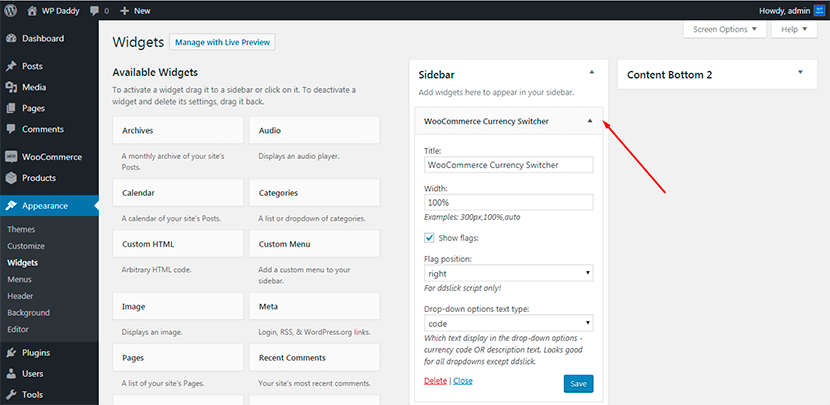
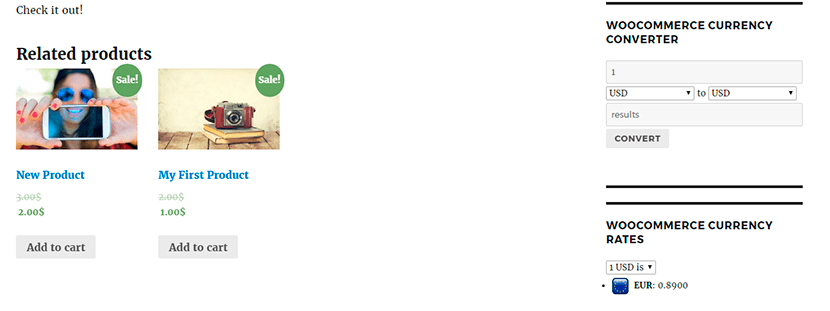
Go to the Appearance -> Widgets menu and you will see three widgets of this plugin available there. They include a currencies switcher, a currency converter, and currencies rates. Click the selected widget and then choose where to add it to your website’s page.

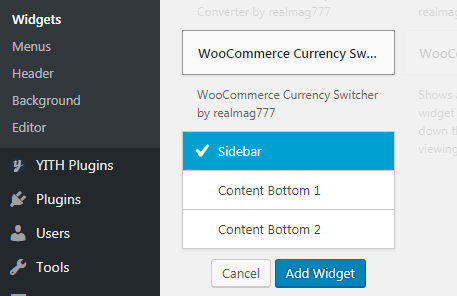
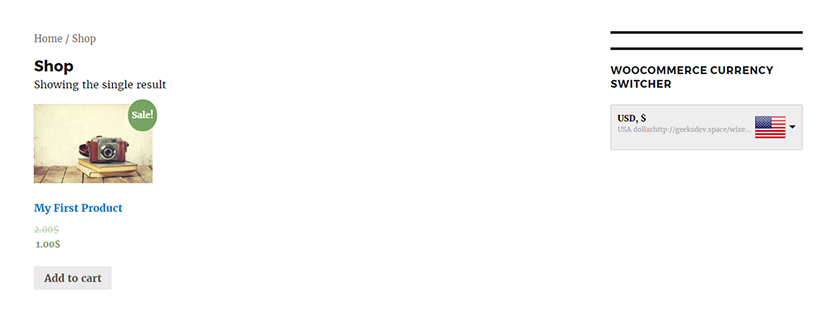
If you prefer a sidebar, then save the widget in the sidebar and then visit your store to see the currency switcher live.
You can also add other 2 widgets where you prefer on your web page and see them live as well.
Now your customers are free to choose the currency which is most suitable for their location and buy products with comfort.
WooCommerce Products Filter
Another plugin to help you with organizing your store is WooCommerce Products Filter. It is extremely easy to use, install and configure. It allows your customers to search for a product filtering it by categories, attributes, product tags, price, and more characteristics.
Install the plugin as easily as it is described above and then activate it with one click. In the Installed Plugins list click the Settings link to open and manage the settings. Here you can check the characteristics by which your product will be searched by customers. You can also manage the design and other advanced and regular options available.
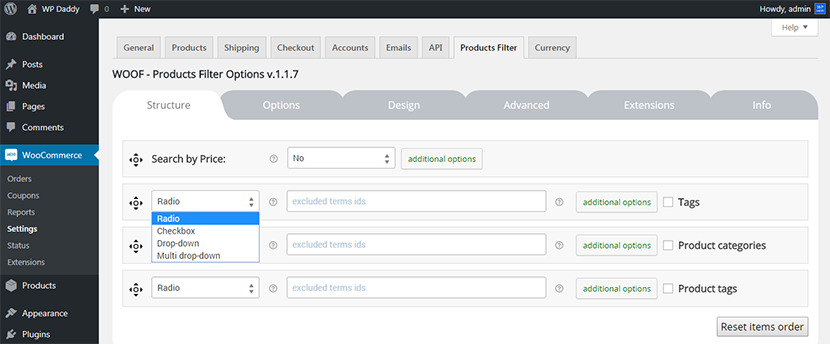
If you go to the Extensions tab, you will see that most of them are primarily available for a premium plugin version.
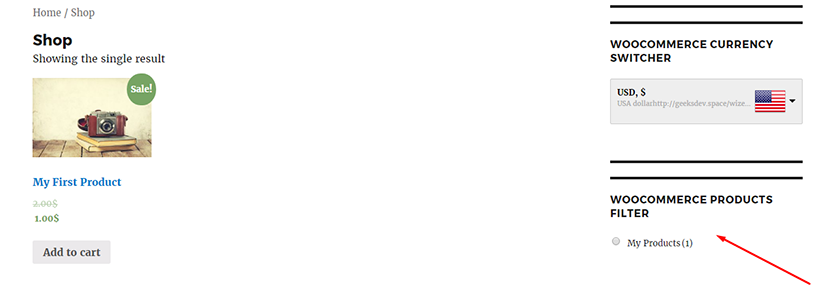
After you’ve made all the changes and saved them you can easily add a product filter widget on your page through the Appearance -> Widgets menu the same way as it’s been mentioned above. Then go to your store and see the product filter live. It really works.
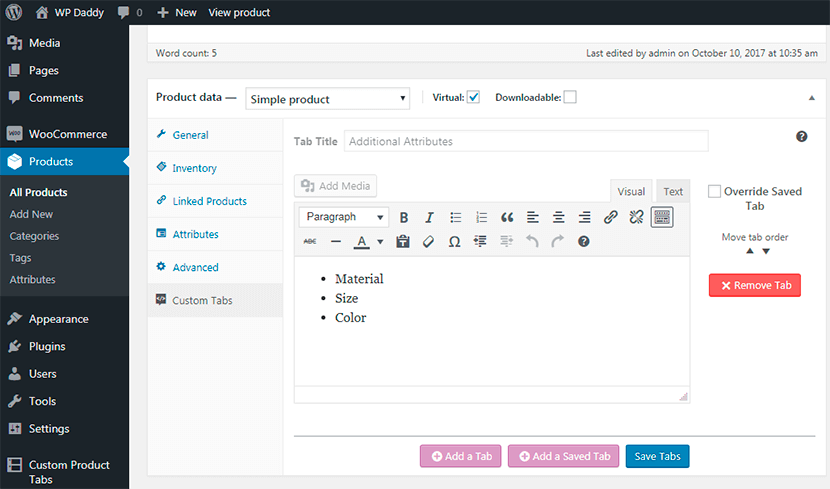
Custom Product Tabs for WooCommerce
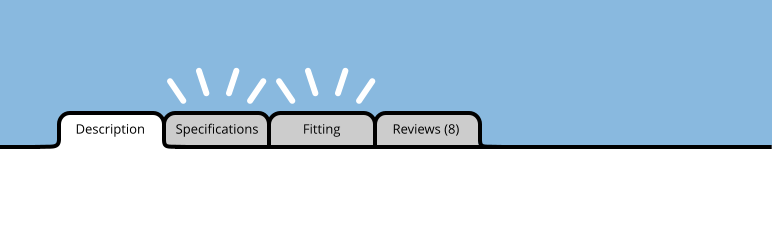
Another useful plugin called Custom Product Tabs for WooCommerce is that very tool that can be helpful for adding custom tabs for products. You can add tabs with product sizes, product colors, and any other tabs you prefer.
After installing and activating the plugin, you will see the Custom Product Tabs menu in your admin dashboard. Clicking the Add Tab link, you will be able to create a new tab with its unique title, name, and content.
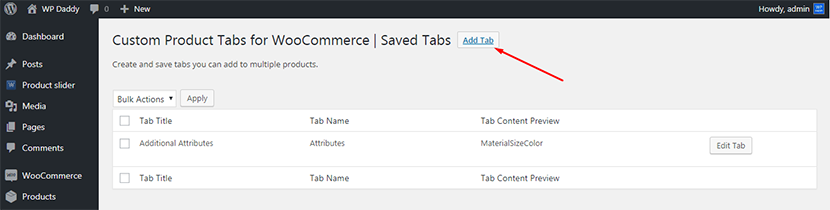
Don’t forget to click the Save Tab button after you’ve made all the changes.

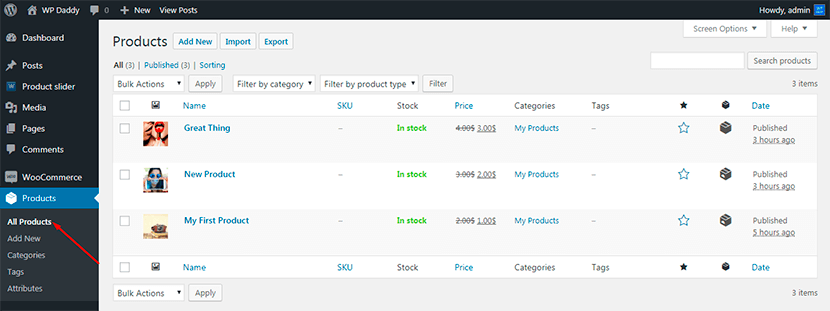
Then go to Products -> All Products and choose any product from the list you’d like to add a custom tab to.
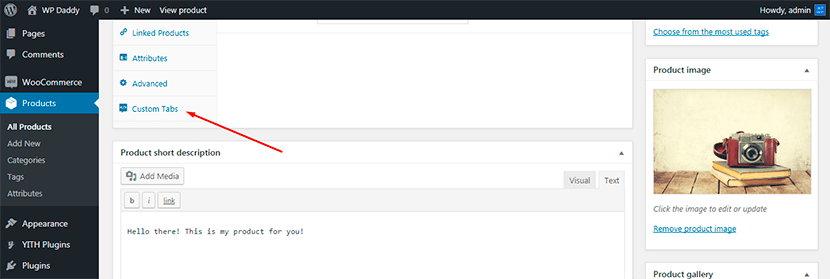
Select Custom Tabs in the Product Data list and Add a Saved Tab you’ve recently created.
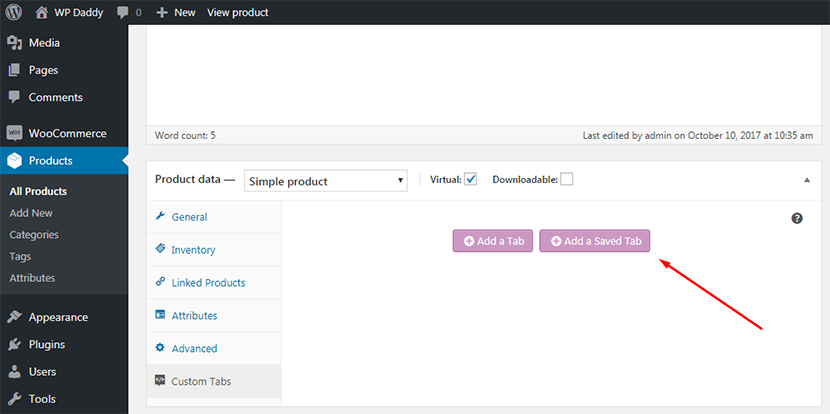
After that, click the Save Tabs button.
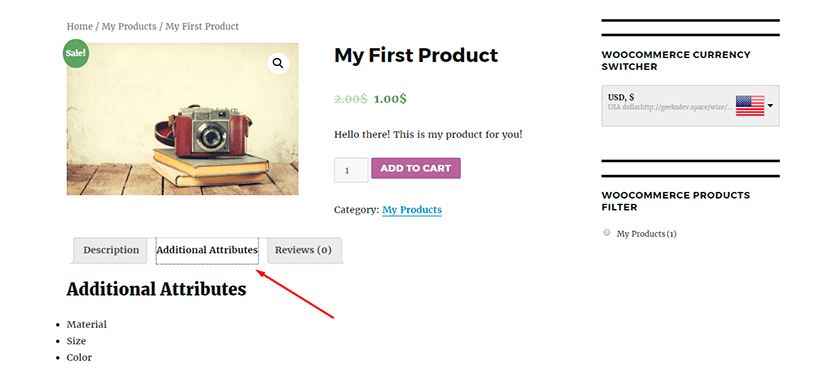
When you are done, you will see the new tab available live on your product page.
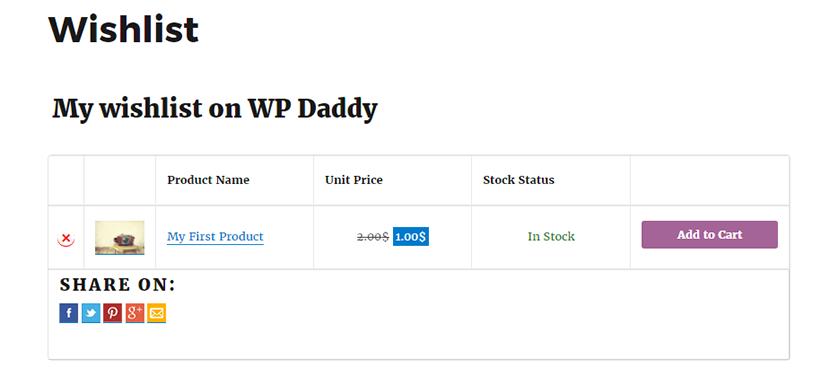
YITH WooCommerce Wishlist
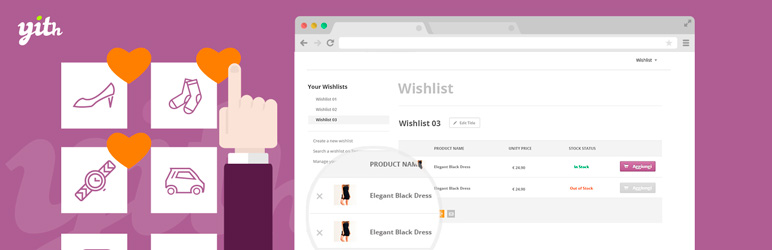
A great YITH WooCommerce Wishlist plugin allows creating an Add to Wishlist button and a wishlist functionality to your online store. You can also share your created wishlist in social media networks if you desire.
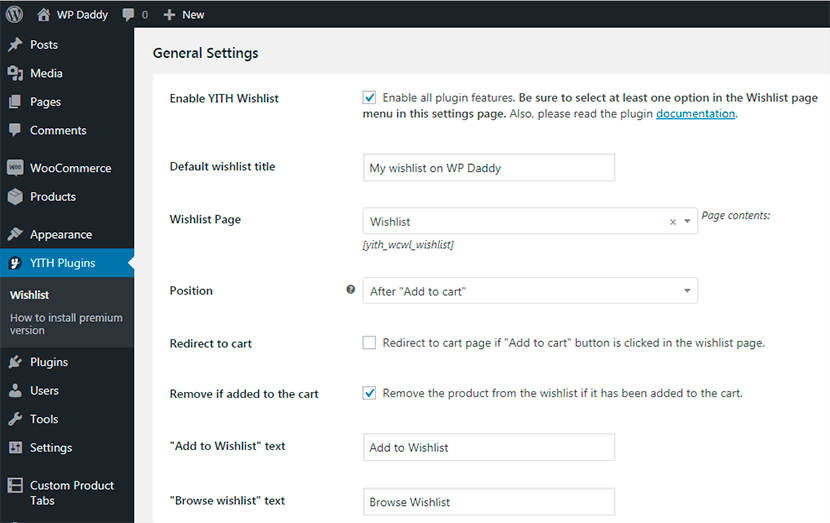
The plugin is as easy to install and activate as all the other ones. After that, open a Wishlist in your dashboard menu and manage the general settings up to your needs. You can also manage colors choosing either the theme style or custom colors you prefer. The plugin also comes with a premium version you can download here.
Just save your changes after managing the settings and wishlist functionality will appear at your website, you can see it live.

WooCommerce Product Slider
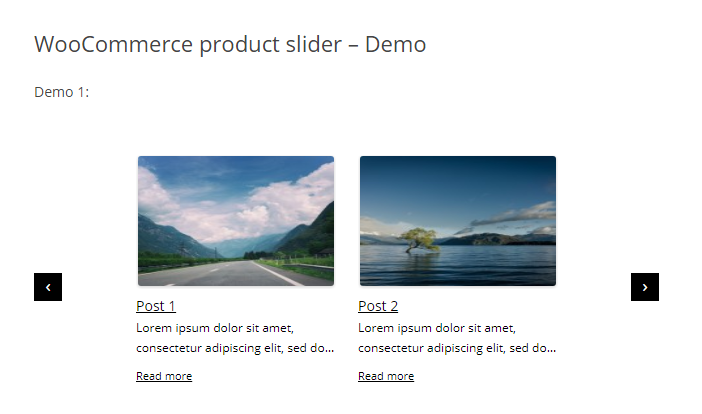
WooCommerce Product Slider plugin allows the creation of a responsive and user-friendly carousel with a lot of features. You can create multiple sliders on your web page and place them anywhere you like. It can be used to showcase products filtered by specific, different, or multiple categories.
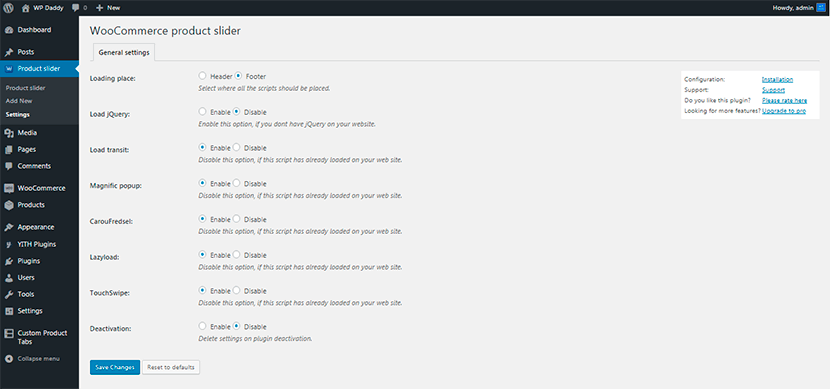
After installing and activating the plugin, you will get the Product Slider menu in your dashboard. Go to Settings to configure the plugin up to your needs. Here you can choose a loading place, enable or disable jQuery, load transit, magnific popup, and so on.
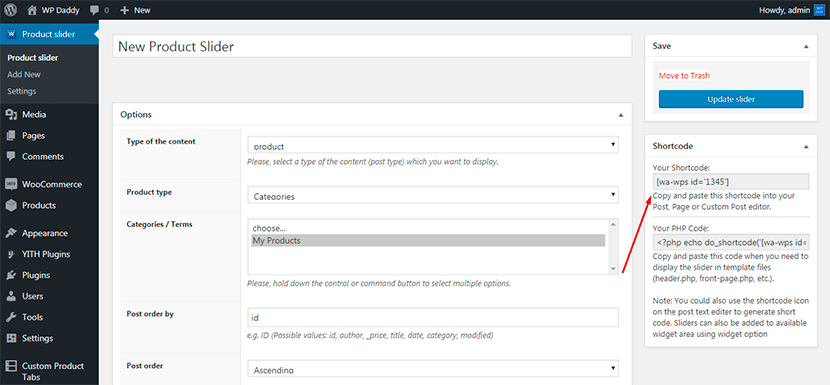
Go to Product Slider -> Add New and manage the options to create your slider. After the slider is created, you will get the shortcode which you can put anywhere on your website.
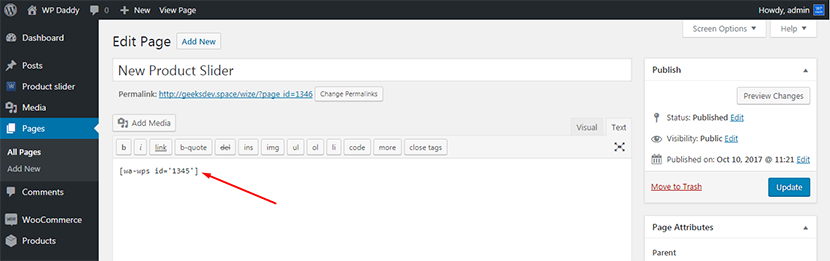
For instance, go to Pages -> Add New, choose the title for your slider and insert the shortcode into the content area. Then publish the page.
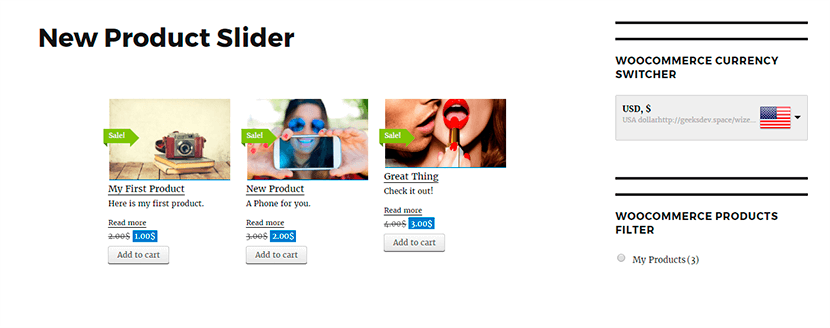
You can see the product slider on your new page live.
We hope this brief guide will help you easily come up with the idea of how to use every mentioned above plugin right after you’ve installed them. You can also check the official pages and see the demos of every plugin to understand their functionality in detail. Follow the links in the post.