This small review is going to unveil the advantages and functions of two directory extensions called WP Job Manager Extended Location and WP Job Manager Claim Listing. Of course, you should install WP Job Manager plugin to start working with these extensions.
The Purpose of WP Job Manager Extended Location
When you run a directory website, you need your visitors to be satisfied with your website’s functionality and you want to provide them with a simple way to find any place closest to their location and make it as quickly as possible.
The great thing to find a place, product or service you want now is to use the extended search functionality. It’s also great when this extended search option is available by default, so a user doesn’t have to choose any additional parameters when starting to search for something.
WP Job Manager Extended Location allows to ensure your user that their business listings are easy to find. A user can manage a map and choose their exact business location on a map. In addition, this extension allows to show listing only relevant to the user’s location. The IP-based lookups automatically suggest the user’s location and filter the listing results according to a definite location.
So, after the extension is installed (as always through Plugins -> Add New -> Upload plugin) and activated, start from setting up the ability to automatically fill in the search location field with the current city of a user. This is defined by the user’s IP address.
Go to Listings menu in your admin panel and then open Settings -> Location Settings and check the Enable City Suggest near the Auto Location option. Now you are done, and you visitors will be satisfied with quick and easier search possibilities.

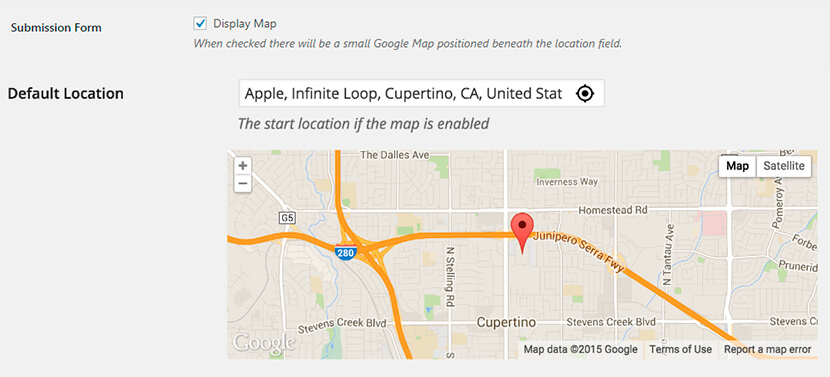
Right here in your Location Settings you can check the Display Map option near the Submission Form menu. If the map is enabled, you can also set a default marker location for the submission form.
WP Job Manager Claim Listing
One more extremely functional and necessary extension for your directory website is WP Job Manager Claim Listing. As well as many similar extensions, it requires WooCommerce installed and activated. It allows your customers (business owners) claim their listing, and allow you to generate more revenue.
The extension helps business owners create a verified listing and ensure the website visitors that all business information is up to date and relevant. A claimed listing means that only a business owner can update this listing, and of course a business owner is always interested in keeping their business information relevant to make potential clients easily find.
Right after you’ve installed and activated the extension, create a page to allow business owners claim a listing.
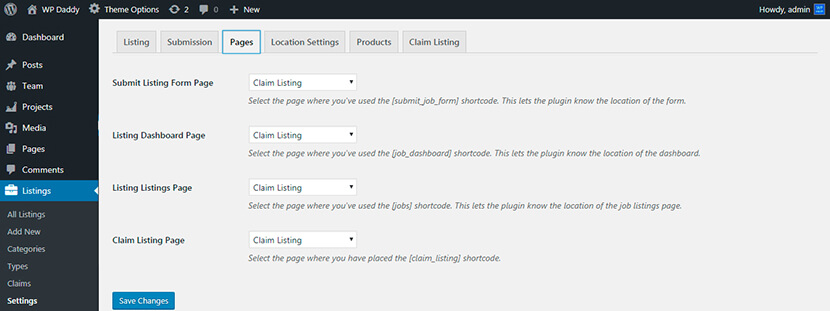
Go to Pages -> Add New and create a page with a [claim_listing] shortcode.
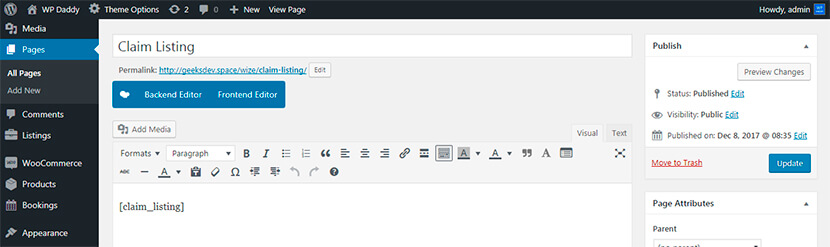
Go to Listings -> Settings -> Pages and select the page you have created in the Claim Listing settings. In our case this page is called “Claim Listing”.
After that you can create paid claims with the help of WooCommerce -> Products -> Add New functionality. By the way, you can also enable free claims for your users.
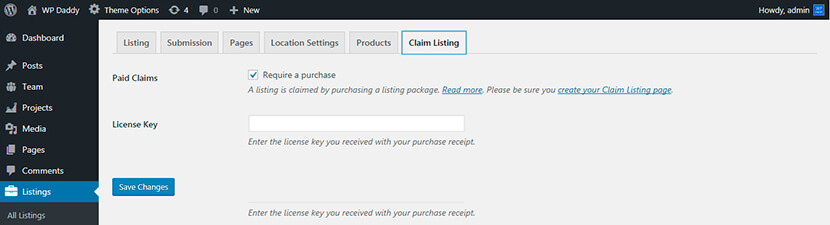
Before you create a paid claim, go to Listings -> Settings -> Claim Listing and check Require a Purchase option to enable paid claims.
So when you go to Products -> Add New, choose a Listing Package in the Product Data.
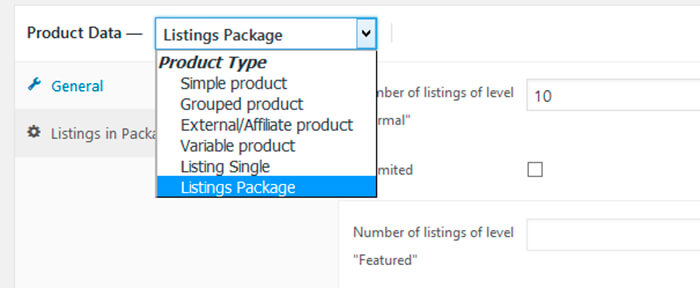
Check the Use for Claims box near the product data, this will allow to use a separate listing package and remove the package from the standard Listing Submission process.
After that you can set a Regular and Sale Price, set a Listing LImit (it must be set to 1), and manage other settings.

Now when a user sees a listing that has not been claimed they will observe the option to claim. A user will be able to choose a claimable package and complete the checkout process.
If you go to Listings -> Settings -> Claim Listing and uncheck Require a Purchase option, you will enable free claims.
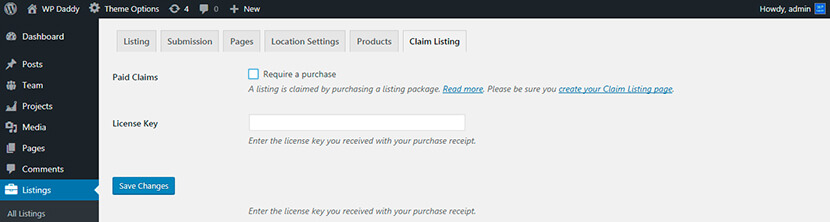
In our blog we’ve recently reviewed WP Job Manager – WC Paid Listings plugin, so enabling free claims is a necessary step if you’ve got this plugin activated.
So when a user opens a listing that hasn’t been claimed, they will be shown the option to claim. Once clicked, a user will get a notification that a claim has been submitted.
If you’ve got some questions or concerns, please leave them in the comments. We’ll be happy to discuss!