Would you like to learn how to add a favicon to your WordPress website? And do you want to find out what is a favicon and why is it important to add it to your WP website? In this post I will make it all clear and you’ll see how to add a favicon to WordPress without any specific efforts.
What is a favicon?
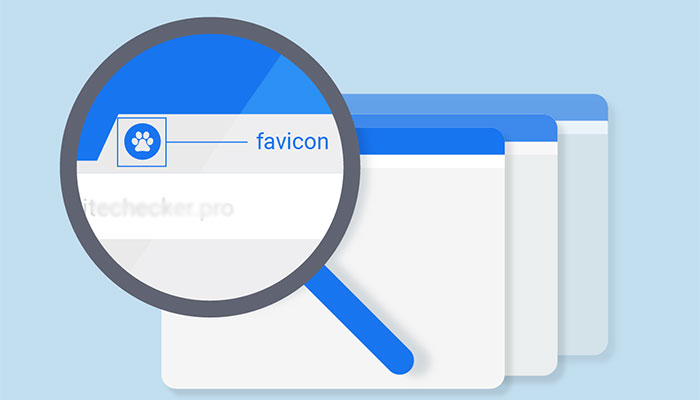
A favicon is also called a website icon and it is located near the website title in the browser’s address bar. This icon makes your website easily recognizable among a number of tabs opened by a user within one browser.
A favicon increases the recognizability of your brand and your official website as well as makes it easier for a user to quickly switch to your website in a browser when a lot of tabs are opened.
If your user adds your website to the home screen of their smartphone or tablet, your website will be displayed as an icon (your favicon), so a user will be able to quickly identify and open your website with one click.
![]()
Where is it possible to obtain a favicon?
You should have a square image that is 512×512 pixels in size and download it in JPEG, PNG, or GIF format. This image can be found in any modern stock marketplace like Shutterstock, free image resources like Freepik, or others. You can also create a favicon by yourself or hire a designer for a particular project at Upwork or similar websites to get a favicon designed for you within a short time.
The favicon can look like a transparent image (without a background) or you can upload an image with a certain background you prefer. If your image is 512 px by width but its height is a bit larger, WordPress will allow you to crop your favicon image when you upload it.
So how to upload a favicon into your WordPress website?
Adding a favicon to WordPress is an easy process. The latest WordPress versions allow you to add it right from the Live Customizer. You should just log in to your dashboard and then go to Appearance -> Customize menu in your admin panel.
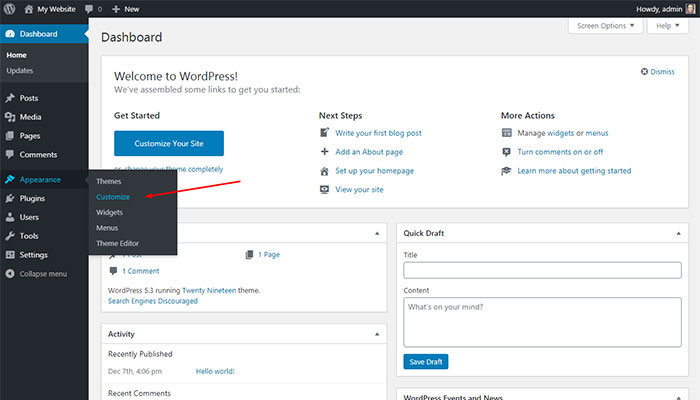
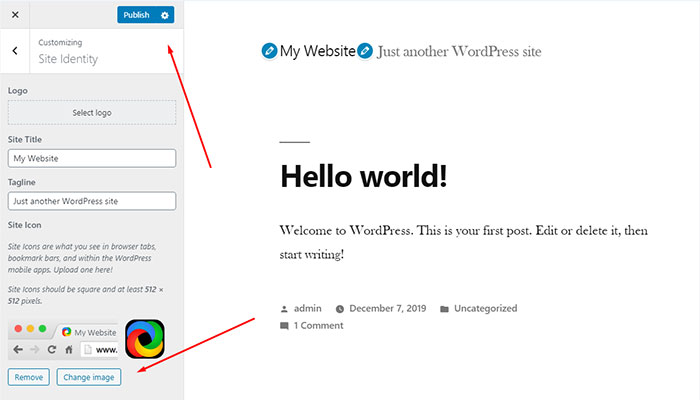
Once you get to the Live Customizer, select the ‘Site Identity’ tab
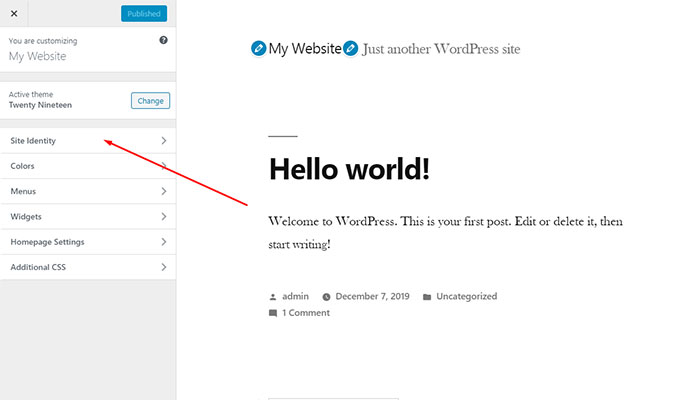
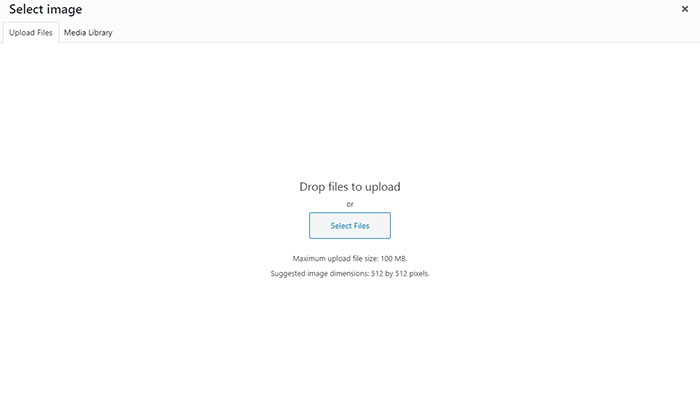
and you will see the options to upload a website logo, add a site title and a tagline as well as upload a site icon. Click the ‘Select Site Icon’ button
![]()
and you will see the media library open, so click the ‘Select Files’ button,
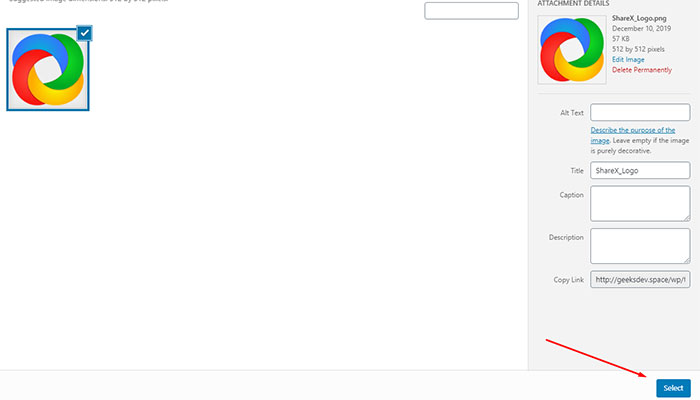
choose the required favicon file on your PC and click the ‘Select’ button to upload a file to your Customizer.
Once the file is uploaded, you can easily remove it or change it any time you prefer. Now you can just click the ‘Publish’ button in your Customizer to save the changes.
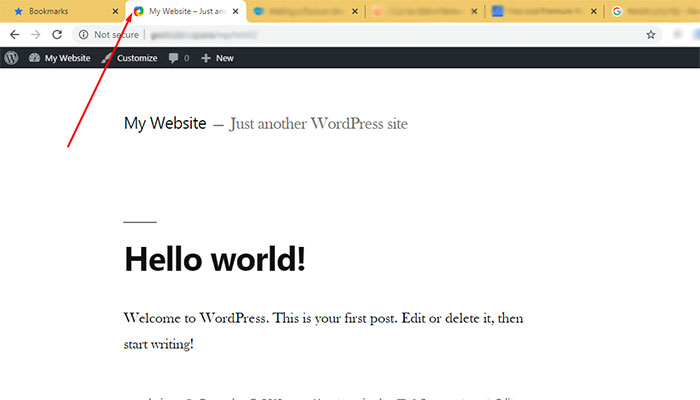
Once the favicon is uploaded and saved, you will see it live in the address bar.
How to add a favicon to the older WordPress version?
If you don’t update your WordPress and use the WordPress version 4.2 or lower then adding a favicon to your WP website is going to be a bit more complex but quite a possible task.
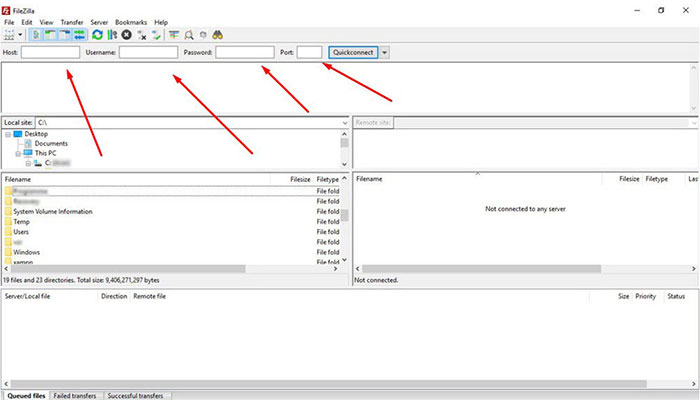
Connect to your website using FTP (utilize the FTP client like FileZilla):
1. Enter the Host, Username, Password, and Port that you usually use to log into your cPanel. Click the ‘Quickconnect’ button to go forth.
2. Locate the ‘httpdocs’ folder on your website through FTP (in the ‘Remote site’ section) and click it to open.
3. Then locate the favicon file on your PC in the ‘Local site’ section of your FTP client.
4. Right-click the favicon file and select the ‘Upload’ option in the drop-down menu.
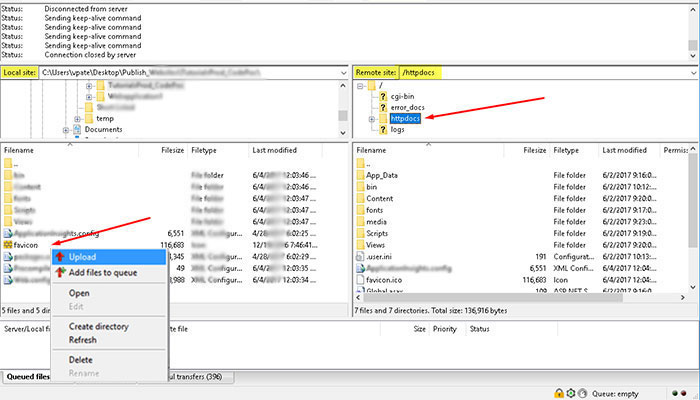
5. Now your favicon file is uploaded to the ‘httpdocs’ folder.
When you are done, it’s time to deal with the header.php file of your currently installed WordPress theme:
1. You can find this file navigating to wp-content/themes in your FTP client and then click the folder with your current theme to open it.
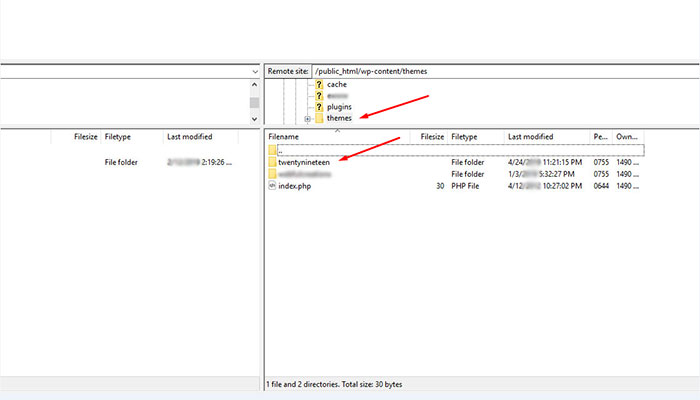
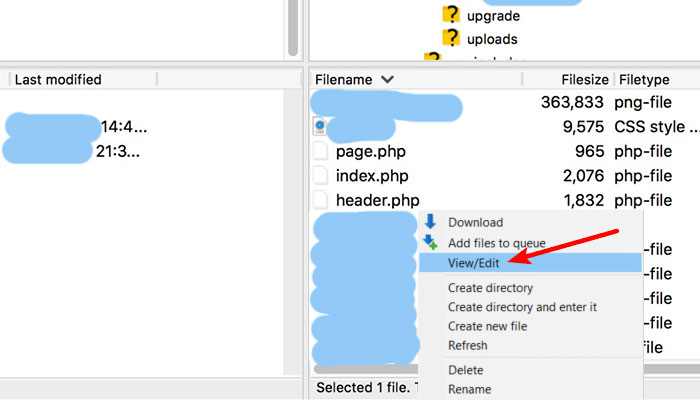
2. Locate the header.php file of your WP theme and right-click it to select the ‘View/Edit’ option in the drop-down menu.
3. Insert the following code into your header.php file and save the changes:
< link rel = “icon” href=”https://www.your-website.com/favicon.png” type=”image/x-icon” / >
< link rel = “shortcut icon” href=”https://www.your-website.com/favicon.png” type=”image/x-icon” / >
Remove unnecessary gaps when inserting the code.
Don’t forget to replace www.your-website.com with your own website address. If your favicon is available in any other format except for PNG indicated in the mentioned above code, then change the file format before saving the changes. For instance, replace ‘favicon.png’ with ‘favicon.jpeg’ or ‘favicon.gif’.
How to add a favicon to your website with a plugin?
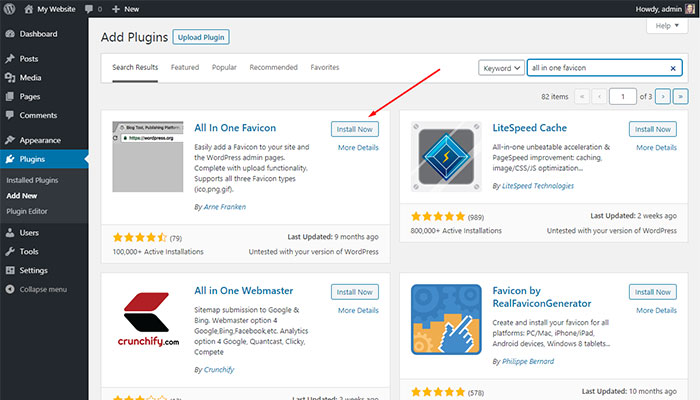
If you don’t want to deal with FTP when uploading a favicon to your WordPress website based on its older version, you can try to set a favicon with the help of a plugin. For my purpose, I’m going to use an ‘All in one Favicon’ free WordPress plugin available in the official WordPress repository.
Go to Plugins -> Add New in your WordPress dashboard and search for the ‘All in one Favicon’ plugin in the search bar.

Locate the required plugin and click the ‘Install Now’ button near the plugin’s name, and then click the ‘Activate’ button to start using the new functionality provided by the plugin.

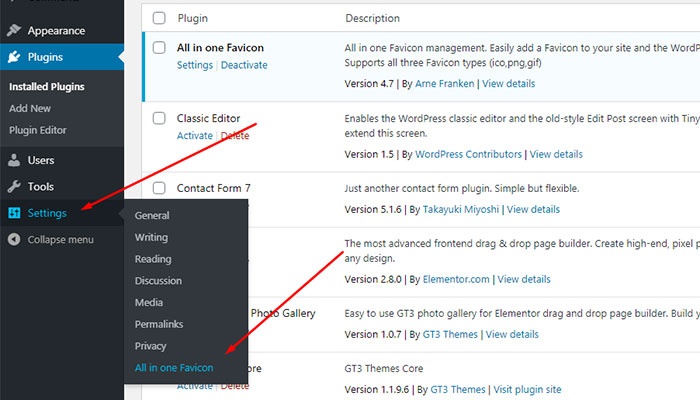
When the plugin is installed and activated, go to Settings -> ‘All in one Favicon’ menu in your admin panel and you’ll get access to the plugin’s editor.
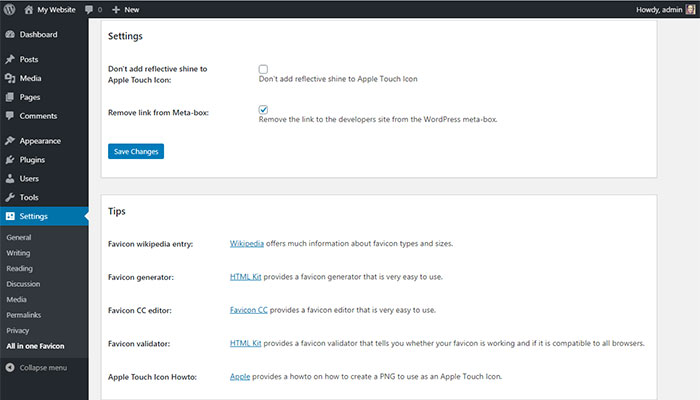
Here you can manage the frontend and backend settings for your favicon to set its look in different formats.
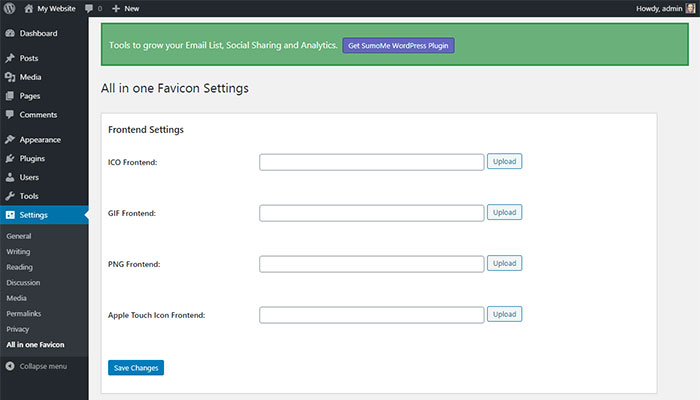

You can upload icons in any format you prefer and then save your changes.
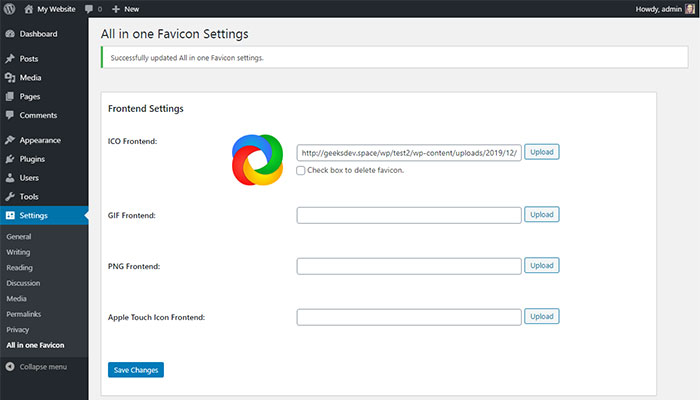
All settings of the plugin are intuitive and self-explanatory. When your settings are saved, your favicon is going to appear in your address bar as it has to.
Well, for now this is all, so I hope this tut was helpful for you.
See you soon,
Melany H.