When you need to log in to your account on a certain website, you should enter your login and password and then just click a ‘Login’ button. However, sometimes you need to take more steps to identify your personality for entering your account and these additional steps are called 2fa and 3fa (two- and three-factor) authentication types.
Such authentication is required to keep your account secure and protect it from being hacked.
What is 2-factor authentication?
2fa authentication supposes the double-checking of a user’s identity to make sure that a person enters their own account and not someone else’s one. Most of the times, a user needs to use two separate passwords to access their personal account.
A user determines a primary password by themselves, and the secondary one is generated automatically by the website or app. The second password is a one-use authentication code (one-time password or OTP) that is sent to the user via SMS or by email.
What is 3-factor authentication?
3-factor authentication supposes both the mentioned above identity-confirming credentials including the login, password, and OTP code as well as one more additional step, for instance, iris or fingerprint scanning, voice recognition, or other verification methods.
In WordPress, it’s possible to enable 2-factor authentication for additional security. So let’s see how to make it step by step.
How to enable 2fa authentication in WordPress?
I found a great way to double-authenticate your identity before entering your WP dashboard with the help of an app.
For my purpose I am going to use Google Authenticator – WordPress Two Factor Authentication (2FA, MFA) plugin by miniOrange available in the official WP repository.
Please read this post to learn how to install and activate a plugin in WordPress.
When the plugin is active, go to miniOrange -> Two Factor menu in your admin panel and select either 1st or 2nd option of the 2 ones offered. You can select either 2-factor authentication plus website security or just 2-factor authentication itself. I choose the second option.
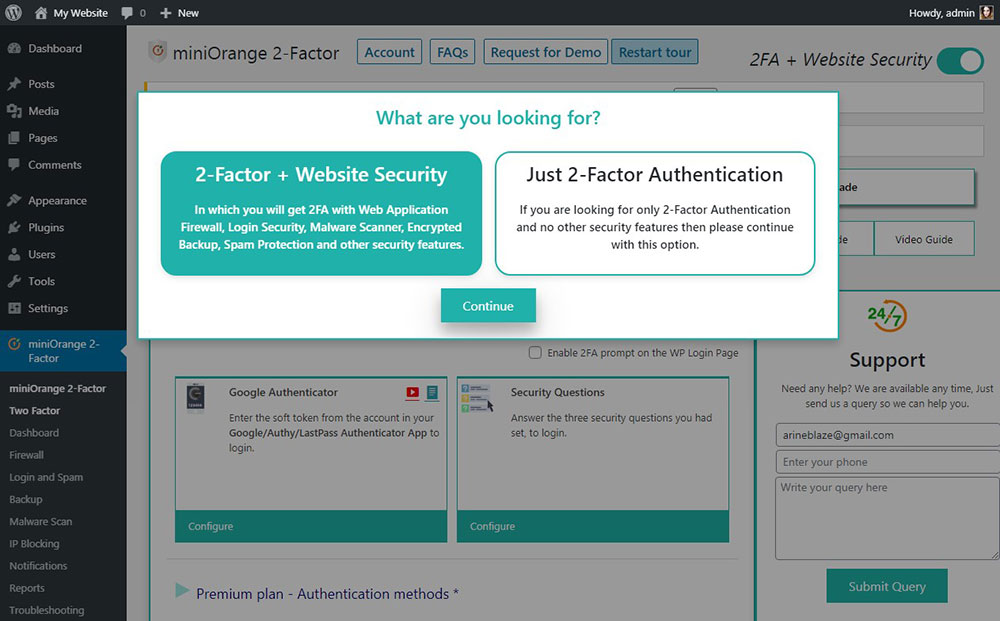
Now you can select either free or premium plan (authentication method) to configure a required feature.
I select the first free plan called Google Authenticator. This means that I am going to use a Google Authenticator app to enter my WP dashboard next time.
You should also check the ‘Enable 2FA prompt on the WP Login Page’ option to see the 2-factor authentication additional field under the login and password fields on your WordPress login page.
So click the ‘Configure’ button in the Google Authenticator authentication method section and
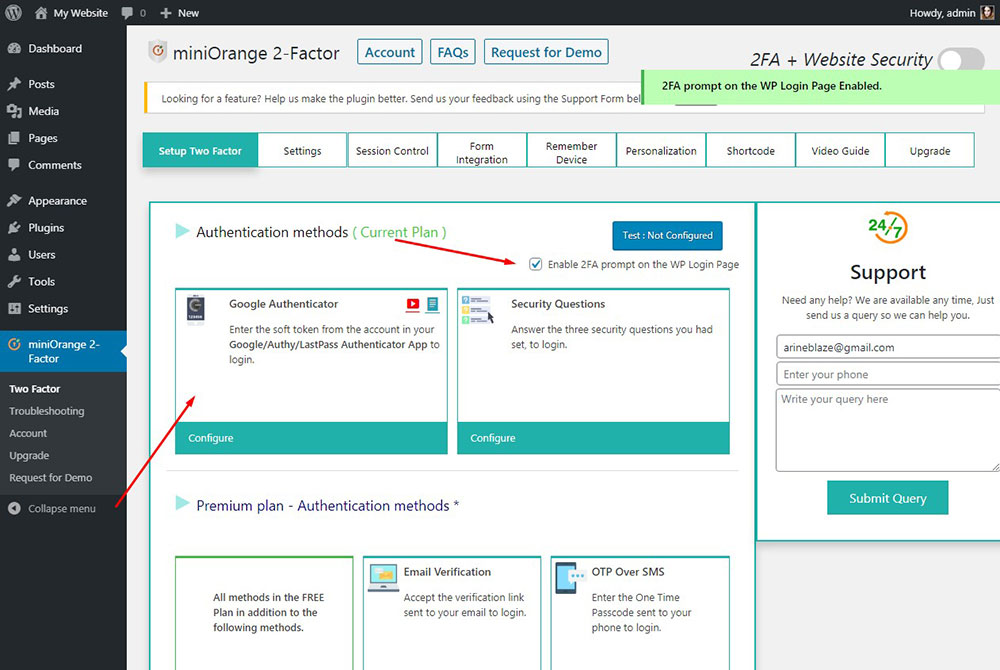
you’ll get to the configuration page.
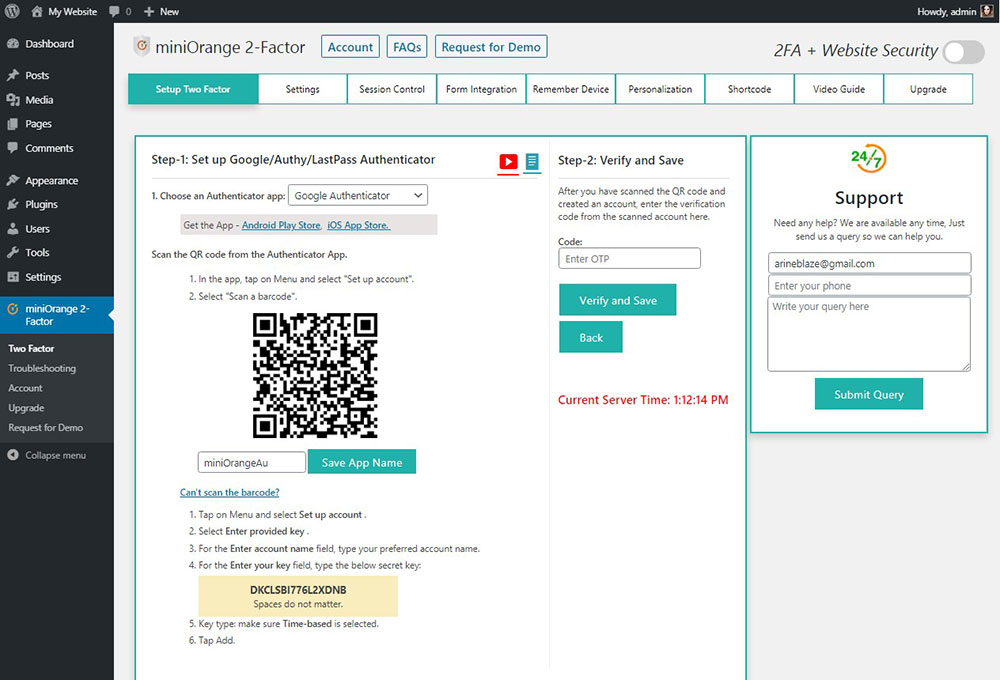
Now you should go to Google Play on your smartphone or tablet and download an app from the drop-down list offered. You can select from the apps like Google Authenticator, Authy Authenticator, LastPass Authenticator, and more.
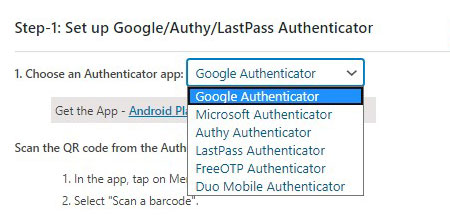
I select the Google Authenticator app, download it, and open it to go further.

Now I can choose from 2 options: I can either scan a QR code or enter a setup key.
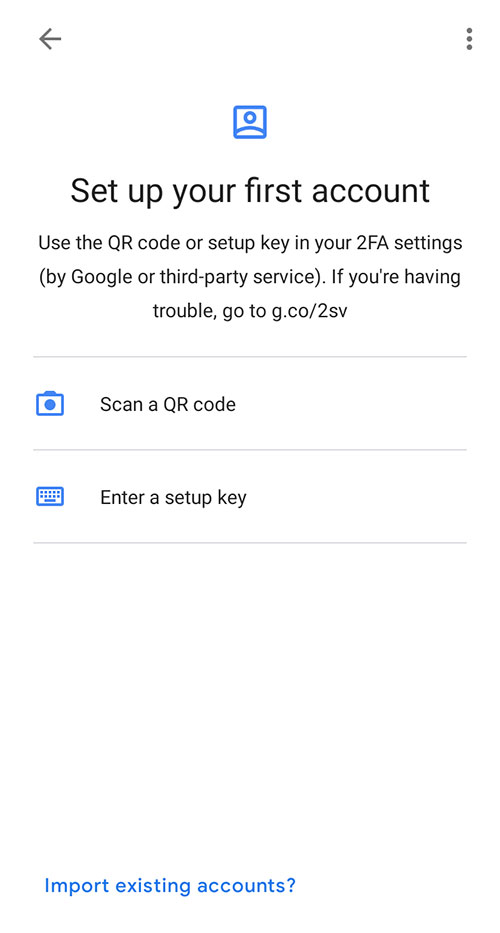
I select the first option and then I can scan the QR code (barcode) with the help of my smartphone.
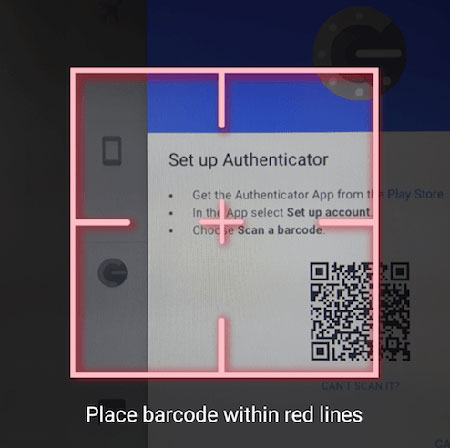
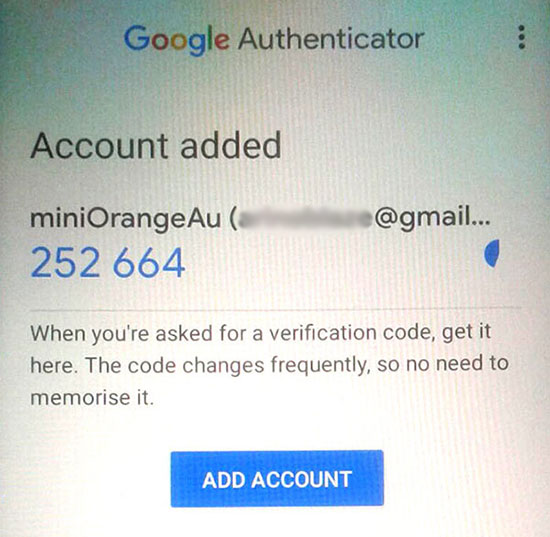
The QR code is available in the Google Authenticator configuration page within the WP dashboard open on my PC.
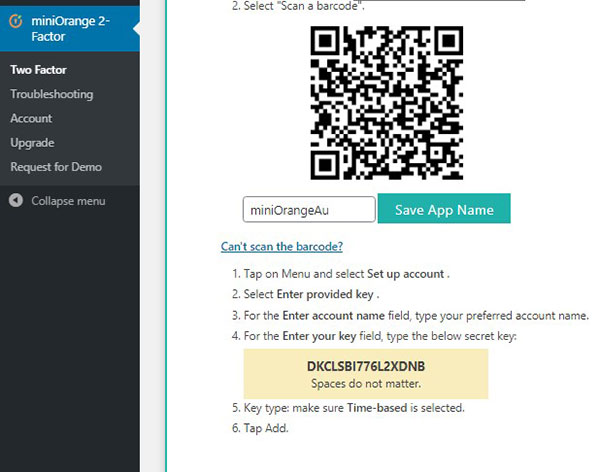
Now, when the account is automatically added I go back to the Google Authenticator configuration page. Here I should enter a verification code from the app into the code field of the ‘Verify and Save’ section and then click the ‘Verify and Save’ button.
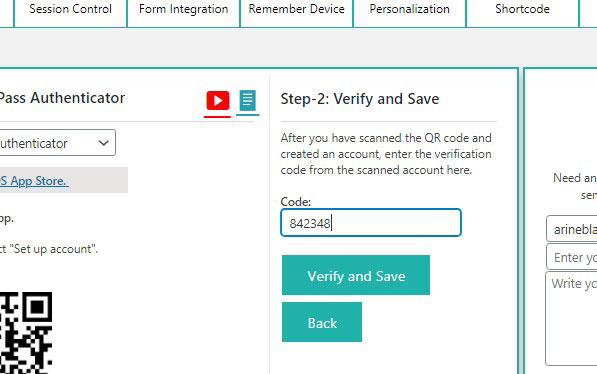
The verification code is available in the Google Authenticator’s miniOrangeAU field for about 1 minute, so you can remember it and enter it to the corresponding field for authentication. After a minute has passed, the old code disappears and becomes the invalid one, so if you weren’t able to submit it in time, you should enter a new one. A new verification code is generated every minute.
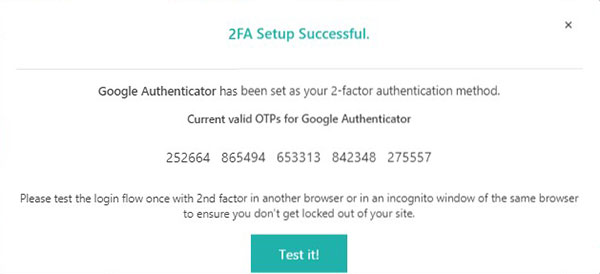
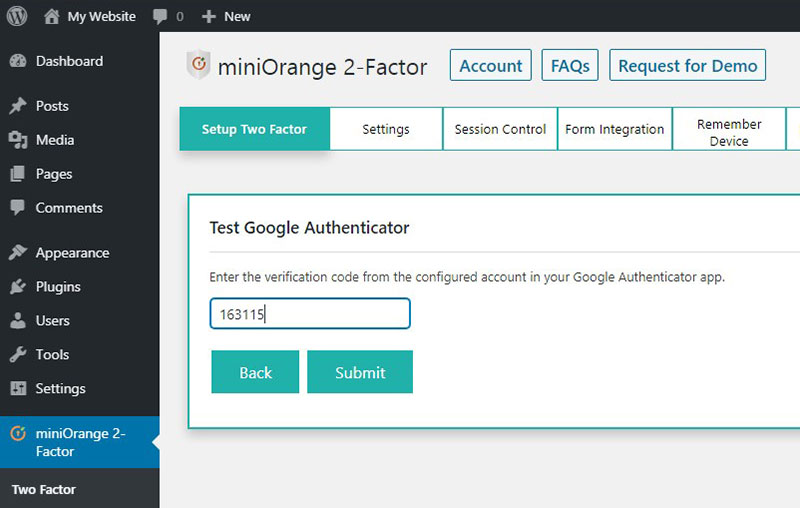
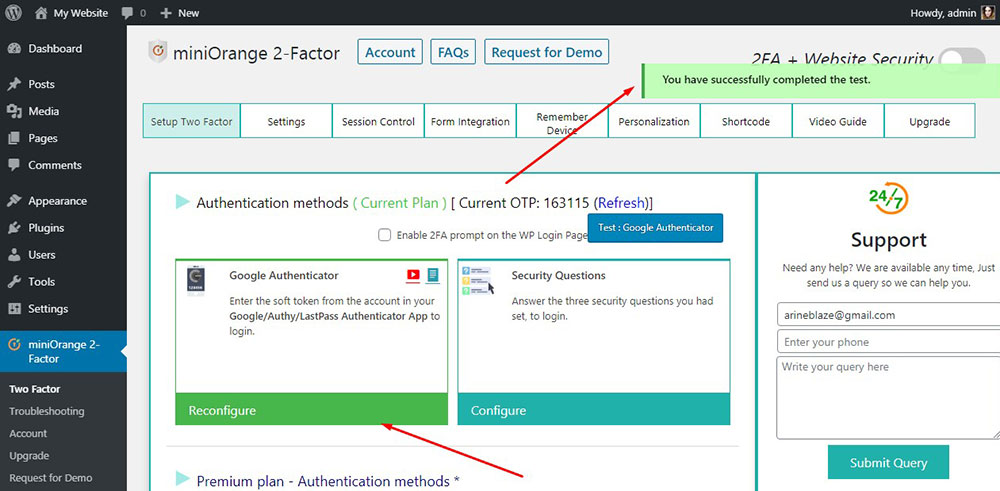
When the verification is successful, you can test it.
Enter a 1-time code into the ‘Test Google Authenticator’ field and click the ‘Submit’ button.
When you complete the test, you’ll see the Google Authenticator authentication method section has changed its color and the ‘Reconfigure’ button appeared.
Now you can log out from your WP profile to get to your WP login page and enter your WP dashboard using a one-time verification code from the app you’ve configured.
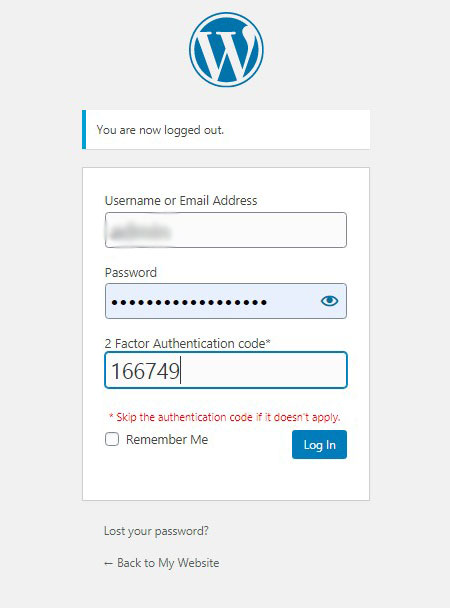
Next time when you enter your login and password and then click the ‘Login’ page to enter your dashboard, you’ll be redirected to the ‘Validate OTP’ page where you should enter your one-time verification code and click the ‘Validate’ button to log in to your WP profile.

As you see, enabling 2fa authentication is quite a simple task.
Hope this tut was helpful,
Melany H.