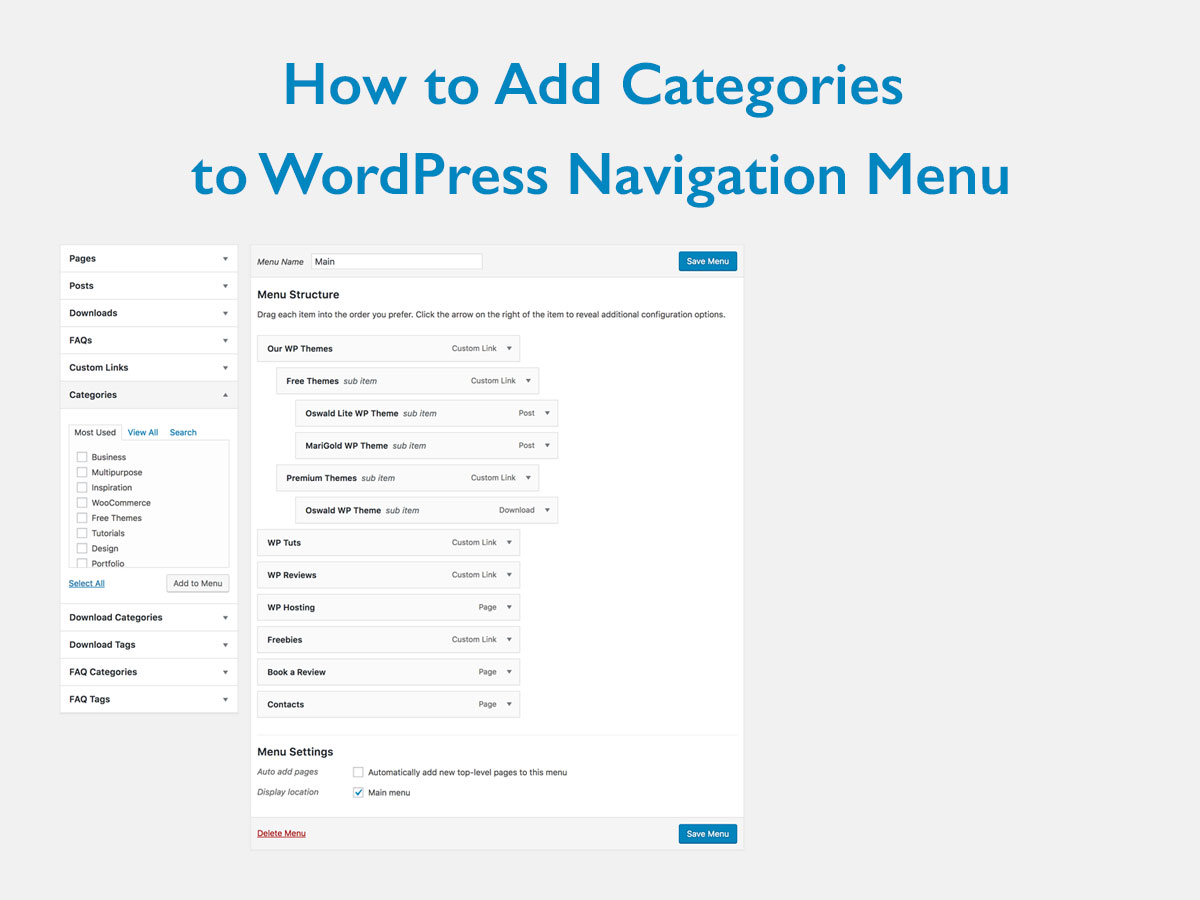
If you run a business blog where you share startup ideas or business tips, or if you are about to launch a traveling agency website, you’d probably need to use a navigation menu where you can place a list of business types, a list of countries to visit, etc.
Navigation menu allows users to reach the important sections of your website. You can easily create unlimited menus in WordPress to make your website simple to navigate. Sections are displayed in the menu, so you can easily add posts, categories, custom links, and more.
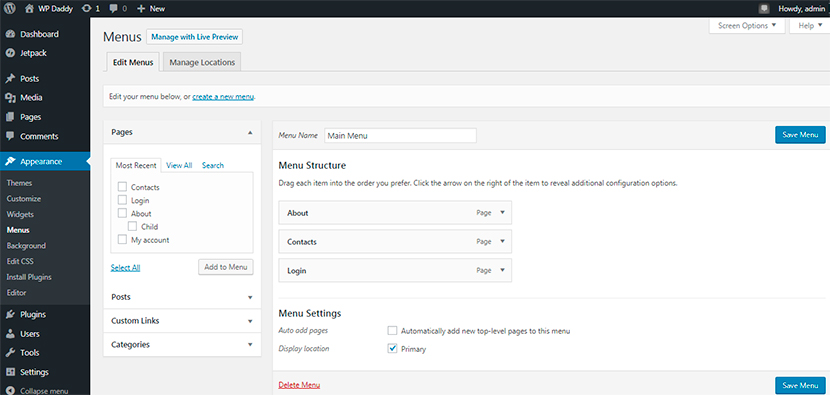
In this post we will speak on how to add categories in the WordPress navigation menu.
What are the categories in WordPress?
As you know WordPress comes with the integrated system which sorts all of the website’s content into taxonomies. The taxonomies include categories, post types, tags, etc. Categories are hierarchical taxonomies, so they can be divided into parent and child ones.
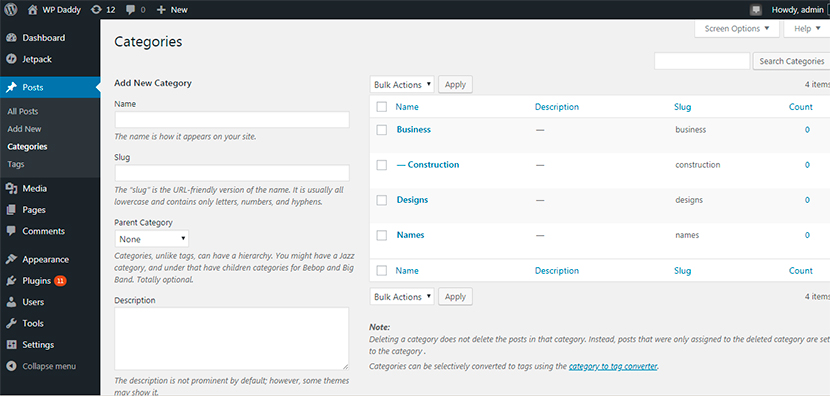
If you go to Posts -> Categories, you will be able to create a number of new categories. So after they are created, you can go to Posts -> Add New and see the list of categories on the right next to the post editing area.
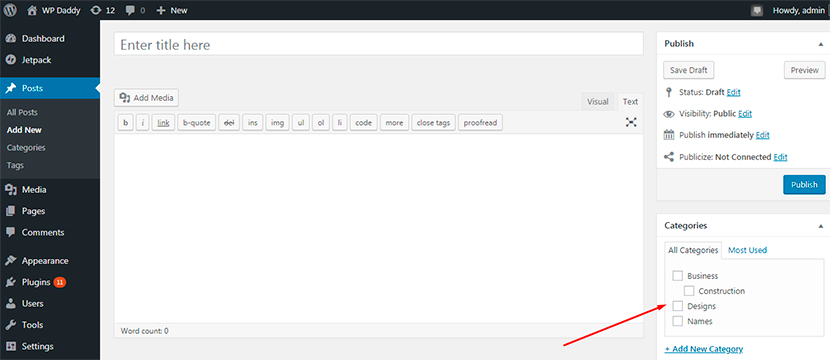
Both parent and child categories can be added to the navigational menu.
How to add categories to your website’s navigation menu?
So after you’ve created a few posts and filed them under several categories, go to Appearance -> Menus to add them to the menu. You will see the categories tab on the left side from the menu you’ve already created. So click on it, and you will open a list of all the categories available on your website.
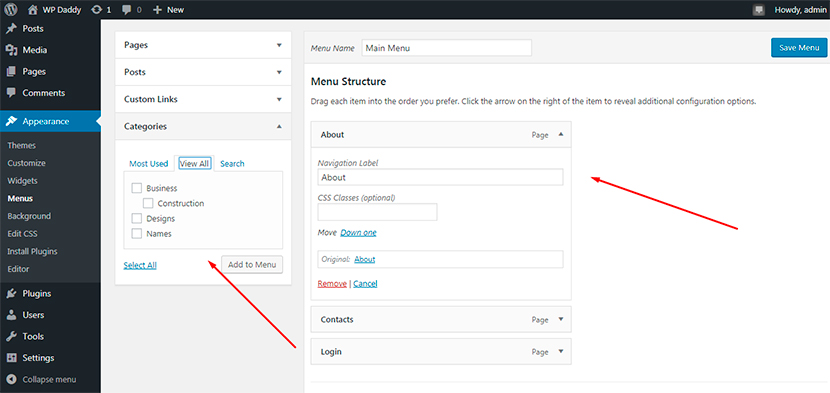
Check any category you want to add to the menu and click the Add to Menu button. Now you can drag and drop the menu blocks to place them where you personally require.

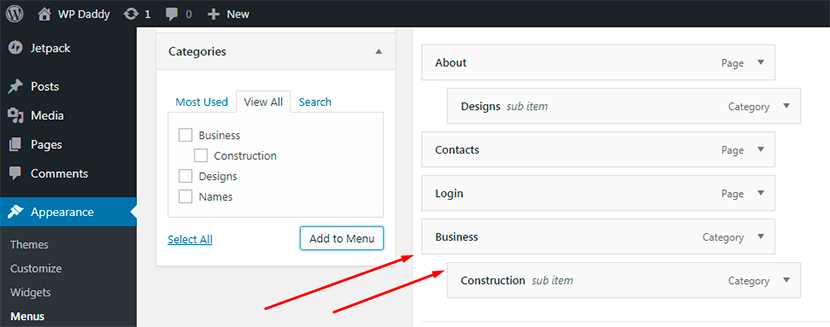
If you’ve got the subcategories you can also add them to menu and place them under the parent ones. As you see, all is pretty easy.
That’s all, hope this guide will be useful for you.
