The way you layout the elements on a page makes a big difference for user experience when it comes to website design. Full-width web designs flow nicely because elements like columns and sidebars are the same width. Main content areas change width which allows images and text flow to different areas of the webpage.
Read this guide to find out how to make full-width pages with Elementor for WordPress. Elementor is a Live Page Builder for WordPress which allows making changes by dragging and dropping the elements and without any coding knowledge. You can observe the changes in real-time mode once they are made.
Install Elementor for WordPress
First, let’s see how to install Elementor for WordPress to start building a great looking and effective website on your own.
1. Let’s Add the Plugin
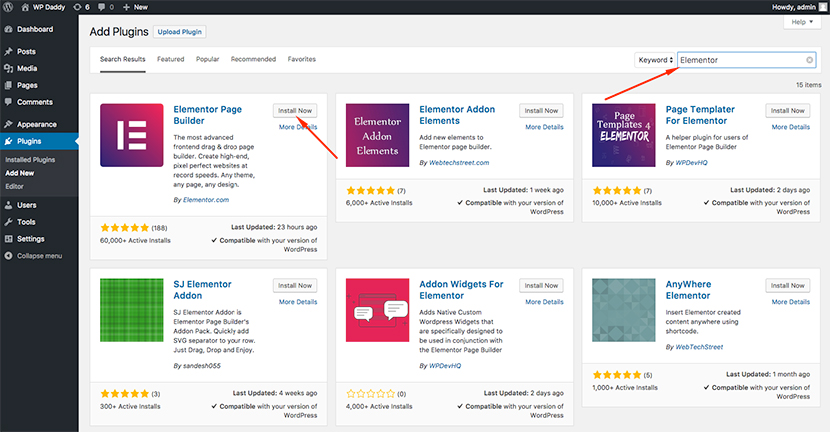
Go to the Plugins -> Add New section in your WordPress dashboard and enter Elementor in the search field and then click the Install Now button. Once the plugin is installed, click the Activate button to activate the plugin.
You can also download Elementor directly from its official website or from WordPress Org.
2. Manage the Settings
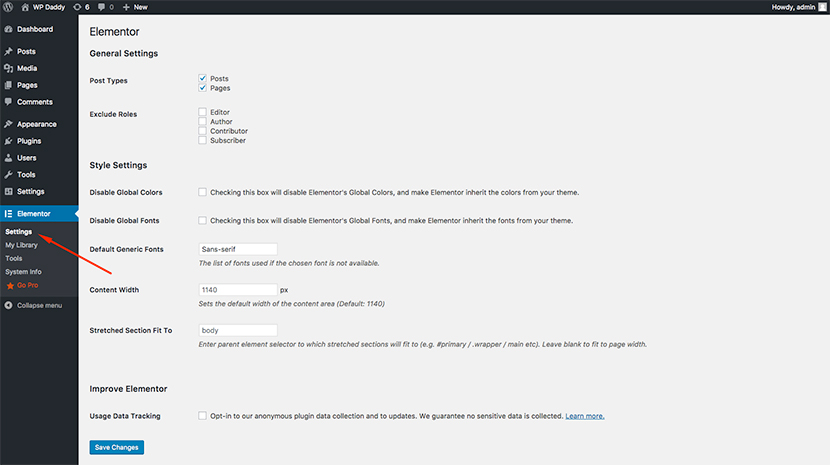
Go to Elementor settings to choose which post types the Elementor will use and which users will be allowed to use the plugin. You can also set the font that the plugin will get if the selected one is not available.
3. Start Working with Elementor
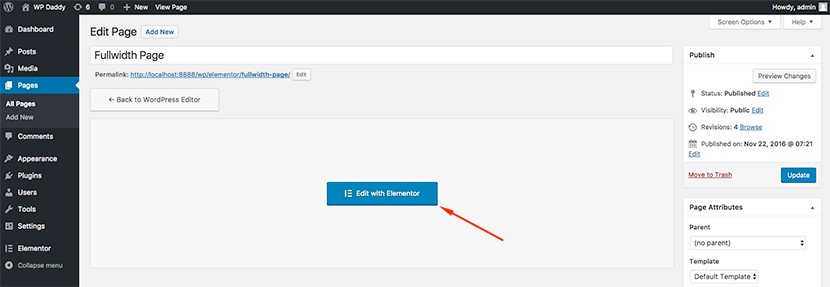
Go to Pages, add a New Page and name it. You’ll see the Edit with Elementor button, so you can click it to start your work.
Create Full Width Pages with Elementor
The ability to create full-width layouts is one of the most asked-for features in Elementor. This ability requires a little bit of hack and a plugin that needs to be downloaded and installed. So let’s go through the step-by-step guide on how to do it quickly and easily.
We’re going to take MariGold – A Responsive Free WordPress Blog Theme as the example. This is a great theme to work with ‘cause it’s got a lot of useful options. It has got full-width already and you can also turn off the sidebar, but let’s see how to make full-width when it doesn’t work as it has to work. We now get a simple blank page to work with it further.
1. Please switch over to the admin. Go to the Pages -> All Pages section in the left panel, select the Homepage, and take a look at the settings. (You’ll see that the attributes on the right-hand side include a full-width template, but we’ll show you how to make a genuine full-width.)
2. Click the Edit with Elementor button to start creating a full width layout with this plugin.
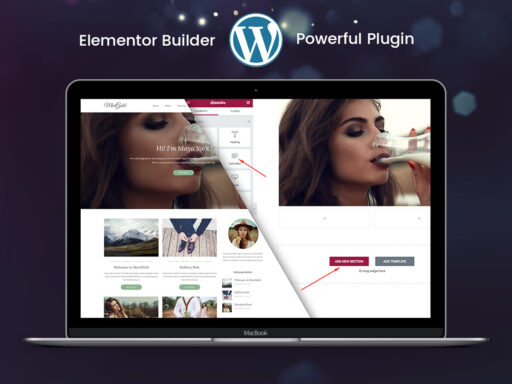
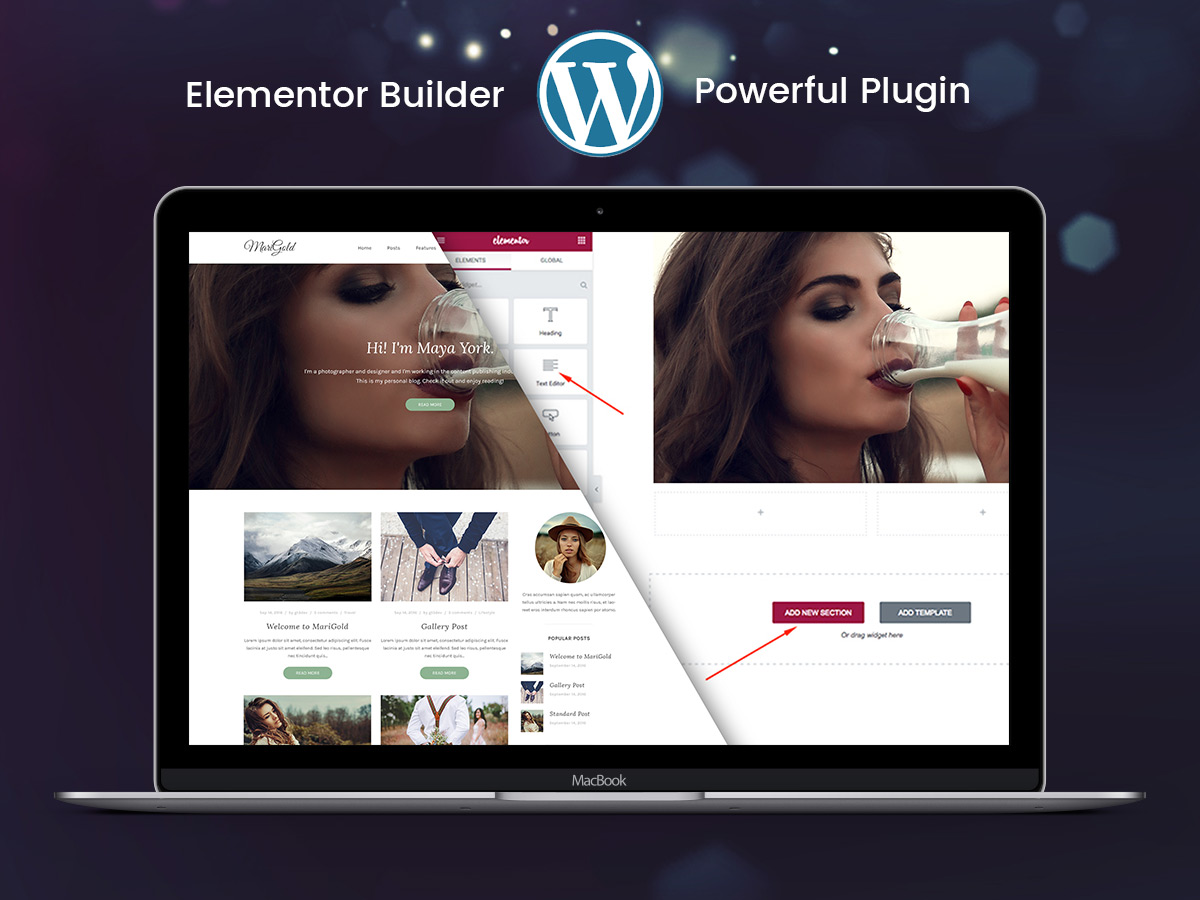
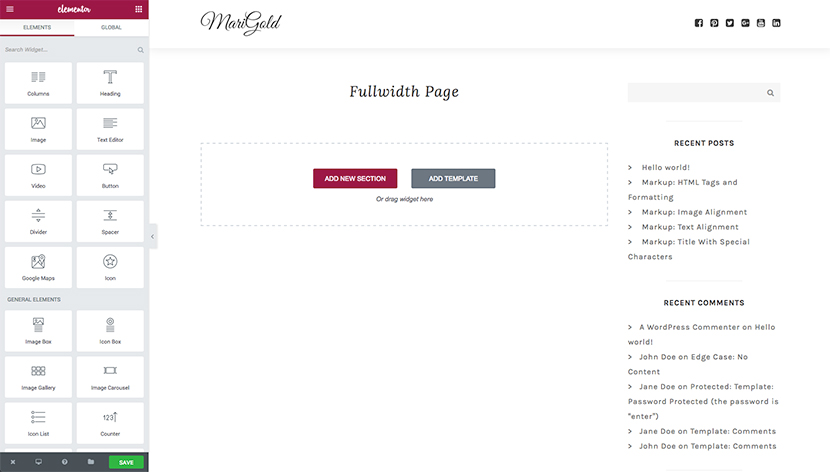
3. Put an image at the top of the page. For this, please find the Image Option on the left-hand side, drag-and-drop it into the content area.
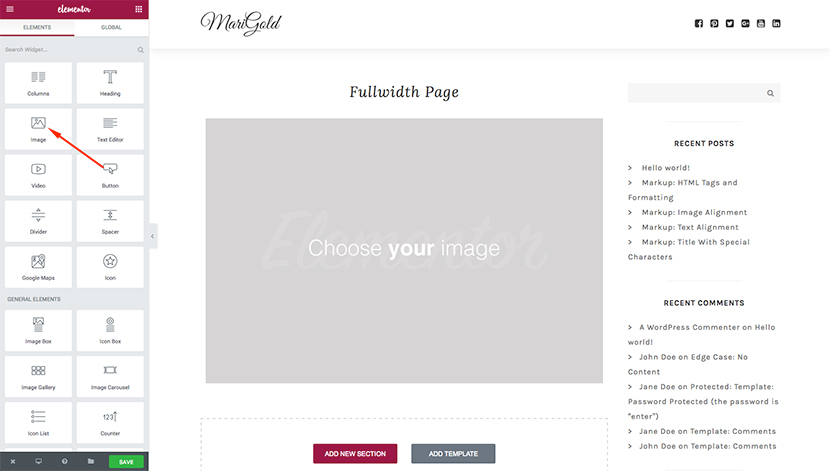
4. Click on Choose Your Image option on the left and select the image from the media library. Once the image is inserted you’ll see it in the content area.
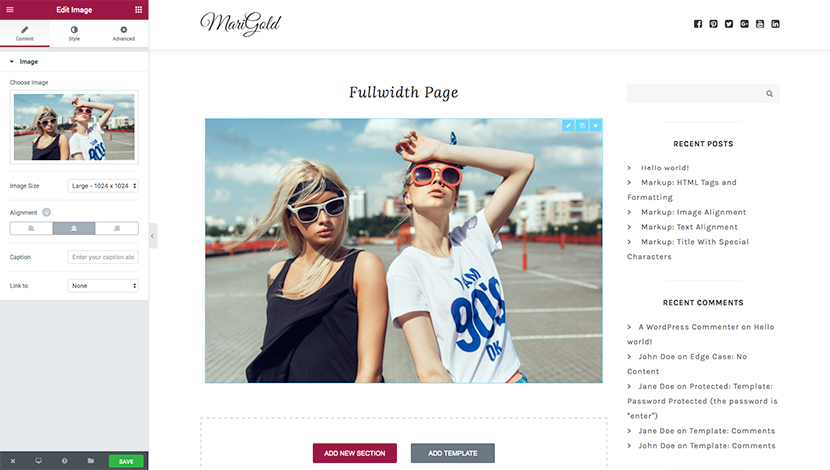
Set the section for this particular image block, it has to be full-width.

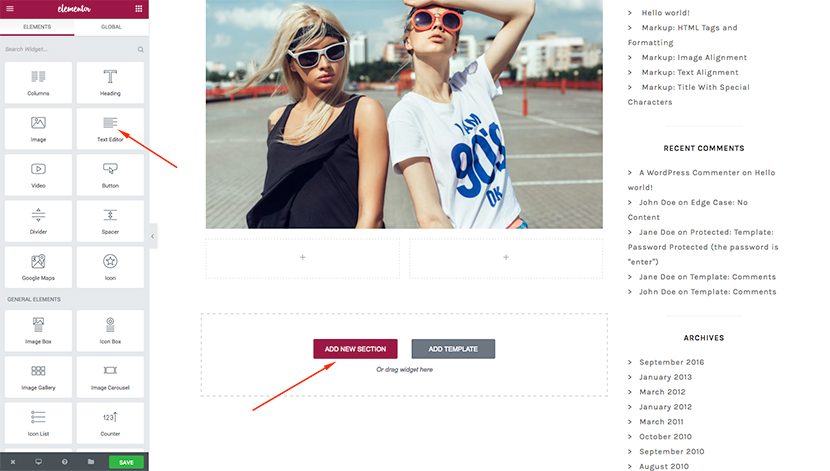
5. Then add some text under the image. Scroll down and click the Add New Section button. Select Your Structure and drag-and-drop the text editor down there. Put some text into the text block and hit the Save button.
6. Go to the demo page and refresh it to see what it looks like. Though we’ve got the full width setup on the full-width template and the full-width set for this particular image block, your full-width may look different from what you want it to be. If it’s not a full-width you require, let’s go further.
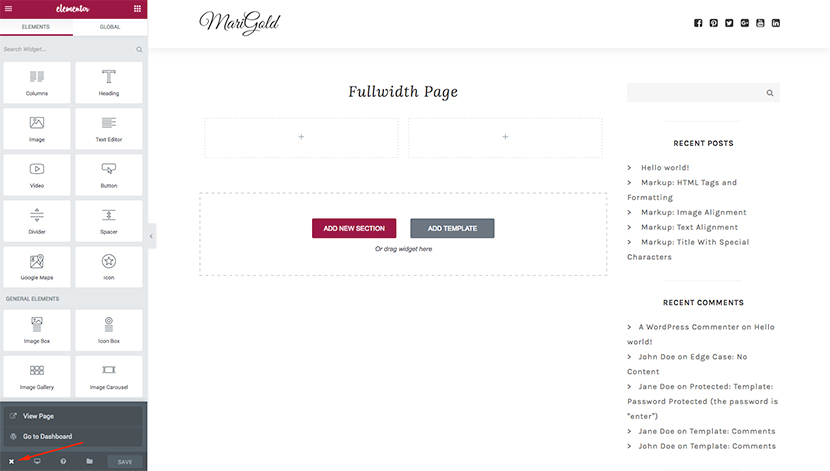
7. Go back to the dashboard again.
8. Select Plugins -> Add New section and type Elementor in the search field. Except for the installed plugin, you’ll see the Elementor Page Templater free plugin available. This plugin installs two additional templates – one for the header area and the other – for the footer area.
(Please make sure this plugin is compatible with the theme you have chosen for your website).
9. Click the Install Now button and then click the Activate button to activate the plugin.
10. Go to the Pages -> All Pages section in the left panel, select the Homepage and take a look at the page attributes on the right hand. There are two additional templates installed and they are Elementor Fullwidth Blank and Elementor Fullwidth Standard.
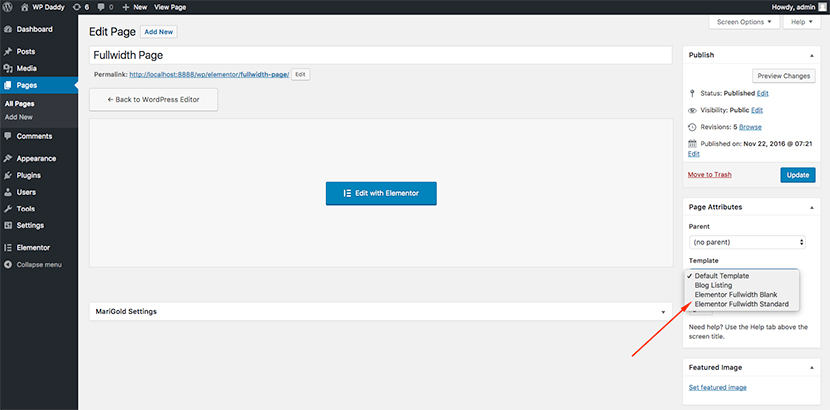
11. Choose the Elementor Fullwidth Standard template and Update the page. Then go back to the demo page and refresh it to see the changes. Now you’ve got the genuine full-width available.

You can change the text block to make it match the full-width image. Go back to the page editor, click the Edit with Elementor button, select the text block and set the section. You can change the style of the text by adjusting the typography options or you can manage the advanced settings up to your needs.
After all changes are made, hit the Save button and refresh the demo page to see that they take effect.
So you’ve now got the benefit of genuine full-width layouts for your page. We hope you found this tutorial useful. So if you’ve got any concerns please drop a line in the comments section below.