Everyone using WordPress as a blog platform or having it for their own websites although once in their life tried to add photo or video galleries. You might have noticed that the standard WordPress gallery is not a user-friendly one and it does not offer the advanced options to create really cool galleries. Today’s WordPress tutorial will show you how easily you can create an awesome photo or video WordPress gallery on your website, absolutely for free. So, let’s get started.
We’ve decided to choose a free plugin called “GT3 Photo & Video Gallery”, you can download it officially from WordPress Org website.
- Plugin installation. There are 2 ways to install the plugin, the first one via your WordPress dashboard Plugins -> Add New (search by “photo” keyword) and the second one via FTP, download the plugin zip file from wordpress.org, unzip it and upload it to wp-content/plugins folder on your server.
- Once the plugin has been installed, please activate it in the Plugins section of your WordPress dashboard.
How the Plugin Works: Advanced Options
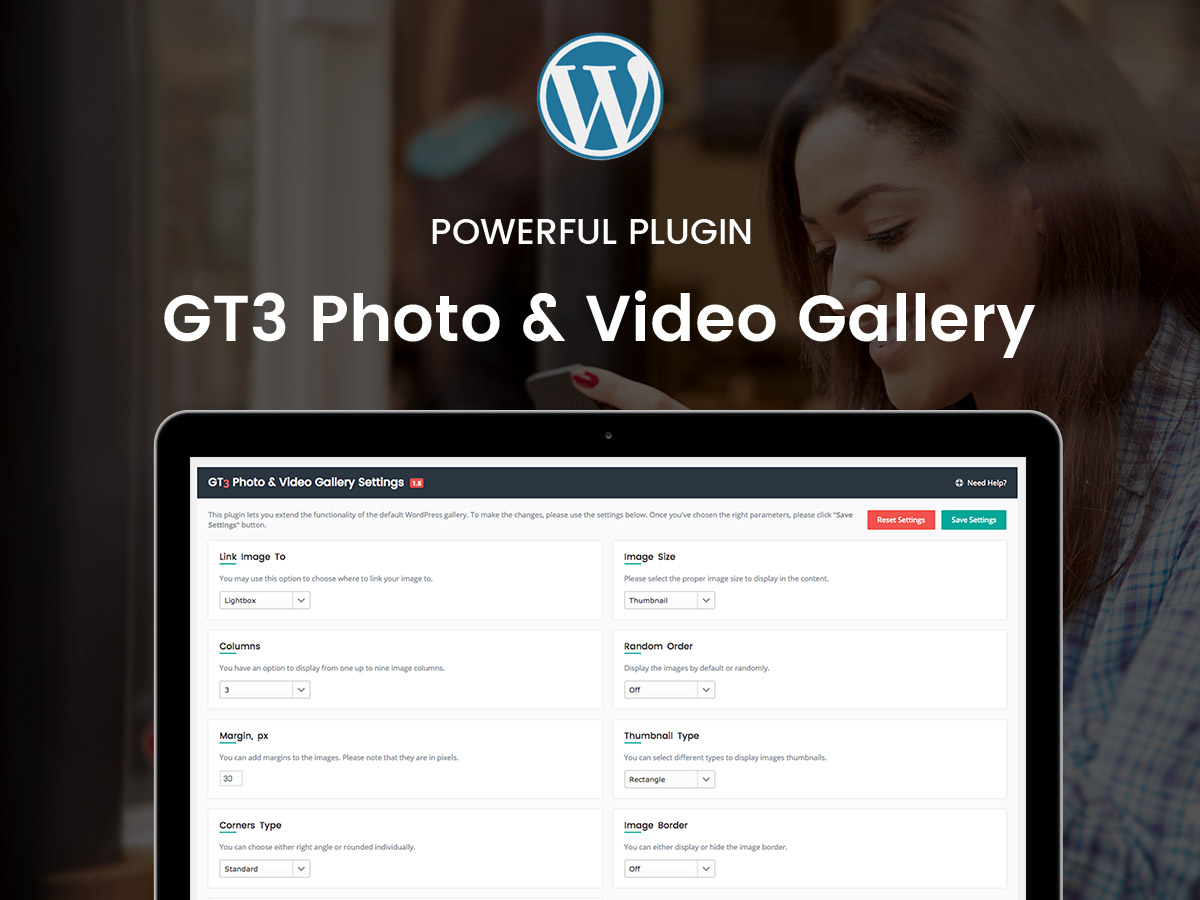
After plugin activation, you will be redirected to its options panel.
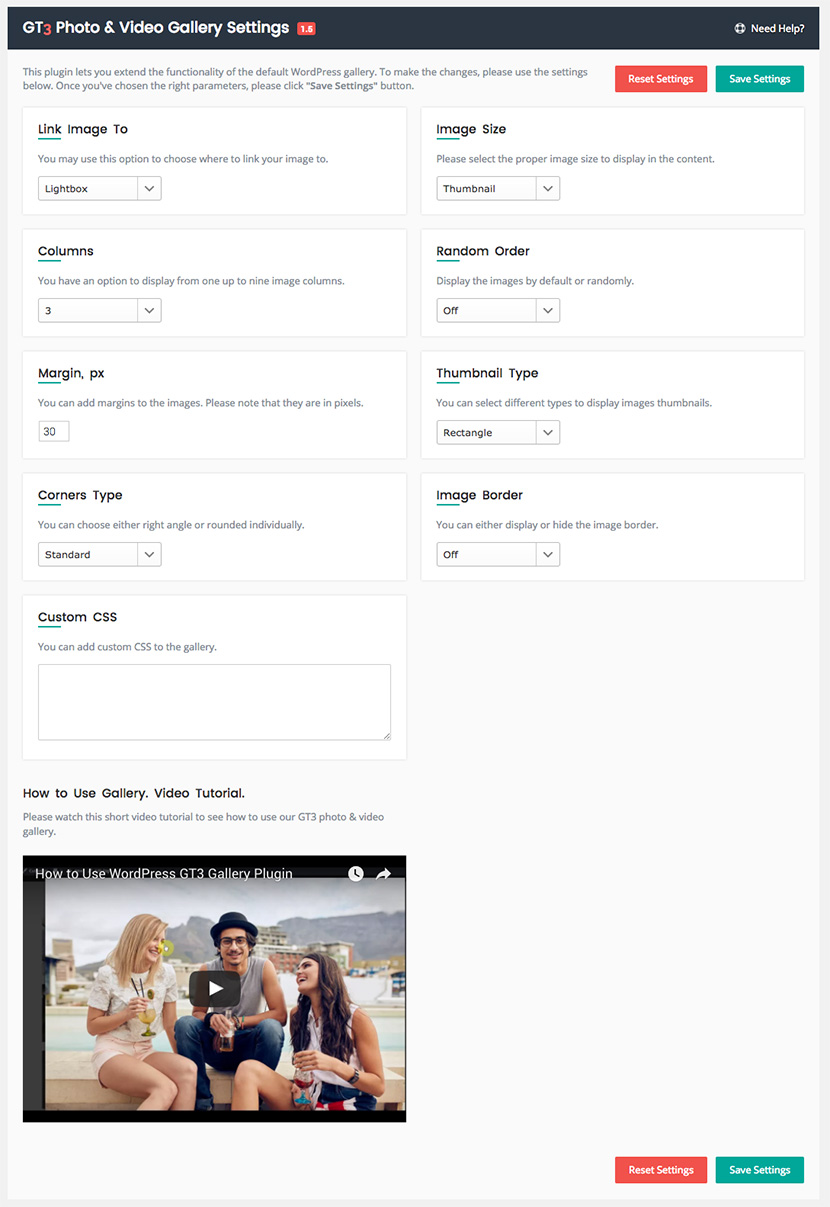
The plugin offers different options for the photo and video gallery, let’s review them.
- Link image to – you can choose the way to link the image either to lightbox or attachment page, or even remove the link;
- Columns – allows you to set the number of columns to display on the page or in the blog post. You can choose from 1-6 columns;
- Margin – with this option you can change the look of the gallery by adding the margin to the images;
- Corners type – there are 2 types, classic or rounded;
- Custom CSS – this option is very useful for an advanced WordPress user. You can add the custom CSS and change the look of the gallery;
- Image size – you can have 4 different image sizes: the thumbnail, medium, large and full size;
- Random order – if you want to display the selected images randomly, simply enable it;
- Thumbnail type – this is really cool feature. It allows you to choose different looks of thumbs from square, rectangle, circle and masonry;
- Image border – easy way to add the border to your thumbs. When you enable it, new parameters appear, and they are like the border padding to the image, border size and border color.
How to create photo and video gallery:
Here is a step by step guide on how to do that.
- Let’s add the photo gallery to the existing blog post. Please open the post you are going to add the gallery to.
- Click the standard “Add media” button, the popup window appears.
- Top left corner, please click “Create Gallery” and select the images for your gallery. Once they are selected, please click “create a new gallery” button.
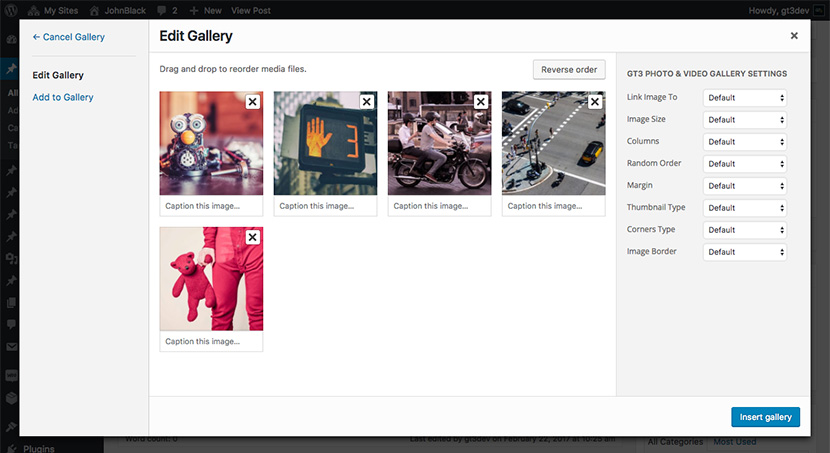
- In the new window you will see the settings for “GT3 Photo and Video Gallery”, see the screenshot below.
- You can choose the individual parameters for this specific gallery using the settings at the right side or keep the default settings.
- Click “Insert gallery” button. That’s all.
You can also watch this demo video.
Final result, pros and cons.
Pros:
- Easy to install and manage;
- Intuitive gallery options panel;
- Working with the existing media;
- Modern clean design and great functionality;
- Can apply different settings for each gallery;
- Fully responsive;
- SEO optimized;
- Custom CSS allows to change the look of the gallery.
Cons:
- No autoplay option for the lightbox;
- No social network sharing option;
- No option to comment the image;
- No option to display thumbs in lightbox.
We like this free WordPress photo and video gallery plugin for its functionality and ease of use.
If you’ve already used this plugin, please leave your feedback in the comments.
Thanks.
