Are you curious about how to prevent WordPress from generating multiple image sizes every time you upload one on your website? Read further to learn more.
Hello there! In this post, I’m going to show you how to prevent your WP engine from generating a number of sizes for every image you upload.
The Story of a Bug
My recent story is as follows: I’ve installed another free WP theme on another domain of mine and started to customize it as always to replace the dummy texts and create a full-fledged website.
Of course, I knew that WordPress creates up to 3 sizes for every image I upload to my media library, and all of these sizes are stored on the server, so I can see them only if I connect to my website through FTP.
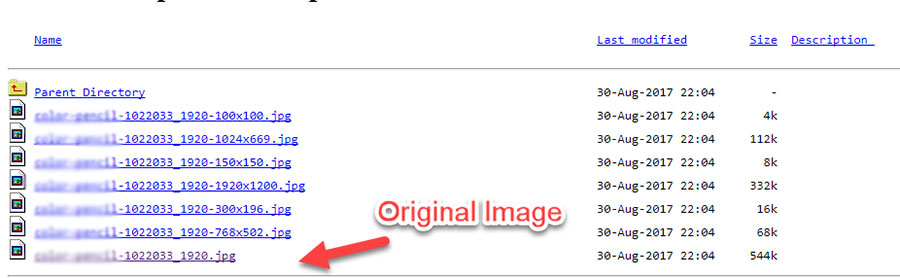
The theme I’ve installed showed me all my additional image dimensions right in the media library. Yes, they all were visible right there, and this was a strange ‘bug’ I’ve never faced before.
This happened when I uploaded a header image and images in PNG formats for the logo and favicon of the site. I thought I shouldn’t have seen all of them visible in the media library ‘cause I’ve got used to being sure that all of those additional image sizes are hidden.
This was the reason for me to remember how to prevent WordPress from generating additional image sizes if I don’t require them and I’ve resolved to share this information with you.
By the way, you probably know that some WP themes and plugins sometimes also create additional dimensions for every image uploaded to the site, and these sizes can reach the amount of 5 and up to 10 items. The problem that occurred with the photos on my site was because of the ‘bug’ within the free theme I’ve installed.
So why additional image sizes are generated by WordPress?
Usually, you don’t see all additional image sizes created by WordPress or a WP theme right in the media library. You can see just the one you’ve recently uploaded, and this is the full size.
Additional sizes are generated for you can choose the required size of the same image to upload it to different content areas. For instance, you can choose the full size of your image to upload it to the post and then choose the medium size of the same image to upload it to a certain page or select the thumbnail of the same image to upload it to a page with a certain list and use it as a preview.
To choose the desired size, you just go to ‘Attachment Display Settings’ in your media library and choose the needed dimensions in the drop-down list.
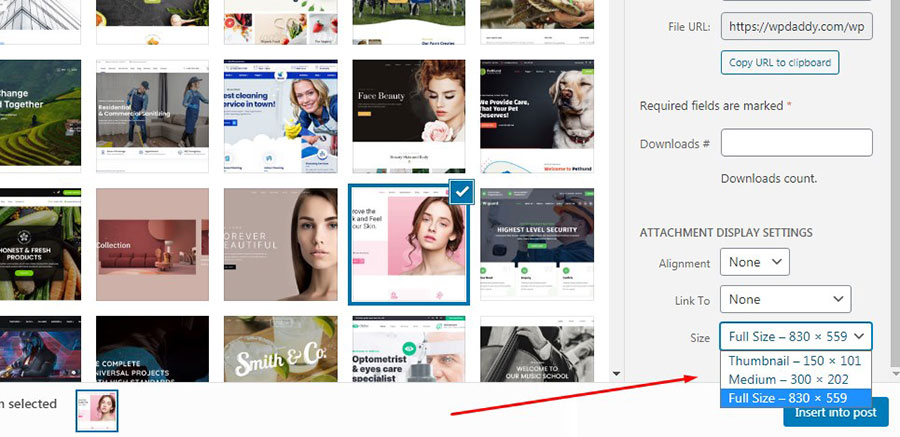
As your photos are already stored on the server in several sizes, you should just select the necessary photo for your definite purpose in the list, and it is going to be pulled from the memory to allow you to insert it to any post or page.
What if you don’t need all of those multiple photos?
And that’s what I wanted to show you today. How to get rid of this “multiplication chaos” if you don’t need it for your site? That is very easy!
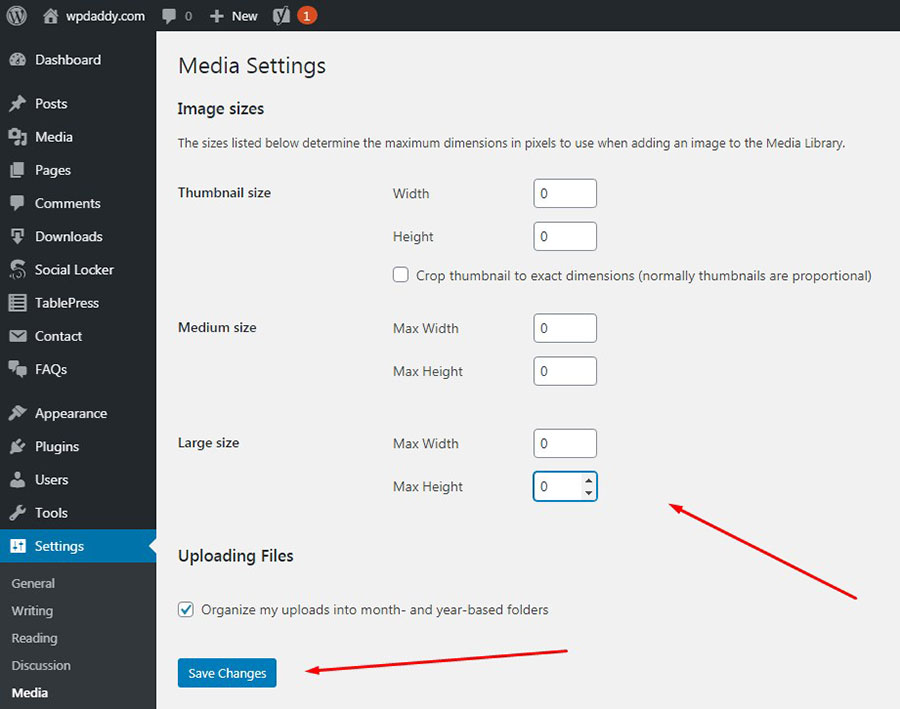
Go to Settings -> Media menu in your WP dashboard and you’ll see standard sizes set for thumbnail, medium and full dimensions of your every photo in pixels. Those sizes are adjusted based on the width and height of the initial (full) image you upload.
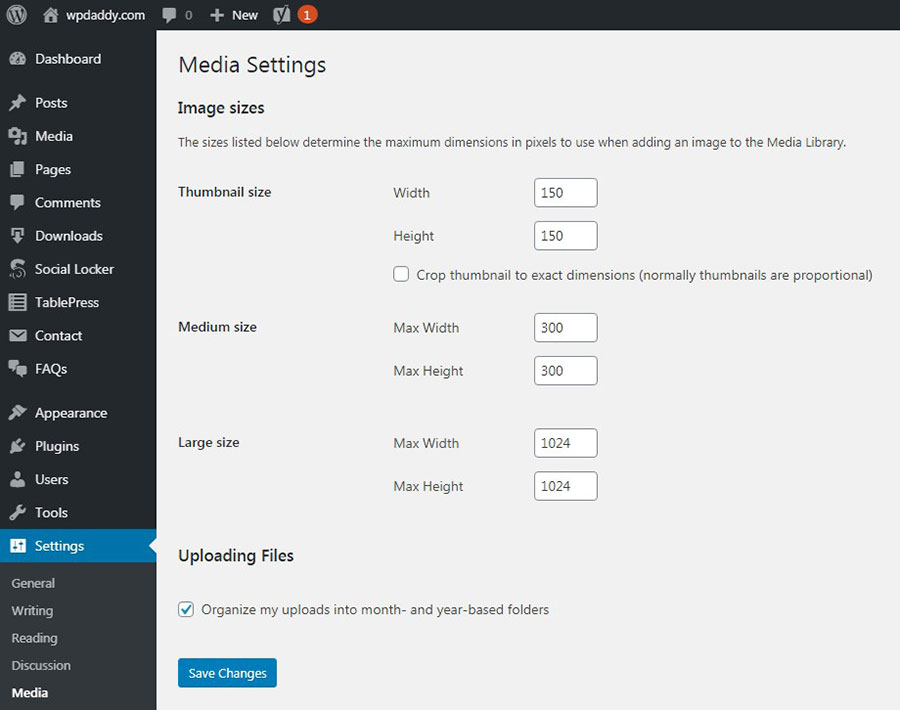
To stop your WP site from generating all of those additional photos in the future, replace all of those dimensions with zero and click the ‘Save Changes’ button to keep your changes live. That’s all!
By the way, this is going to save you storage space on your server given to your website by your hosting provider based on your pricing plan.
Now you can feel free to upload images to your media library just in its full size.
Hope this tut was helpful,
Melany H.