If you’ve been running your blog for some time, for instance, for a year or two, then you’ve already probably got a few really popular posts that are visited and commented the most. These posts define your rates in the search results according to certain search inquiries and influence your overall SEO.
If you want to improve your SEO and traffic you usually create new content, promote your website in social media, publish the guest posts on popular websites, increase the reference weight, etc.
However, there is one more helpful method suited for making your SEO much better, and this is the republishing.
What is republishing?
The process of republishing supposes that you find an old but popular post, update its content with new information, upload new snapshots and photos, insert some fresh links, change its title and featured image, and then publish it with the new date to make it be displayed on your homepage as a newly-published article.
Of course, you should also change the initial URL of your popular post and then redirect all of your traffic from the old URL to the new one.
In this post, I’m going to show you how to make a republishing in WordPress step by step. So, let’s start!
How to make a republishing?
Well, you’ve resolved what post you want to republish, now go to Posts -> All Posts in your WordPress dashboard and find the post you want to edit for republishing.
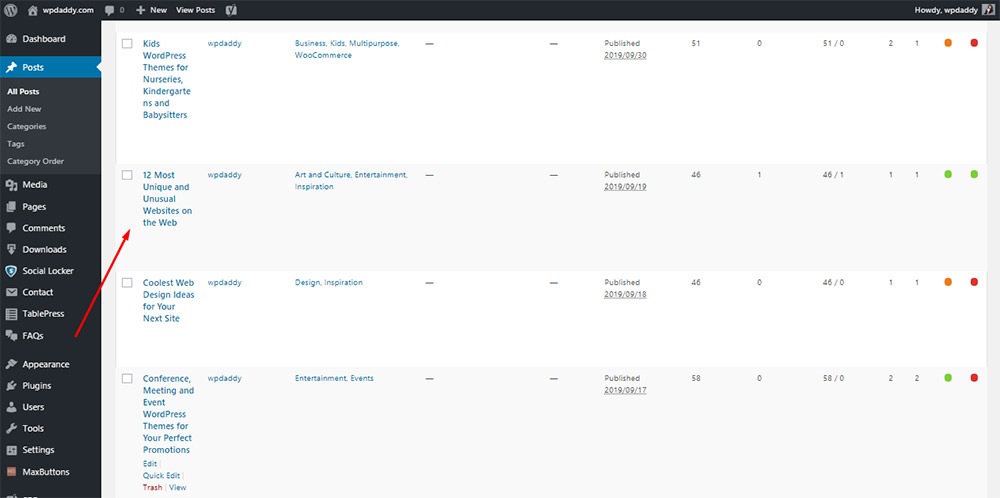
Click the Edit link to open the post editor and start updating your post.

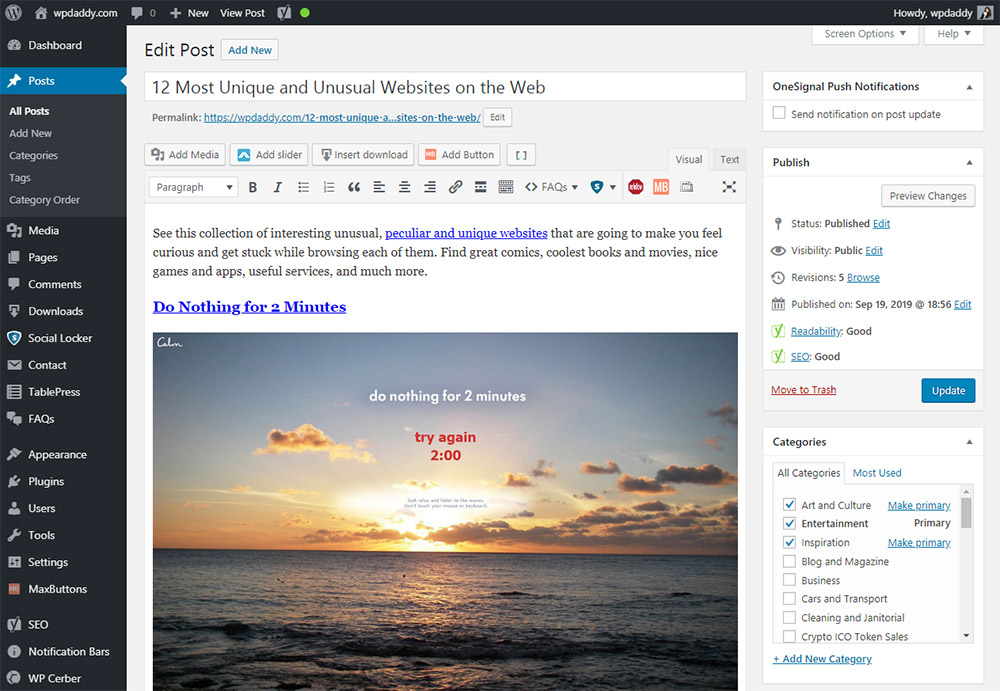
1. Change and Update the Title and Text
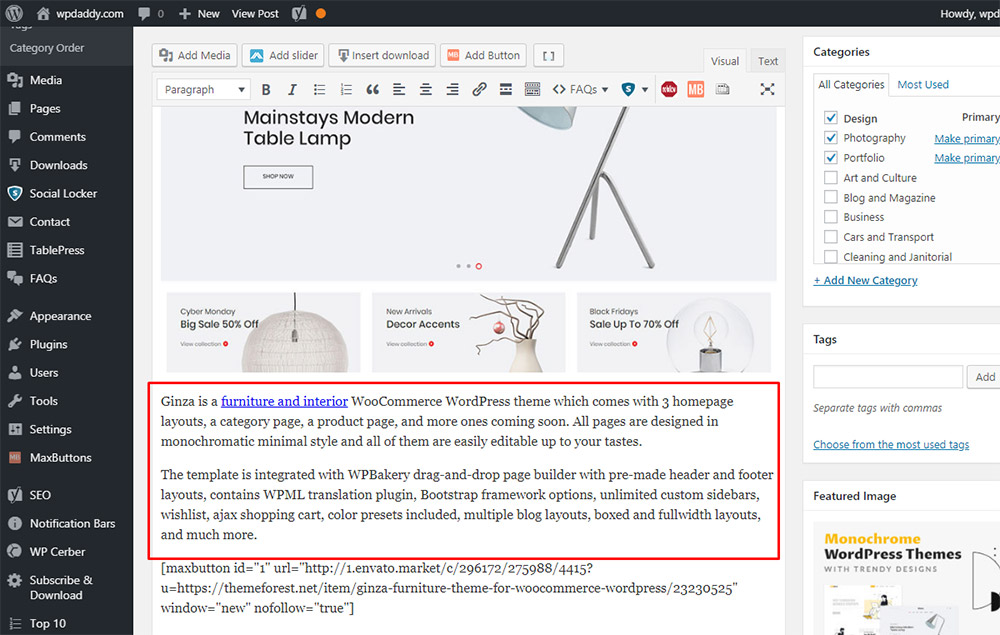
Now you can complement or completely change the title of your post as well as insert additional text into your post.

For instance, write more welcoming text, add some more description for your existing products or add several new products with new descriptions, etc.
2. Upload New Images
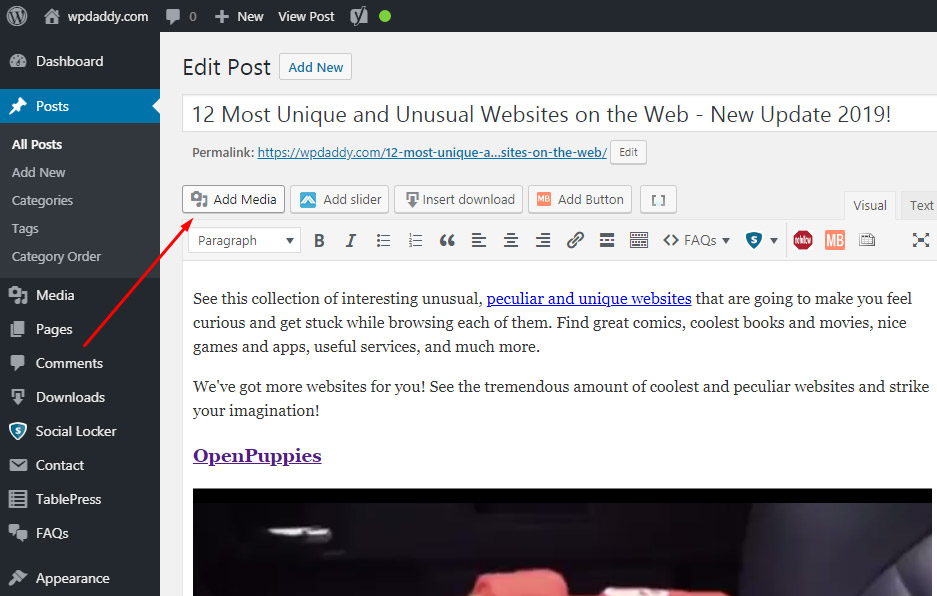
If you want to upload additional images, click the ‘Add Media’ button in the post editor
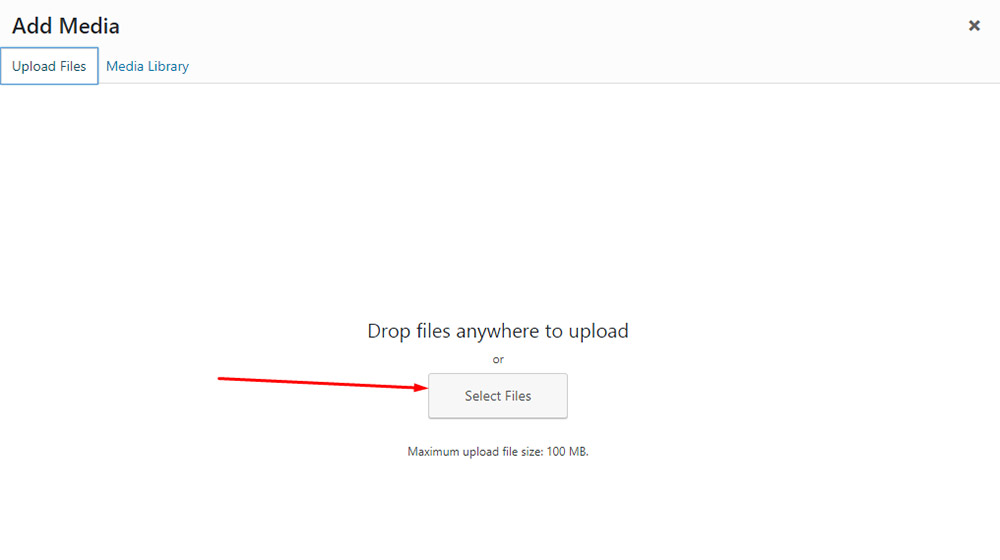
and then open the ‘Upload Files’ tab and click the ‘Select Files’ button to pick the required ones on your PC and upload them to the media library.
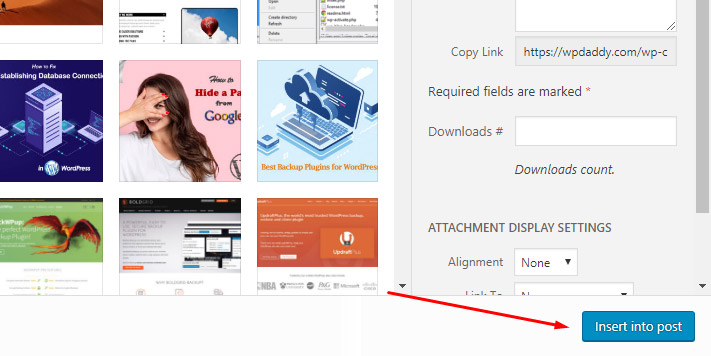
When the image is uploaded, click the ‘Insert into Post’ button to insert the image into the text of your article where required.
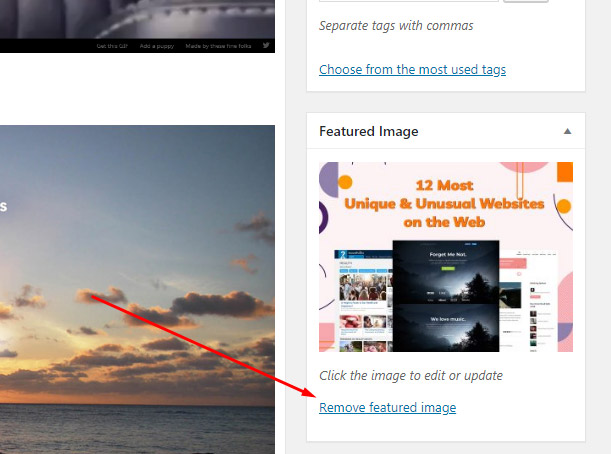
3. Change a Featured Image
Now it’s time to change the featured image of the post you want to republish. Go to the ‘Featured Image’ section in your post editor and click the ‘Remove featured image’ link to remove the existing image already uploaded.
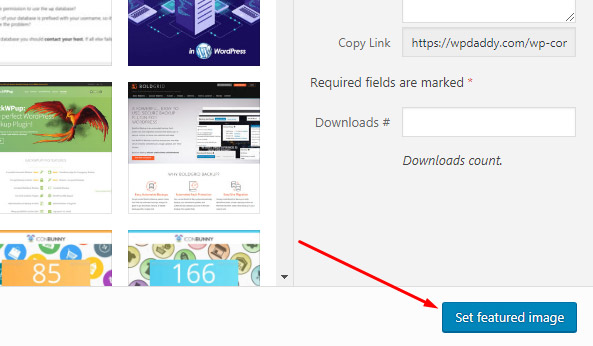
To set a new featured image click the ‘Set featured image’ link and then the media library will be opened.
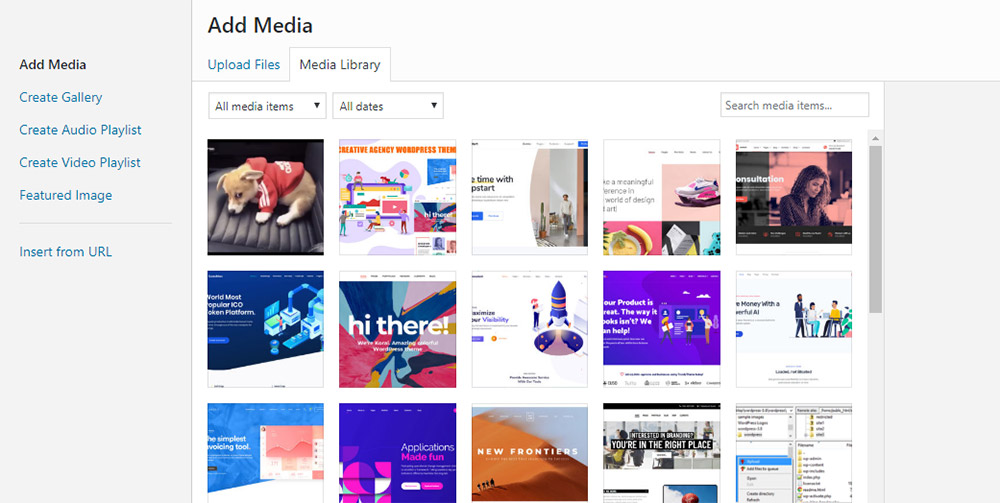
You can either select any image in the media library (if you’ve already uploaded it before) or upload a new image as I’ve described in point 2 of this post. When the image is chosen, click the ‘Set featured image’ button to set a new image instead of the old one.
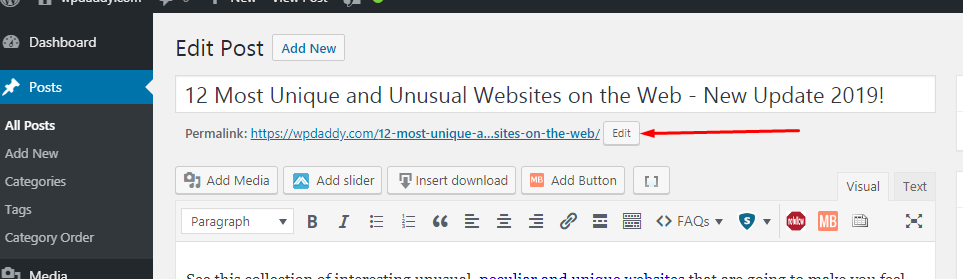
4. Replace the old URL with a New One
To change the URL of your post you should edit the Permalink located under the post’s title in the post editor. Just click the ‘Edit’ button and insert a new URL of your post.
Usually, when you insert the post title, the permalink is created automatically when you update the post. The URL exactly reflects the title of your post, so when you make the republishing, you can change the permalink to make your URL perfectly reflect your newly added title.

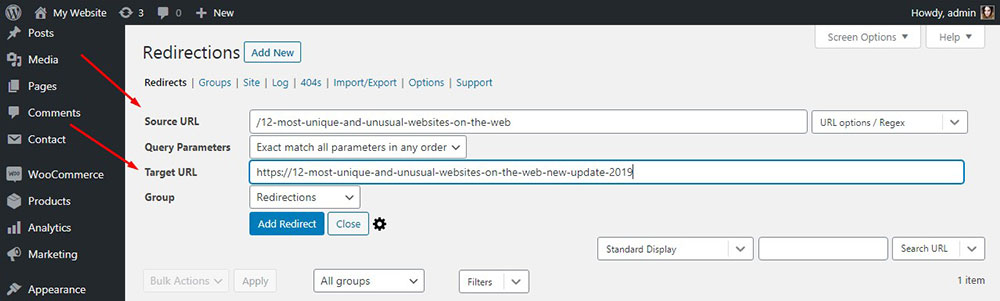
5. Create the Redirection
This is the most important step when making the republishing. Your old popular post is already indexed by the search engines and has its specific position in the search results. If you change the post’s URL, then the old one will still stay available in the search results; but if a user clicks it, they will see the 404 error (because the old URL is already removed and doesn’t exist).
404 errors can damage your SEO, so you should avoid them by creating the redirection.
I’ve described the detailed process on how to make redirection in WordPress in this post, so please see this step-by-step guide and set the redirection for your republished post properly.
6. Change the Date and Publish the Post
To make your old post appear on the homepage as a new one, you should replace the old date with the current fresh one.
Go to the ‘Publish’ section in your post editor and click the Edit link near the Published date.

Change the date by choosing the appropriate one and click the ‘Ok’ button to save the changes.
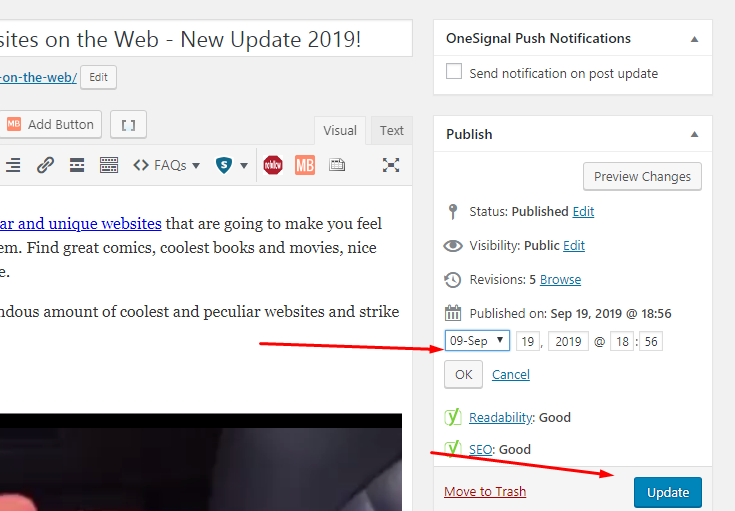
Now you are done. Click the ‘Update’ button to make the post go-live.
Please see some of the republished posts by WP Daddy:
25+ Phone and Computer Repair WordPress Themes – a Freshest Bundle
20+ Dotwork, Blackwork and Aquarelle Style Tattoo WordPress Themes for Tattoo Parlors and Artists
25+ Pet Care WordPress Themes for Dog Breeders, Cat Addicts and More
Hope this tut was helpful.