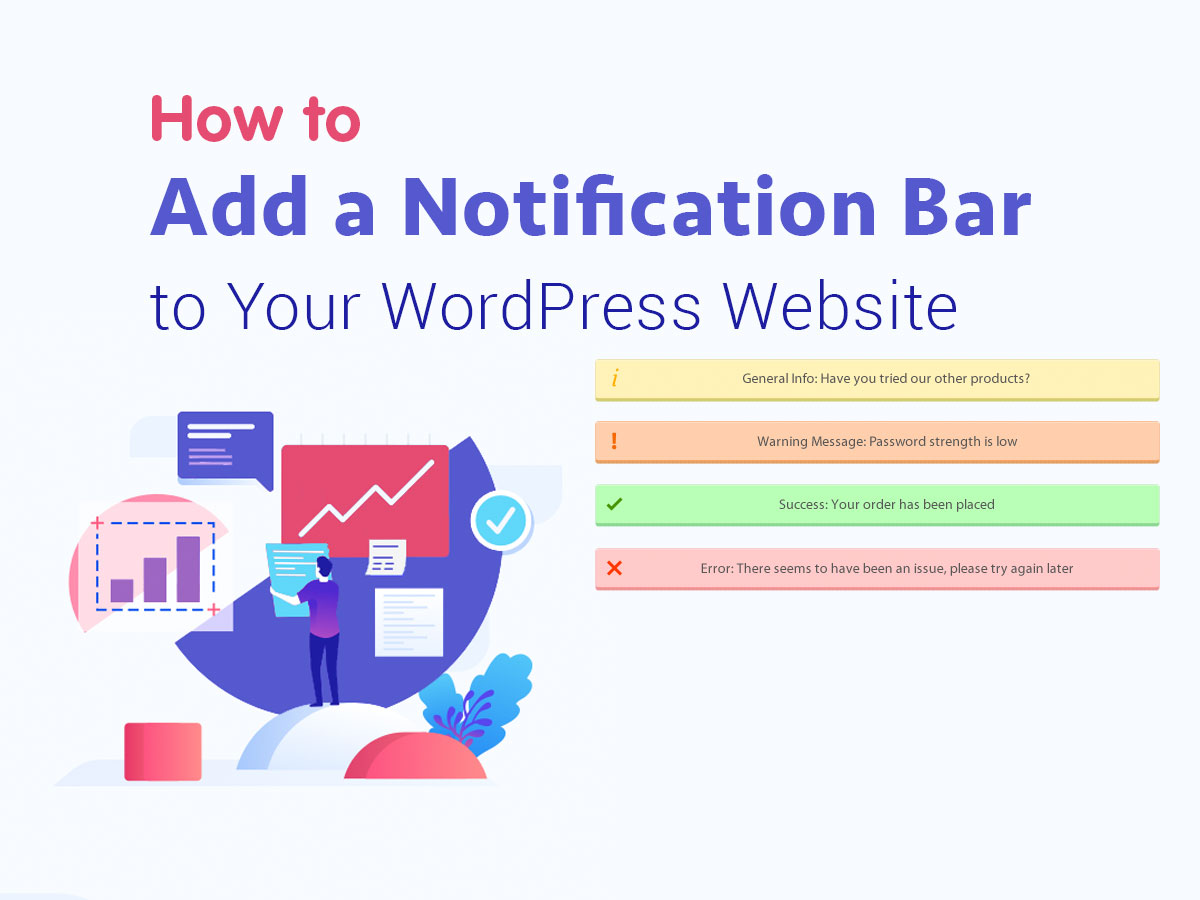
Notification bars can be considered to be a good modern trend used by bloggers and other website owners to increase engagement, CTR (a click-through rate), announce important upcoming events and promote digital products or published posts.
These bars look more user-friendly than popups and sideouts because they don’t obstruct the area of viewing and don’t infringe the principles of user experience.
If you’ve recently created a great detailed guide, issued an eBook, launched a new project or crafted a new design, you can use notification bars to inform your users about it. This will help you retain visitors and transform them into repeat ones. By the way, it will, of course, improve your conversion.

The notification will work as a promo bar with a hyperlink you can locate in your website’s header and direct your visitors to the necessary page without actually sacrificing main content.
There are a few ways to add a notification bar to your website:
- Using HTML and CSS
- Using a plugin
Of course, using a plugin is a simpler and more convenient method in this case, but sometimes plugins can affect your website’s performance. Not all of them, but some can make your website load slower, and this will make your visitors leave your website and find some faster one. If you resolve to use the plugin for creating a notification bar on your website, please test your website for speed after its installation.
In this post, we will both try to create a notification bar with the help of a plugin and using HTML and CSS. So let’s start!
Create a Notification Bar Using a Plugin
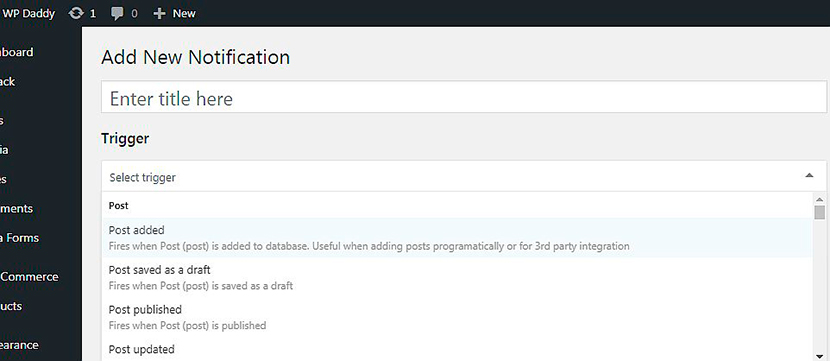
For our purpose, we are going to use Notification – Custom Notifications and Alerts Plugin for WordPress. After its installation and activation, go to Notifications -> Add New Notification and create a notification bar as well as select a trigger to fire it.
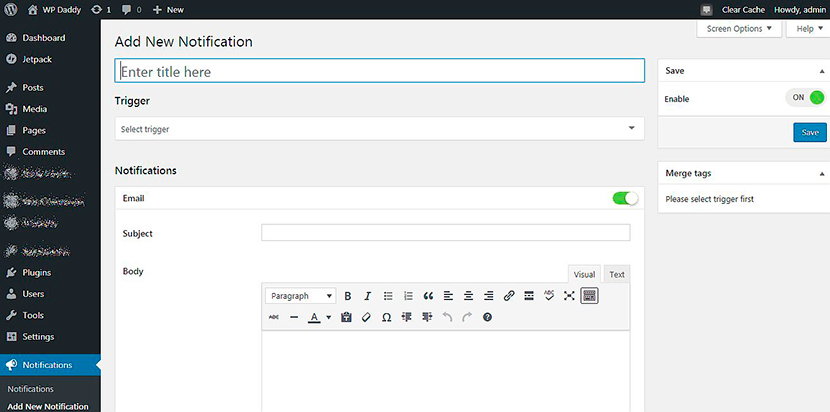
For instance, when the post is added, the post is saved as a draft, the post is published, etc., your notification will appear.
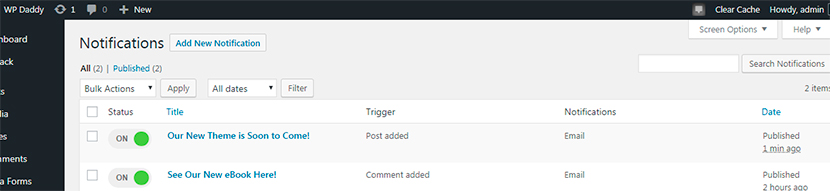
After the notification is saved, you’ll be able to see it in the Notifications list and manage its visibility, edit, duplicate or delete it as required.
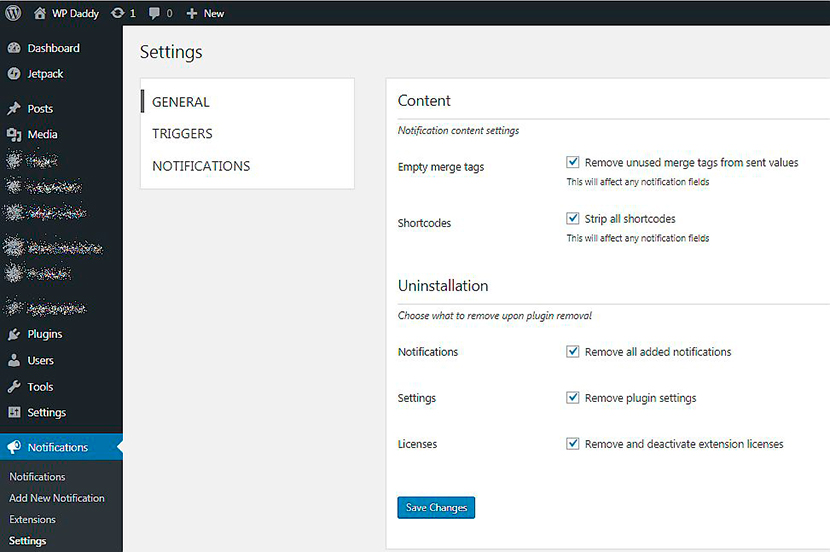
There are settings you can configure in General section to manage content and installation, in Triggers section to manage post, taxonomy, comment, user, media and WordPress options, and in the Notifications section to manage email and webhook.
Create a Notification Bar Using HTML and CSS
So let’s review the simple steps on creating a notification bar without a plugin.
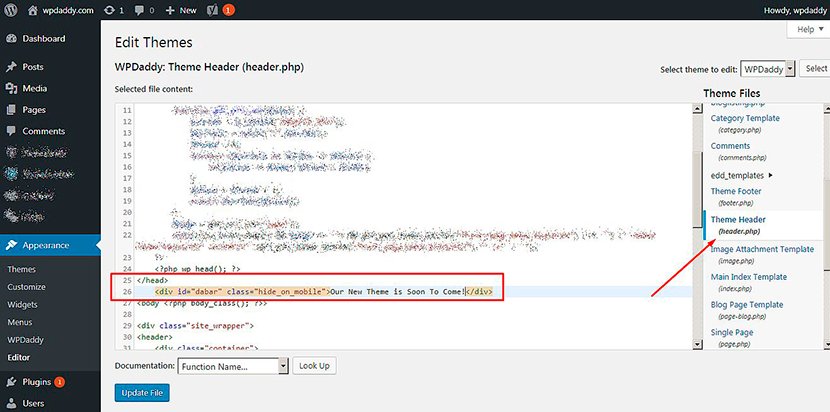
Go to Appearance -> Editor and find the header.php file.
Insert the following code after the </ head > tag.
< div id=”dabar” class= “hide_on_mobile” > Your website message < /div >
Remove the unnecessary gaps in the HTML above and insert it as shown on the snapshot.
Create your custom message instead of “your website message” here. You can also change the hide_on_mobile class if you require.
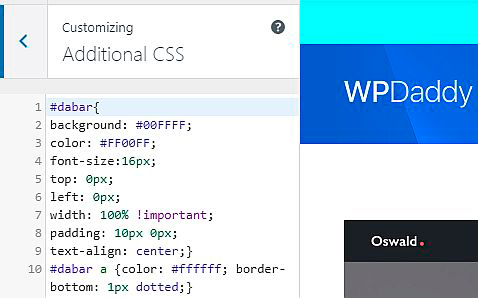
After that, you can add some custom CSS to make your notification message look attractive. I put my own background and font color but you can tweak it to your taste. Find the HTML color codes here. Add this code to the Custom CSS (or Additional CSS) panel in Appearance – > Customize section. If your WordPress theme doesn’t have a custom CSS panel, you can add it using any free plugins developed for this purpose.
#dabar{
background: #00FFFF;
color: #FF00FF;
font-size:16px;
top: 0px;
left: 0px;
width: 100% !important;
padding: 10px 0px;
text-align: center;}
#dabar a {color: #ffffff; border-bottom: 1px dotted;}
This notification bar will be static and disappear when you scroll down.
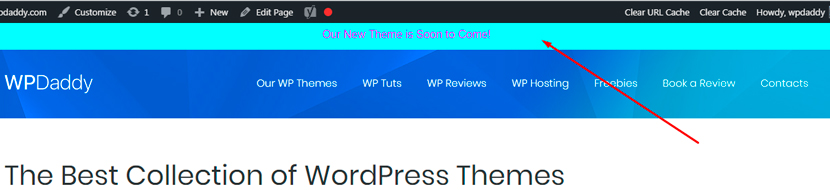
But you can make it look any other way up to your needs. Just create your own custom CSS if necessary. For instance, if you want your notification bar to be fixed and stay on its place when a user scrolls down, use the following CSS:
#dabar{
background: #00FFFF;
color: #FF00FF;
font-size:16px;
position: fixed;
z-index:1;
top: 0px;
left: 0px;
width: 100% !important;
padding: 10px 0px;
text-align: center;}
#dabar a {color: #ffffff; border-bottom: 1px dotted;}
Here you can also change the colors to your liking.
Hope this tut was helpful for you and you’ll enjoy your increased traffic and conversion when you start using notification bars on your website.