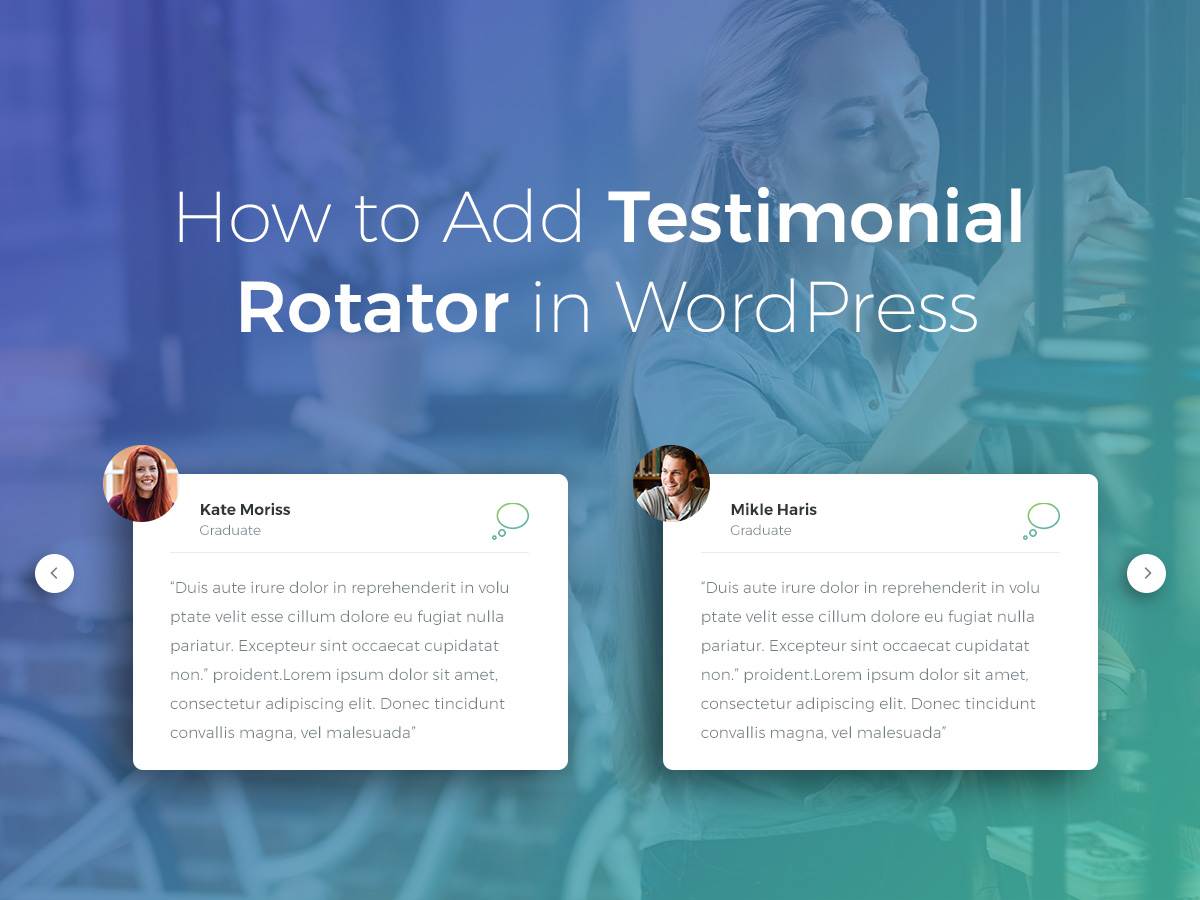
Whether you own a web store or just run a business website, you obviously need to make your customers satisfied with your products and services. If you encourage clients to leave feedback on your website and they do it with pleasure, it would be great to display a testimonial rotator with their opinions on your homepage or in the sidebar to increase trust.
In this tut, we will show you how to create a testimonial rotator on your WordPress website, manage the settings to get the required result, and then publish a testimonial rotator on your web-page.
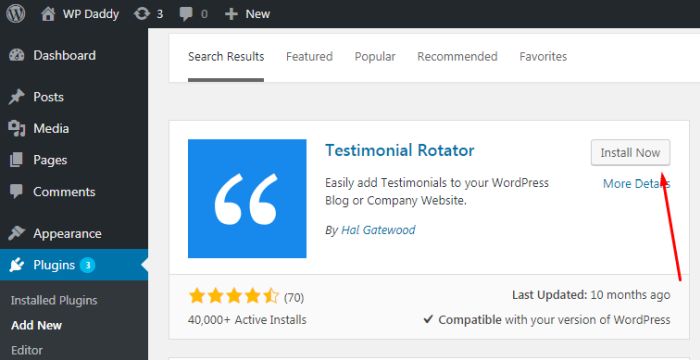
Let’s start by installing the Testimonial Rotator plugin, you can learn how to install a WordPress plugin in detail here.
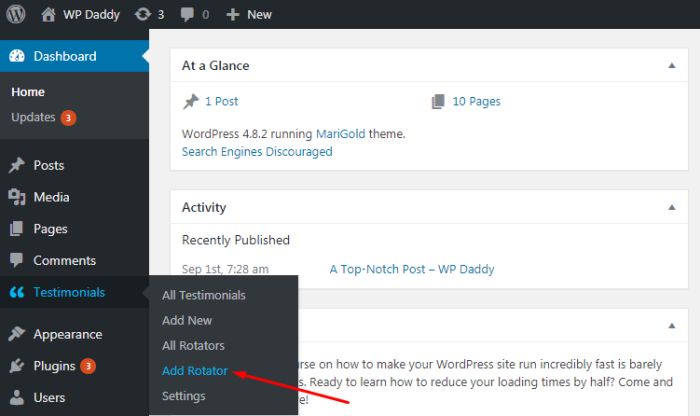
After the plugin is installed and activated, you will get a Testimonials menu in the admin panel.
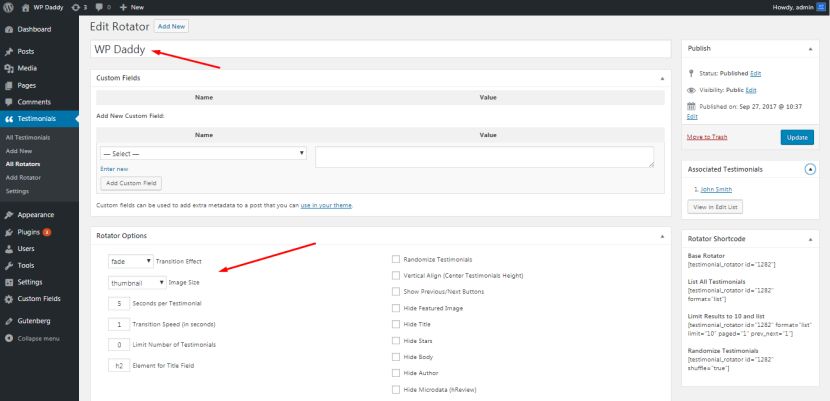
Go to Testimonials -> Add Rotator and add the Rotator name which can be the company or product that your testimonials are associated with.
You can manage your rotator options, add a carousel to display testimonials and define the behavior of your rotator.
Choose the animation duration in seconds, set the transition speed, choose any of the available transition effects, select the thumbnail image size, show or hide items, titles, stars, body text, etc.
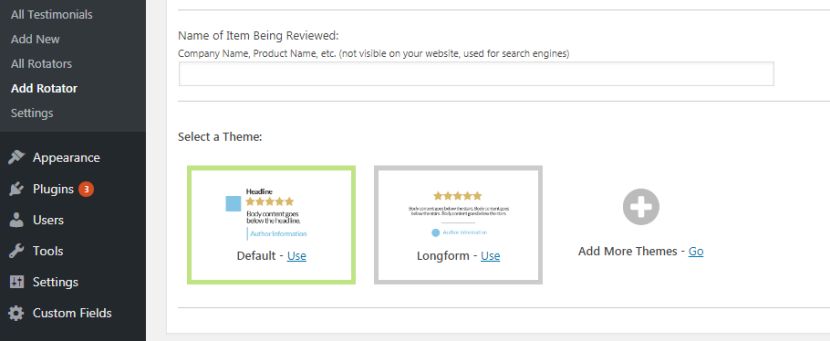
After that, you can choose the theme for your carousel from the default themes available with the plugin or buy additional ones.
Once you are done, you can publish your rotator. Just click the Publish button and save all the changes you’ve made.
After the rotator carousel is published, you can start adding your testimonials.
Go to Testimonials -> Add New and you will open a new page for adding your data.
In the title field, you can add a client’s name and then add the text of the certain testimonial in the post editor.

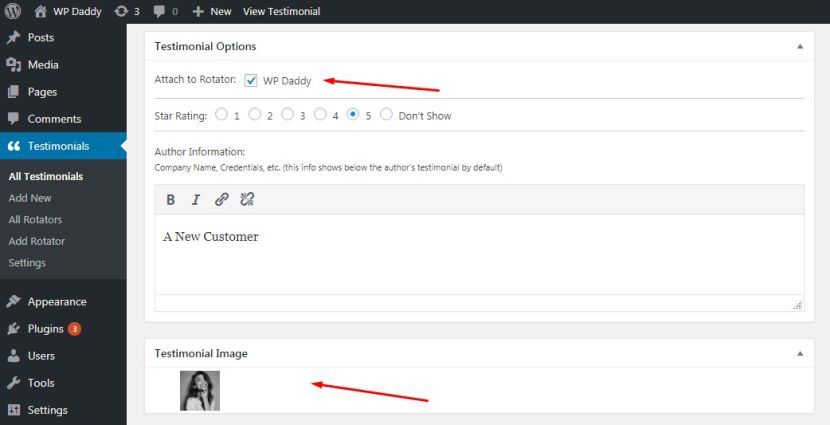
In the testimonial, options decide either to show or hide the star rating, add your current testimonial to the created rotator, and add a testimonial image (a photo of a client who has written the testimonial). You can also add author information.
Once you have created a few testimonials, it’s time to add them to your WP website.
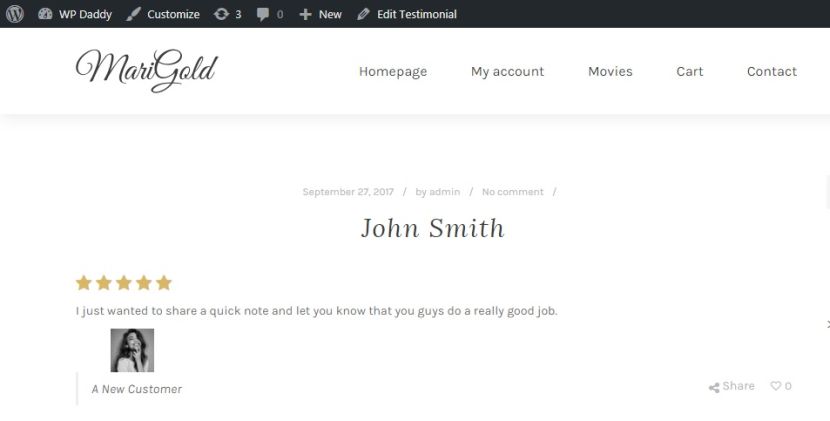
Go to Testimonials -> All Rotators, and you will see the list of the ones you’ve created earlier. You will also notice the small shortcode located near each of them. Copy this shortcode and then insert it into any page or post where you want your testimonials to be displayed.

You can also preview the page with your testimonials to see how they look on your live website.
If you’ve got any questions, please leave them in the comments. Thanks.