Today it’s extremely easy to start selling online, that’s why almost anyone has their own web store which either brings them primary income or becomes their side living. Actually, there are two key ways to start your shop on the Web and they suppose:
1. Creating a public page on social media and selling products to subscribers.
You just create an account in social media and then build a public page to add friends and get followers who will probably become your customers. You may either store the products in your own warehouse or run a dropshipping business, it’s up to you. This is the easiest way for a newbie to start getting some additional income and gaining a lot of experience in online sales.
2. Launching a full-fledged website with a cart and full eCommerce functionality.
The second variant requires a few more efforts like buying a hosting plan, choosing a domain name, selecting an eCommerce platform, managing products, and processing orders, as well as some more important tasks.
In our today’s post, we will speak on the basics of starting an online shop on WordPress and discuss the main steps of creating an online shop with this platform. We believe that the key steps should be as follows:
- Hosting and domain name;
- WordPress installation and configuration;
- eCommerce platform installation and activation;
- SSL certificate purchase and installation (for accepting payments);
- Selecting and customizing a theme;
- Adding a product to your store.
After that, you can start developing and promoting your online store, but now your first task is to properly launch it.
So let’s start!
1. Hosting and Domain Name
The first thing you should think about before launching your store is a hosting provider. Here at WP Daddy, we’ve already spoken on what aspects to consider when choosing a hosting provider, so you probably know that server speed, reliability and security are the key conditions to pay attention at. So what do they mean?
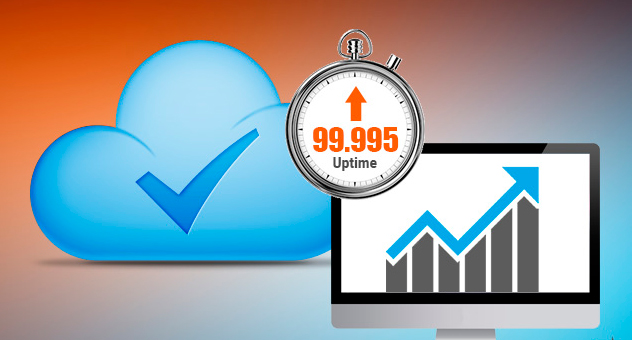
Speed and Uptime
Of course, every hosting provider will promise the super-fast performance of your website and many more advantages, but, as website speed is an important factor for the proper work of your web store, it’s not compulsory to take providers at their word. It would be better to check the speed of a hoster using convenient online tools like, for instance, a Speed Test Tool at Pickup Host. Here you will be able to find out how fast your chosen hosting provider is and then resolve if this certain hoster is suitable.
Uptime is another aspect to consider when choosing a hosting provider. Uptime is defined as the amount of time a certain server stays up and running. It is actually listed as a percentage and defines the ability of a provider to keep their system up and running to avoid the website’s continuous downtime. As your store won’t be able to keep customers if its pages are down, it’s much essential to avoid the downtime; and this depends only on your hoster.
As it’s not possible to check the uptime before you buy a hosting plan, the best thing to trust is customer feedbacks and reviews. Browse them before you opt for a definite hosting provider and a hosting plan.
Reliability and Security
Depending on the hosting plan you will get different security features from the hosting provider. The most important aspects to be available are:
- Backups and restore point (How frequently backups are conducted? Will it be possible to restore your website from backup files?).
- Network monitoring (Does the provider monitor the internal network for intrusions and unusual activity?).
- SSL, firewalls, and DDoS prevention (How well a firewall stops DDoS attacks? When the hosting plan owner will be informed as to the potential problem that might harm their website?).
- Antivirus, Malware scanning, and removal (Does the support team suppose to identify and remove the malware in case if your website is infected?).
- Availability and disaster recovery (Is a hardware failover available? Is 99.9% uptime possible?).
Domain Name Registration
You can either register a domain name directly with a domain name registrar or do it through your web host. Getting a domain name supposes that you register a name you want to get with an ICANN organization (either through a domain name registrar or a hosting provider).
For instance, if you want to have a name like “yourwebsite.com”, you should go to a registrar, pay a registration fee, and get the right to use this name for a year. Every year you will have to renew the name for the same price per annum.
Some web hosts can register the name and pay for it themselves, while others will do the registration for you but you’ll have to pay the registrar fees.
2. WordPress Installation and Configuration
Some hosting providers automatically install WordPress and WooCommerce on your website, but if this option isn’t available, you should install WordPress by yourself.
There are some script auto-installers offered on the modern market and available both on Shared Server, Reseller, VPS, or Dedicated Server. But today we will speak on the manual WordPress installation. So let’s start!
1. First, you should download WordPress from its official website and unzip the downloaded file to a folder on your local PC.
2. The next step you should make is to upload WordPress to your hosting account.
There are three options for uploading WordPress to a hosting account available, and they are as follows:
- upload via FTP;
- make it via File Manager;
- or complete this task via SSH.
In our case, we will use the File Manager in cPanel.
3. So let’s create a MySQL database and a user. This is required because all WordPress information will be stored in the database.
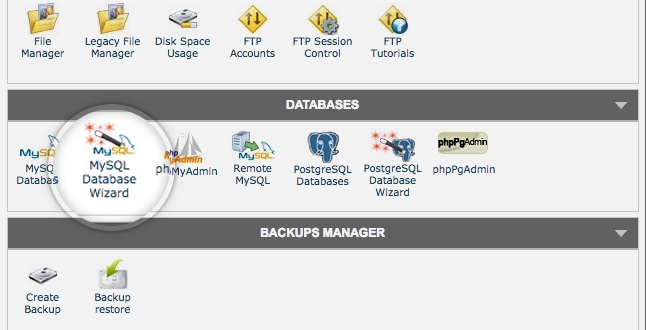
1) Log into your cPanel.
2) Click the MySQL Database Wizard icon located in the Databases section.
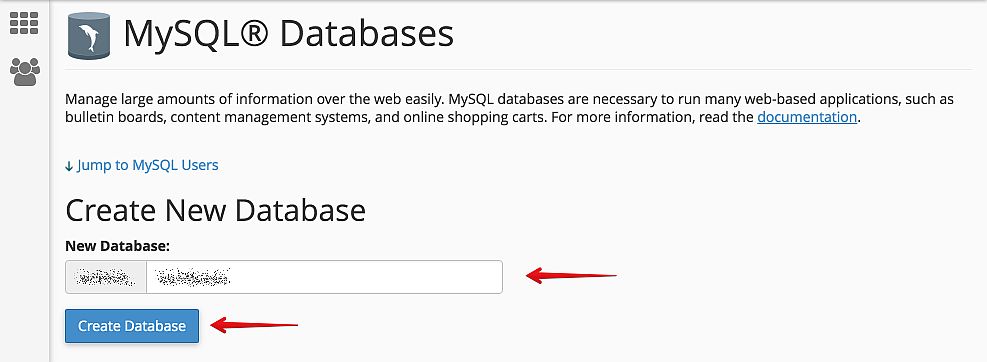
3) Enter a database name and click the Next Step button (you create a database).
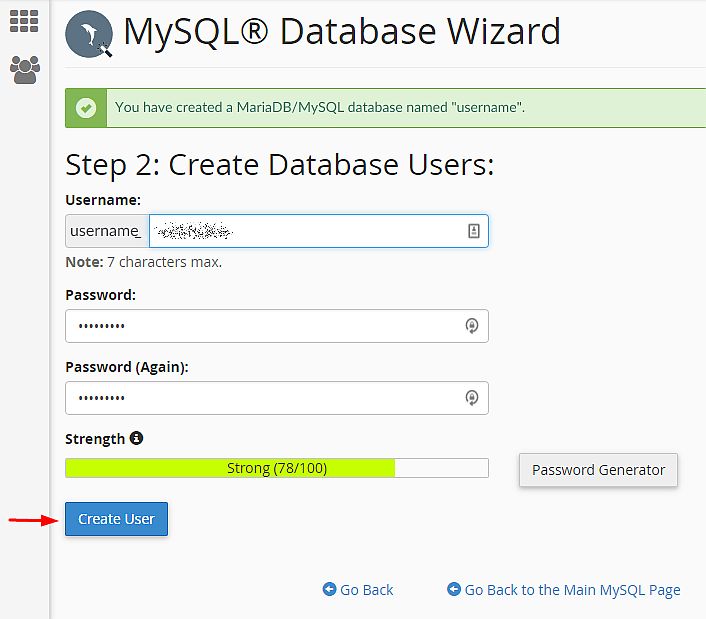
4) Enter a database user name and password and then click the Create User button (you create database users).
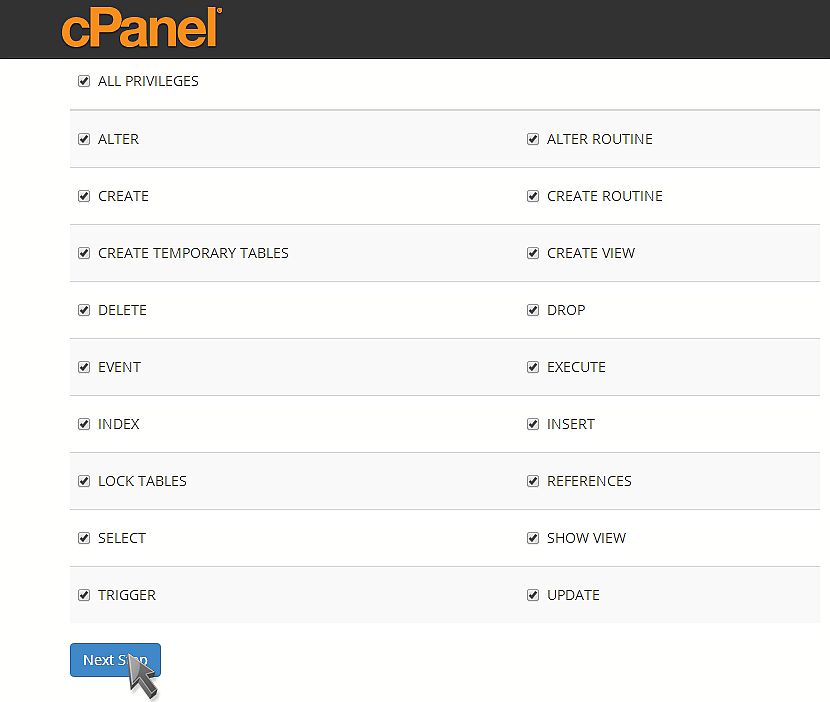
5) Check the All Privileges checkbox and then click the Next Step button (you add a user to the database).
6) Note down the database name, username, and password (you will need them further).
4. Next, you should configure a wp-config.php file.
The wp-config-sample.php file (which is located in the File Manager, in the folder including the WordPress installation) contains the database information and tells the WordPress app which database to pull the data from.
This step should be completed to make sure that the correct database information is associated with the WordPress installation.
1) To modify the file log into cPanel.
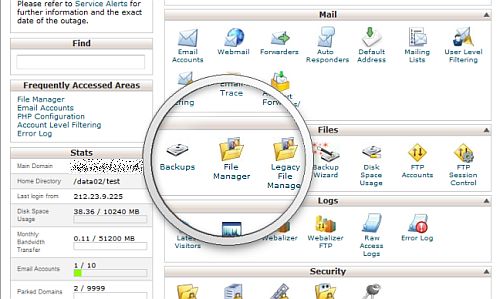
2) Click the File Manager icon in the Files section.
3) You will see the pop-up box, so select the Web Root and check the Show Hidden Files (dotfiles) box, after that click the Go button.
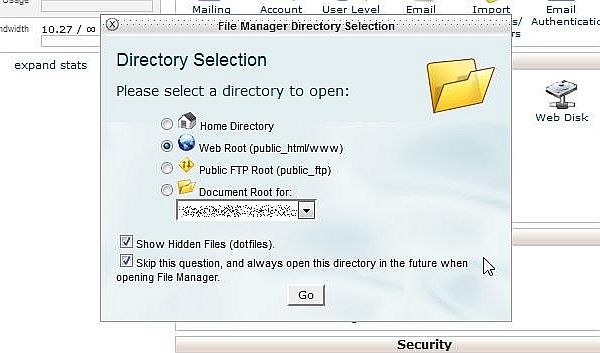
If you don’t see the pop-up box, you may have selected the “Skip this question, and always open this directory in the future when opening the File Manager” option. To make the pop-up emerge again, just reset all interface settings at the very bottom of your cPanel.
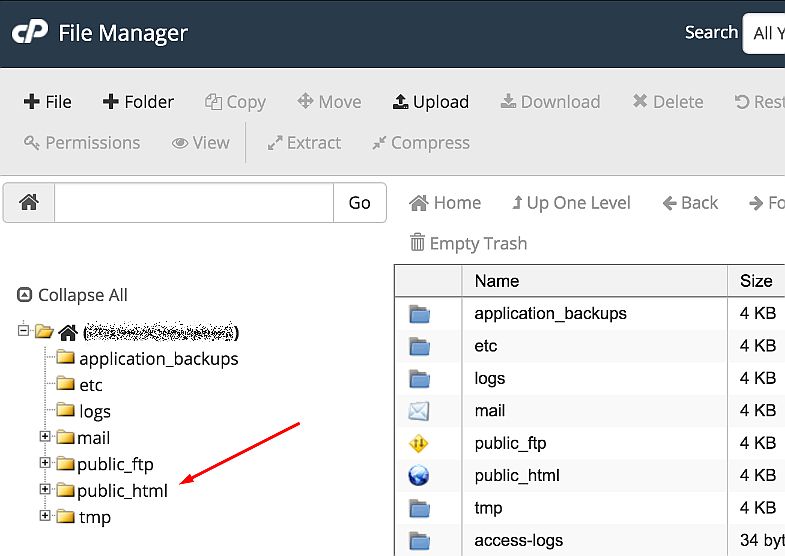
Find the public_html folder at the left navigation menu of the File Manager and click it to expand.
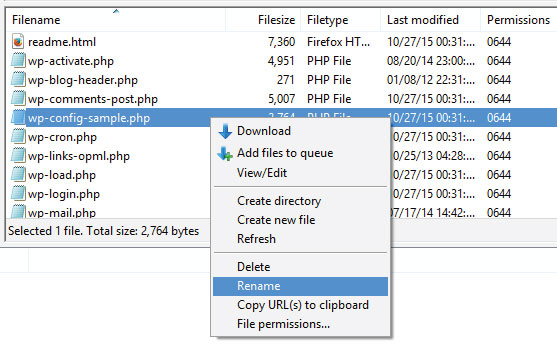
Open the folder containing the WordPress installation. Locate the wp-config-sample.php file on the right side of the File Manager. Right-click on the file and select the Rename option in the context menu.
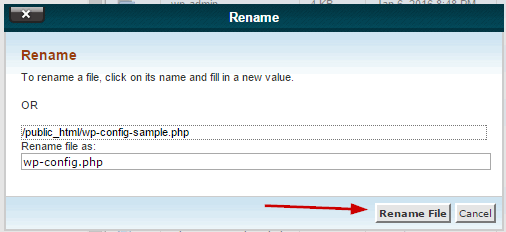
Now change the name of the file to wp-config.php and then click the Rename File button.
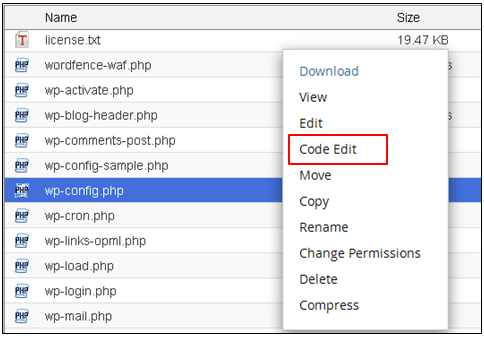
Now right-click on the wp-config.php file and select Code Edit option.
When the file opens, look for the following information:
define(‘DB_NAME’, ‘database_name_here’);
/** MySQL database username */
define(‘DB_USER’, ‘username_here’);
/** MySQL database password */
define(‘DB_PASSWORD’, ‘password_here’);
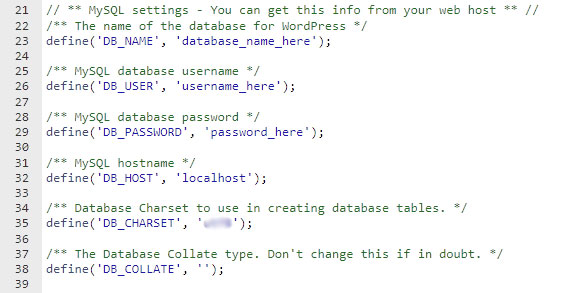
Replace database_name_here with the name of the database you’ve created, replace username_here with the username of the database you’ve specified, and replace password_here with the password of the database that you’ve mentioned.
When the editing is complete, save your changes and close the file.
5. Now it’s time to run the Installation.
Open a new browser window and insert the installation page URL into the address bar to run the installation script. Depending on where you’ve installed the script, you will find it either at:
http://yourwebsite.com/wp-admin/install.php
or
http://yourwebsite.com/blog/wp-admin/install.php
Be sure to replace yourwebsite.com with your actual domain name.
You will now see a welcome page with the “Welcome to the famous five minute WordPress installation process!” message.
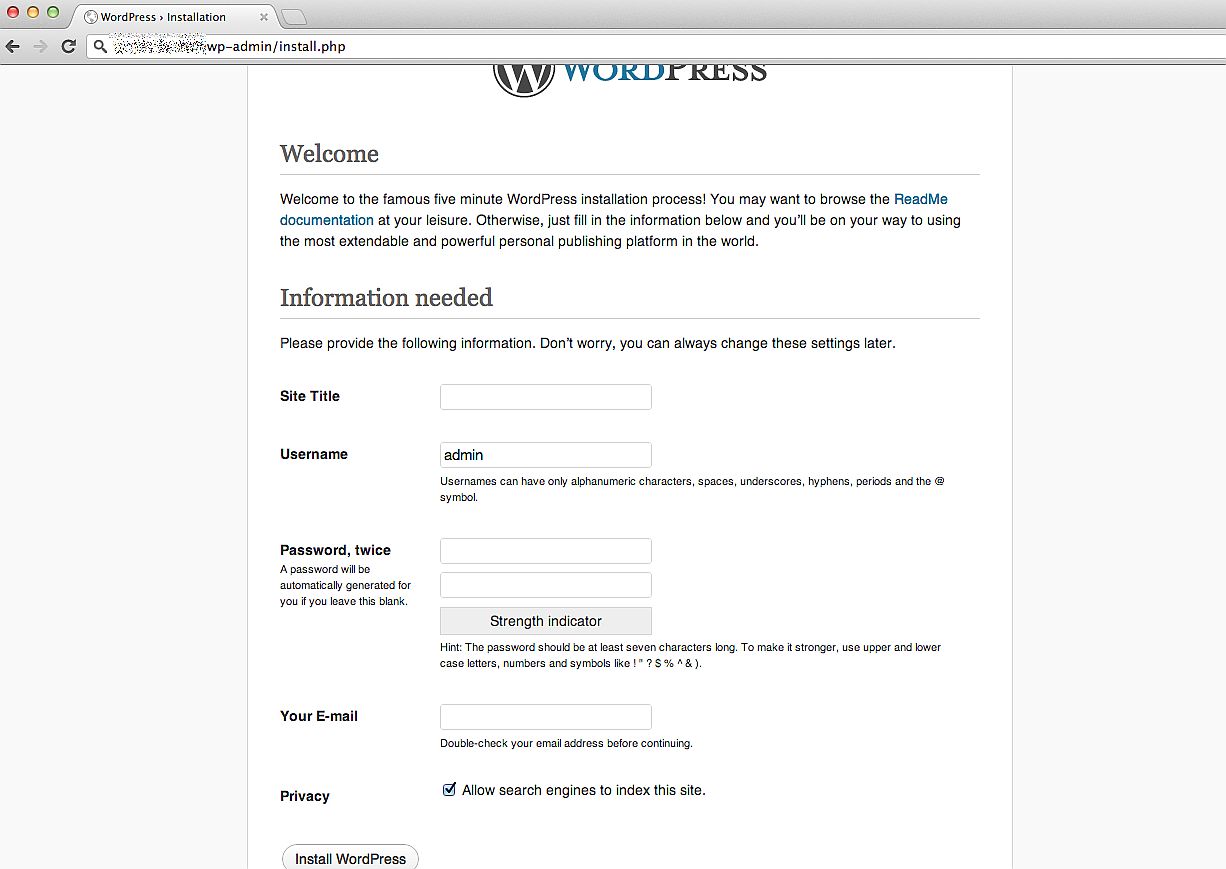
6. Finally, it’s the very time to complete the installation.
Fill in the following fields:
- Site Name;
- Username;
- Password and confirm password;
- Email address;
- And then decide whether you want the search engines index the website.
Click the Install WordPress button, and you will be taken to the final screen, showing the “Success! WordPress has been installed” message.
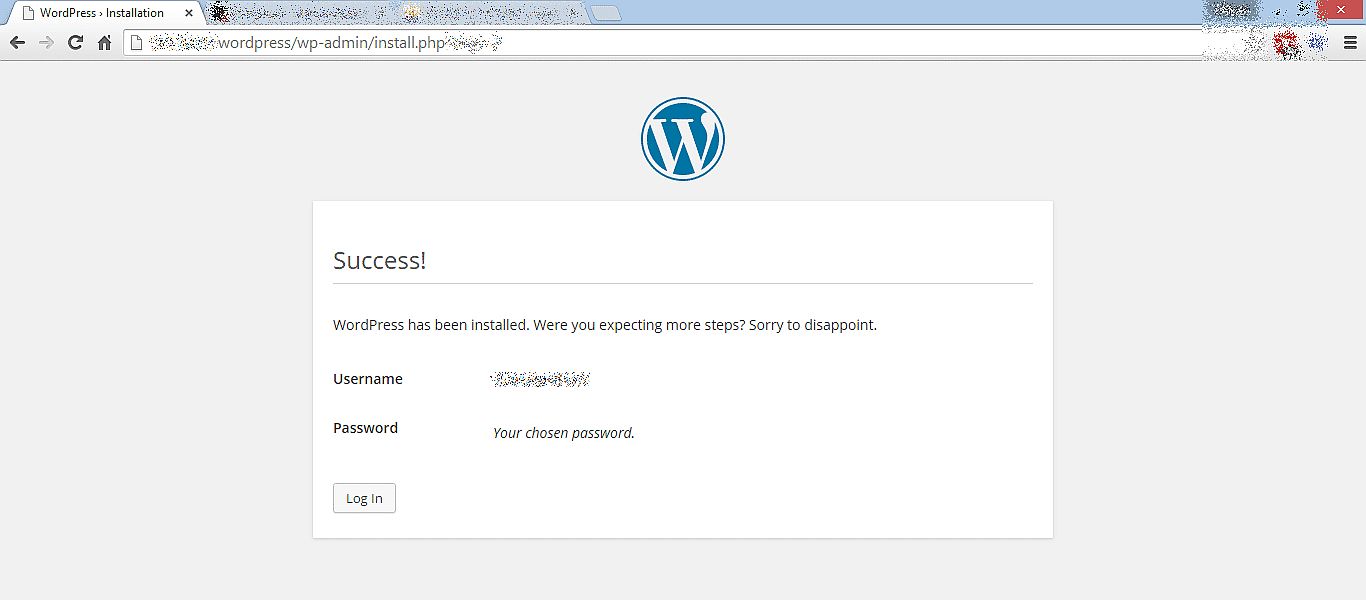
Now your WordPress is installed!
2. eCommerce Platform Installation and Activation
As we speak about running an online store on WordPress, you are able to choose from two shopping platforms available for this CMS, and they include WooCommerce and Shopify. If you doubt what eCommerce platform will meet your needs better, then please read our Shopify vs WooCommerce comparison review.
We prefer WooCommerce – an open-source plugin that helps any WordPress website be easily transformed into a web store providing it with the eCommerce functionality. Using this plugin you can allow your customers to add products to cart, place the orders right on your website page, make payments, etc. You get all the necessary functions to run an online store with simplicity.
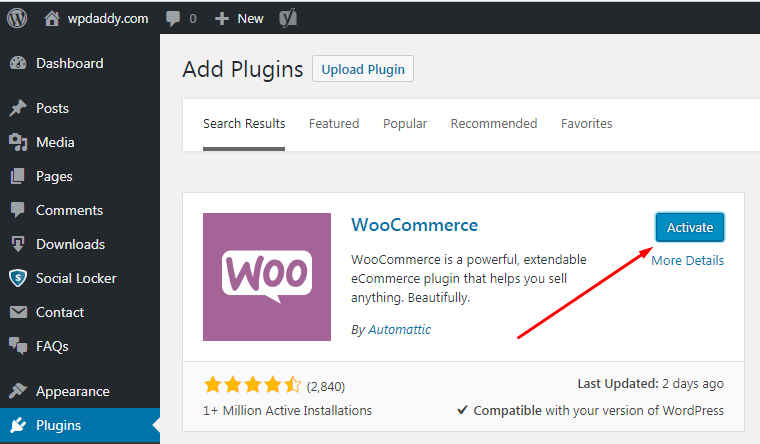
You can easily install WooCommerce on your WordPress dashboard just as well as you install any other plugin.
Go to Plugins -> Add New, search for the required plugin in the search field and click the Install Now button.

After that, click the Activate button and now you can start configuring WooCommerce for your website.
Please read the step-by-step guide on how to configure WooCommerce for your WordPress website and then start accepting credit card payments. Briefly, you will have to complete 6 steps until you are ready to use all WooCommerce possibilities on your website. The steps include:
- Store setup – specify your address, currency and product type details;
- Payment – choose online or offline payment methods (PayPal, Stripe, etc.);
- Shipping – select the shipping zone and method, weight and dimension units;
- Extras – opt for recommended extras like Storefront theme and Automated Taxes add-on;
- Activate – connect your store to Jetpack;
- Ready – subscribe for newsletter and then start creating your first product or import the existing products in CSV format.
Before you start to create your first product, you should install the SSL certificate. This is required for any website involved in personal information exchange. This means if you run a store, you are surely going to accept payments from your customers. Buyers will share their personal data which should be properly secured. So the next task is to install the SSL certificate.
4. SSL Certificate Purchase and Installation
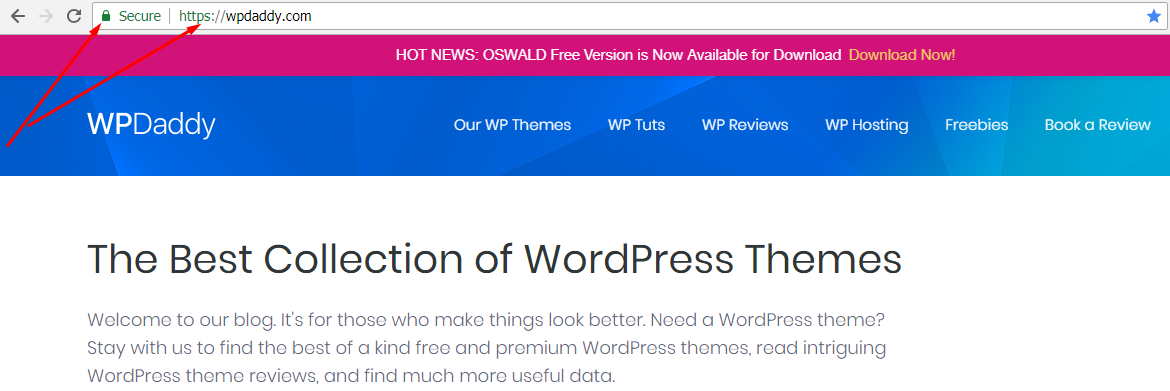
First, let’s define what is an SSL (Secure Sockets Layer) Certificate? Such certificates are considered to be small data files that connect a cryptographic key to a company’s details. Such a certificate is installed on a webserver to activate https protocol and a “Secure” padlock to allow for secure connections between a web server and a browser.
How to purchase an SSL Certificate?
Before you order the SSL certificate, you should prepare your WHOIS record, create a CSR, and get your company validation documents ready. What is CSR? This abbreviation means the Certificate Signing Request and represents a block of encoded text that is given to a Certificate Authority when applying for an SSL Certificate. A CSR is usually generated on that server where the certificate is going to be installed. It includes the information which will be included in the certificate, such as:
• organization name;
• common name (domain name);
• locality;
• country.
The process of ordering a certificate supposes a few key steps:
1) You get ready for ordering: getting your server set up and get your WHOIS record updated;
2) Generate the CSR on the server;
3) Submit the CSR and other data to the Certificate Authority;
4) Your domain and company are validated;
5) You get the issued certificate and install it.
Private Key and Certificate Activation
The installation is possible after you have purchased a certificate and got the certificate’s key generated. There are two keys used by SSL/TLS protocol and they include a private and a public one. The keys are required to authenticate, secure, and manage secure connections. The private key looks like a text file required to secure and verify connections using the certificate created per that request.
The private key is generated simultaneously with the CSR which contains the domain name, public key, and additional contact information. The CSR will be sent to the certificate authority for validation and signing immediately after the certificate activation. Activation is the next main step after purchasing an SSL certificate. If you’ve got a CSR code generated on your server, then you’ll be able to easily activate the certificate.
How to Install an SSL Certificate?
When you install a certificate, make sure that it is not self-signed. Self-signed certificates are easy targets for hacker attacks, that’s why your users may see the security warnings in their browsers. You can install a self-signed certificate temporarily and then replace it with a certificate from a valid certificate authority (CA).
Install the certificate using the cPanel
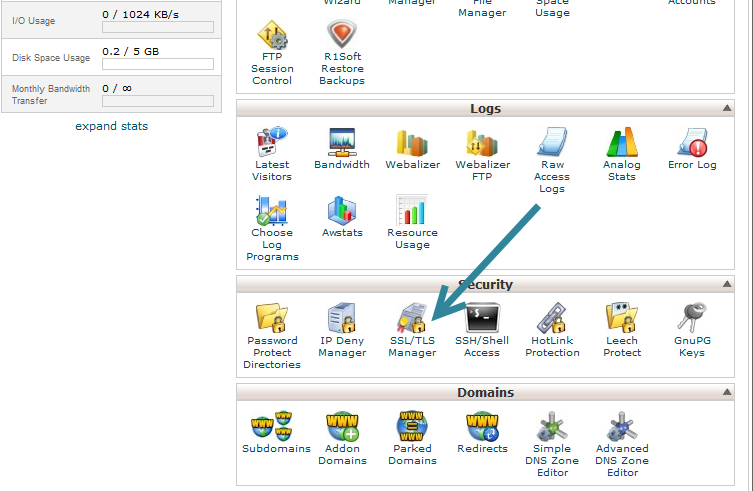
1. Log in your cPanel and go to SSL/TLS menu in the Security section.
2. Click the Manage SSL sites option to proceed to the next step.
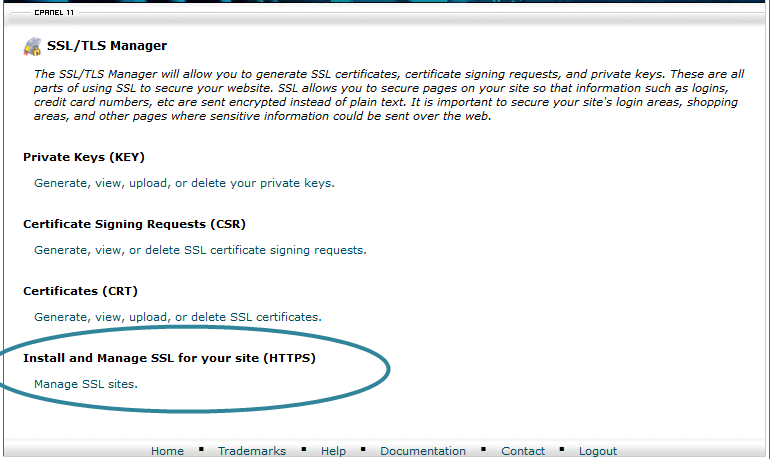
If you don’t see this option available, please enable it by creating a Feature List via WHM.
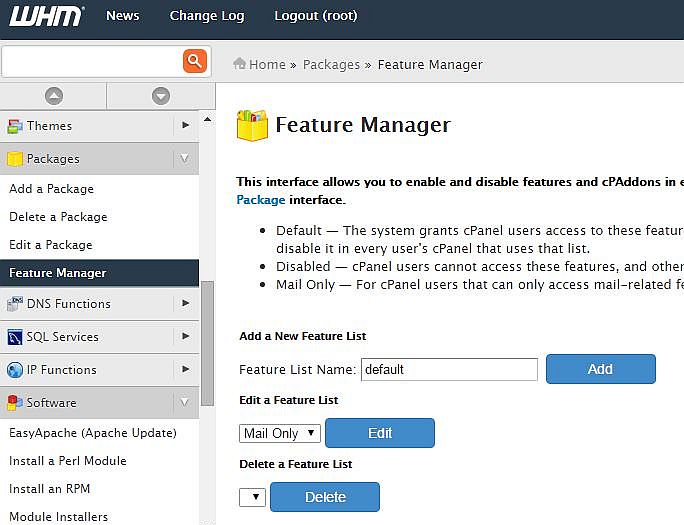
How to create a feature list?
Log in WHM and go to the Feature Manager. Here you should add the name of your new feature list and click the Add feature list button.
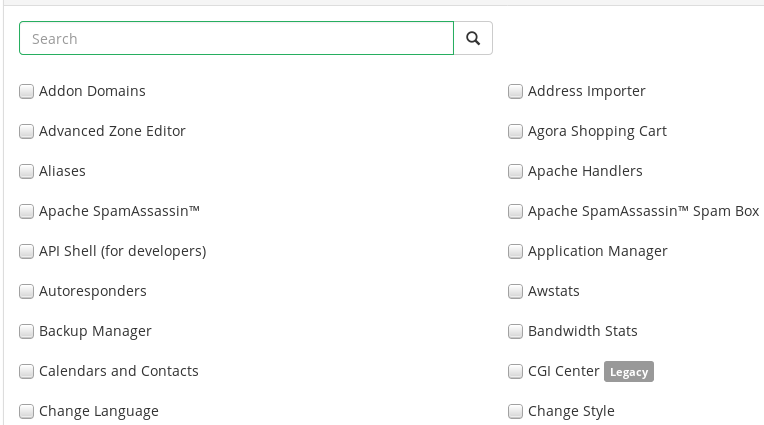
After that, you will see the options to select for your newly created list. Select the necessary options and click the Save button.
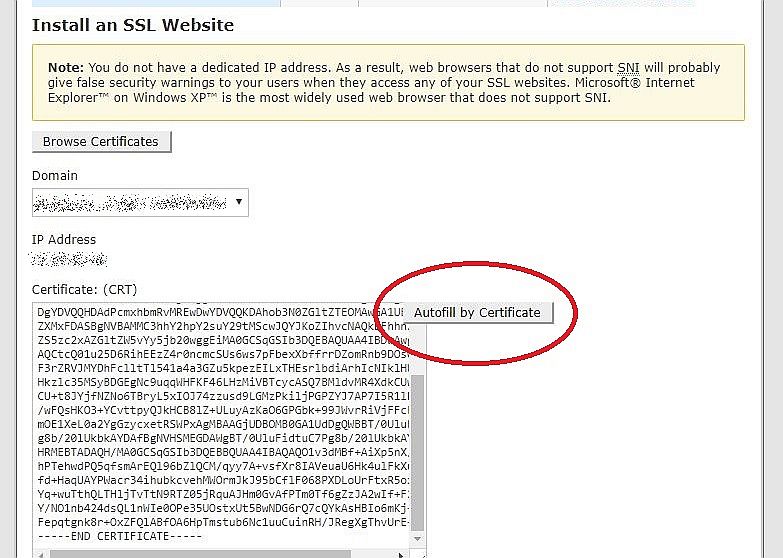
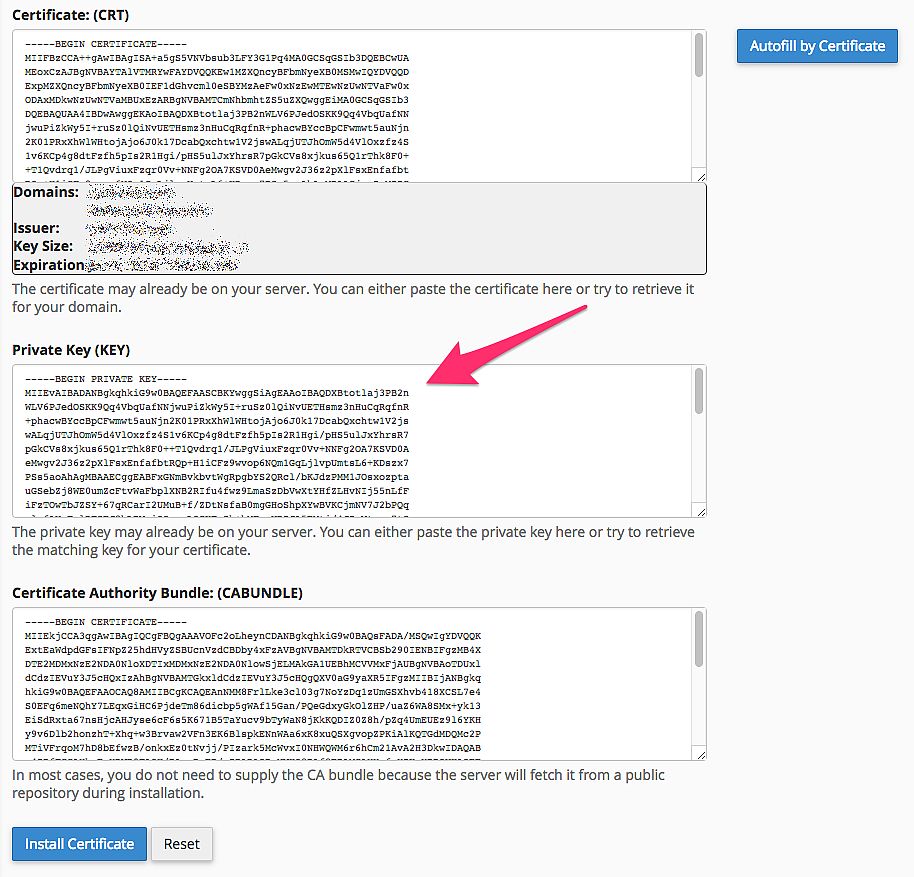
3. In your cPanel copy and paste your certificate file into the Certificate: (CRT) box and then click the Autofill by Certificate button. If you previously used the CSR creator inside the cPanel, then clicking the Autofill by Certificate button will automatically generate the Private Key.
4. Paste the Certificate Authority Bundle and click the Install Certificate button to complete your installation.
Install by the certificate’s domain
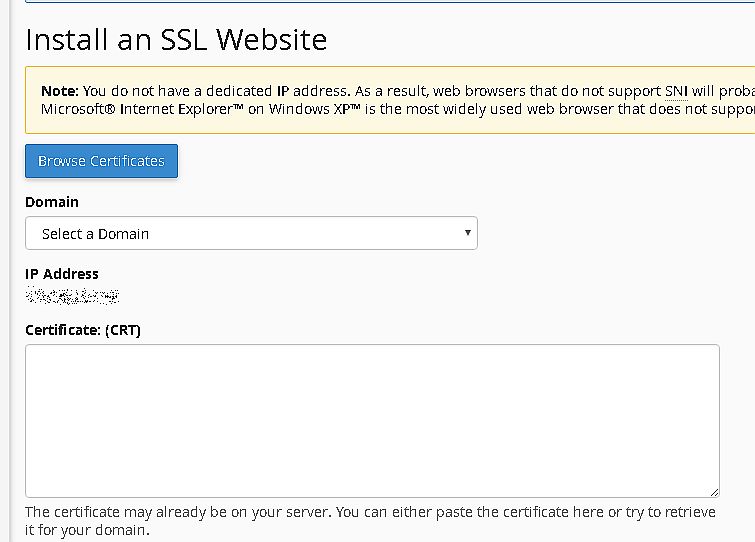
1. Click the Browse Certificates button in your cPanel and select the certificate from the list. The domain should be automatically detected. However, you can manually select the domains covered by this certificate.
2. The Autofill by Domain button should appear.
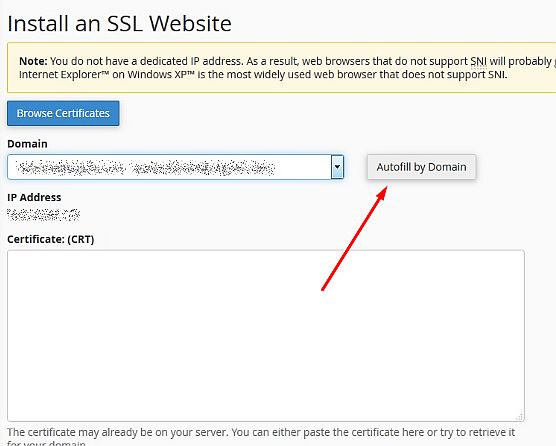
3. Now you can either insert the certificate’s information in the appropriate textboxes or click the Autofill by Domain button to automatically generate the certificate information in the text boxes below.
4. Click the Install Certificate button, and now your website is secure.
5. Selecting and Customizing a Theme
There are lots of free and premium themes developed for WordPress by contributors and experienced developers across the globe. Most of the premium themes support the WooCommerce plugin, so you can easily choose any of them to launch your shop.
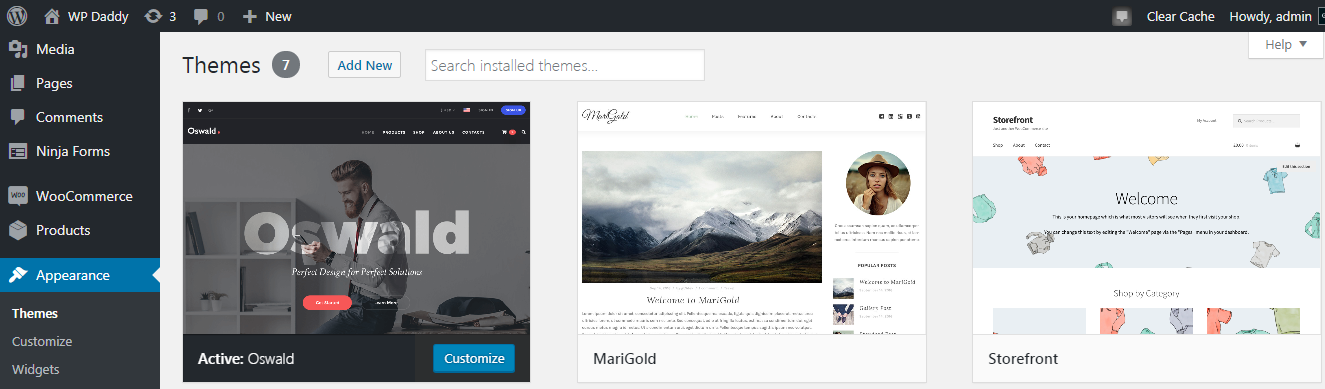
We recommend you check our OSWALD – Creative MultiPurpose Responsive WordPress Theme which is fully integrated with WooCommerce, or opt for its free alternative – Oswald Lite One-Page Creative WordPress Theme. The free version includes a shop layout, so you should just fill the page out with your custom content and products.
We will show you how to easily install and customize the theme in your WordPress dashboard.
In your Appearance -> Themes menu click the Add New button and you will be redirected to the Add Themes menu.
Here you can either upload a new theme from your computer or use the Search Themes option to look for free themes at WordPress.org.
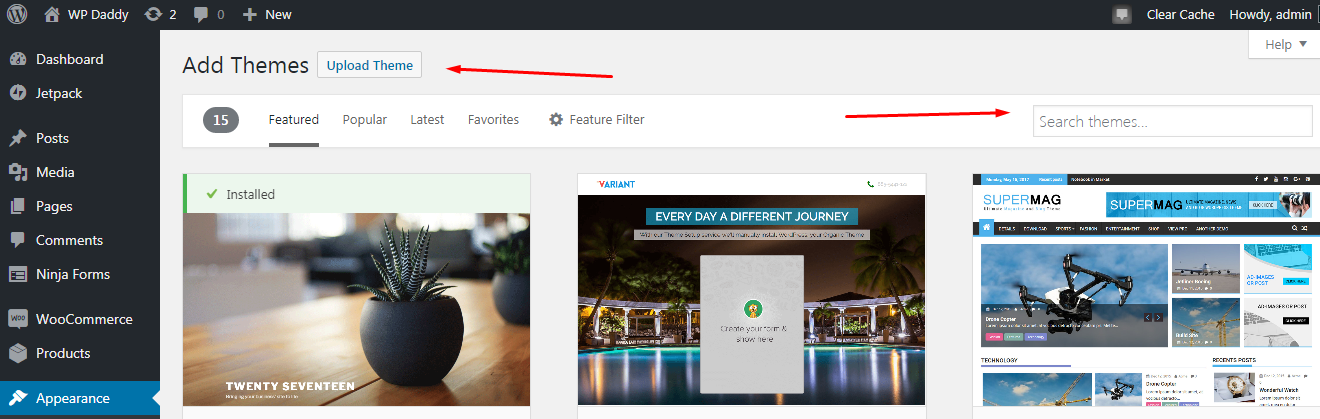
If you want to take the theme from your local PC, click the Upload Theme button and then click the Choose File to select a theme zip on your computer.
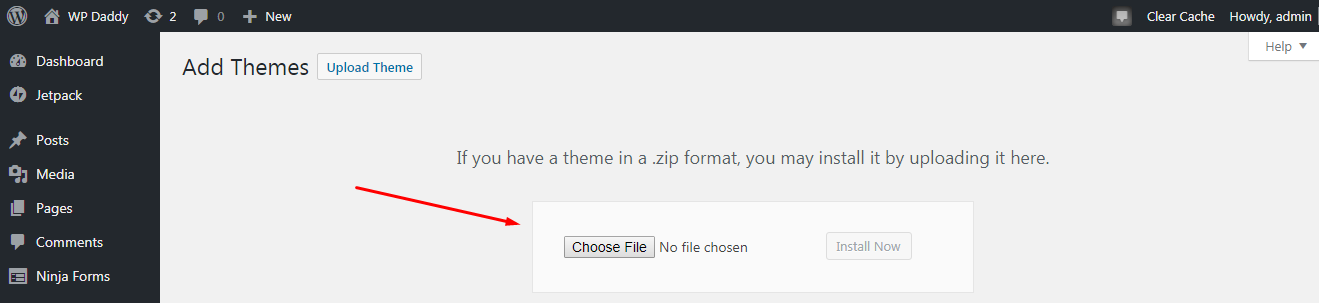
After the theme has been uploaded, click the Install Now button and then activate the uploaded theme.
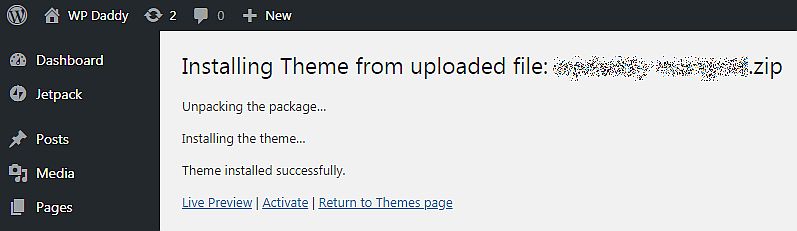
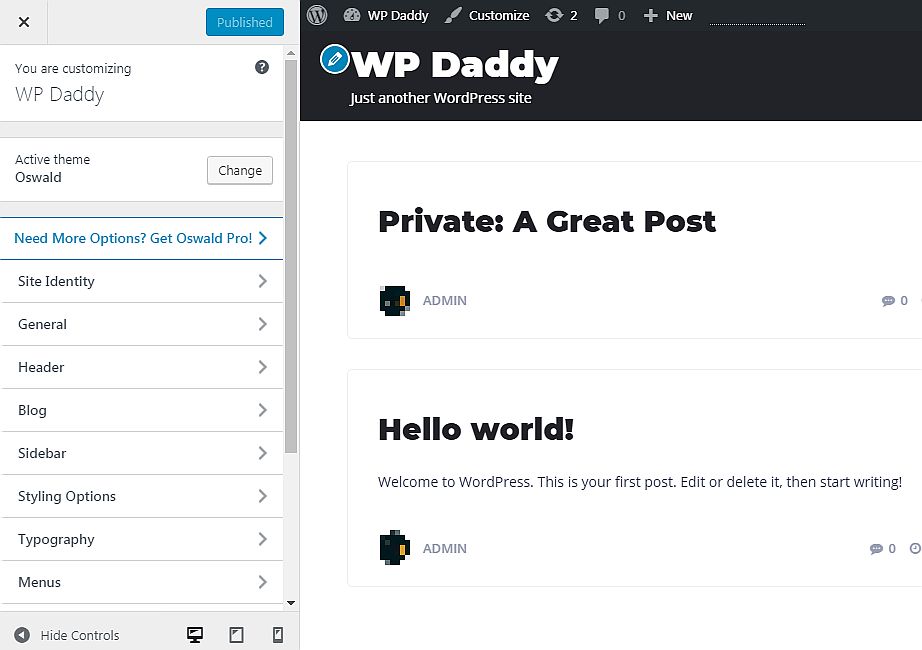
When your chosen theme is activated, go to Appearance -> Customize and start customizing your theme. Using the Live WP Customizer you can change styling, upload your logo, manage sidebars and blog layouts, and make any other changes depending on what options are available in your theme.
When the theme is installed, activated, and customized, you can now proceed to add your first product.
6. Adding a Product in Your Store
Now, when your eCommerce platform has been configured, SSL Certificate has been installed and a WordPress theme has been customized, it’s the very time to add your first product.
WooCommerce allows selling both physical and digital products, so you have real freedom of choice here.
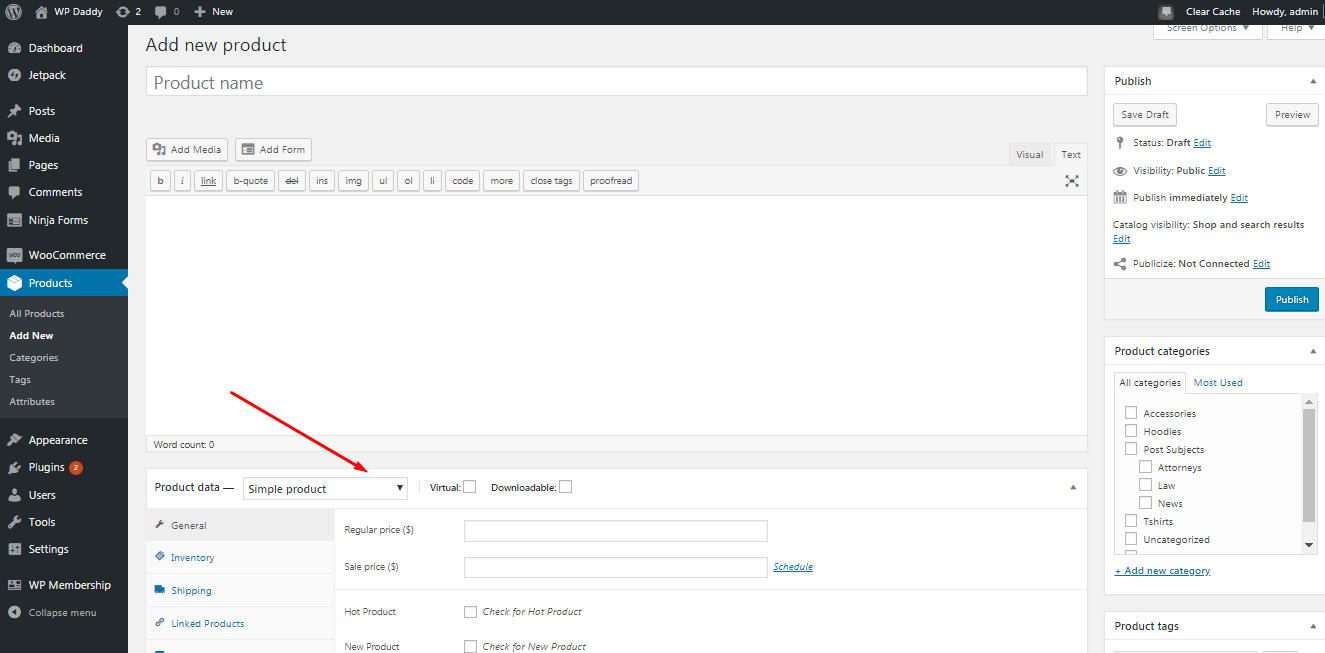
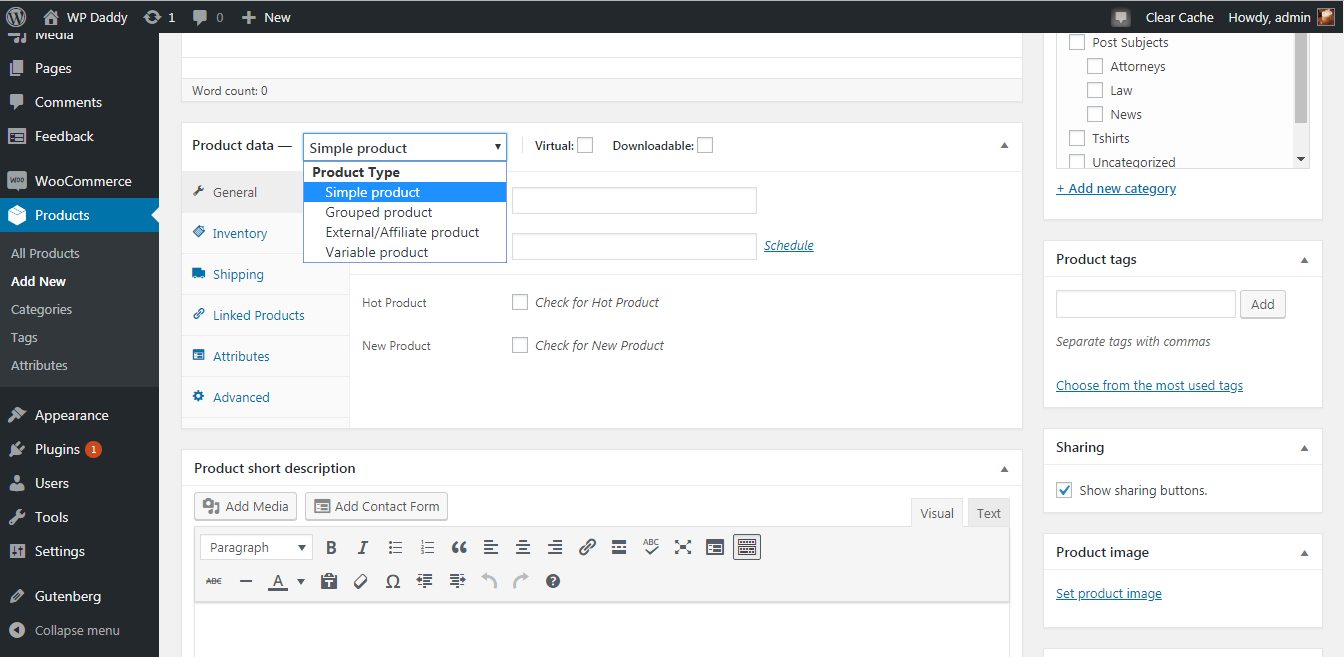
Go to Products -> Add New in your WP admin dashboard and insert your product title, then scroll down to choose a product type in the Product data drop-down list. Here you can also enter the regular and sale price, manage the inventory and shipping options, and set many more details.
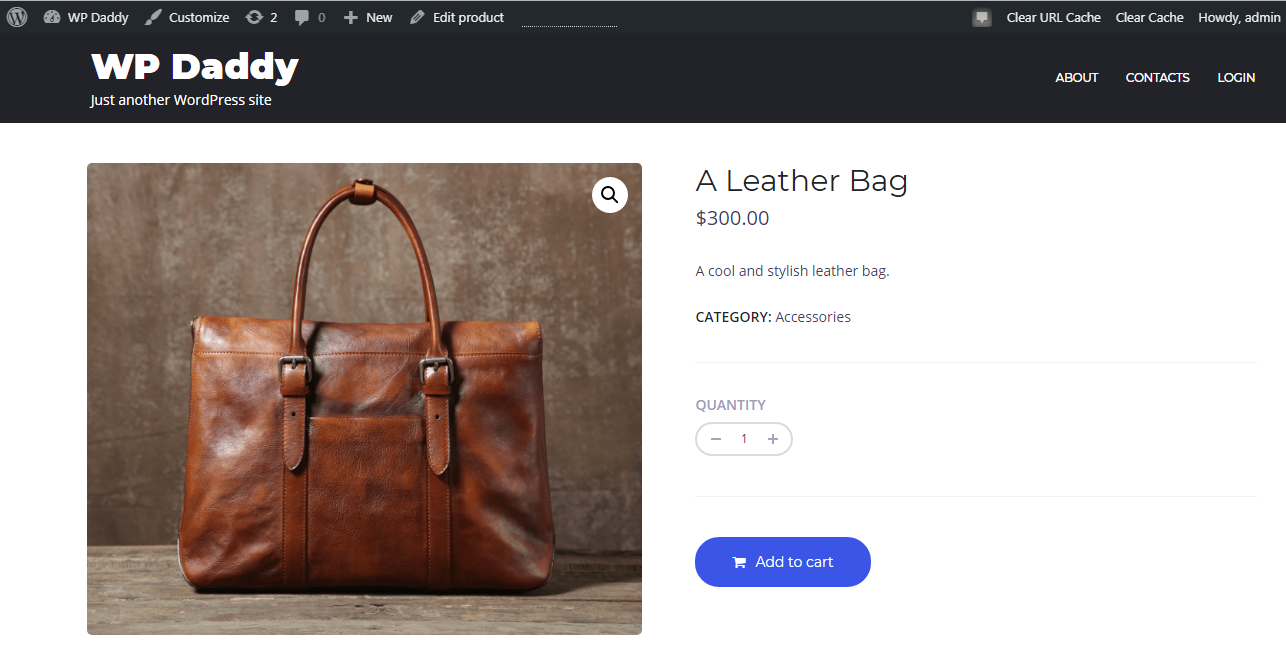
Select the category for your product; add its small description, upload image, and more. After all editing is complete, click the publish button and view your product live.
You can also create membership products here if you’d like to launch a membership website and start selling premium content to the members. For instance, you can sell job packages, subscriptions, and more.
Conclusion:
Launching and running an eCommerce store requires some effort, patience, and purposefulness. Although every step is so easy to complete, you should be addicted enough to transform your newly created online store into a profitable and comprehensive selling giant recognized and beloved by most target customers across the globe, and known by almost every person using the Web for shopping. So it’s all up to you, go ahead and succeed!