Do you promote your business on Facebook? Here at WP Daddy we also use this social media for promoting our blog. More precisely, we mostly utilize Facebook and Twitter for publishing our posts and attracting subscribers.
Facebook has a lot of strict rules of publishing and demands to content, so if you infringe the terms of use, your public page or personal account can be terminated. Despite this, its support team is always happy to help resolve any issue you face while using Facebook either for your business or personal communication.
Today I will speak of some key peculiarities of running a public page on Facebook and highlight the useful options I personally use for my purpose. In addition, I will disclose the issues I’ve recently come across while publishing posts on Facebook.
So, let’s start!
Settings of the Public Page
In the ‘Page Info’ tab (the about section) of your Settings menu, you can include the description of your page, choose the categories that your page is most applicable for, and enter your contacts like email, phone number, and website.
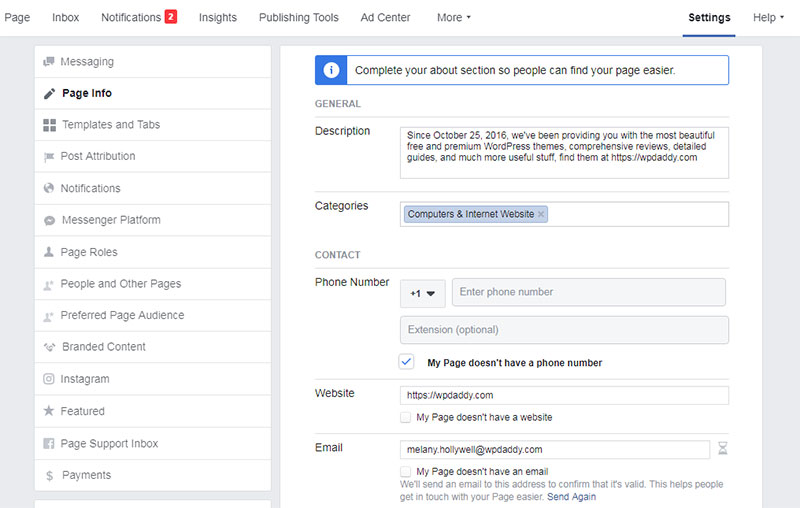
Scroll down the about section to indicate your location on the map and select the opening hours.

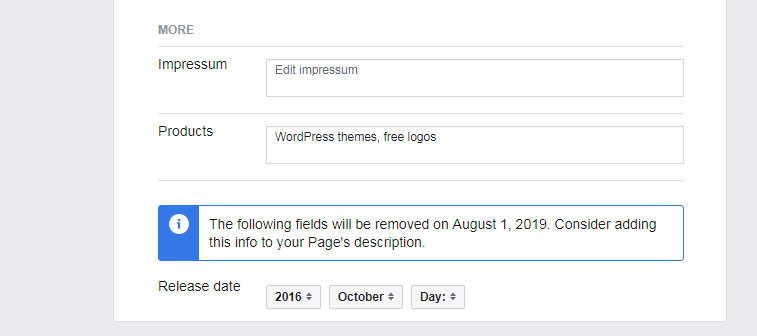
Leave your Impressum and unveil the product you offer. An important notification right here is that your page creation date, which is currently displayed on your Facebook public homepage, is going to be removed on August 1, 2019. So as the creation date won’t be displayed after that certain date, you can add it to your page description.
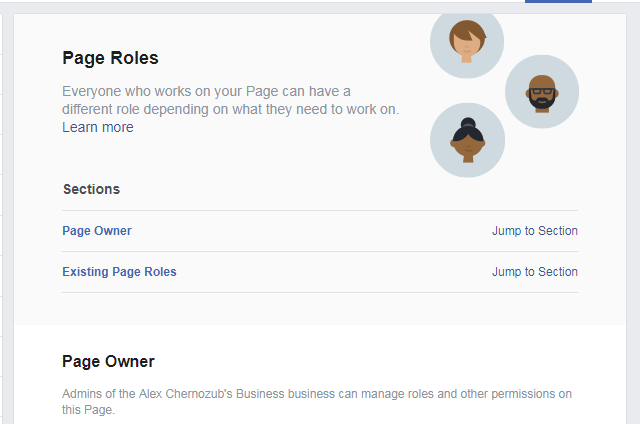
In the Settings section, you can find the ‘Page Roles’ tab and manage the page roles: the admin (the owner of a page) can assign editors and control permissions here.
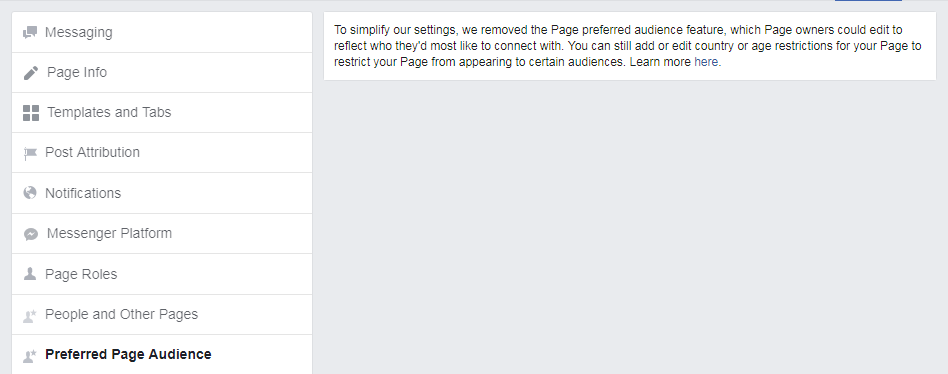
The ‘Preferred Page Audience’ feature was removed to simplify the settings.
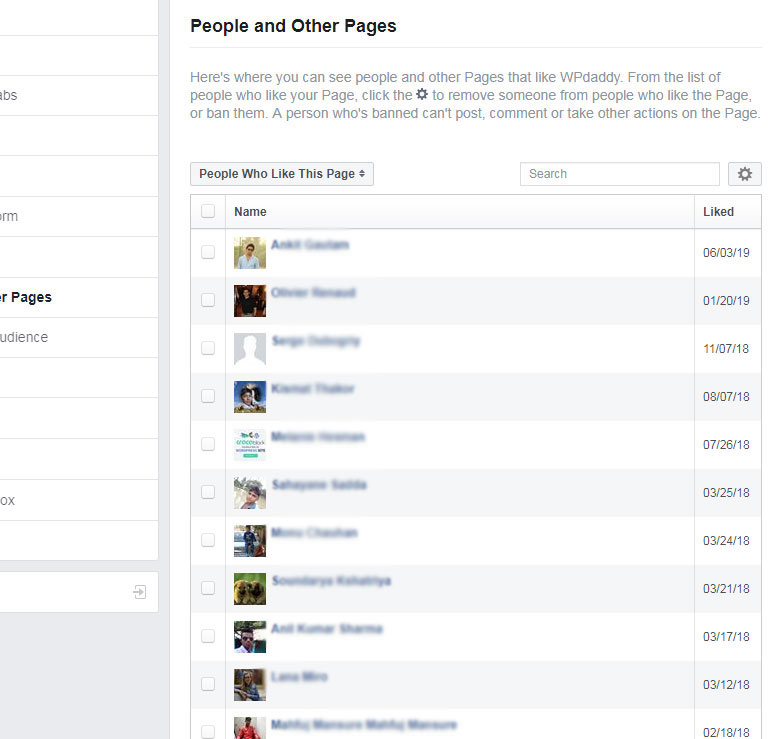
In the ‘People and Other Pages’ tab, you can find the folks that like your page.
Browse the tabs of the Settings section to learn what else you can set up here.
Main Menu and Page Management
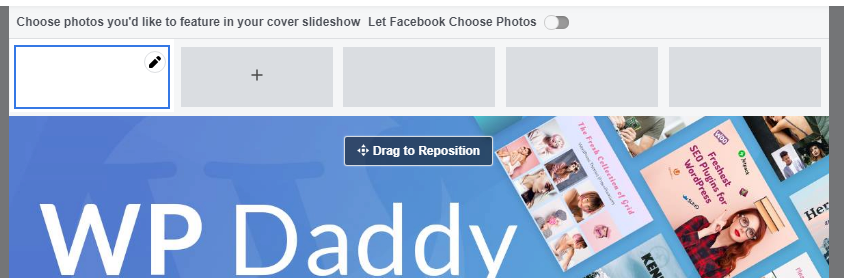
On your page, you can upload your cover image by choosing a photo, video, or slideshow.
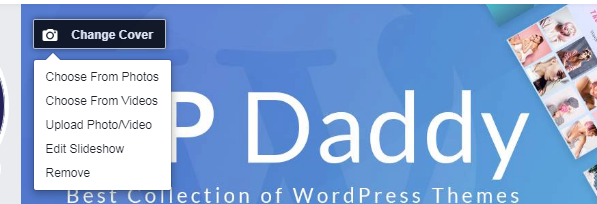
If you prefer the slideshow, your cover images will change depending on your page activity.
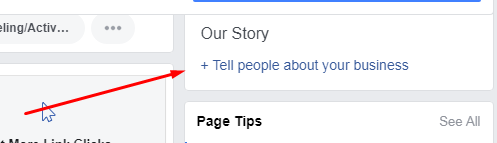
You can also upload your unique avatar and add your unique story by clicking the plus icon near the avatar picture.
![]()
Your story will be displayed in the about section in the right sidebar of your page.
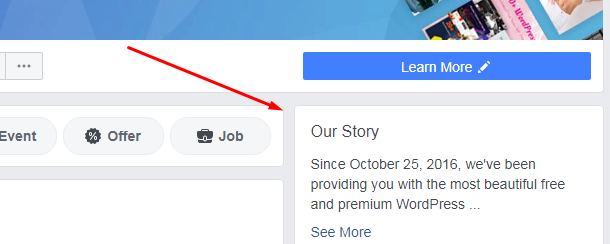
You can also update your story by clicking the ‘Tell people about your business’ tab in the same sidebar on your page.
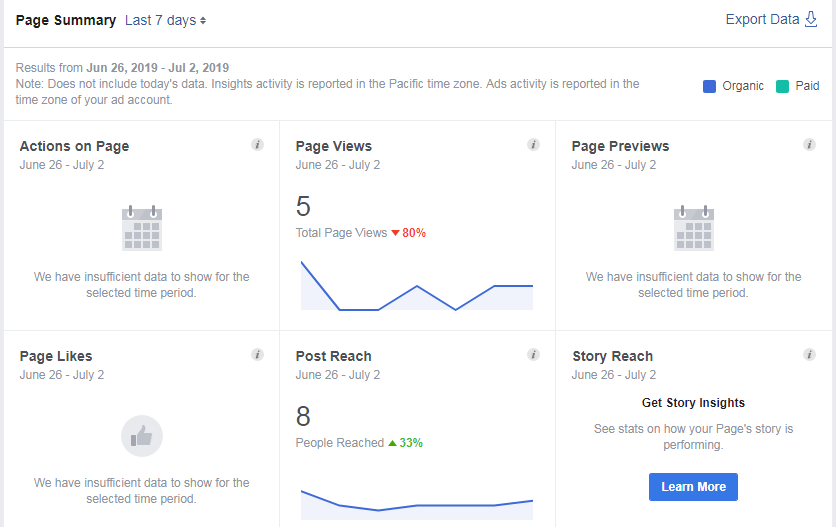
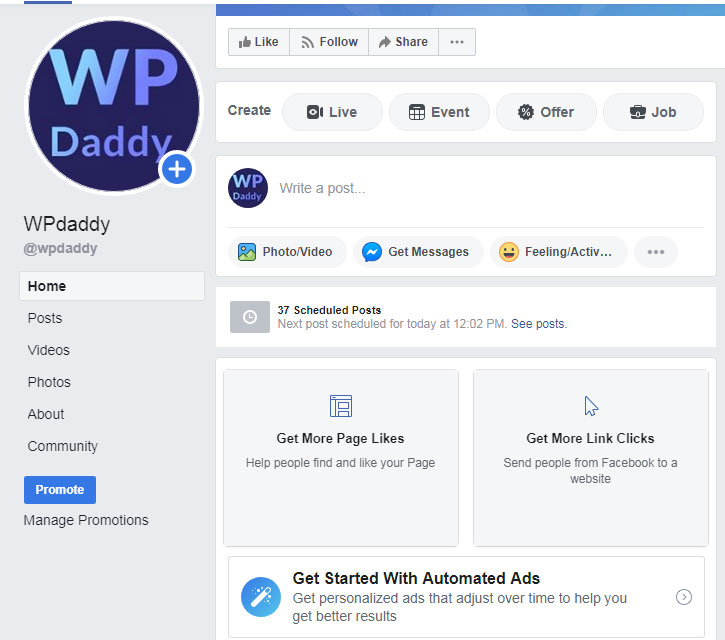
The main menu of the page includes the insights option which allows to observe the statistics of your page like page views, likes and previews, post reach, and more.
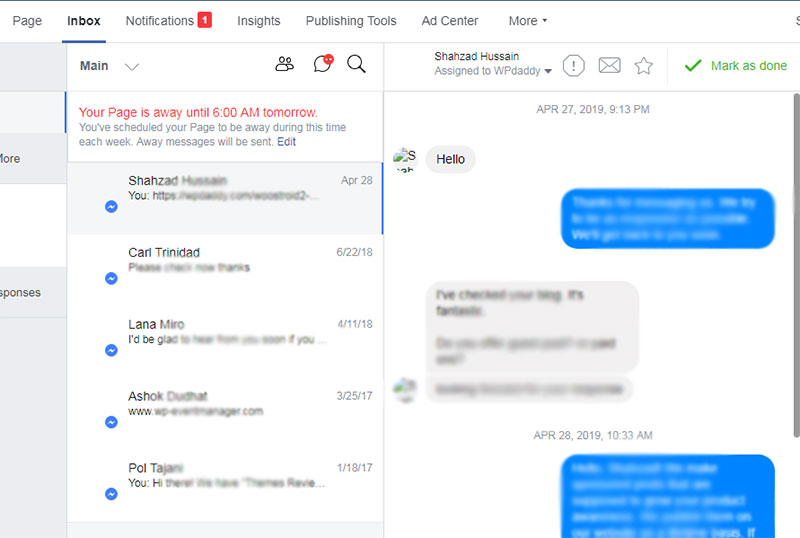
People can write messages to your page, so all of them will appear in the Inbox.
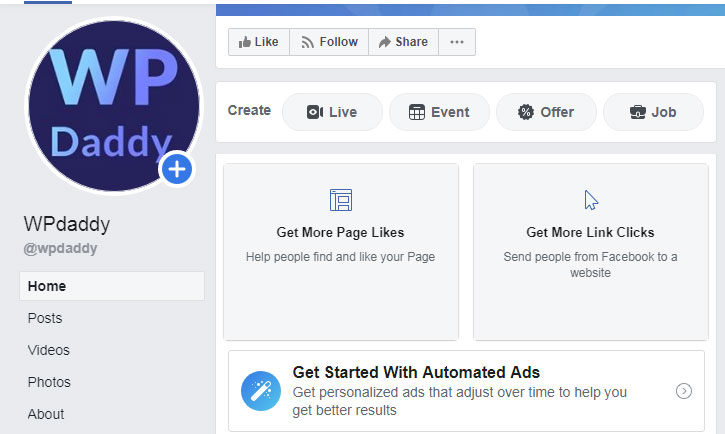
The main menu also has the Ad Center, but I’ve personally never used this option. You can feel free to boost your posts on a paid-for basis, get more page likes and link clicks by ordering the additional page promotion if you like.
The main menu also includes the ‘Publishing Tools’ option, so I will speak of it further.
Publishing the Posts
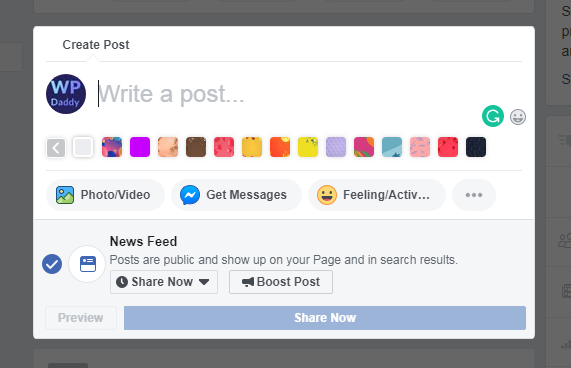
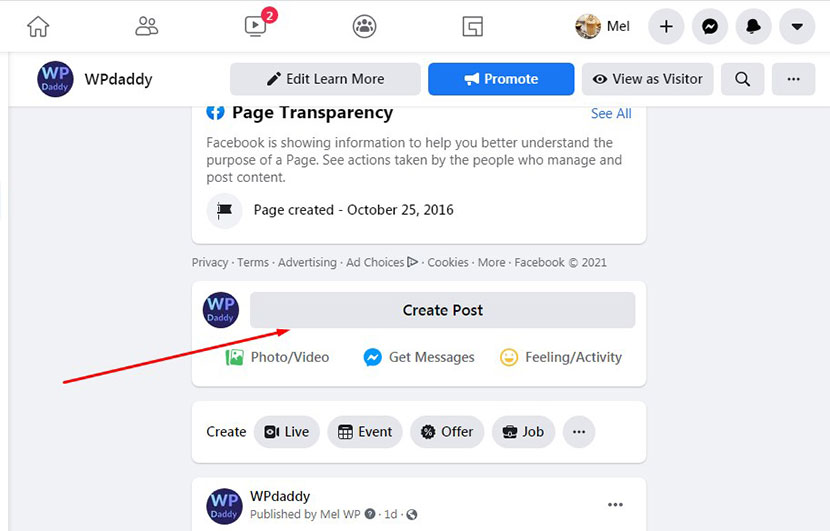
If you want to publish a post, just find the ‘Write a Post’ inscription on your public page and the ‘Create Post’ window will be open.

You can also go to the ‘Publishing Tools’ menu option and find the ‘Create’ button to add a post to your page.

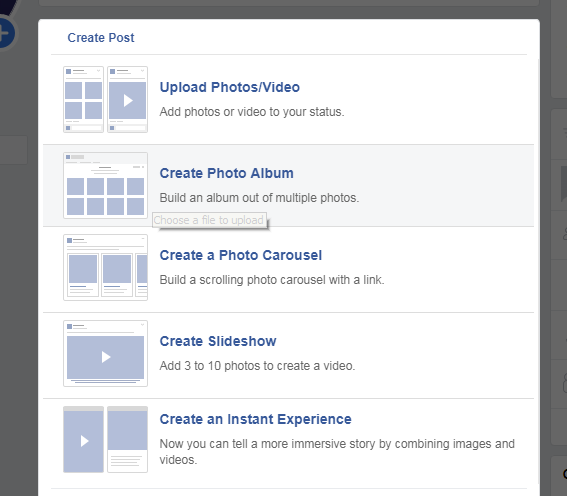
In the ‘Create Post’ window you can insert your post link, add a small explanation or a short description of your post, create a personal message with a link, add media like upload photo or video, create photo album, create a photo carousel, slideshow or an instant experience.
Update 2021, February:
Now you can click the ‘Create Post’ button right on the top of your page and start adding your post.
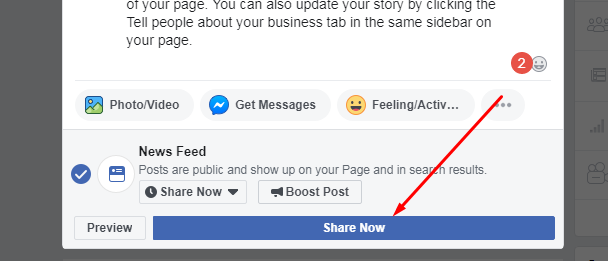
When your post is created, click the Share Now button to get it published.
You can easily edit every post, delete it, change its date or pin it to the top of the page. If you select the ‘Edit Post’ option from the drop-down menu near the post, then you can edit just the post’s description.
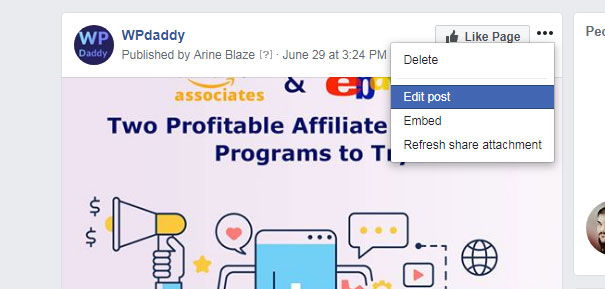
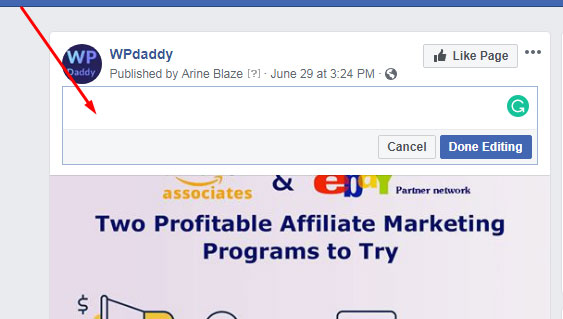
If you want to edit the link you’ve shared and its fetched preview, you can click the delete option and you’ll be suggested to edit the post instead,

click the Edit option and delete the fetched preview to replace it with another one.
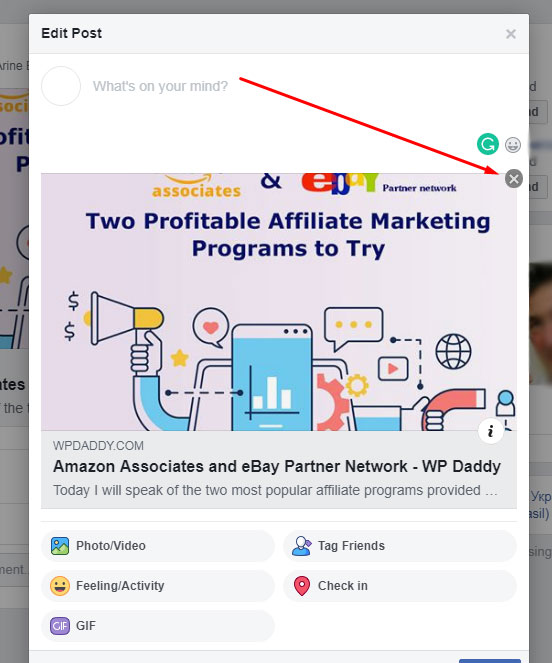
Update 2021, February: Now you can just click the ‘Edit Post’ option in the drop-down menu near the chosen post and both edit the text and delete and URL or replace it with another one.
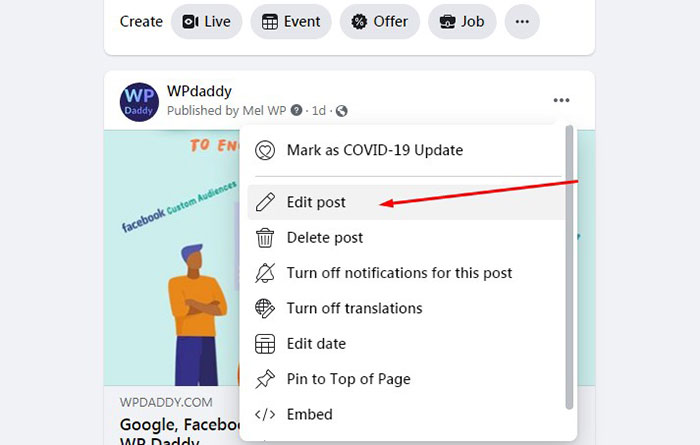
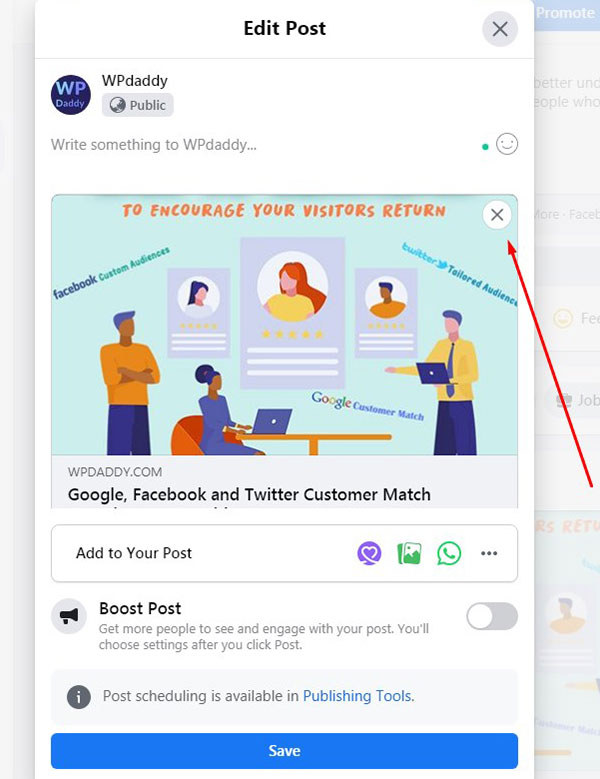
If you want to change the date of a post, select the ‘Change Date’ option from the drop-down menu,

select the date you want to set up and then click the ‘Save’ button to keep your changes.
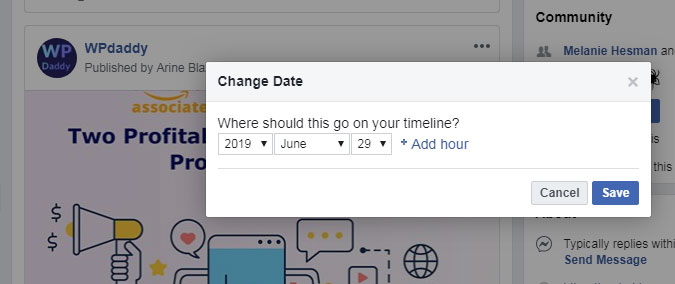
The ‘Change Date’ option works only for the past dates, otherwise, you can schedule the post for being published in the future. I will speak of this and more options further.
Backdating and Scheduling
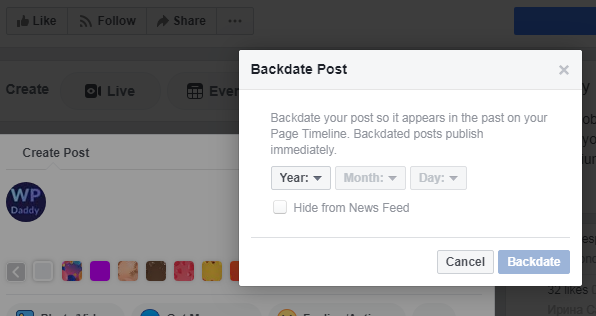
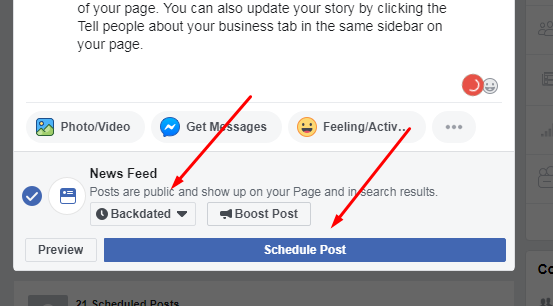
Except for instant publishing, you can backdate the post. Select the ‘Backdate’ option from the drop-down menu as shown in the snapshot below.

Choose the date, click the ‘Backdate’ button, and then click the ‘Schedule Post’ button to publish the post with an older date.
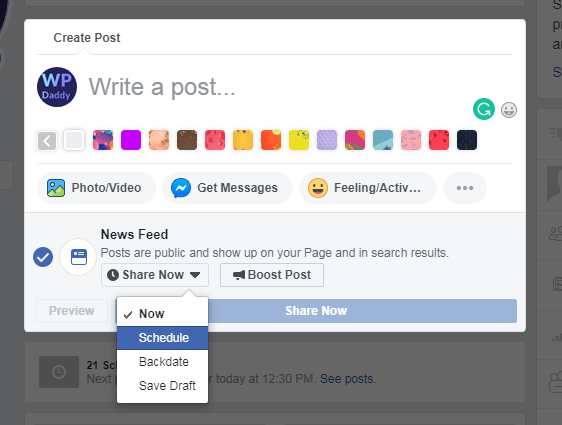
Besides the backdating, you can also save the draft or schedule posts for the future to make them be automatically published on a chosen date and time.
Scheduling posts is the same as backdating: select the ‘Schedule’ option -> choose a date -> click the ‘Schedule’ button and then click the ‘Schedule Post’ button to schedule the post.
The number of all your scheduled posts will be displayed on your Facebook public homepage, click the ‘See Posts’ link to open the Publishing Tools and see the list of posts to manage them.
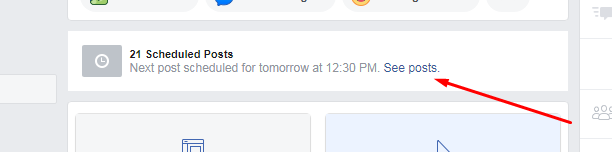
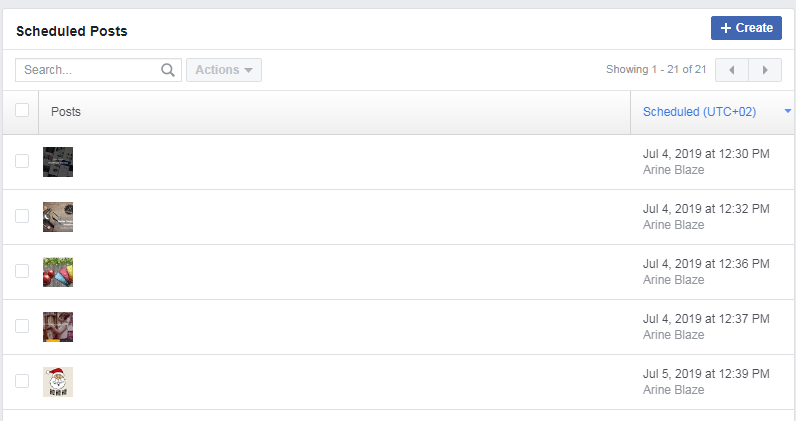
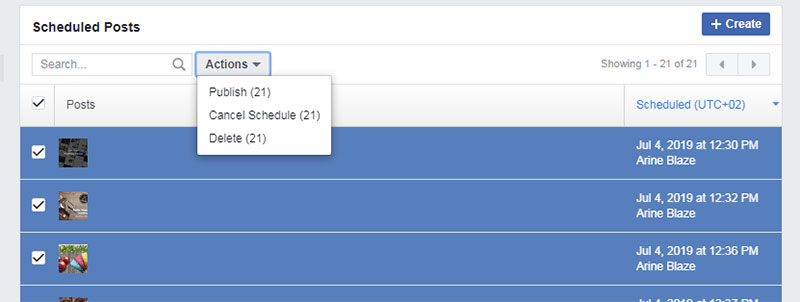
You will be able to cancel the schedule, publish the scheduled posts in bulk or delete the posts if required.
When the posts are published, you will get the notification under the bell icon in the header. These notifications are also visible in the main menu of the page.

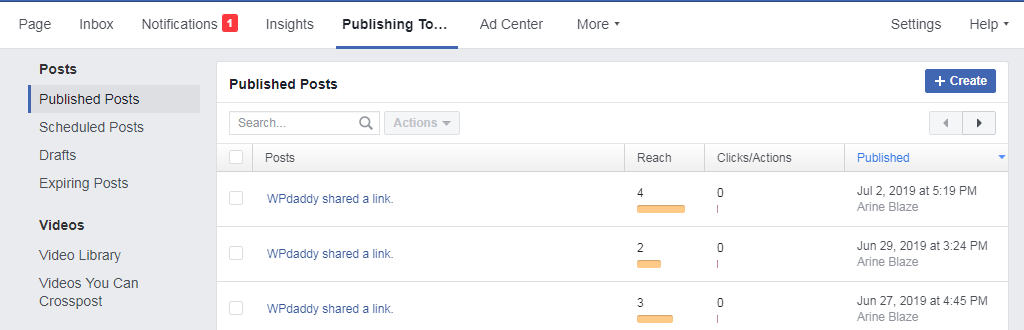
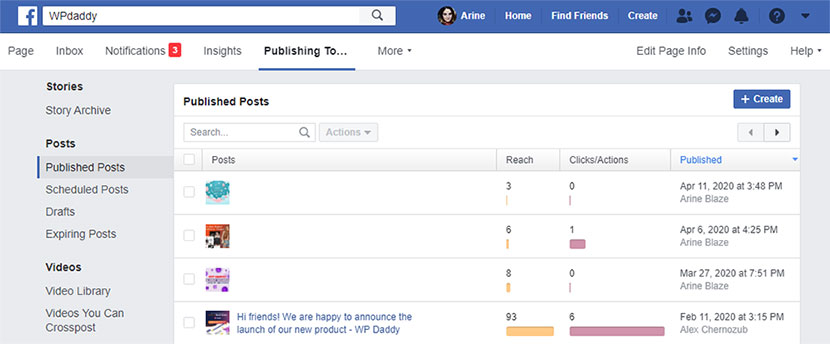
Besides the scheduled posts list, the ‘Publishing Tools’ option shows the reach for the Published Posts. Here you can also see the number of clicks and actions for each post as well as search for a certain post from the list of the published ones.
The ‘Publishing Tools’ option brings many more possibilities of content editing like managing videos, tools, jobs, branded content, and more.
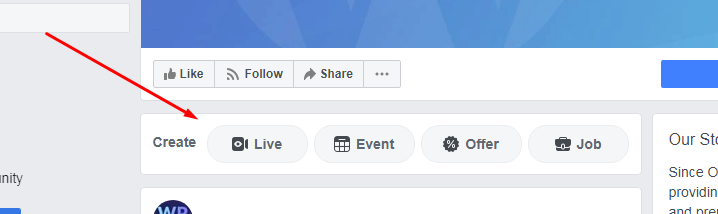
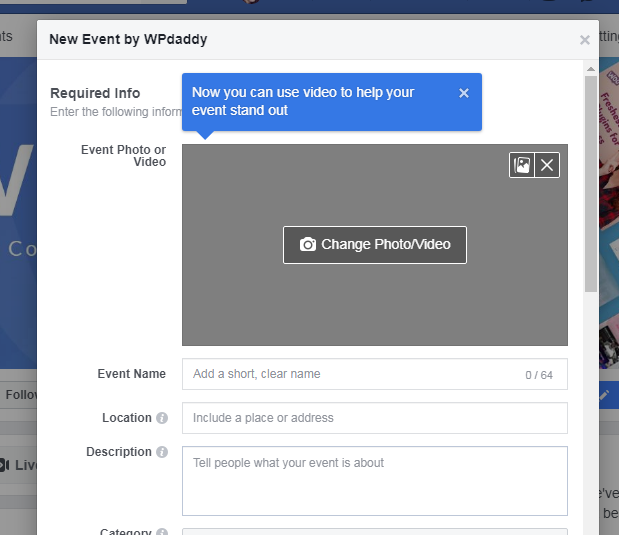
On your Facebook page, you can also share the live broadcast right from your camera, create an event, an offer, or a job.
Issues and Support
There were only two issues I personally faced when publishing my posts on Facebook: the ‘Write something bar” missing and the “Scheduled Posts list” missing ones.
The Scheduled Posts List is missing – read this discussion to learn what to do to resolve the problem. If you face the problem when the “Write something” bar is missing, go to Settings -> Publishing Tools and click the “Create” button to write the post on your page.
The problem was that I wasn’t able to see the bar and the list on their places on the public page under my page’s cover but still they were available in the Publishing Tools. I updated the page a few times but nothing happened. The next day the problem was resolved itself: both the bar and the list were brought back to their places again. I guess this was something like the website’s malfunction.
If you face any problems, here are some of the support departments you can address:
Give Feedback About a Facebook Feature;
Report an Issue with Facebook Mobile Texts;
Report an Issue with Home Page or News Feed;
Report a Violation or Infringement of Your Rights;
Address the Help Community of Facebook to discuss your issue with other users.
Well, I hope this small tutorial was helpful for you and you are going to get a lot of subscribers and likes on your Facebook public page you’ve created for your business, blog, or community. Good luck!
Melany H.