If you run an email marketing or social media campaign or you want to earn referral income in a certain affiliate program, then you probably promote your campaigns in different sources. All users that come from definite sources where you promote your campaign, land on a definite page – this is a landing page. Landing pages are a great way to generate leads, boost traffic and increase sales.
Unlike the homepage, where users usually engage with your website and explore other website’s pages, a landing page is fully dedicated to a single product. It is completely focused on promoting this product and engaging interested folks who click the links, buy or download products, etc. You can create multiple landing pages for every single product you want to showcase, there are no limits.
In one of our posts we’ve been speaking on how to create landing pages with Elementor drag-and-drop front end page builder, and now let’s see how to create a landing page in WordPress using Leadpages online service.
Leadpages is a great platform that allows to create handsome landing pages and publish them on your domain. You will see everything step by step. Let’s start!
Getting Started
To start creating a landing page with Leadpages you should log in or sign up for a free trial to try this service before you pay for the subscription.

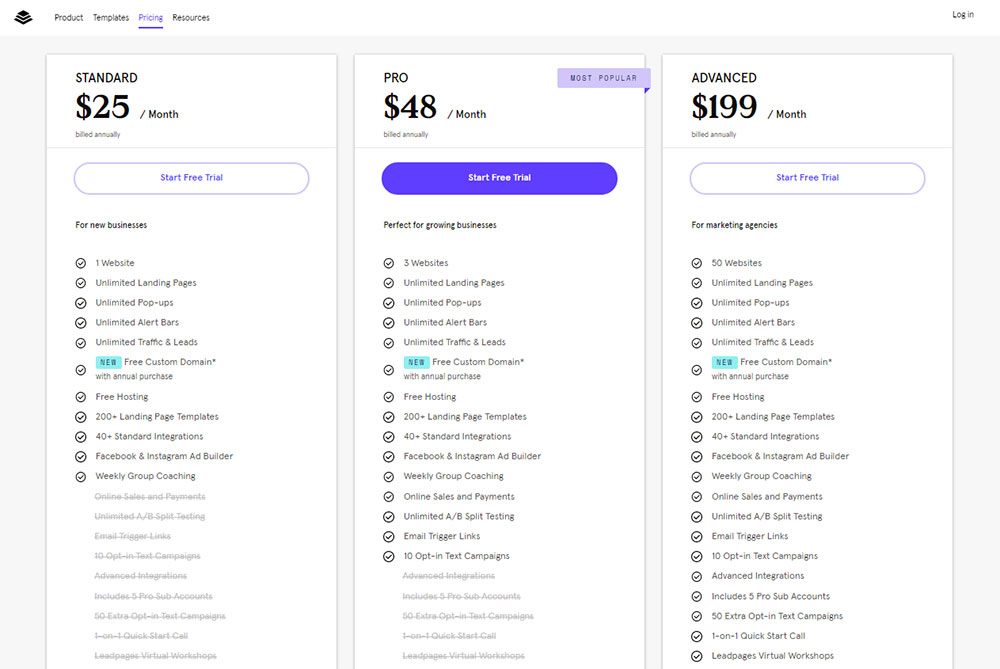
So I click the ‘Start Free Trial’ button on the service’s homepage and now I see the Standard, Pro, and Advanced pricing plans available for me to choose from. I select the Standard one and click the ‘Start Free Trial’ button located under the price.
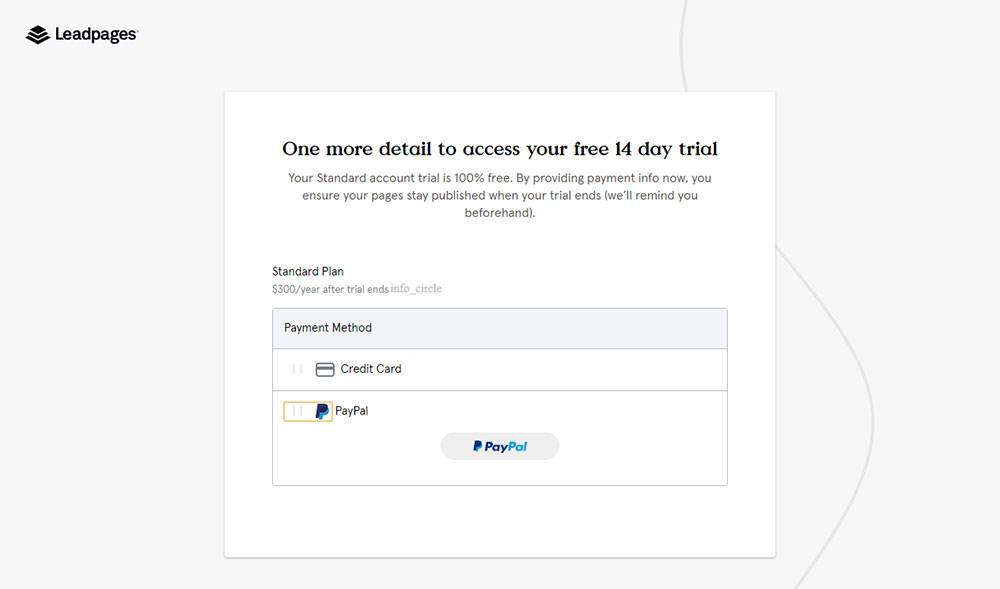
Now you should either enter your credit card details or select the PayPal payment method to access your 14-day free trial.
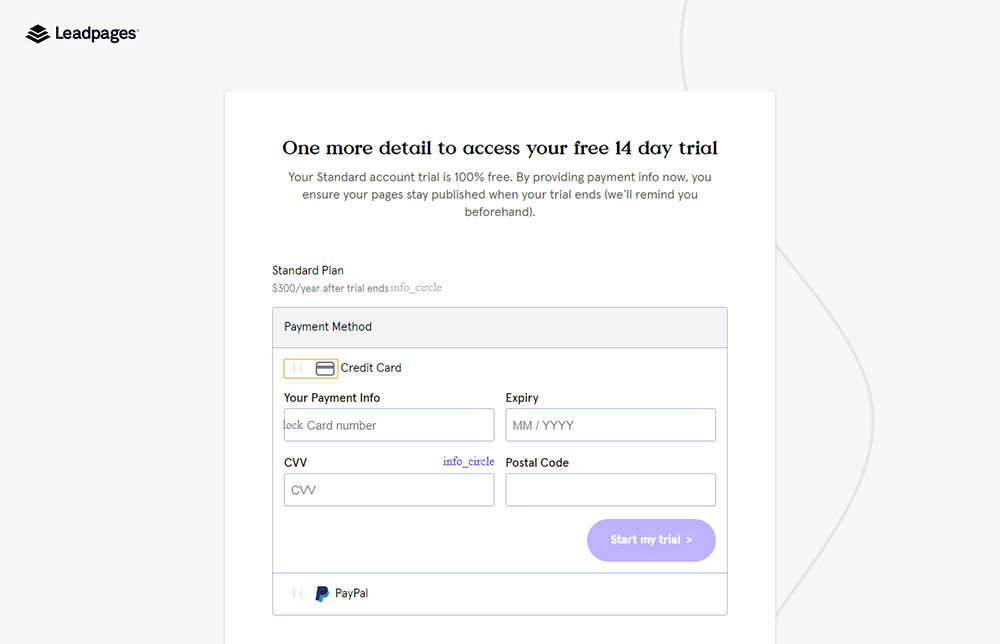
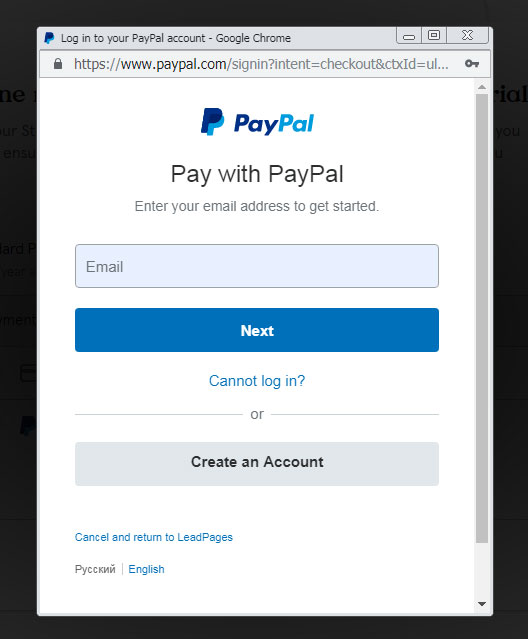
I select PayPal and enter it using my email address.
Now I can agree to use my connected card for future purchases with Leadpages and then I can continue further.
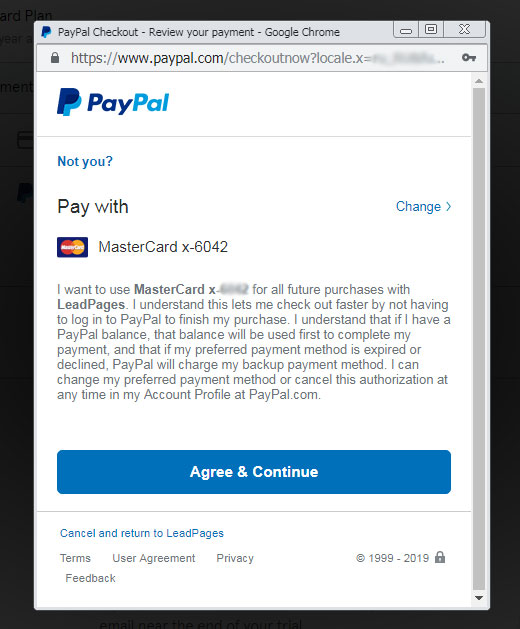
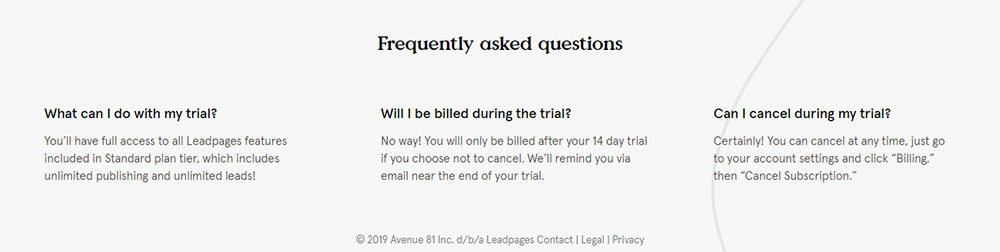
Read the FAQ on the Credit Card details page if you want to learn how to cancel your subscription if you don’t want to pay for the full version of your Leadpages account at the end of your trial period.
Creating a Landing Page
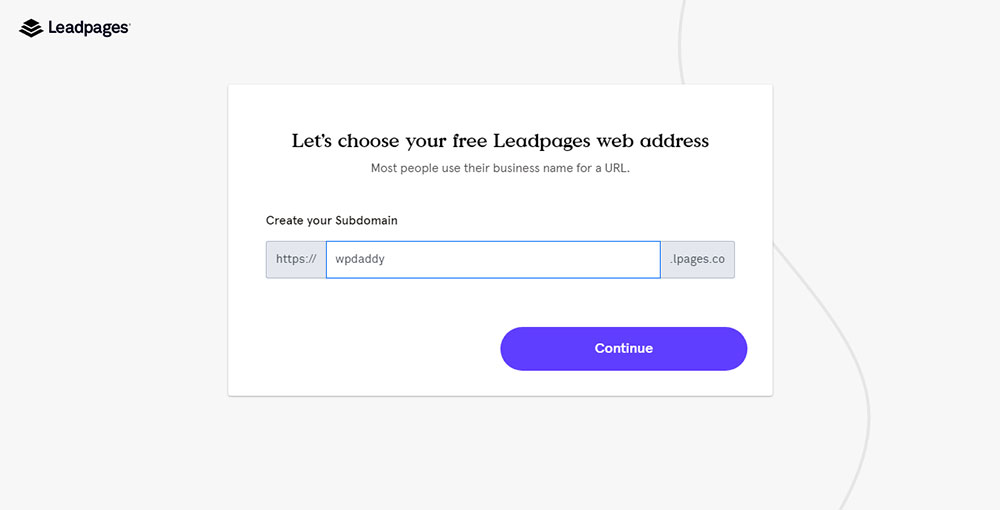
After the registration and choosing the payment method, you can start by creating a web address for your new landing page. This will be the default subdomain where your new page will be first published.
Read further to learn how to publish your landing page on your custom domain.
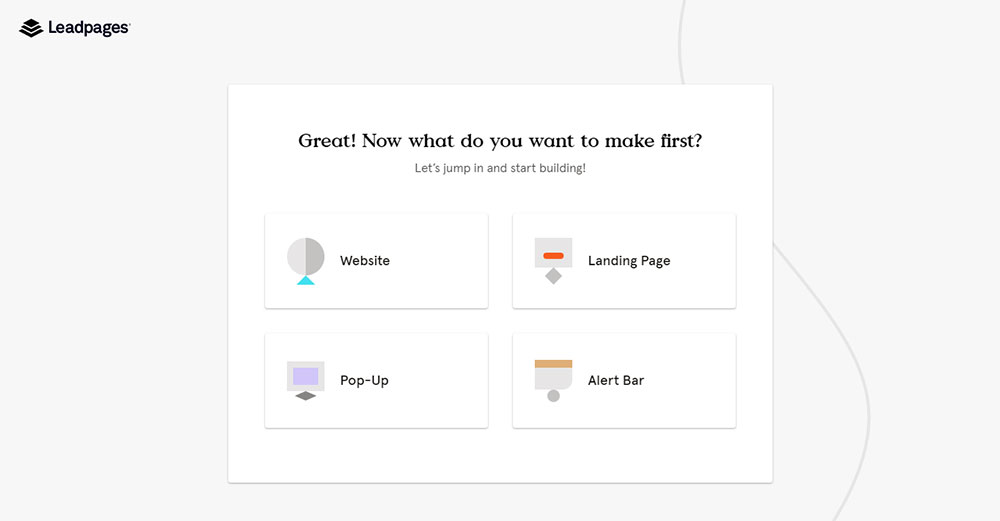
After choosing the name of your subdomain, select the type of page you want to create. You can select from a website, a landing page, a pop-up or an alert bar. I select the landing page type and go further.
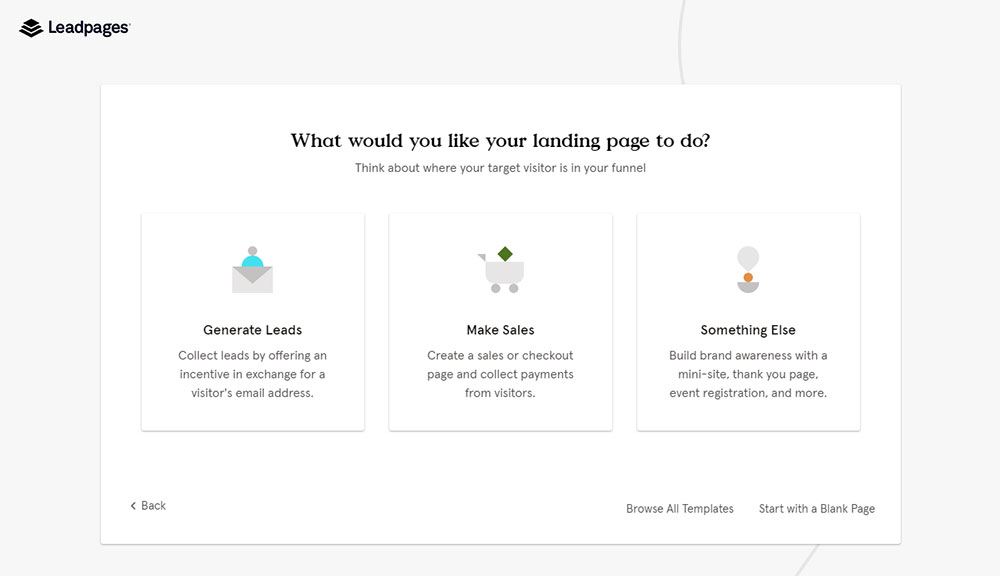
Now you should select what you are planning to do with the help of your landing page. So you can choose from the purposes like Generate Leads, Make Sales, or Something Else. I select Something Else and continue.
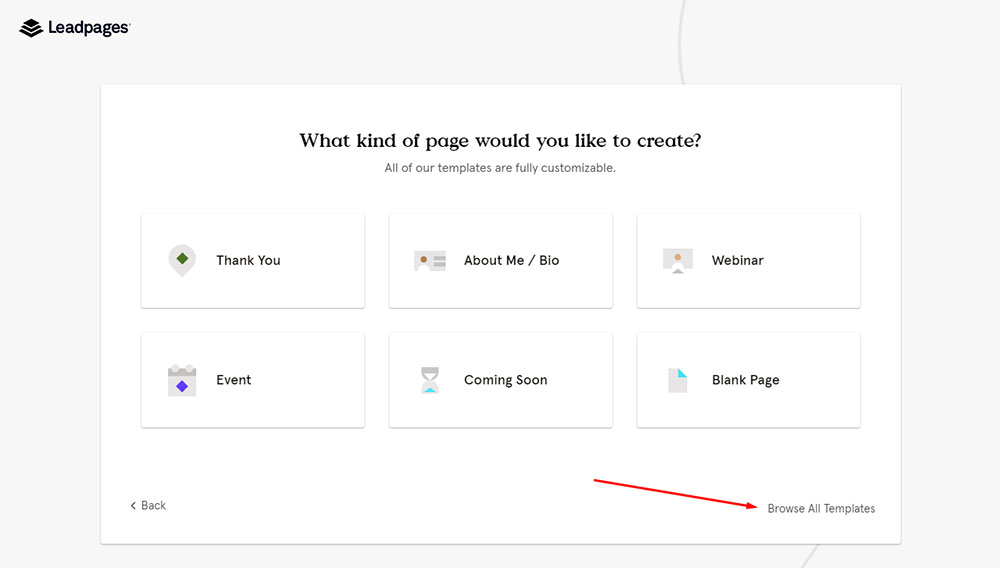
The next step will ask you to choose the type of your landing page from the available variants like Thank You, About Me/Bio, Webinar, Event, Coming Soon, Blank Page or some other variants you can find if you click the ‘Browse All Templates’ option.
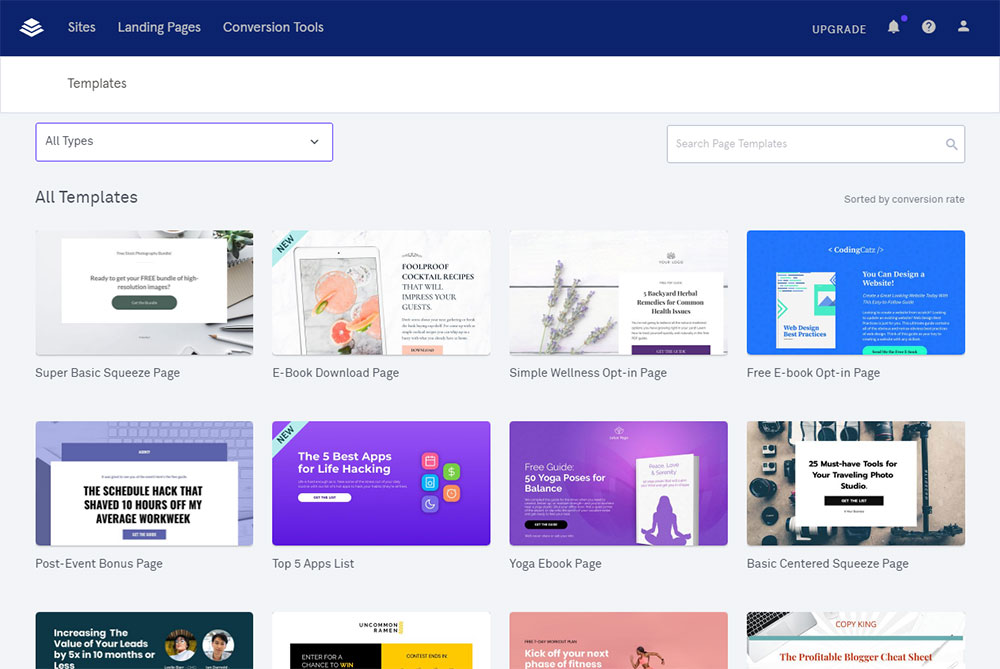
Leadpages provides you with a number of templates to browse and pick the one for your current landing.
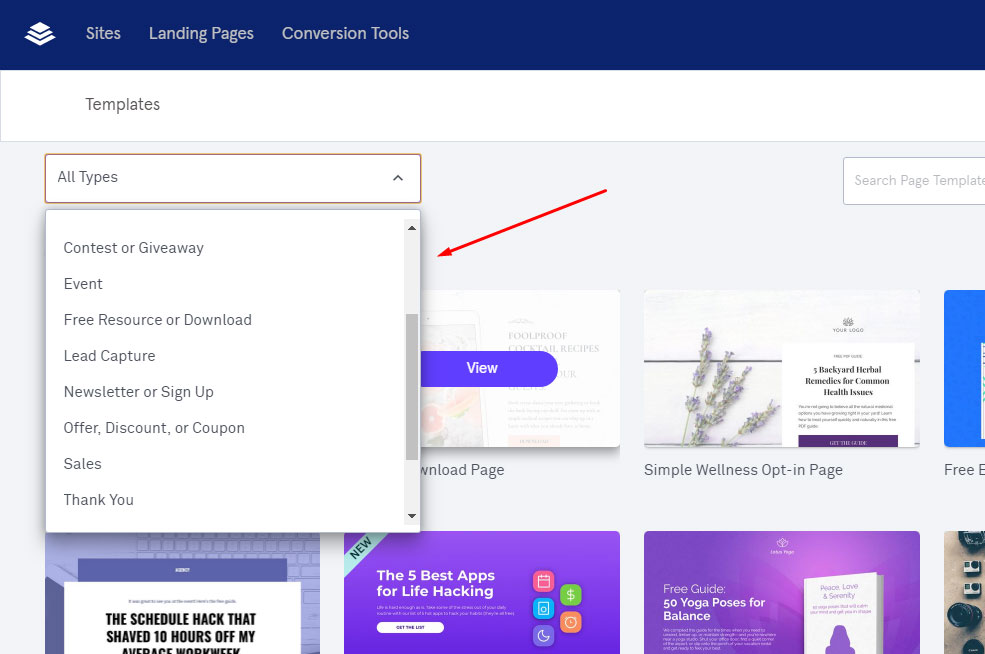
If you click the ‘All Types’ drop-down menu you will find the landing pages like Contest and Giveaway, Discount, Free Resource or Download, Lead capture, Newsletter or Sign Up, Sales, and more.
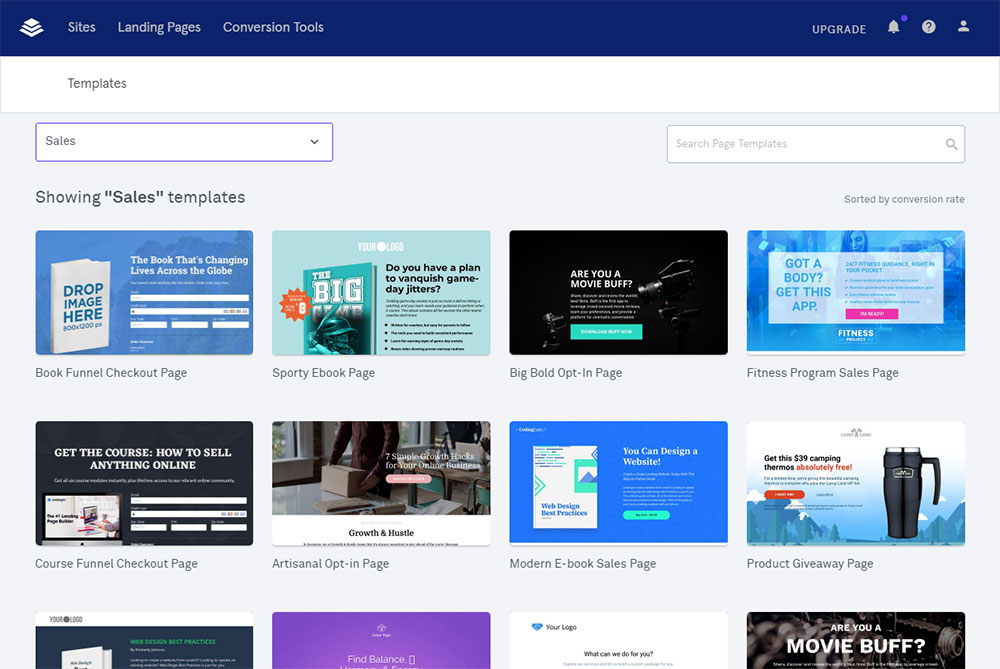
I select the Sales type and now I can select the template from the list of the pre-defined designs specially crafted for the product sales landing page type.
I select the template and click the ‘Use This Template’ button. By the way, it’s possible to view how your chosen template looks on desktop and mobile.

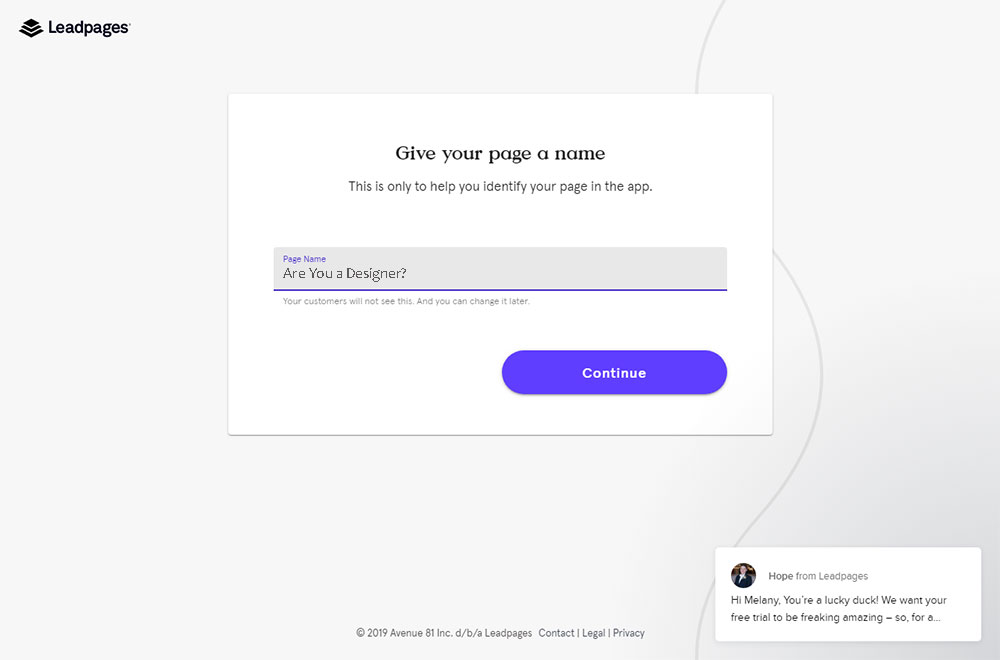
The next step will require giving your landing page a name. So create a name and continue.
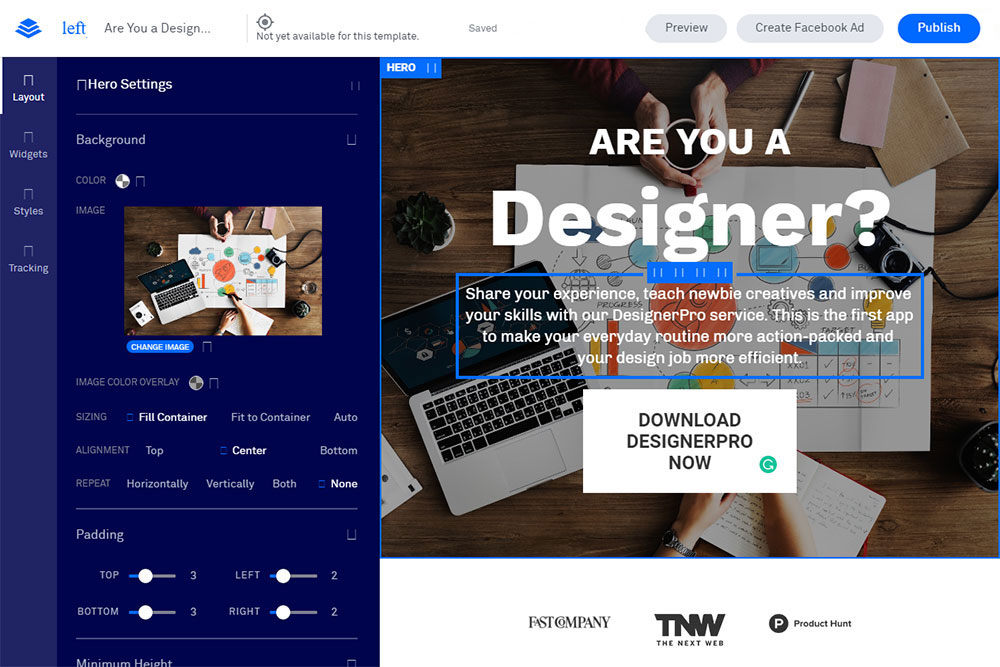
Now you can edit every text block of your landing page template, upload a new custom hero image, manage padding, height, and more options of the image placing method;
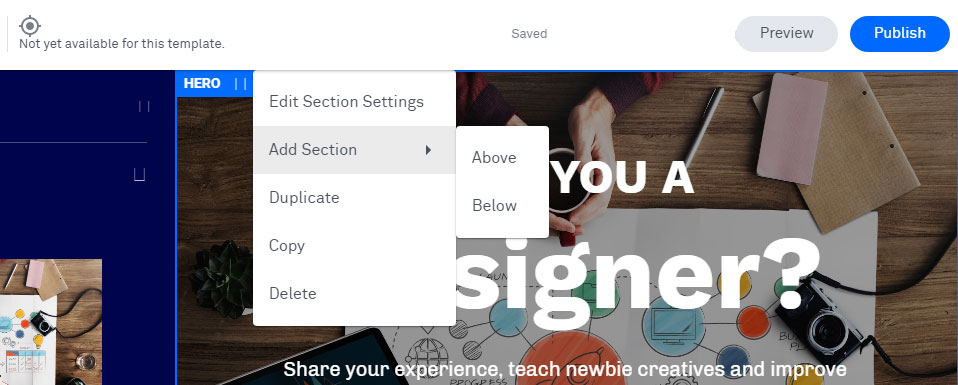
you can edit section settings, duplicate, copy or delete your image as well as add a section above or below.
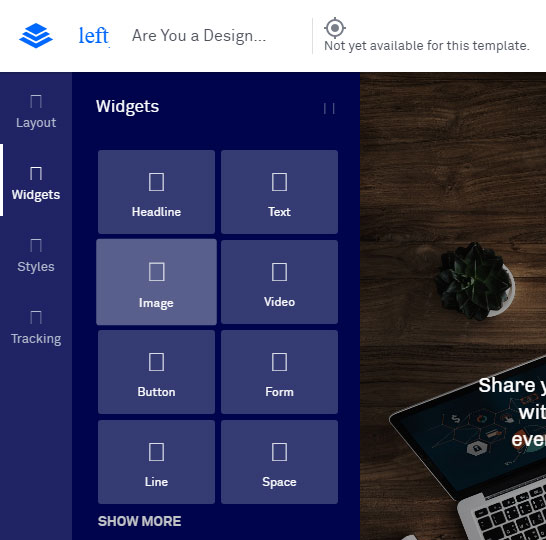
you can use multiple widgets for editing your landing page;
use different styles;
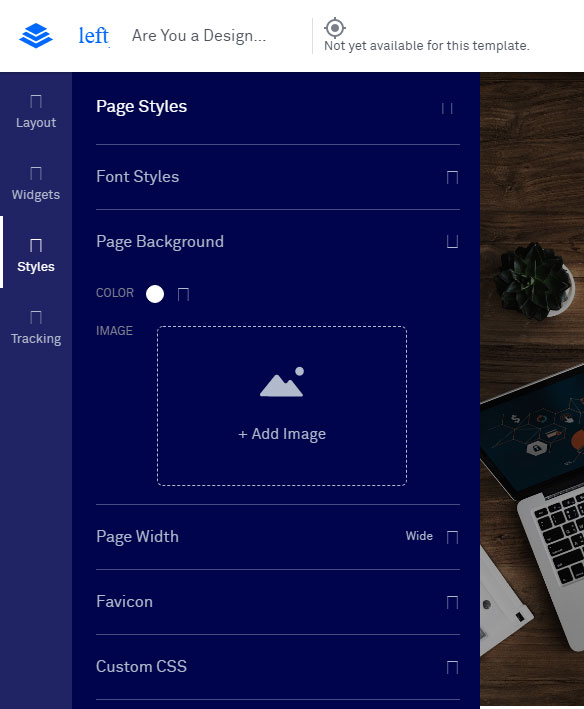
as well as add title, description and page keywords in the Tracking section of the builder to allow the search engines to track your landing page.
![]()
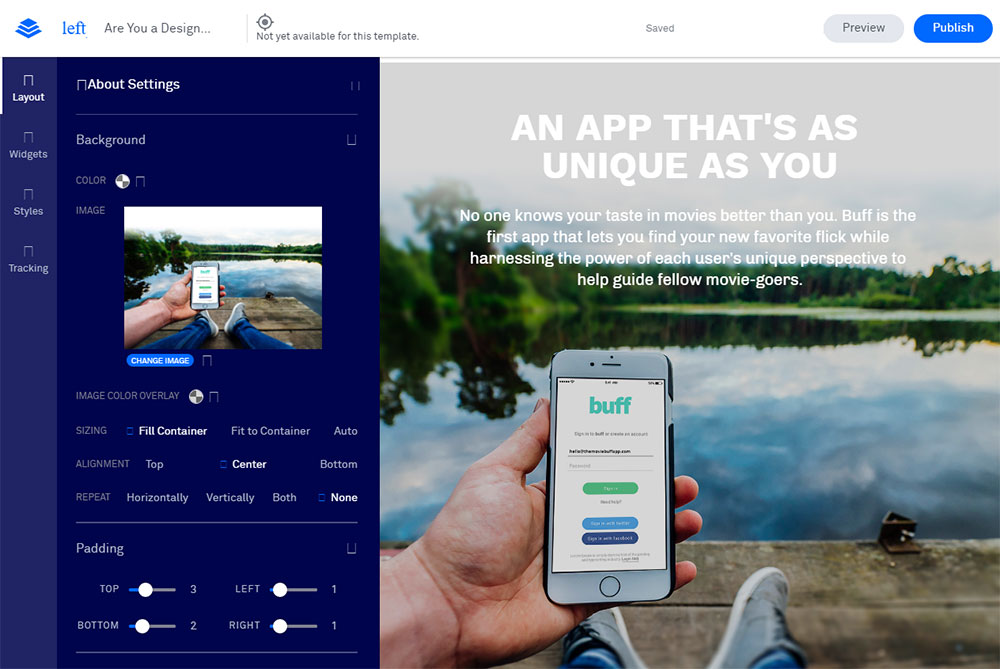
Scroll down your landing template to manage the About section, edit texts, upload new images, etc.
Publishing a Landing Page
Once your landing is ready, click the ‘Publish’ button to make it go live. Now you should publish the page on your previously created subdomain to reach the ‘Publishing Options’.

You can also connect another domain here.
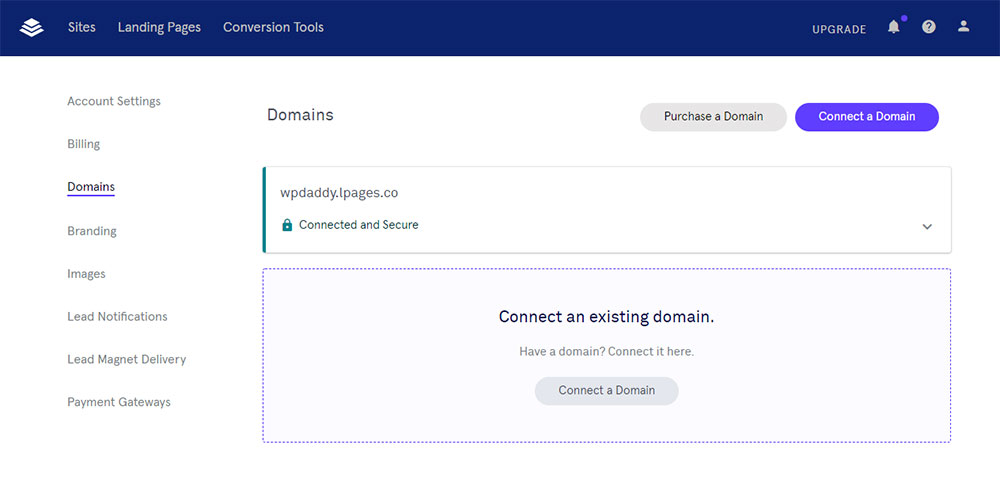
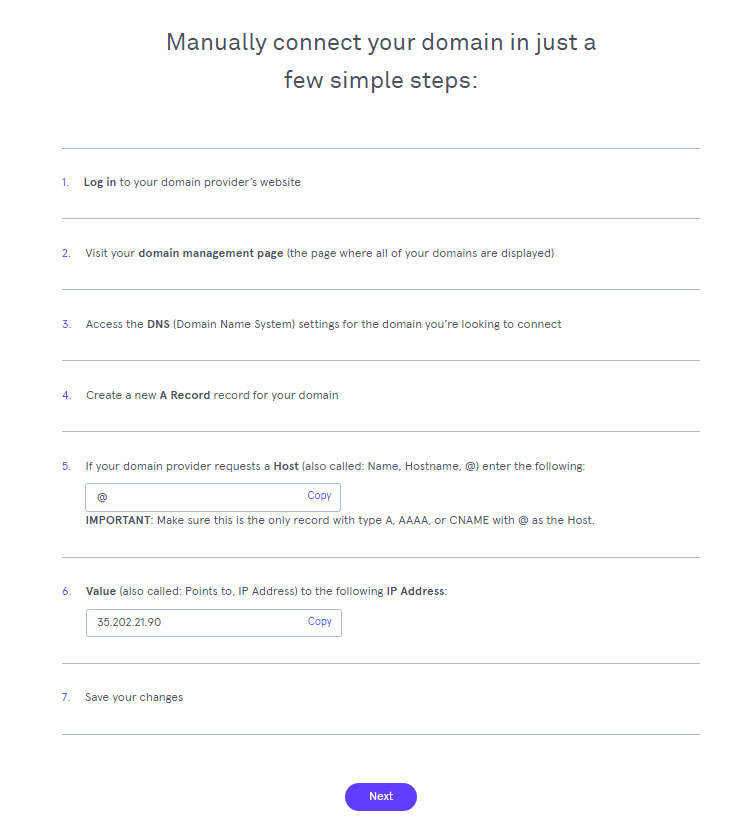
Connecting the custom domain is easy: you just enter the Domain URL;
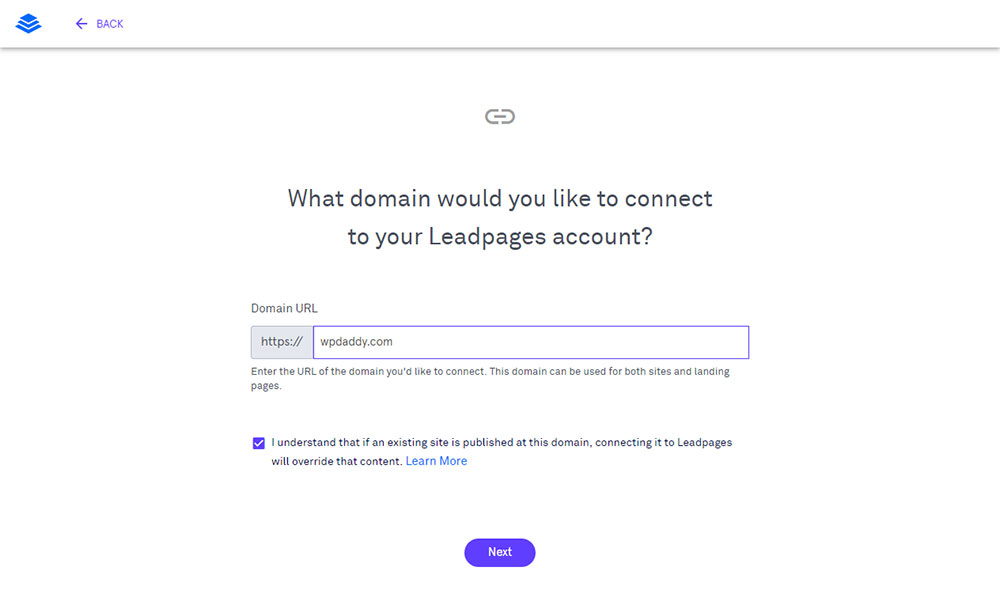
follow the seven steps of connecting a domain manually;
decide whether you want to redirect traffic to the domain you are connecting;
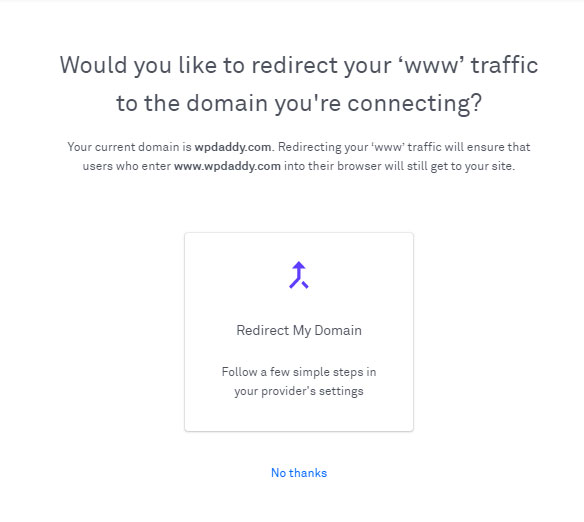
and then wait until your newly connected domain is checked and approved.
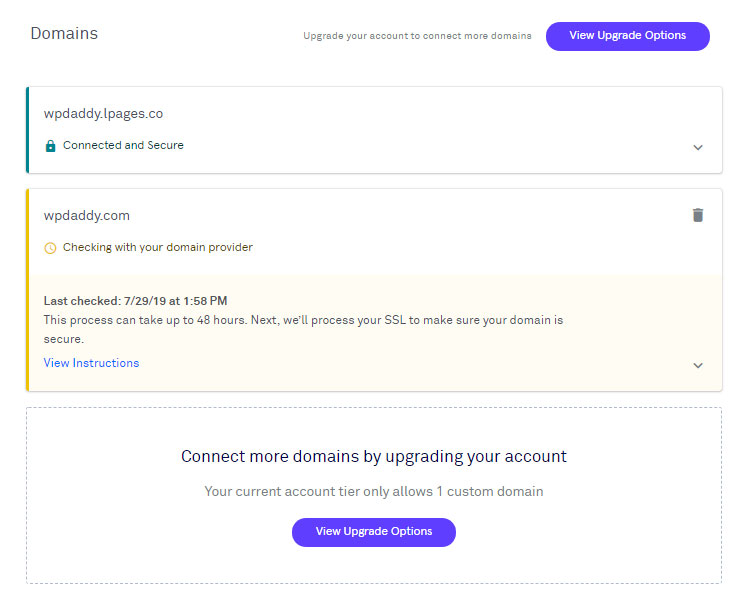
However, I decide just to publish my new page on my recently created subdomain and then enter the Publishing Options to change the domain.
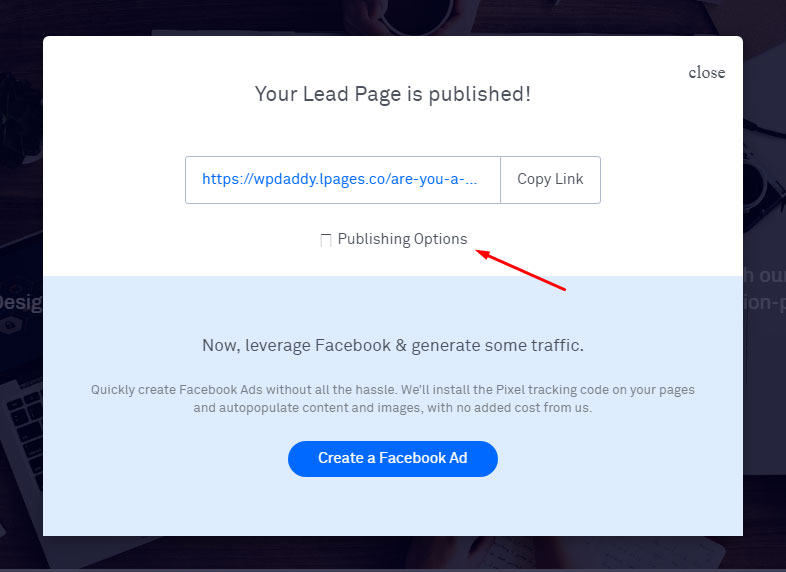
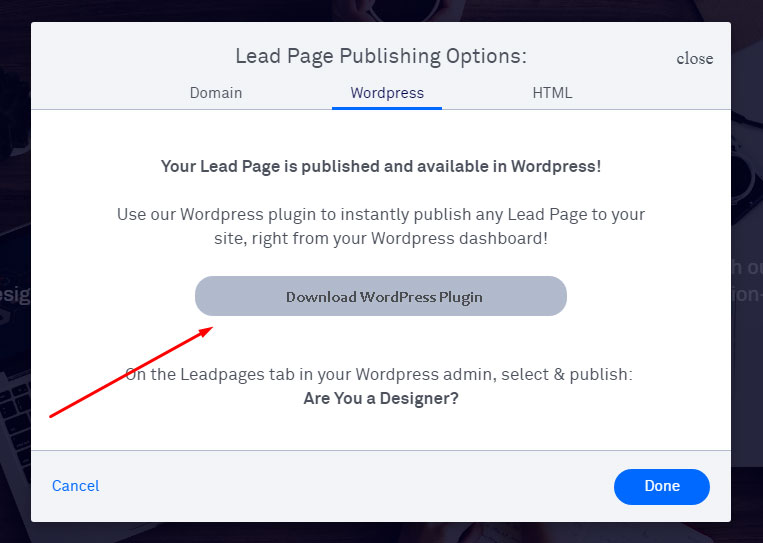
This is how my published page looks like.

Here I go to the WordPress section and download a WordPress plugin zip file to upload it to my WordPress site.
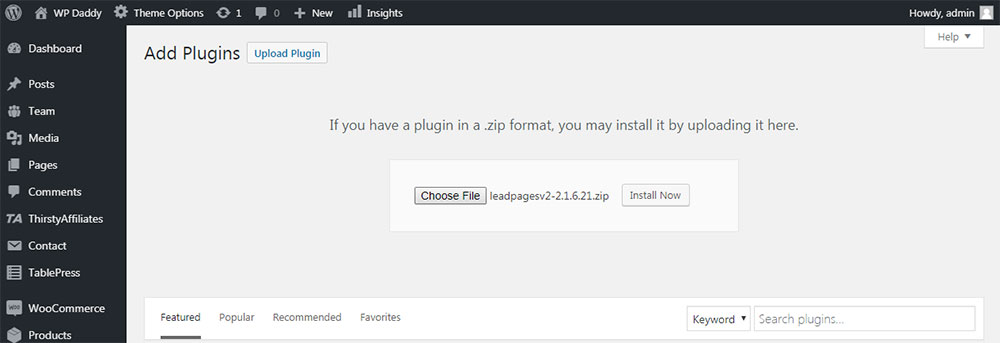
After that, I go to my WP website dashboard, select Plugins –> Add New-> Upload Plugin, choose the downloaded zip file and click the ‘Install Now’ button.
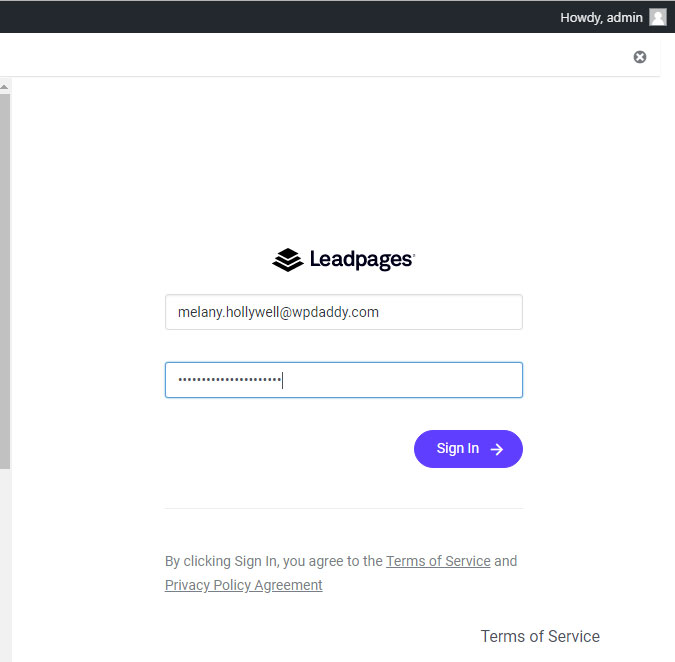
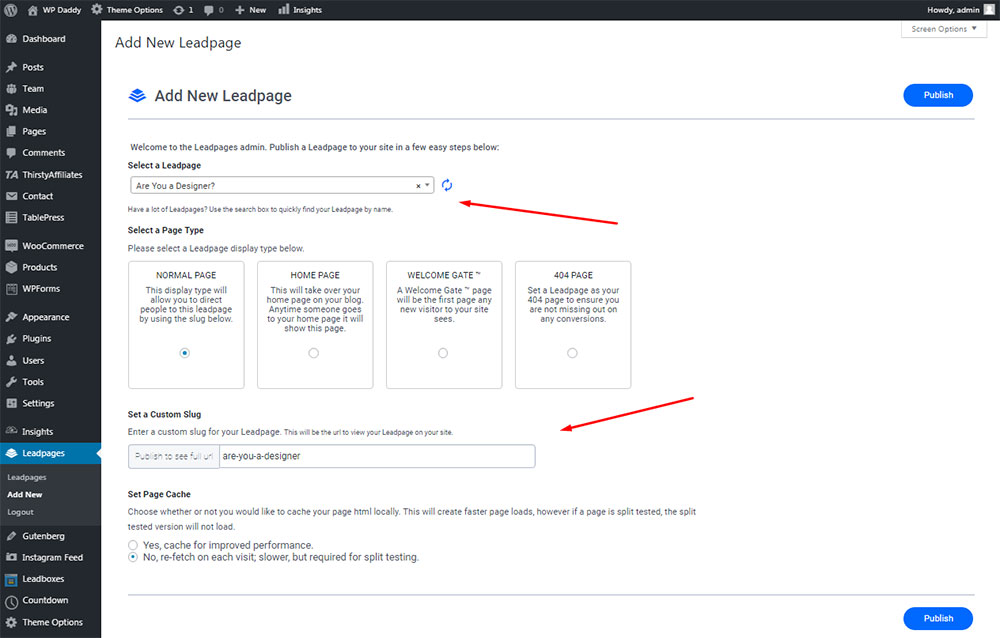
Now I should log in to Leadpages in my WP dashboard and go to Leadpages -> Add New menu to enter the Leadpages admin.
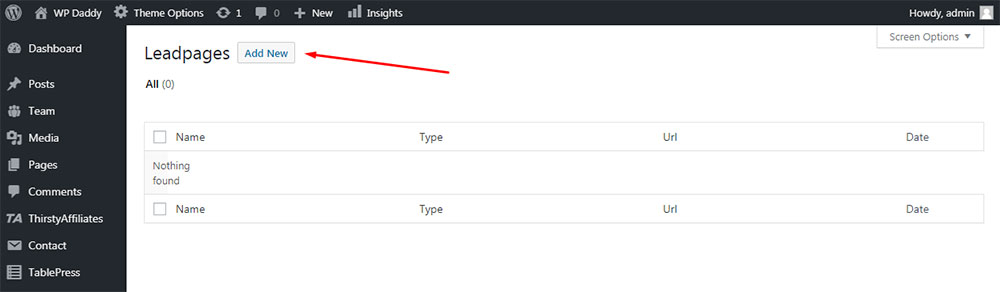
Here I can select the newly created landing page in the ‘Select a Leadpage’ drop-down menu; set a custom slug, set page cache, choose a page type and then publish my new page on my custom domain by clicking the ‘Publish’ button.
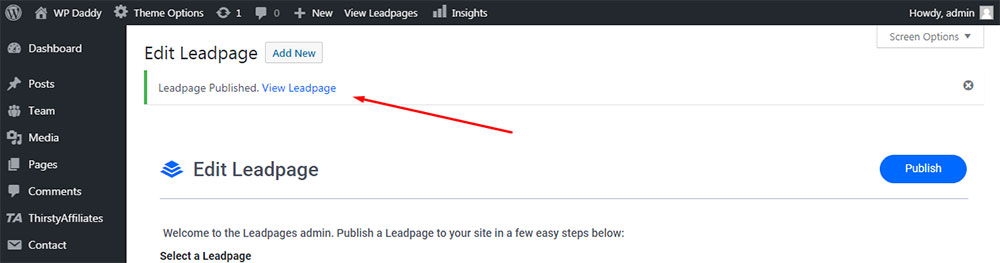
After the landing page is published, I can view it once more but now it’s available on my own domain.
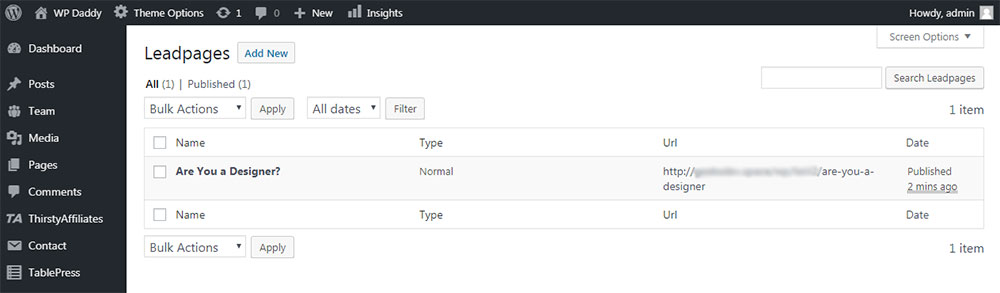
Now this page is also located in my Leadpages list available on my site.
Well, I hope this small tut was a bit helpful for you if you are about to choose the service for quick and easy landing pages creation without the necessity to install a definite page builder on your WordPress website.
Yours,
Melany H.