Hello, dear friends. Today I’m going to share 2 easiest ways of uploading a landing page in HTML format to your WordPress website.
Before we start, please read this guide to learn what the landing page is or take your time to read another guide if you’d like to learn how to create a landing page without using a page builder.
Let’s see what an HTML-based landing page is and why we should upload it to WordPress in this format.
What is an HTML file?
When you design a landing page you save it in the PSD format which is a standard layered Photoshop file. However, if you want your landing to be properly displayed on your website, you should transform a PSD file into an HTML one.
Most of the time website owners are hiring freelance developers that are able to create a proper HTML code based on the ready PSD file provided.
HTML is known as Hypertext Markup Language used to create web pages. It helps web browsers visually display the website structure to show it to users in a clear way. HTML code assists in formatting the text and images in a correct way that is easy to perceive.
HTML is used together with CSS code to add some design elements and organize their behavior on a website.
The Definition of an HTML Template
A set of HTML files with text, images, font style files, and a Javascript is considered to be an HTML template. To be precise, this is a pre-configured package of HTML code that is uploaded to the live website to be customized and used.
A landing page in HTML format is exactly that HTML template (a package of HTML code) which we need to upload to WordPress.
Let’s review several easy ways to upload an HTML landing page to WordPress.
Upload an HTML Landing Page through FTP
This method is suitable for large HTML templates crafted of a multitude of files. To upload a landing page you should use any FTP client you prefer. You can check this list of FTP clients to learn which one will be the most appropriate for you.
Most of the time people choose FileZilla which is suited both for Windows, Mac, and Linux. With FTP you can make any changes to your HTML template locally before they go live.
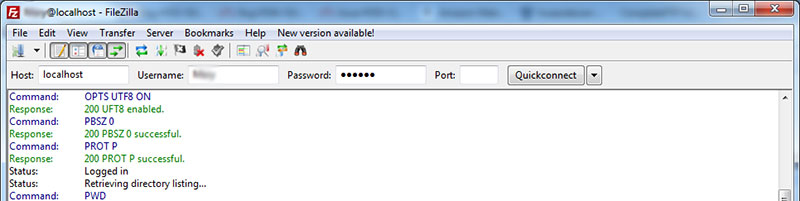
Before you start, please see this guide on how to backup your WP website because you should make a backup to make sure that everything is going to stay ok after you upload a file. In that guide, you’ll also find the instruction on how to login to your website through FTP. To login to your website with FTP, use your username, password, host, and port and then click the Quickconnect button.
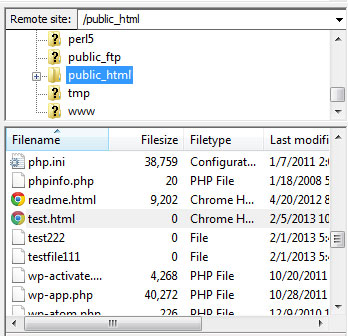
After that, go to the root folder of your website (these files are located on the right side of the client). Click to open the folder and then
go to the left side of the client and find the HTML landing page template you want to upload.
Right-click the file and select the Upload option in the drop-down menu. As a result, you’ll see the file uploaded to your WordPress site root folder.
To visualize your landing page on your website, enter its name into the address bar, add a slash and type the name of your HTML file. For instance: wp.daddy.com/your landing page. You’ll see a newly uploaded file under that URL.
How to upload an HTML landing page through the WordPress dashboard?
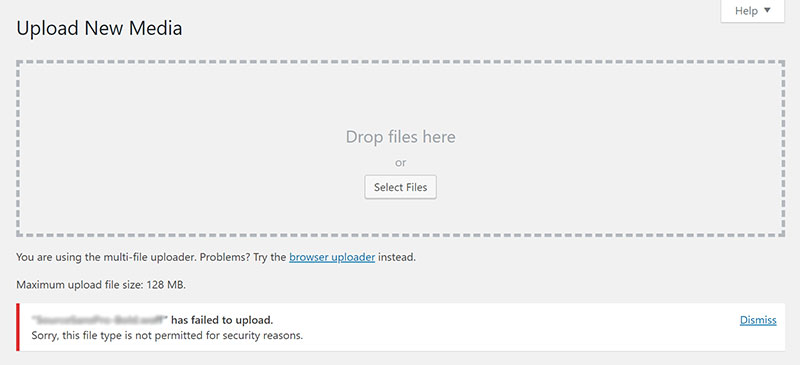
Usually, we use the media library, post, or page editor to upload any files to WordPress. However, some file formats are forbidden to be uploaded to a WP dashboard and if you try to upload them you get the “Sorry, this file type is not permitted for security reasons” message.
The files permitted to be uploaded to WordPress are such as JPEG, GIF, ICO, PDF, 3GP, MP3, and some more ones, so if you want your HTML landing page file to be also permitted for uploading, you should add this file format to the wp-config.php file. Please read this guide to learn more about the wp-config.php file and its purposes.
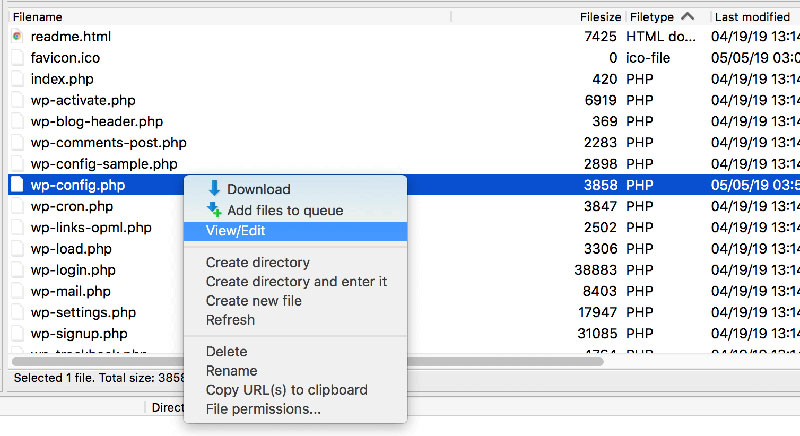
To edit the wp-config.php file, you should connect to your website through FTP, locate the wp-config.php file within the root folder, right-click the file and select the Edit option in the drop-down menu.
After that, enter the following code into the wp-config.php file right before the /* That’s all, stop editing! … inscription:
define(‘ALLOW_UNFILTERED_UPLOADS’, true);

Save the changes and close the file. You can also download it from your server using the FTP client, make changes, and then upload it again to your server to reload it. In this guide, you’ll find an explanation on how to insert changes into the wp-config.php with ease.
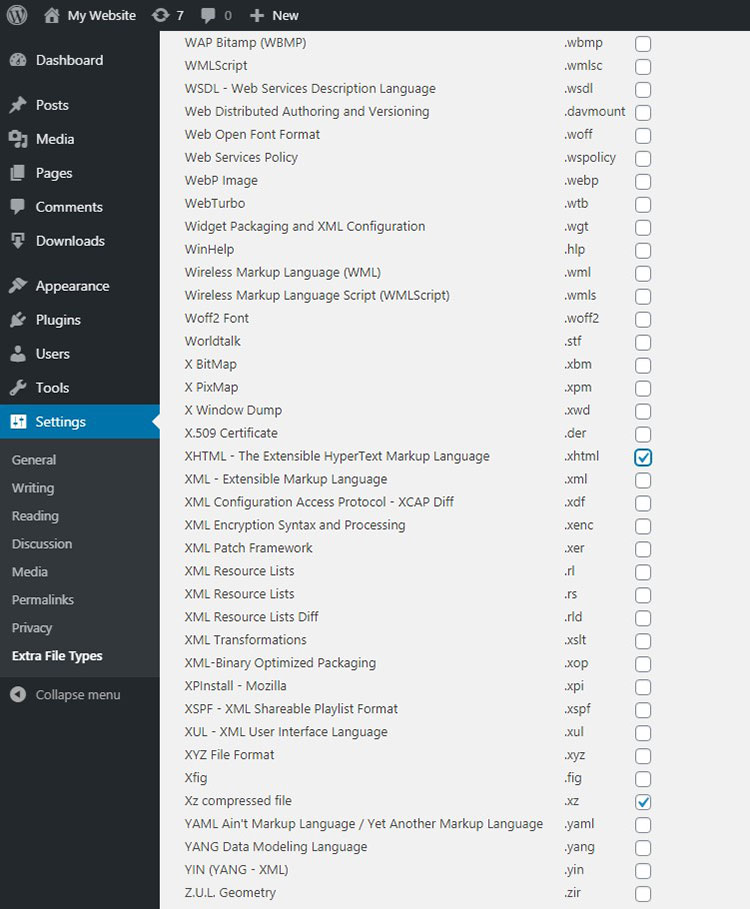
This algorithm should help, however, you can also install the WP Extra File Types plugin available in the official WordPress repository and just select the required file types in the list to make them permitted for uploading. See this guide to learn how to install and activate a plugin in WordPress.
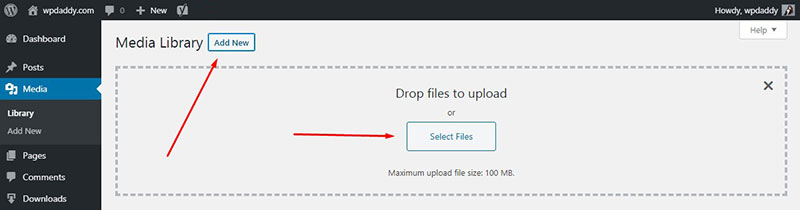
After that, go to Media -> Library -> Add New -> Select Files and pick the required HTML landing page file on your PC to upload it directly to the media library.
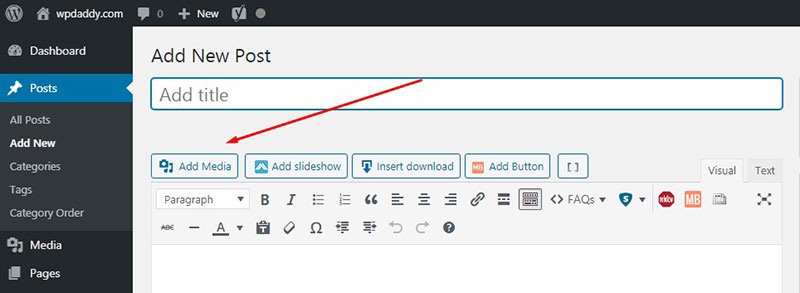
You can also upload a file right to your post or page. Just go to Posts -> Add New or Pages -> Add New -> Add Media -> Upload Files -> Select Files, choose the required file, and click either ‘Insert into post’ or ‘Insert into page’ button depending on where you want a file to be inserted.
If you are using the Gutenberg content editor, then select the ‘File’ block in the editor and click ‘Upload’ to upload the file.

When you save the post or page, you’ll see the downloaded HTML landing page template live.
Well, these were the easiest ways to upload an HTML landing page to your WP website and I hope this tut was helpful.
Melany H.