Do you run a multi-author blog on WordPress? So, it would be great to change the editorial status of your posts on your dashboard. This will help to inform other authors and admin on what stage of editing your post is currently available.
For instance, when you just add a post on your website, it is labeled as Draft, after every change you make to your post, you can click the Save Draft button to save the changes. When you click the Publish button, your post has the Published status. While the post is in the draft, it is not visible on your website page. It becomes visible after you publish it. If it is already published, you can choose the Unpublished status and hide the post from visitors.
By default, there are 7 statuses which can be available for posts, and they are draft, auto-draft (auto-save feature), pending review, future (scheduled for publishing), private, trash (deleted), and inherit (child pages that inherit the status of a parent page). In addition to these default post statuses, you can create any other custom statuses like In progress, Deleted, Inappropriate for publishing, etc.
If we speak of custom post types, they are usually available with every free or premium theme you install on your website. But there are some free and premium solutions that allow extending the functionality of your WordPress in a way which will make it easy either to create your own custom status for your blog posts or add new custom post types.
Let’s see how easy it is to add new custom post statuses and custom post types to your WordPress blog.
Custom Post Status is a cool WordPress plugin which allows to easily add unlimited amount of custom post statuses to your posts.
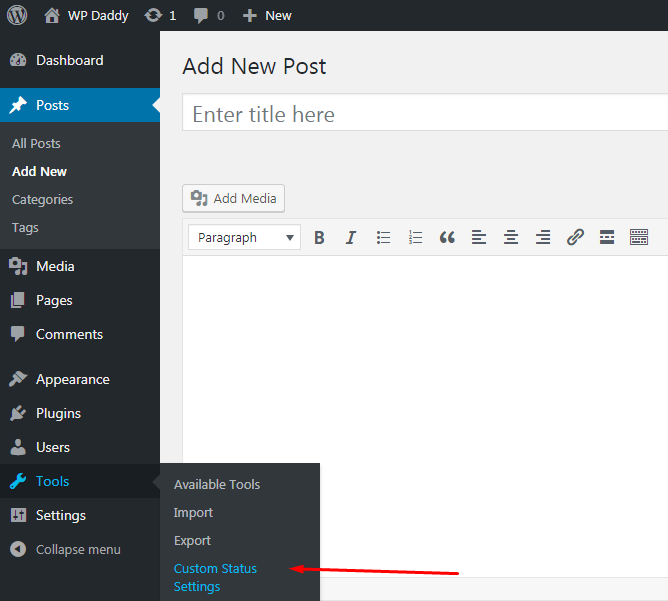
After the plugin is installed and activated, go to Tools -> Custom Status Settings menu in your admin panel.
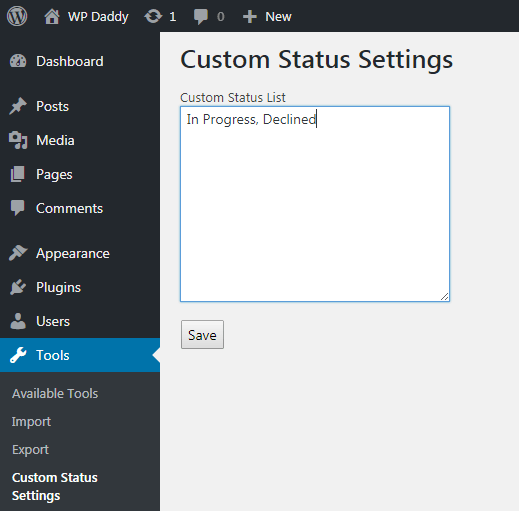
You will find the custom status list empty field, so you can fill it out with any statuses you prefer to have for your posts. Just separate them by a comma and don’t forget to click the Save button.
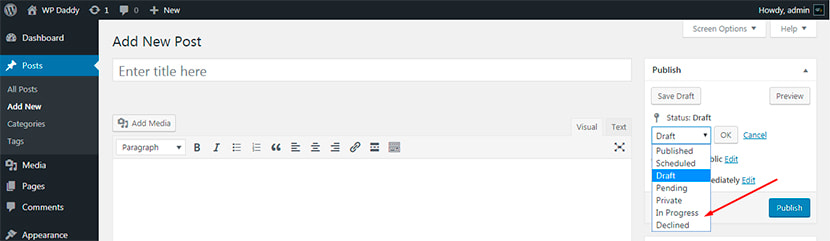
After that, you can go to Posts -> Add New and check out the statuses in the drop-down list. You will find the custom statuses you’ve just added, and they will be available for selection as well as the default ones.
There is also another plugin called Custom Post Types UI. It includes admin UI for creating custom post types and custom taxonomies for WordPress.
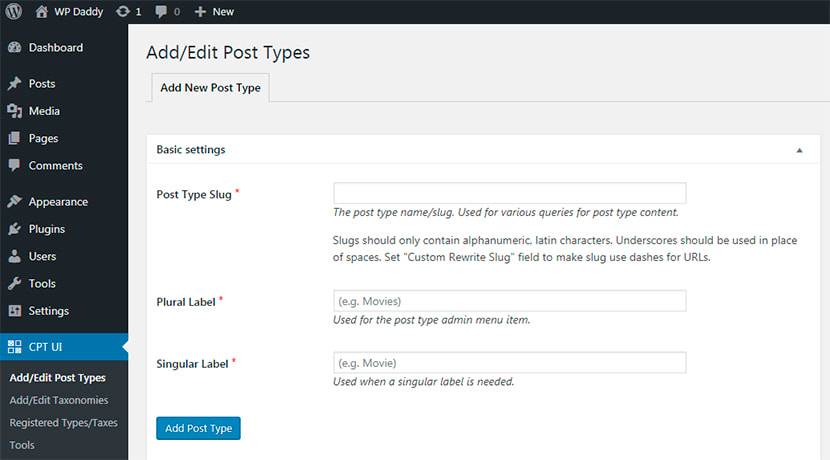
After activation, go to CPTUI -> Add/Edit Custom Post Types. Here you can add a new custom post type choosing its slug as well as its plural and singular labels.
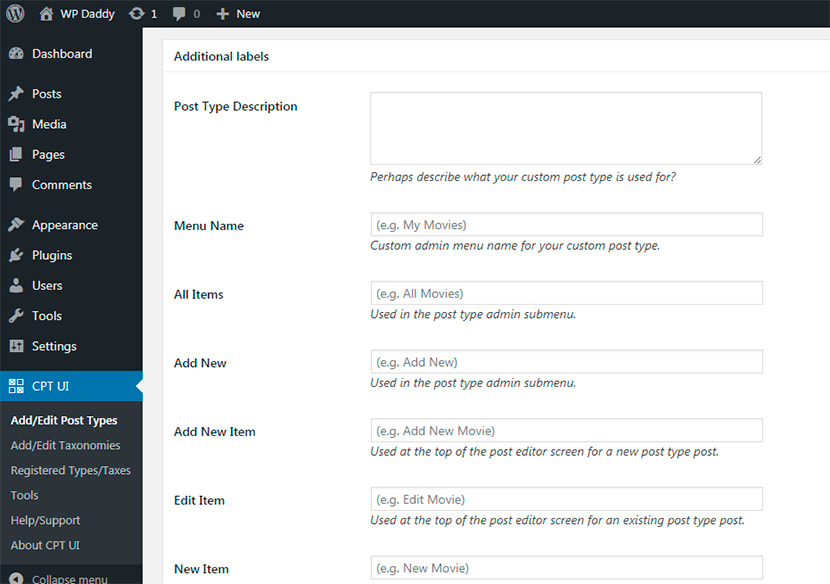
You can also manage additional labels by adding your custom post type description, menu name (admin menu name for your post type), and edit many more options.
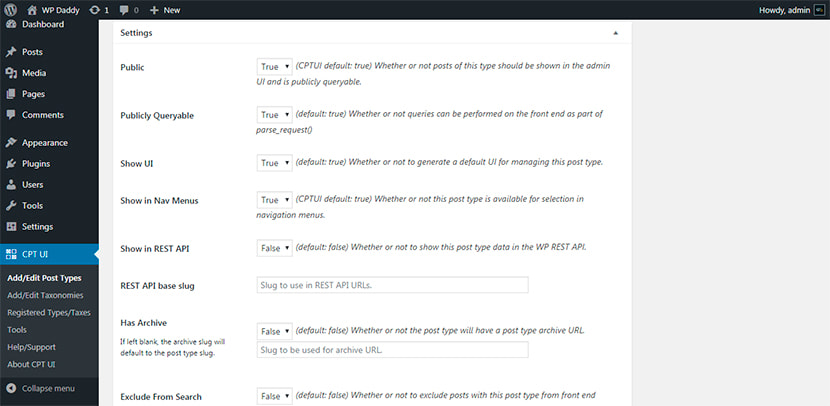
When managing settings of your custom post type, it’s possible to decide whether it will be public or private, whether to show or hide UI, whether it will have an archive or not, etc.
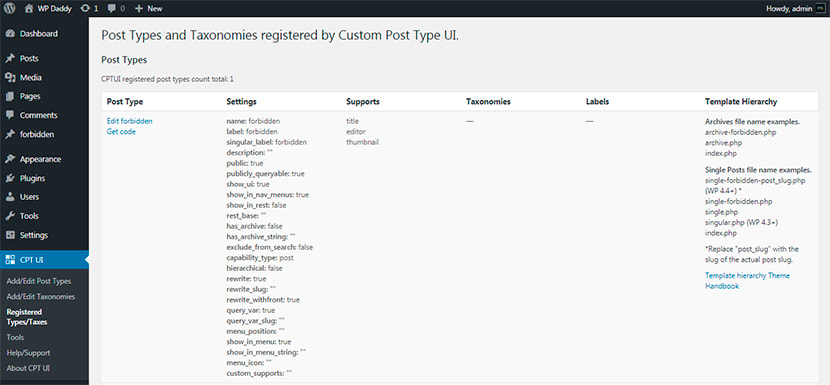
If you go to CPUI -> Registered Types/Taxes, you’ll be able to find the list of new custom post types you’ve just created.
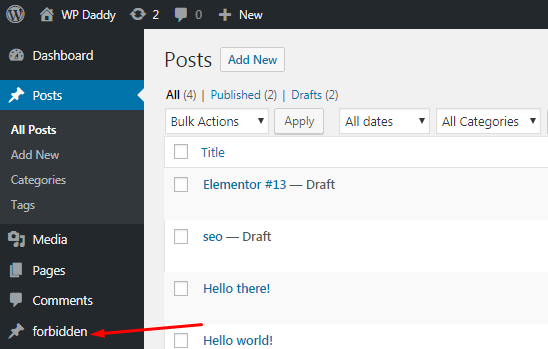
You will also find your custom post type in the admin panel.
Go to Tools to import and export post types or taxonomies, get post type and taxonomy code or check out the debug info. Here you will be able to import a post type from any other WordPress website or export a post type to that different website made on WordPress.

You can also use this plugin for adding and editing taxonomies.
As you see, it is quite easy to add custom post statuses and custom post types without using any coding. So try it by yourself.