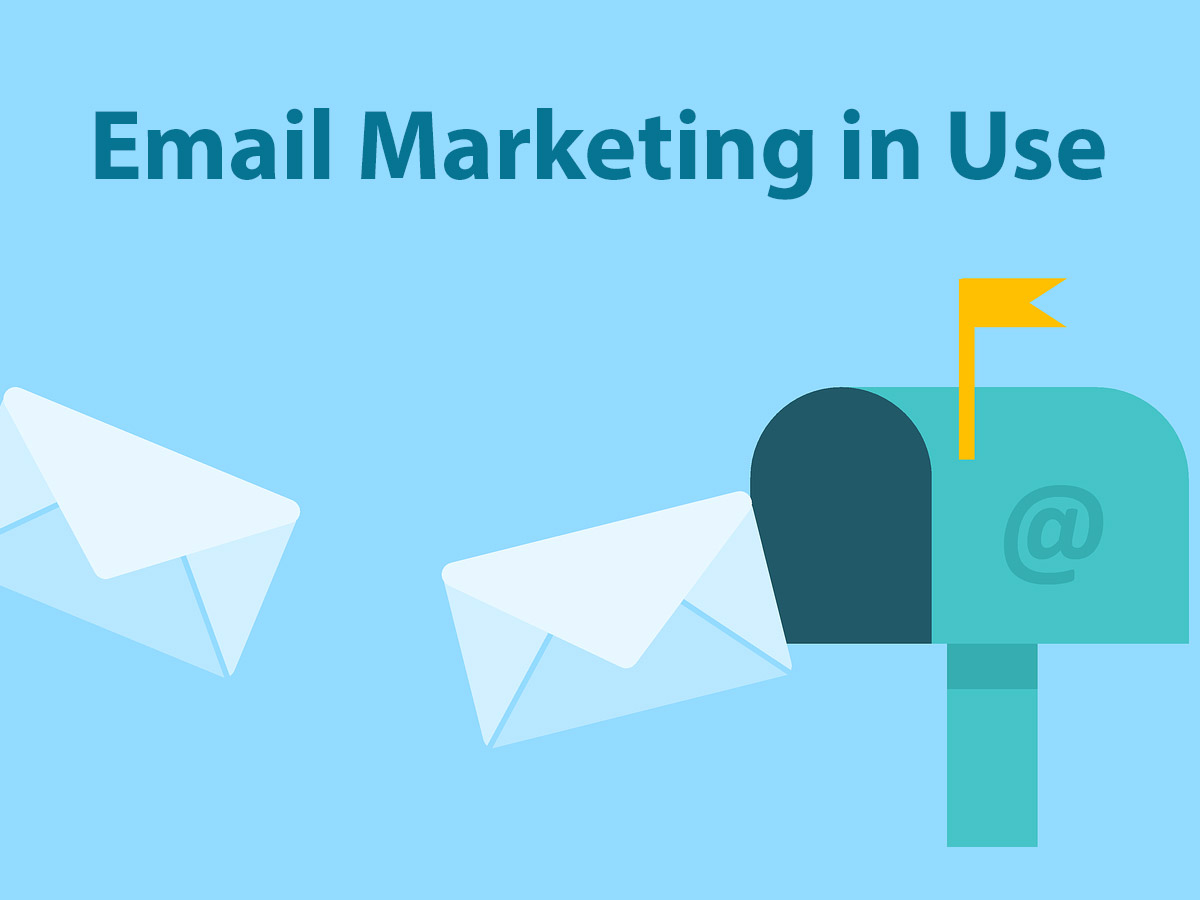
Email marketing is one of the most efficient methods of brand promotion. Your target user signs up for your email list if they are interested in receiving updates from you, so after that, you just regularly send them updates by email and make your best to transform your subscribers into repeat customers. As you reach your users by email, you get leads and visits, so of course, you get the chance to get repeat traffic and improve the ranking as well as increase the popularity of your website in your particular niche.
It would be better if you collect emails for your email marketing without irritating your users by large unexpected popups which appear once they attend your web-page. So please read our guide on how to capture emails which explains how to find people that will receive your newsletters and how to encourage your visitors to become your subscribers.
No matter you run a standard business website or an online store, creating a subscription form to collect emails is an essential task. So in this post, we will speak on a cool solution that will help you attract subscribers and succeed in your business. More precisely we will speak on how to create a subscription form and follow up email for your visitors and potential customers.
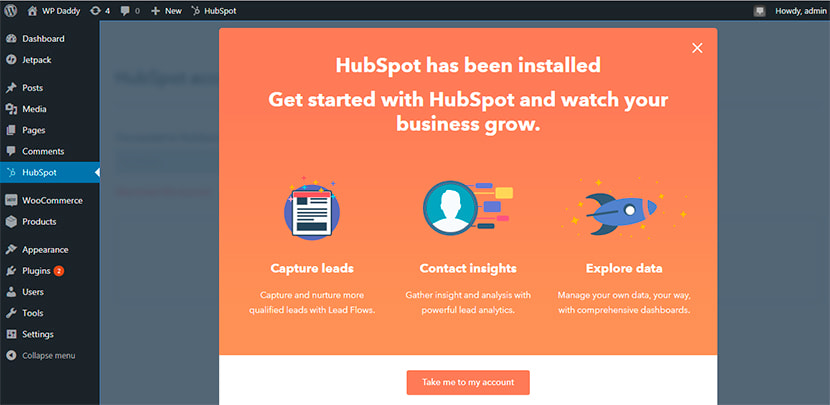
The plugin we will use for our purpose is HubSpot – Free Marketing Plugin for WordPress. This is a solution which allows to build your email list, generate and track leads as well as track user behavior of your website.
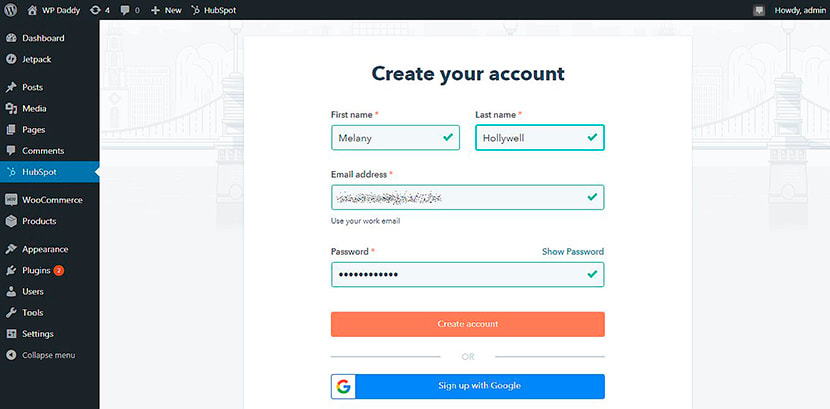
Once the plugin is installed and activated, it will ask you to create your account or sign up with Google,
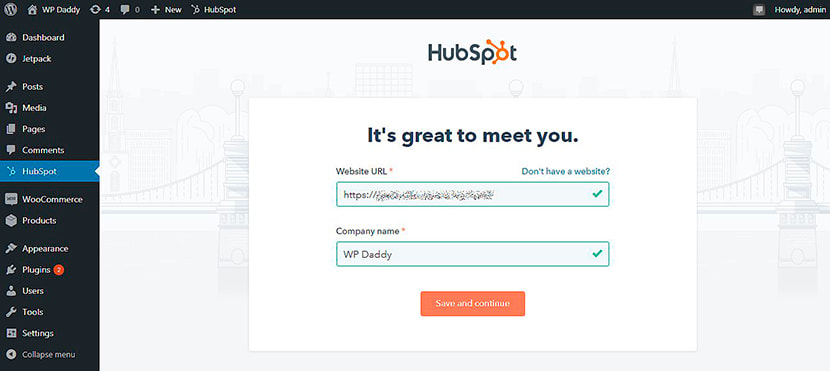
and after that – to insert your website URL and company name.
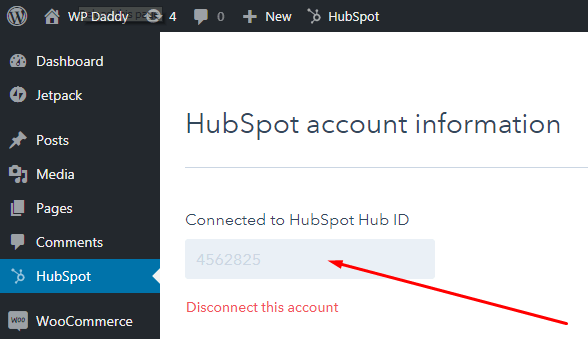
You will see your account connected to your website, so you can log in to it.
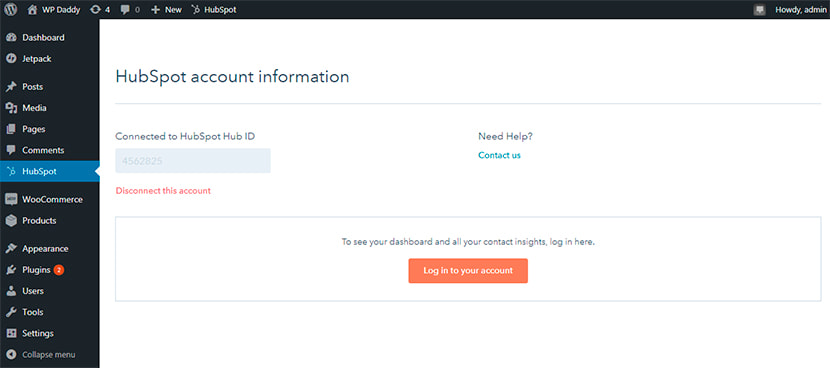
Click the Take Me To My Account button and start setting up your account.
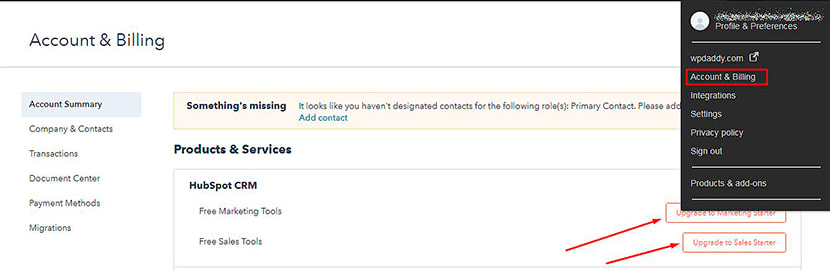
Go to Account and Billing -> Products and Services and either upgrade to Marketing or Sales Starter to get more possibilities.
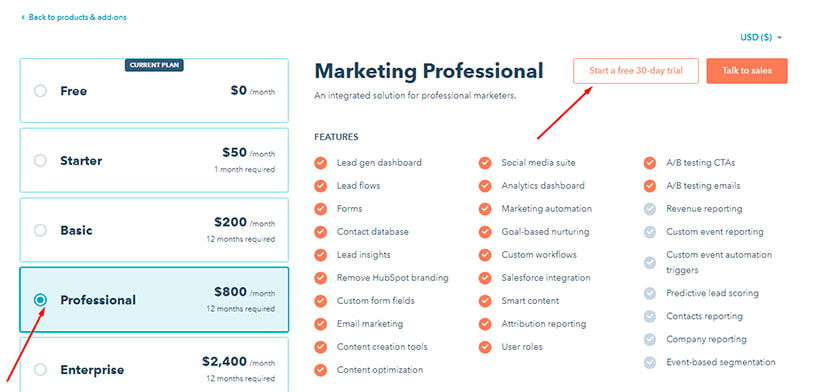
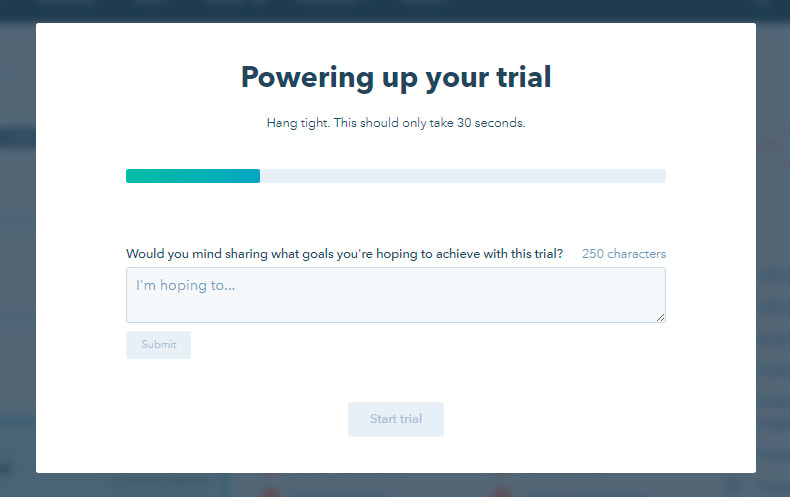
If you select the marketing starter professional plan, you’ll be able to activate the free trial for 30 days and unlock most of the options for your email marketing campaign.
When powering up your tial, you can share your goals you hope to achieve with this trial.
If you go to Settings, here you’ll be able to manage your account defaults (select a time zone, currency, and more), manage contacts and companies, edit import and export details, etc.
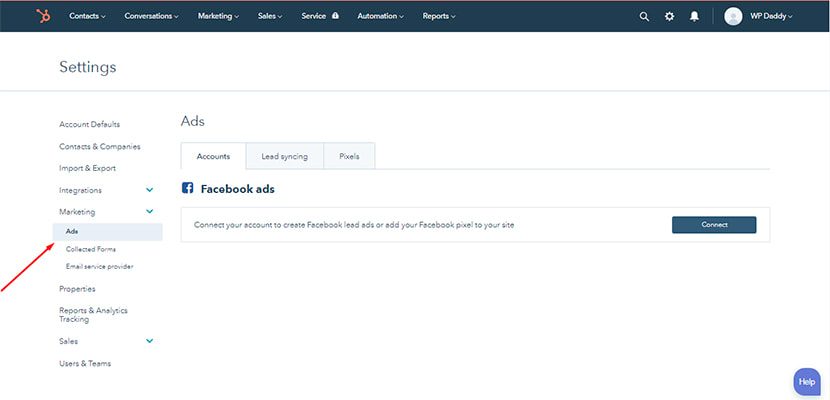
When editing the marketing options, you’ll be able to Connect your Facebook account to create Facebook lead ads,
send email notifications for collected forms submissions to a list of emails you prefer,

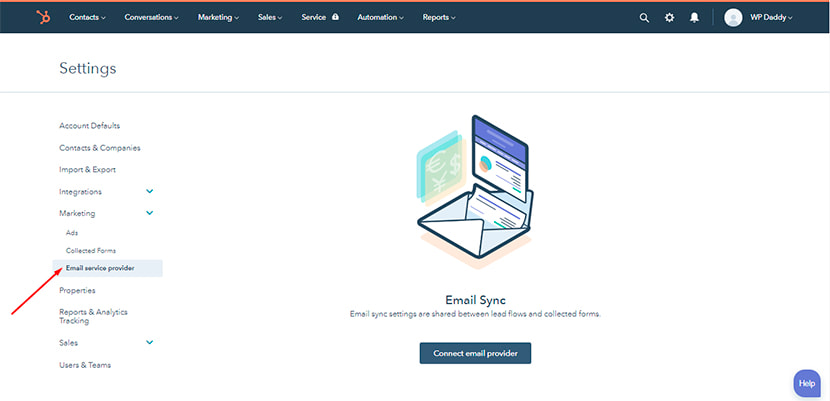
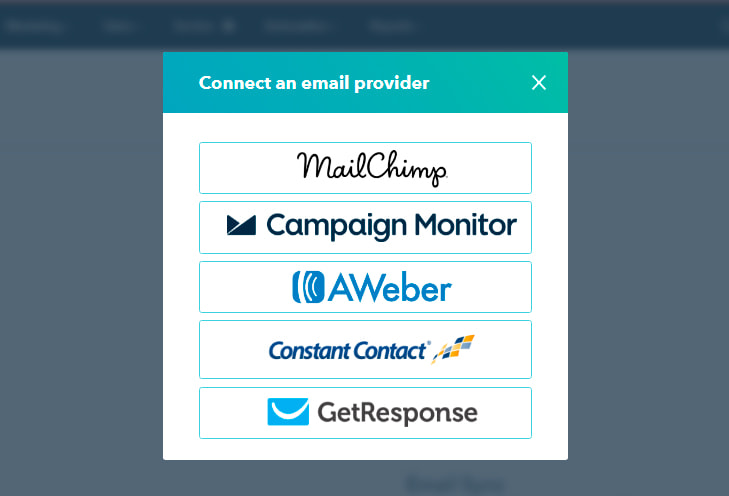
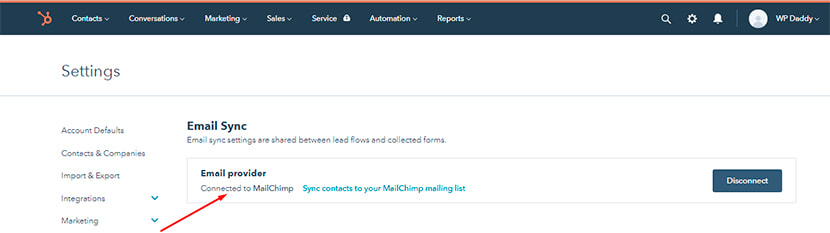
and connect email marketing service like MailChimp or else.
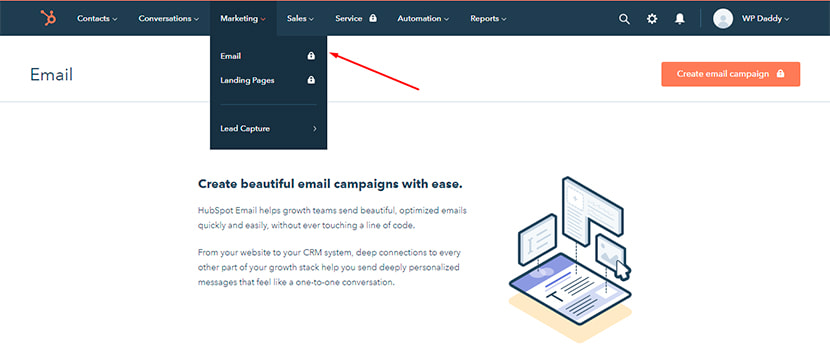
After that you can go to your dashboard to start fulfilling your aims.
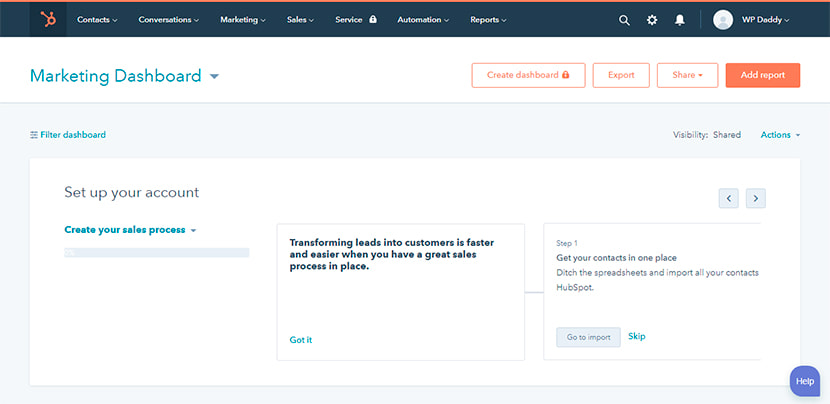
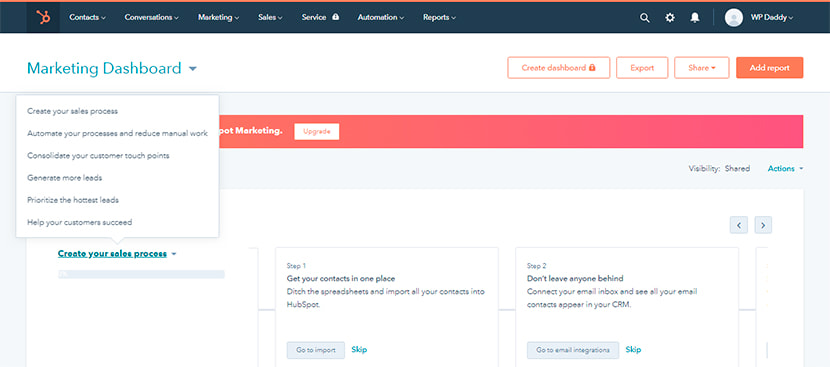
If you click the Create your sales process option, you will find the possibilities to generate more leads, help your customers succeed, prioritize the hottest leads, and more.
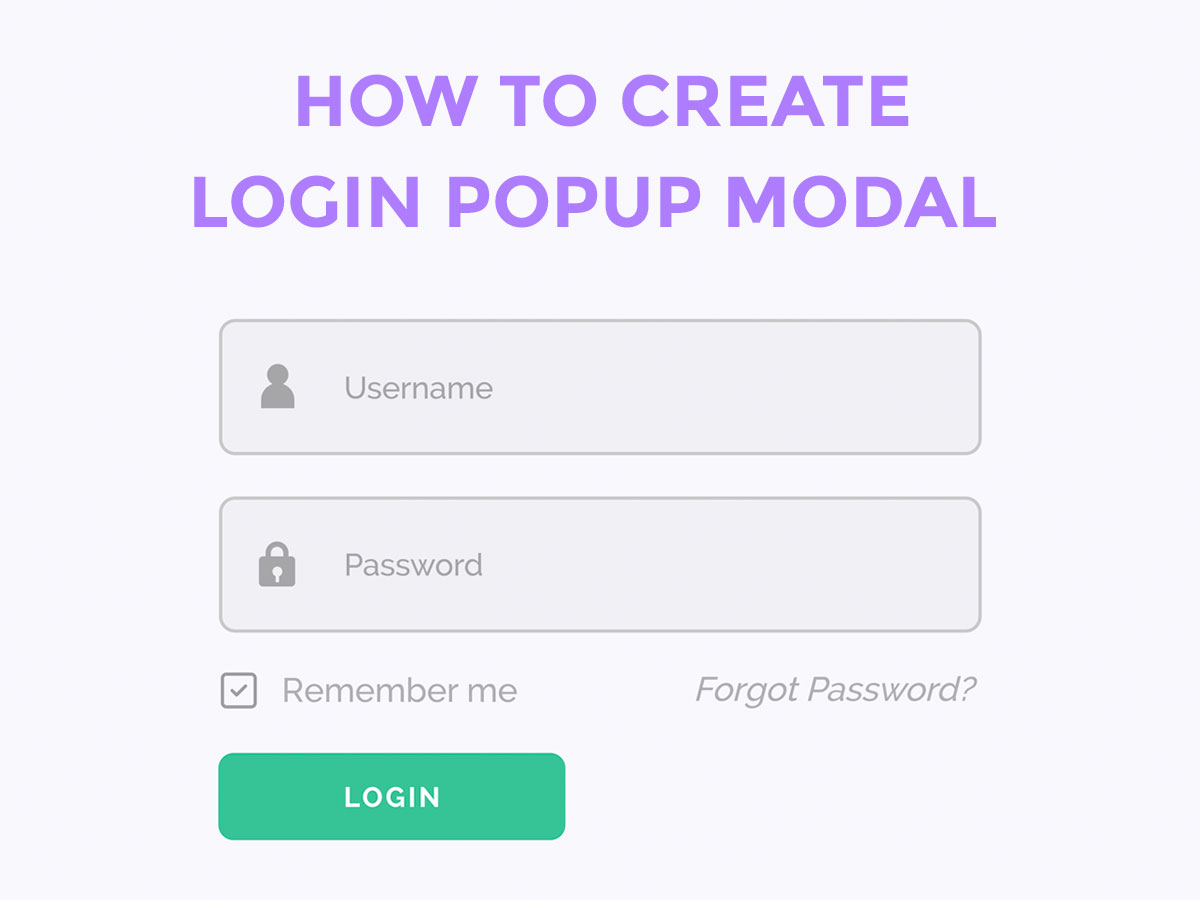
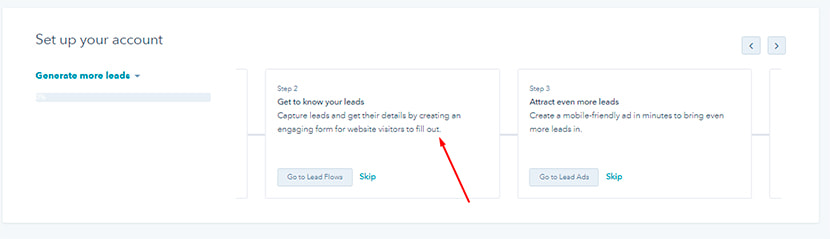
If you select generate More Leads option, you can select the Get to Know Your leads -> Get to Leads Flow -> Create Lead Flow next and start creating a subscription form for your users.

In this menu you’ll be able to choose a flow type from a few available variants like pop-up box, drop-down banner, and more.
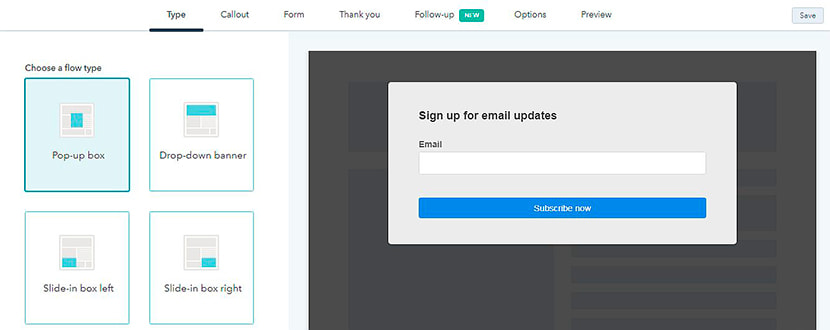
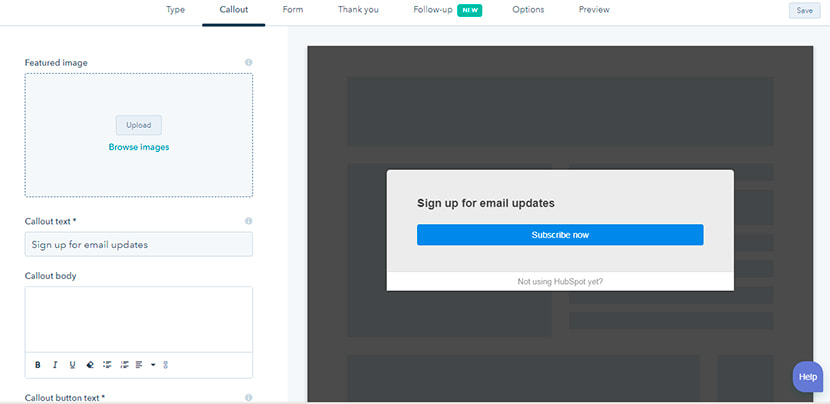
Save your changes and click the Next button to manage your callout section. Here you can add the callout text, upload a featured image, insert the callout button text and callout body.
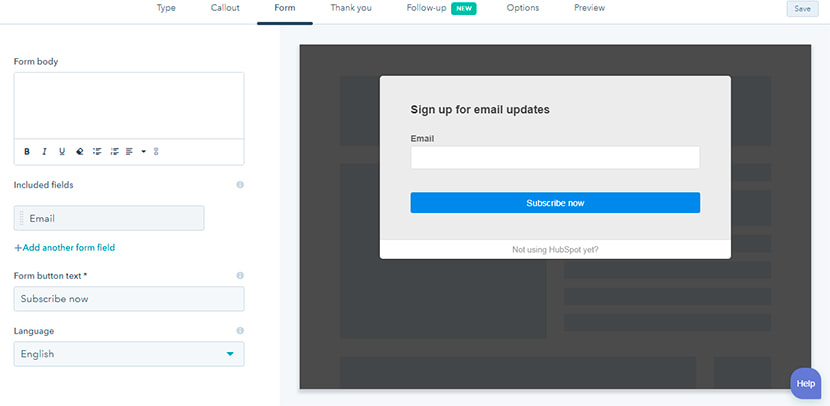
By clicking Next you go to Form section to manage form body, included fields, form button text and its language.
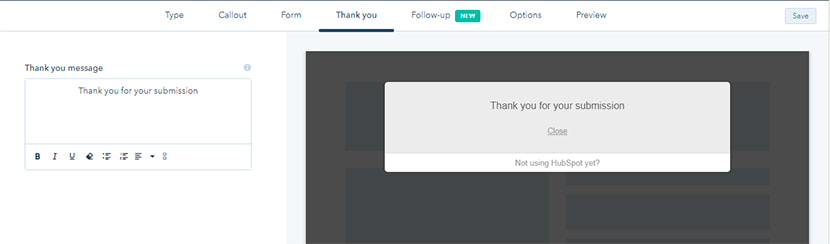
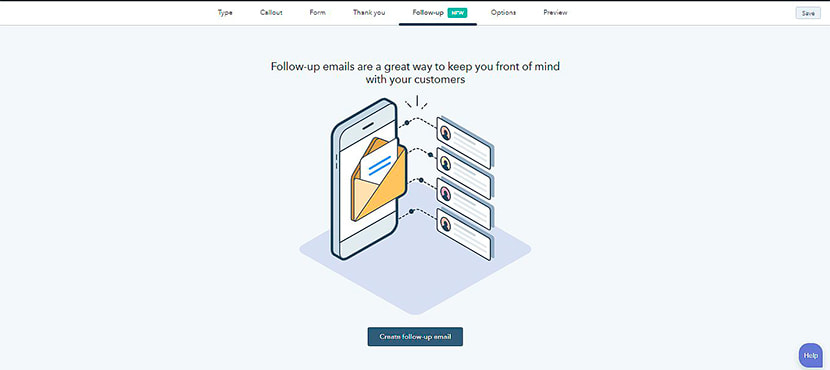
Go further to edit the Thank You Message, and then start creating the follow-up email that will be received by your subscriber after they finish the subscription procedure.
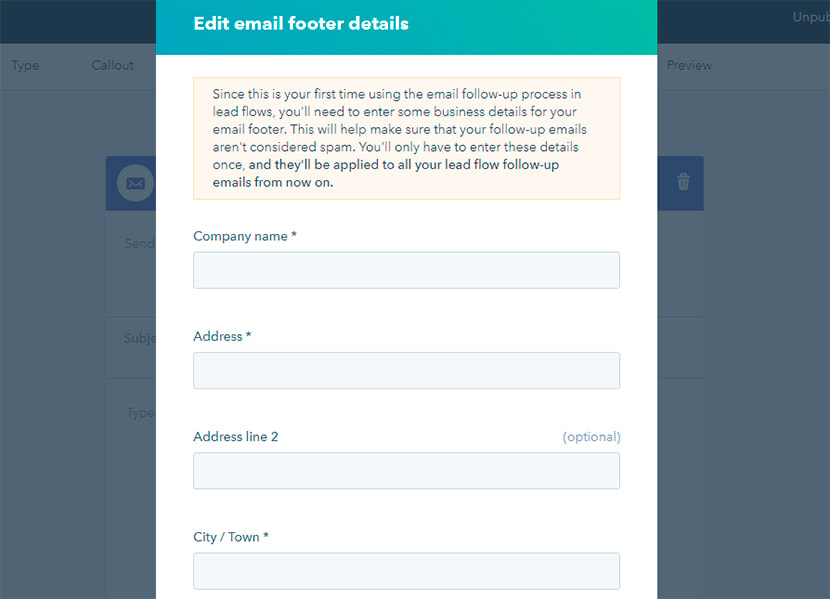
Click the Create Follow-Up Email button and edit email footer details.
These details will be displayed in the letter which will be sent to your subscriber’s email box.
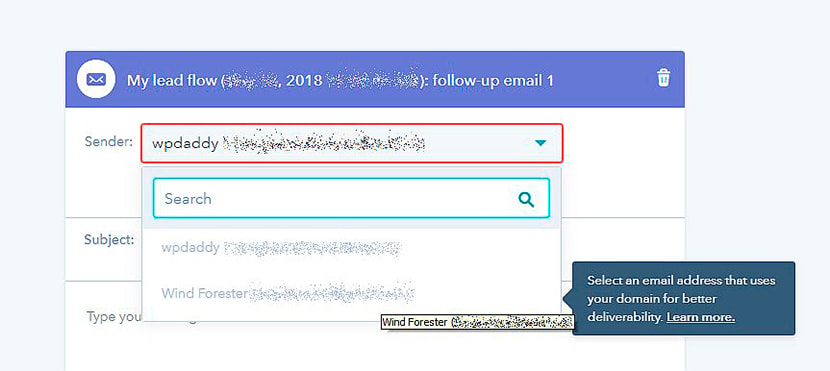
Then you will see the fields like Sender, subject and text. This will be your follow up email, so edit it up to your needs. You will probably be asked to add sender details in the Settings -> Users section of your HubSpot dashboard.
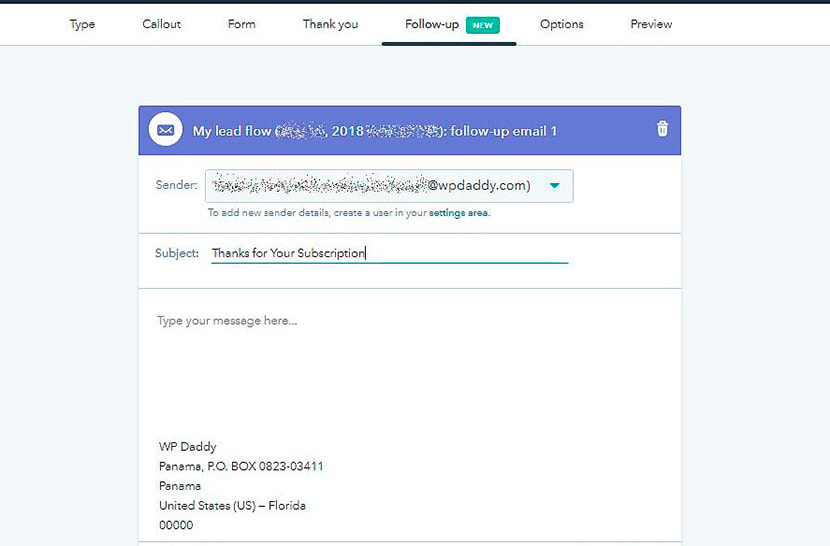
Select a verified user, insert your subject, write a body of your email and send it to your subscriber.
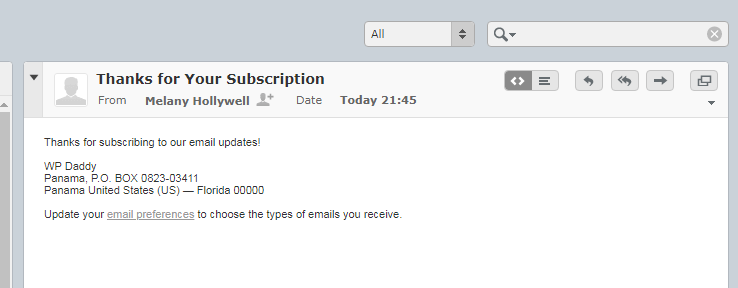
So the subscriber will receive the confirmation of their subscription by email.
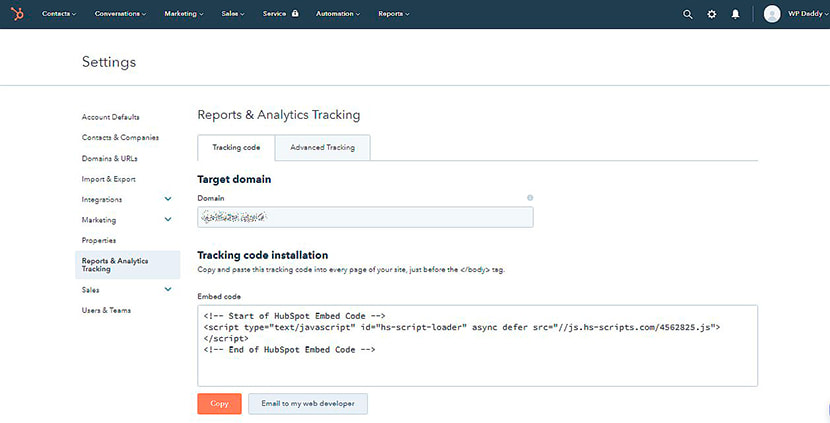
After your subscription form (for instance a popup) is created, enable it by installing the tracking code.
![]()
Click the Get Tracking Code button and copy it from the Tracking Code Installation section.
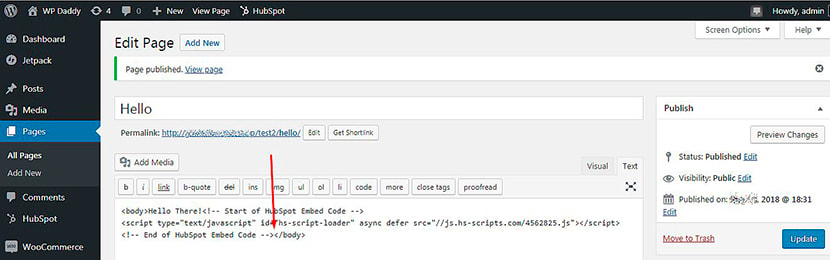
![]()
Then go to your WordPress website’s dashboard, and insert it into every page just right after the < / body > tag. Test it on any new page just by adding this page through Pages -> Add New menu in your admin panel.
After that the subscription form will be available live. Every time a visitor shares their email by subscribing to your updates, you’ll be able to know who they are, where they work, and what pages they visited – all in real time.

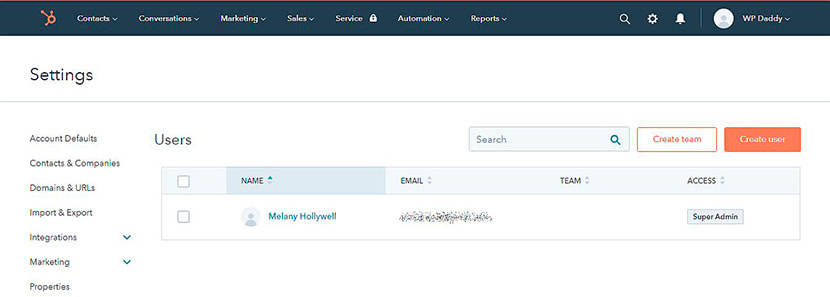
You can also invite more users to join HubSpot.
There is a Super Admin user – which is you.
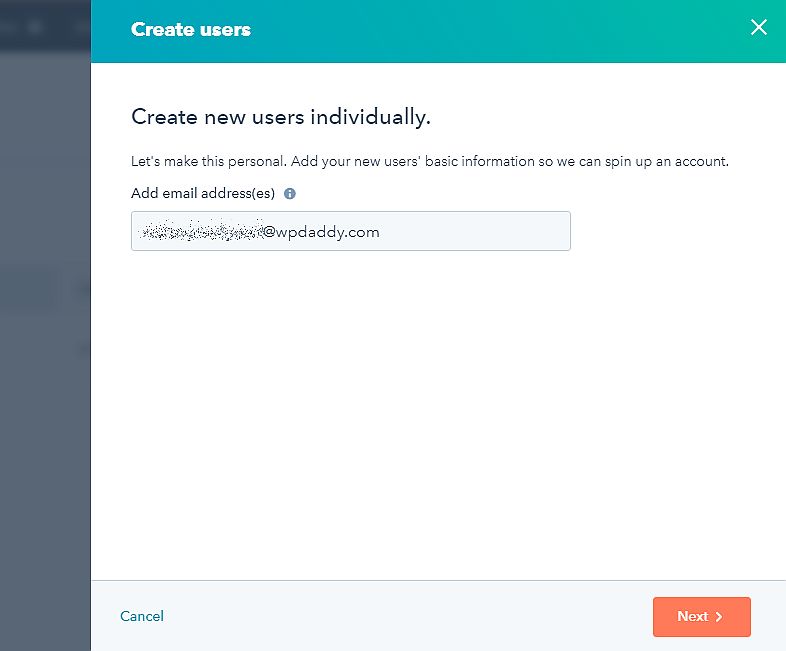
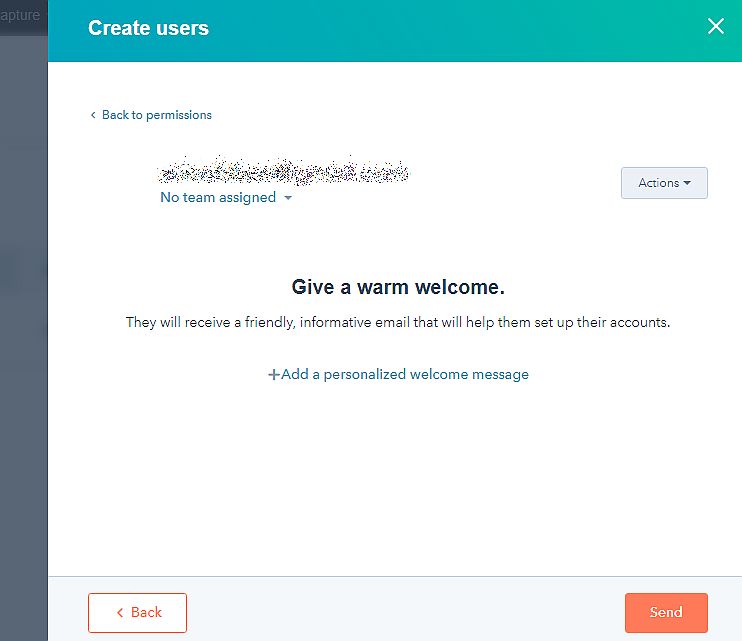
To create a new user click the Create User button -> Add Email Address,
manage the contacts access options (here you can make this user a super admin, selecting this option in the Actions drop-down menu),

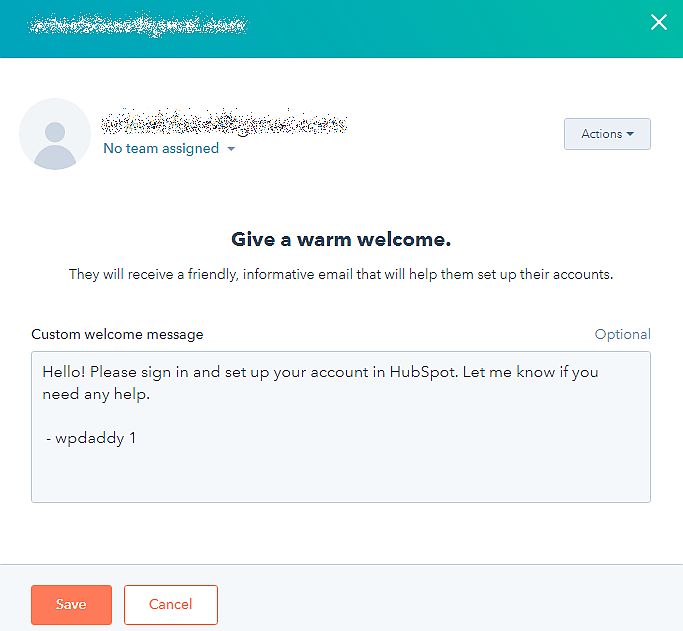
and then go next to give a warm welcome (here you can add a personalized welcome message) and then click the send button to invite a user.
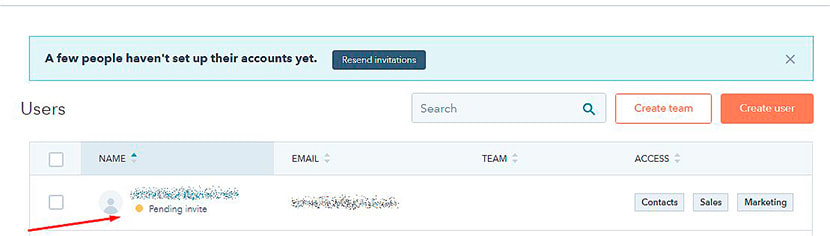
After that, a user will appear in the list in the pending invite status.
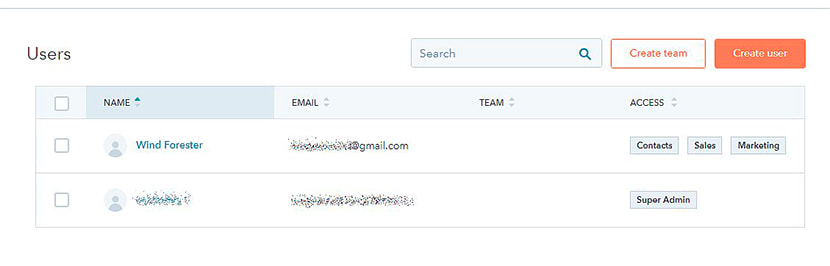
After this user receives an invitation email, joins the HubSpot, signs in and sets up their account, they will be visible in the users list.
If a verified user’s email address uses your domain, you can select it as a sender when creating your follow-up email.
Now it’s your turn to try get subscribers and find out who they are. This will help you create a targeted content, get more leads and make your website more popular than ever.