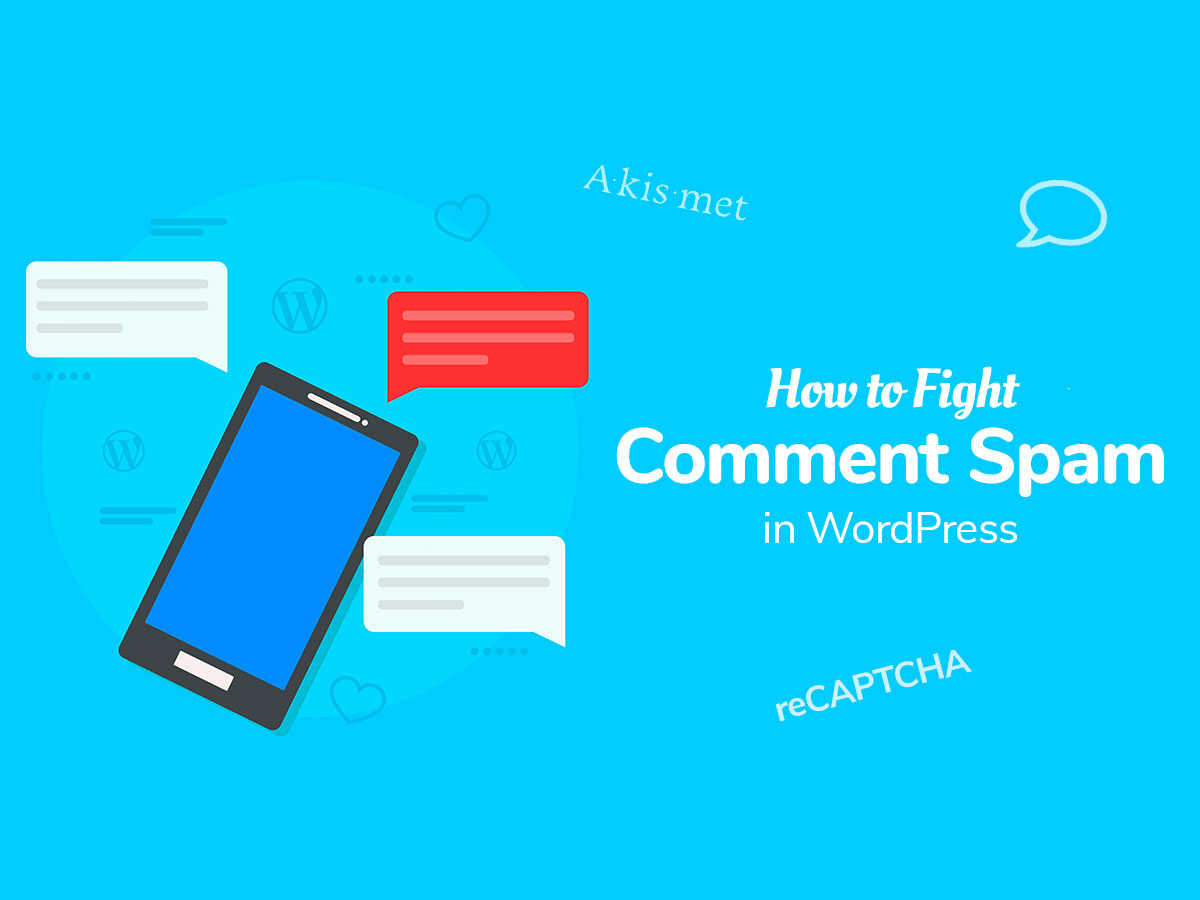
Do you notice a lot of spam in your WordPress blog comments? You enter your dashboard every day and each time you see a number of new comments displayed in the Comments section of your admin panel but most of them are spam? Well, let’s see how to fight the comment spam in WordPress and get rid of it forever.
Let’s Go to the Discussion Settings
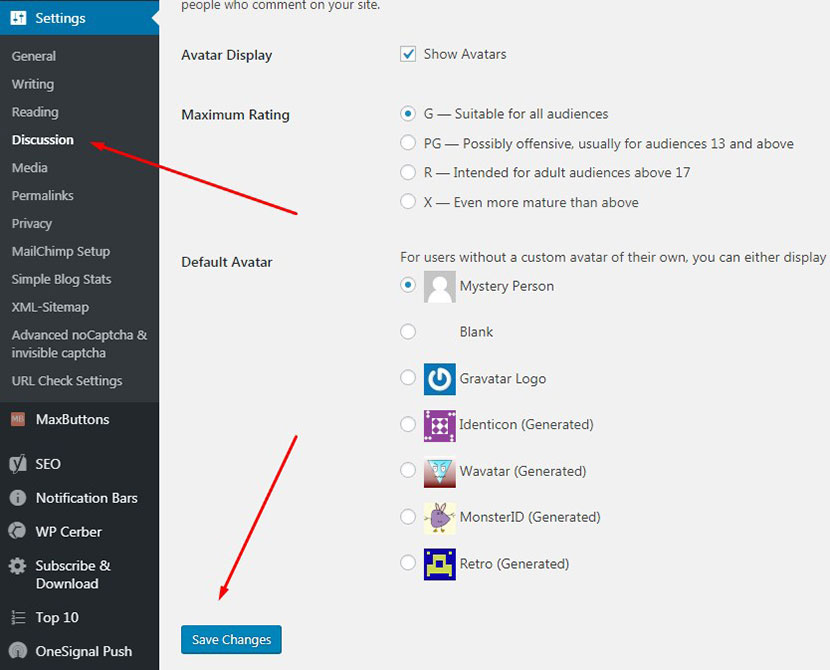
First, let’s review some of the methods to fight comment spam by managing some comments settings in your WP dashboard. Go to the Settings -> Discussion in your admin panel and:
– Turn on comment moderation;
Scroll to the “Before a comment appears” section and check the “Comment must be manually approved” option. Now every comment added by your reader will appear in the dashboard and won’t be published until you approve it. You can disapprove or move the comments to trash if you don’t want them to be published.

Here you can add some keywords that will make a comment go to the blacklist if they are contained in its content. You can also blacklist the names, emails or IP addresses of some commenters.

– Disable trackbacks and pings;
In one of my posts, I was speaking on the disabling trackbacks and pings in WordPress and why it is important. So just disable the trackbacks in the Discussion section by unchecking the ‘Allow link notifications from other blogs (pingbacks and trackbacks) on new articles’ option in the “Default Article Settings” section. Save your changes and you are done.

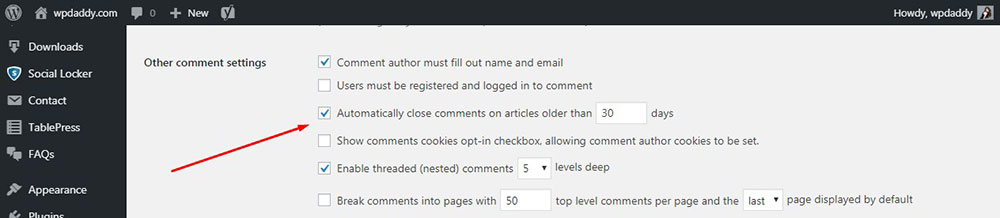
– Turn off comments on old posts;
Most spammers leave comments for the old posts hoping that they are not moderated and will stay unnoticed by the website owner. You can turn off comments for the old posts in the Discussion section of WordPress dashboard Settings.
Just check the ‘Automatically close comments on articles older than …” and set the required number of days in the ‘Other comment settings” section. By default there are 30 days, so you can either leave this number or set your custom one. Don’t forget to save your changes. Now your comments for the older posts will be closed.
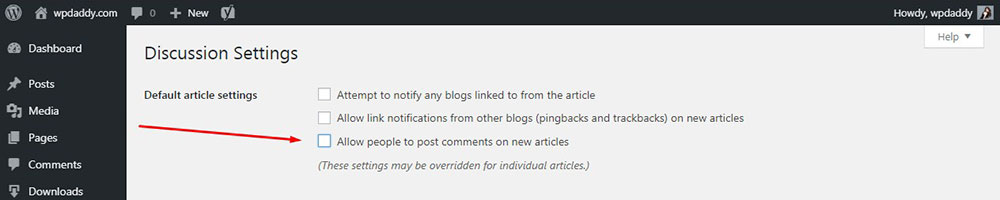
You can also close comments permanently for all of your posts. In this case, you should uncheck the ‘Allow people to post comments on new articles‘ option in the ‘Default article settings’ section and click the ‘Save Changes’. This is it!
Now it’s time to use some additional solutions or take certain actions to protect your WP website from comment spam. Let’s see what they are.
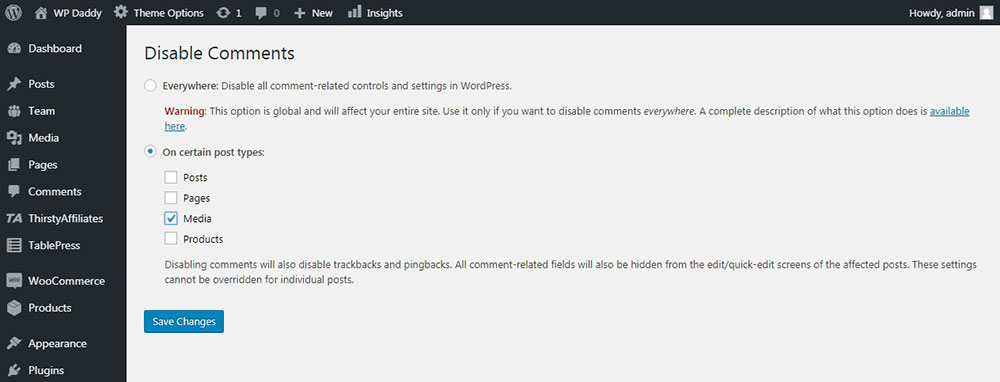
Disable Comments on Media Files
Sometimes bloggers link their images in posts to the attachment page (automatically created by WordPress) where people can view the image separately and leave a comment on that image. There is a plugin which allows disabling comments for media attachments and it is called Disable Comments.
Install and activate the plugin just as well as you install and activate any other plugin for WordPress. Go to Settings -> Disable Comments and check the Media option in the ’On certain post types’ section. Click the Save Changes button to keep your changes and that’s all.
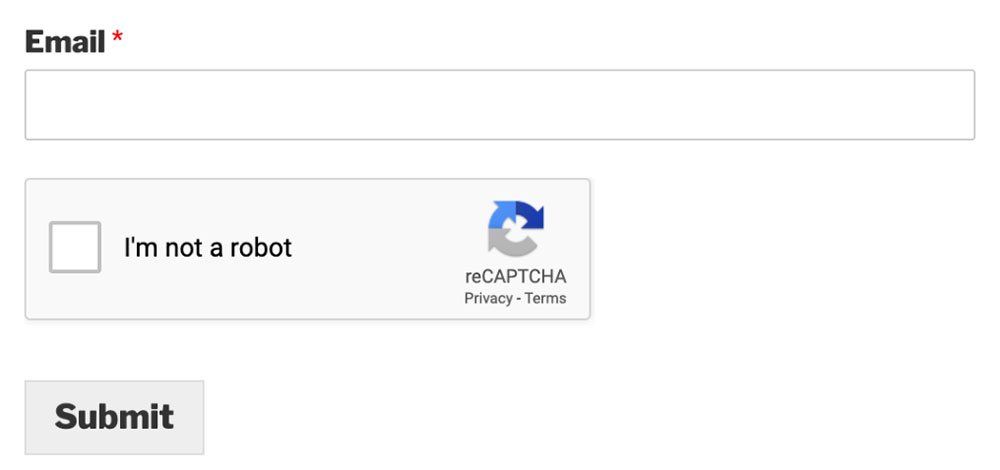
Use reCaptcha
There is a WordPress plugin which allows setting reCaptcha both for login form, registration form and comment form. reCaptcha allows avoiding the automatic commenting made by robots. It enables a user to take a simple action to prove he/she is a human and not a bot. Please see this post to learn how to make it very easily.
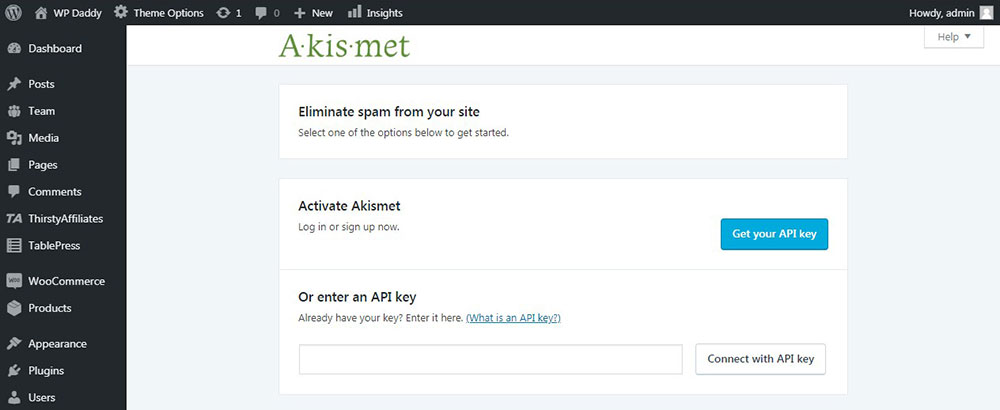
Use Akismet
Akismet is a default spam-control plugin for WordPress. It has its own anti-spam database which allows filtering the comments based on the most common types of spam detected by the plugin. Initially, the plugin is available for free, but to get its API keys, you should sign up for a premium plan.
Disable HTML in Comments
Many spam comments that spammers publish on a WordPress website include different kind of HTML embedded within them. Sometimes spam comments include different types of irrelevant advertisement and promotional material, so they contain links in the form of HTML. To avoid such comments on your website, it would be better to disable HTML and make it impossible to embed links.

There are 2 ways to disable HTML in comments on your WordPress website, you can install and activate Peter’s Literal Comments plugin which is available in the official WP repository. It works out-of-the-box and allows to display your comments just with the plain text without any HTML.
If you want to disable HTML in comments manually, open your functions.php file and insert the following code:
// This will occur when the comment is posted
function plc_comment_post( $incoming_comment ) {

// convert everything in a comment to display literally
$incoming_comment['comment_content'] = htmlspecialchars($incoming_comment['comment_content']);

// the one exception is single quotes, which cannot be #039; because WordPress marks it as spam
$incoming_comment['comment_content'] = str_replace( "'", ''', $incoming_comment['comment_content'] );

return( $incoming_comment );
}

// This will occur before a comment is displayed
function plc_comment_display( $comment_to_display ) {

// Put the single quotes back in
$comment_to_display = str_replace( ''', "'", $comment_to_display );

return $comment_to_display;
}
Save your changes and you are done.
Set the Minimum Comment Length
Some spam comments include just a couple of words and are sent by spammers on a massive scale. Others are too long and include incoherent texts without any certain meaning. To prevent the ability to send too short and meaningless comments, it would be great to set minimum comment length in WordPress.
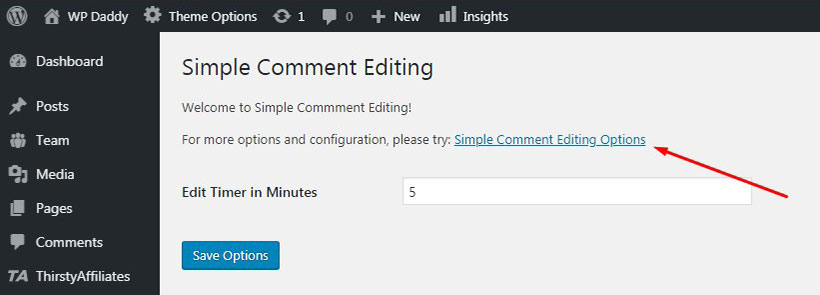
For my purpose, I use Simple Comment Editing plugin which requires additional steps in the installation. First, you install and activate it as always, and then you go to Settings -> Simple Comment Editing option in your dashboard and click the ‘Simple Comment Editing Options’ link to go to the official website of the plugin.
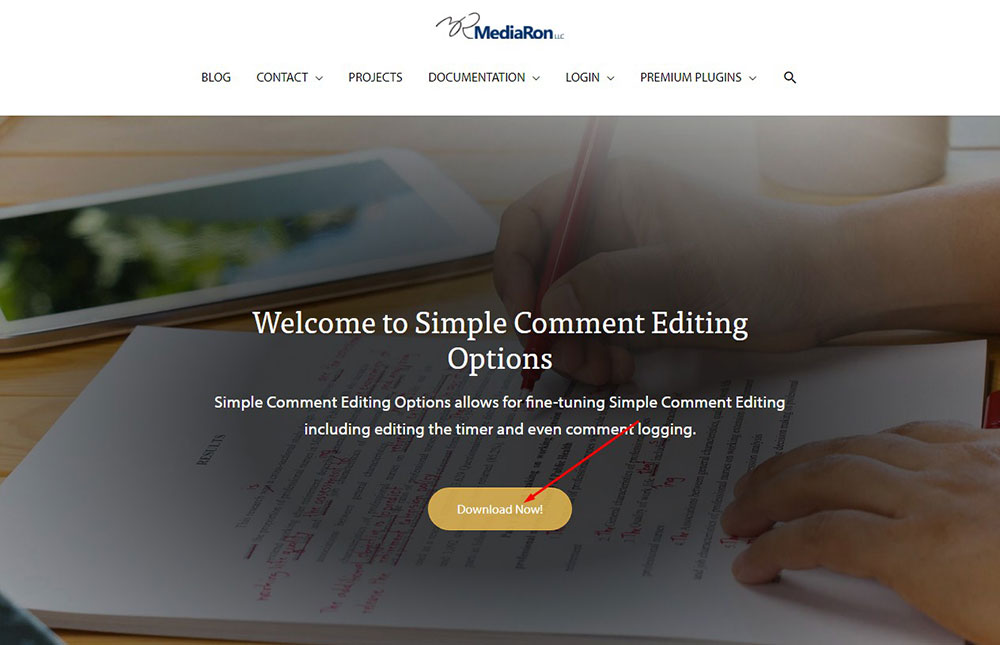
Now you get to the homepage of the plugin and click the ‘Download Now’ button.
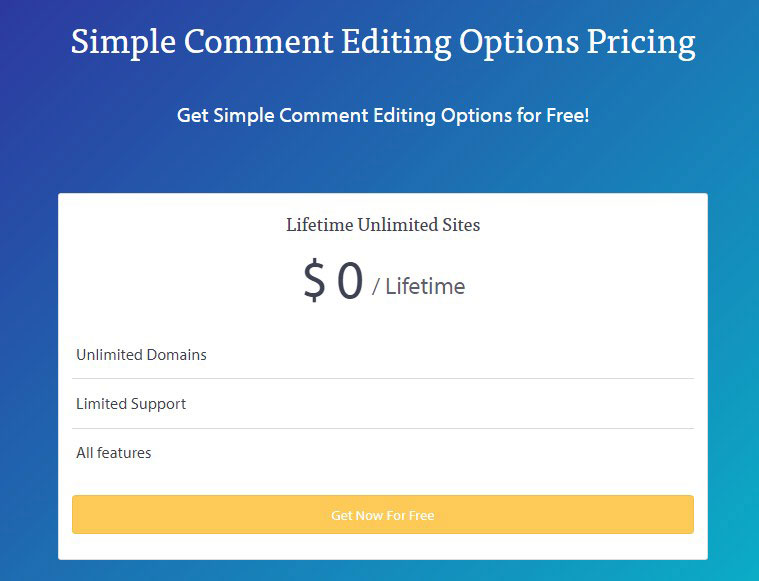
After that, you get to the Pricing page and click the ‘Get Now For Free’ button.
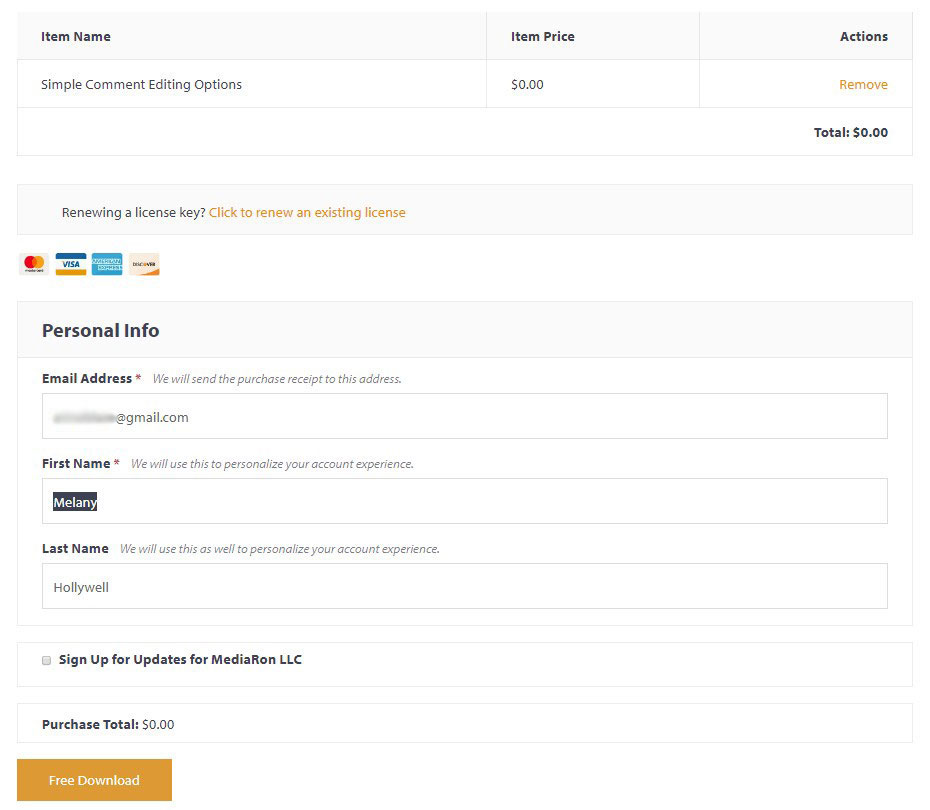
Next, you should insert the personal information including your first and second name and email and then click the ‘Free Download’ button.
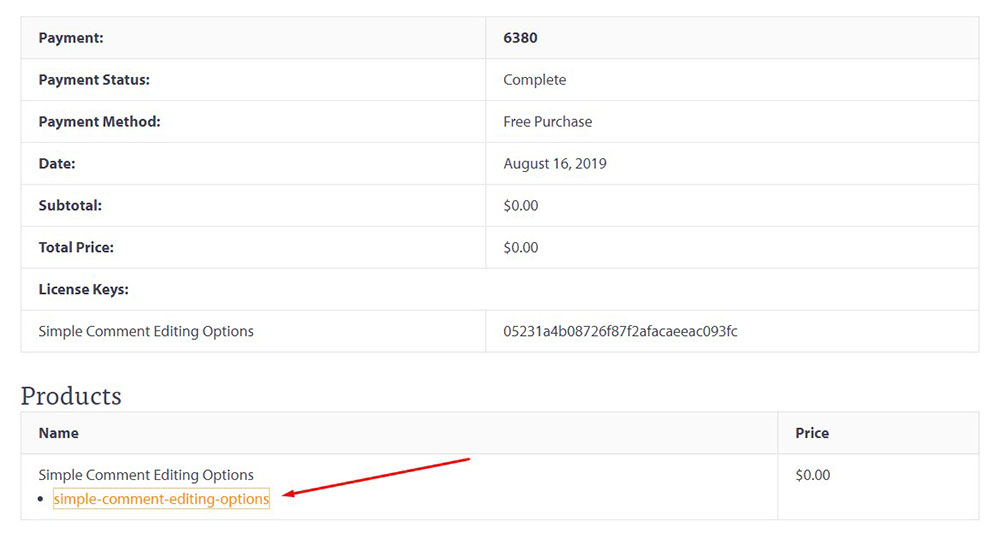
And then you should just click the download link in the Products section of the next table and get the zip file containing the plugin.
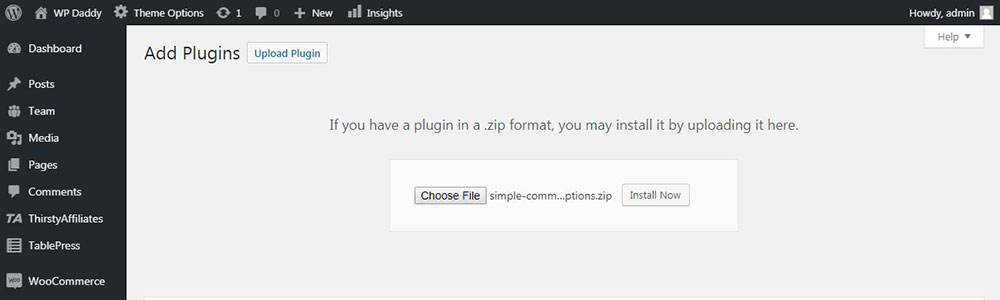
After that, go to your WP dashboard again, click Plugins -> Add New -> Upload Plugin and click the ‘Choose File’ button to select the recently downloaded zip file containing the plugin on your PC. Once the file is uploaded, click the ‘Install Now’ button to install and activate the plugin on your website.
Now go to Settings -> Simple Comment Editing and you will see a lot more options available. Scroll down to the ‘Comment Length’ section and set the number of characters you want your minimum comment length to be. If you check the ‘Ensure an edited comment has a minimum length in characters’ option, the plugin will automatically check if the comment length is observed. Don’t forget to save your changes.

If you use some other plugins for regulating the comment length, feel free to suggest them.
If you use some more methods of fighting spam in comments, you can also suggest them below. Hope this small tut was helpful.