When WordPress was first launched, it wasn’t possible to create galleries in its dashboard without any additional plugins. However, as we all know the next WordPress 5.0 update is going to include Gutenberg visual editor in its core, so creating galleries will become possible without installing and utilizing any additional solutions.
So far we are using WordPress 4.9.8 version and, as always, it makes it easy to create galleries with the help of different plugins that extend its functionality to provide users with comprehensive opportunities for building their photography and portfolio websites.
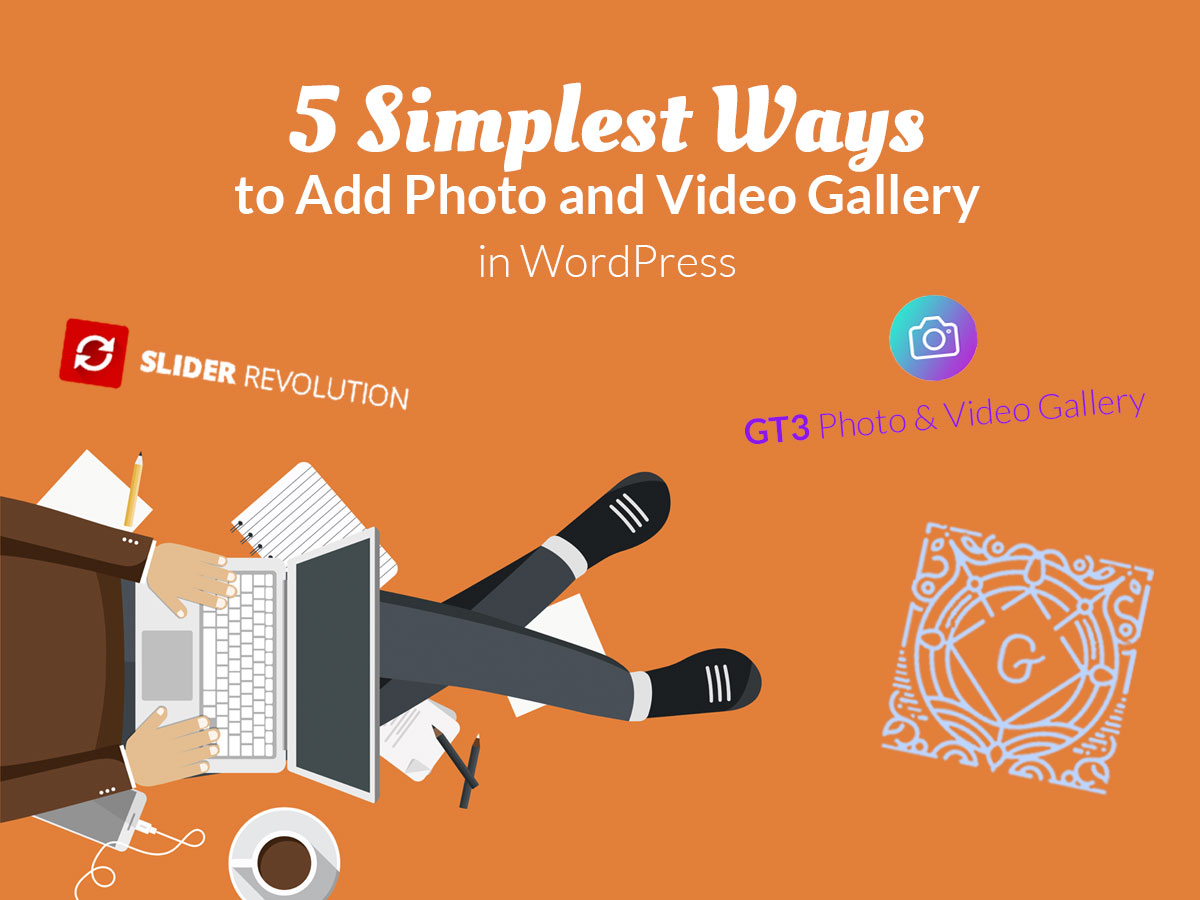
Today I will create photo and video galleries with the help of some popular solutions you’ve probably used a lot of times before or going to use very soon. So let’s see!
1. Add a Gallery in Gutenberg
A Gallery Common Block is available in Gutenberg editor, so if you go to Pages or Posts and choose an available post or page to edit it, or add a new one using the ‘Add New’ option, you’ll be able to edit your post or page with Gutenberg by adding new blocks in your content area.
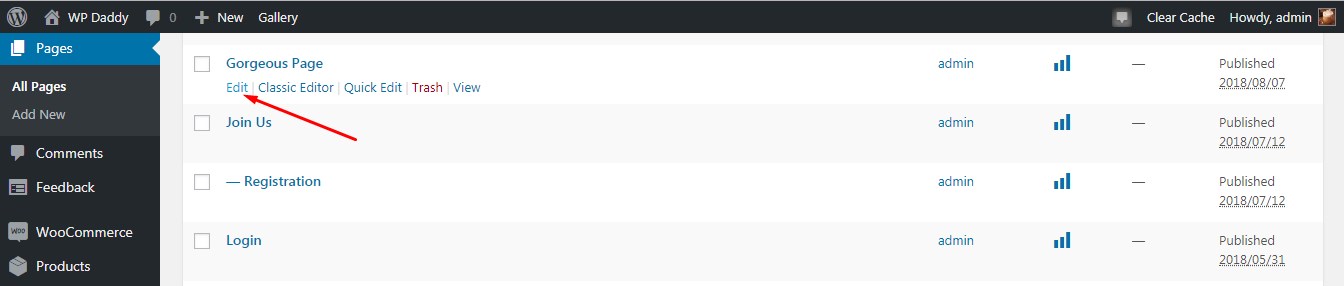
For instance, go to Pages -> all Pages, hover over any page in the list and then click the Edit link under a page to open Gutenberg editor.
Add a gallery block,
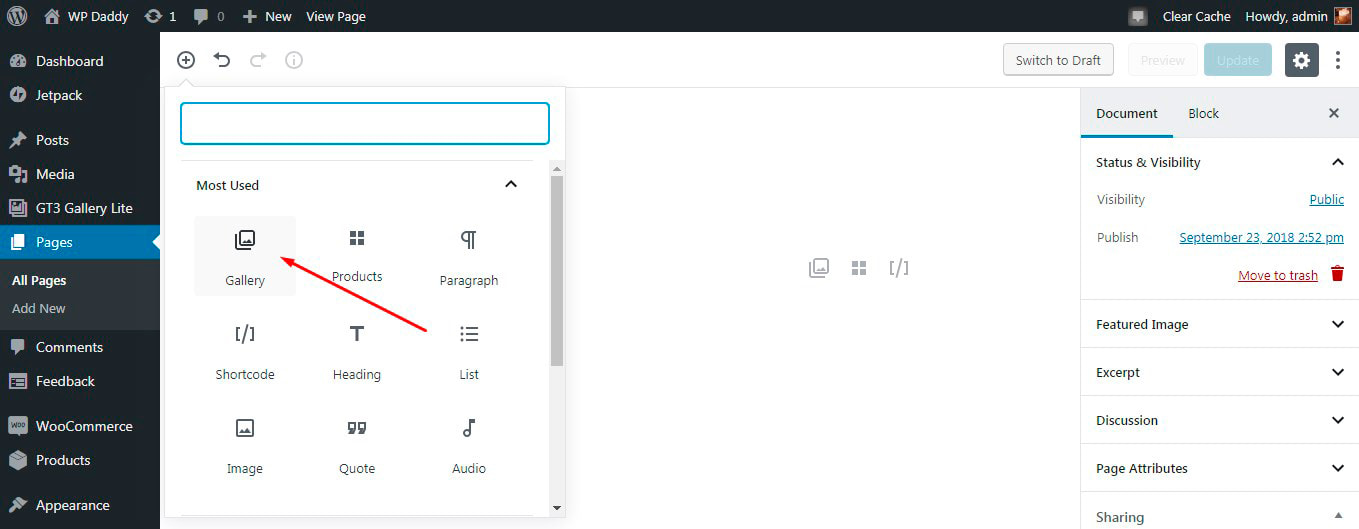
and you’ll see the Upload and Media Library options available to choose from.
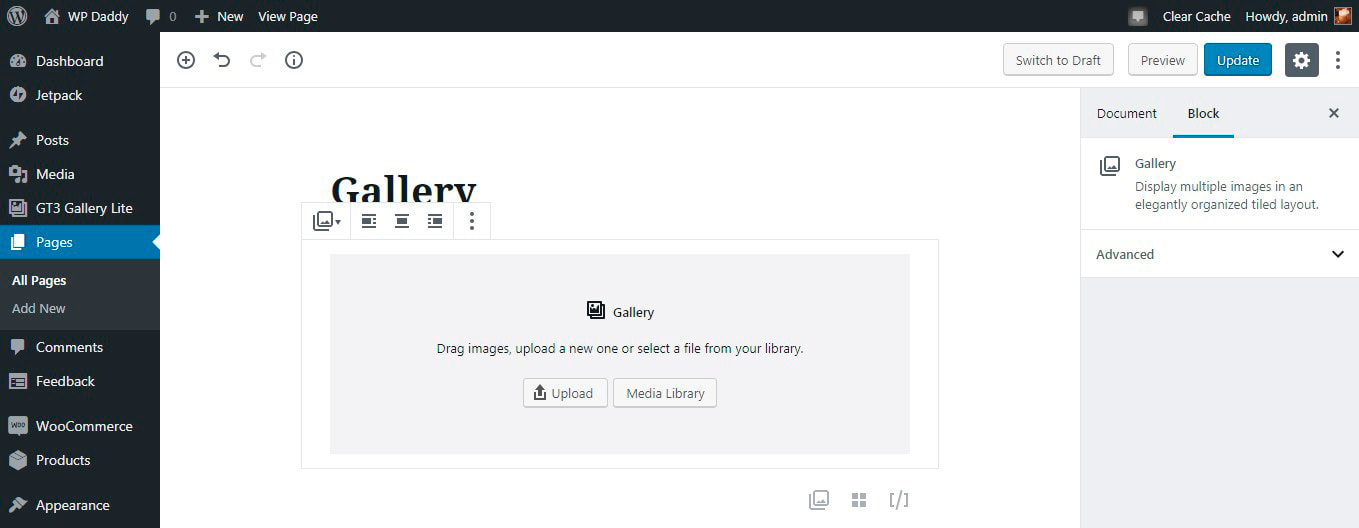
I select Media Library and upload a bunch of images from it ->

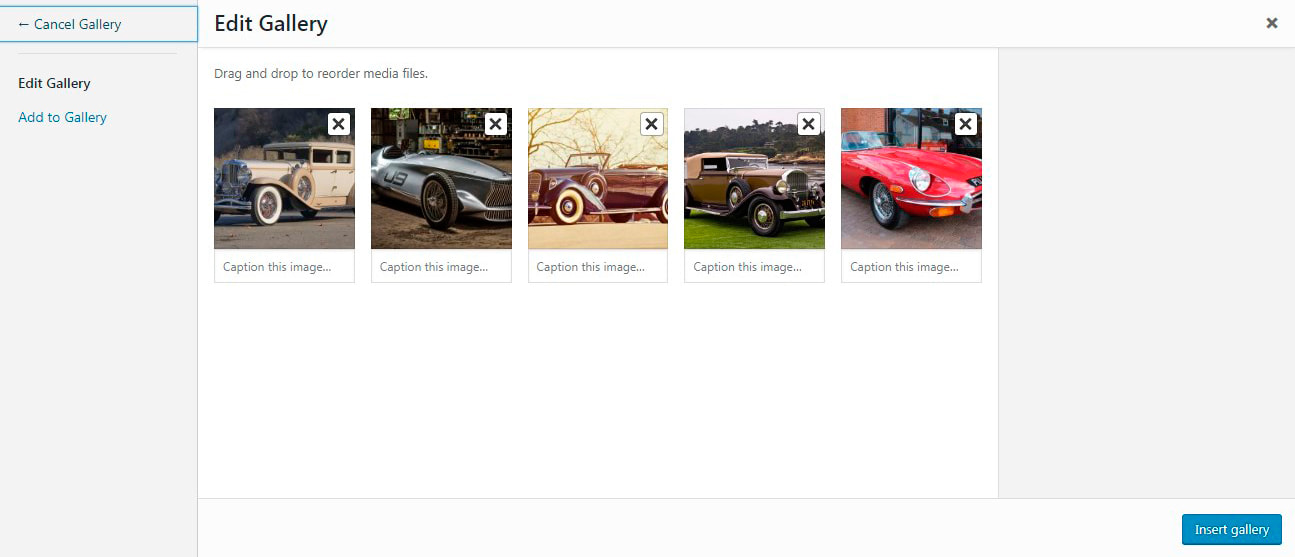
-> Click the ‘Create a new gallery’ button -> drag and drop the chosen images to reorder -> and then click the ‘Insert gallery’ button.
Now the gallery is inserted
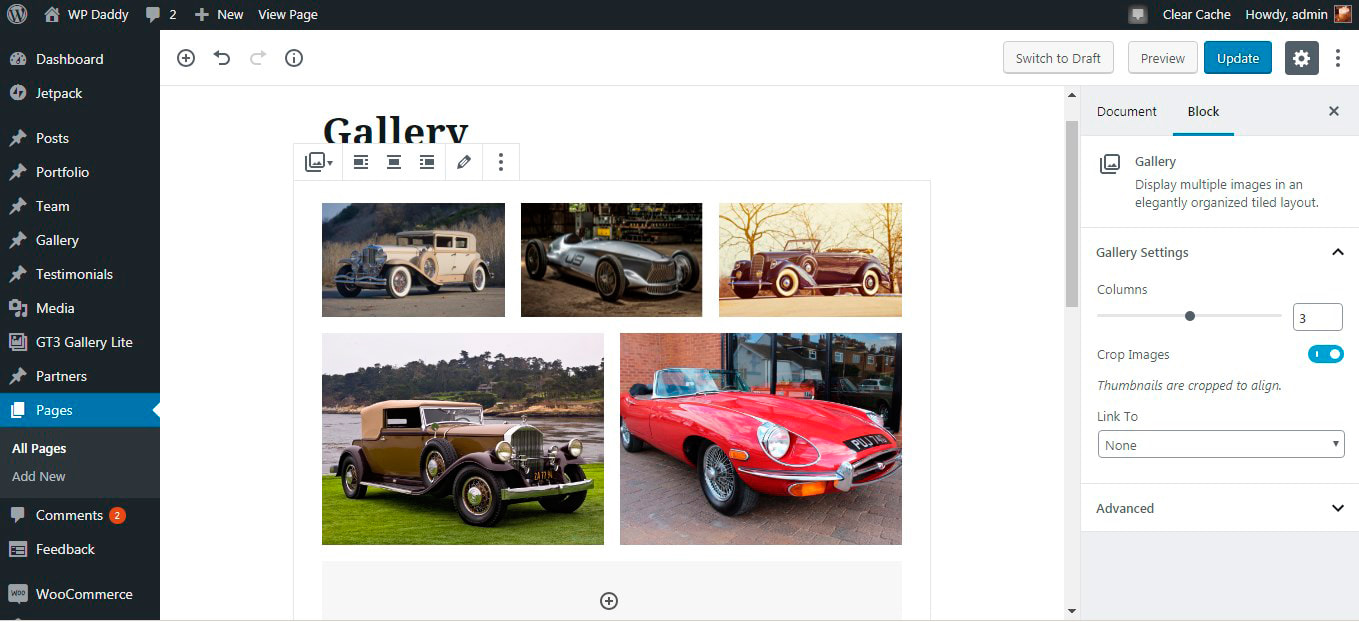
and you can observe it live.
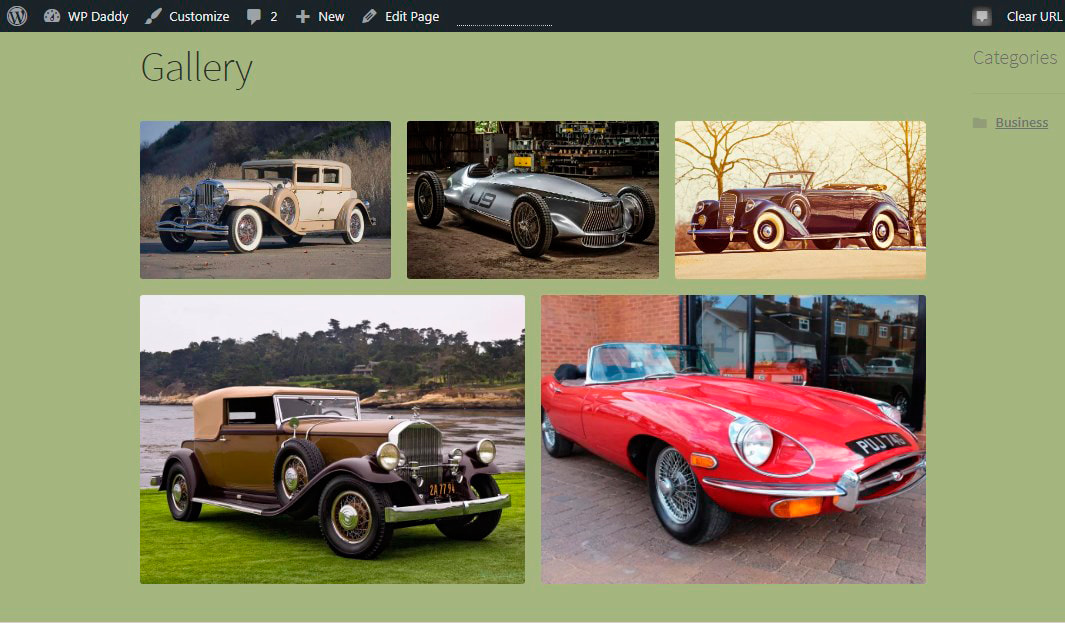
Try it yourself!
2. Add Photo and Video Gallery with GT3 Plugin
Here I will use a Photo and Video Gallery plugin developed by our friends – GT3 Themes. The plugin allows creating galleries in your posts and pages with a few clicks.
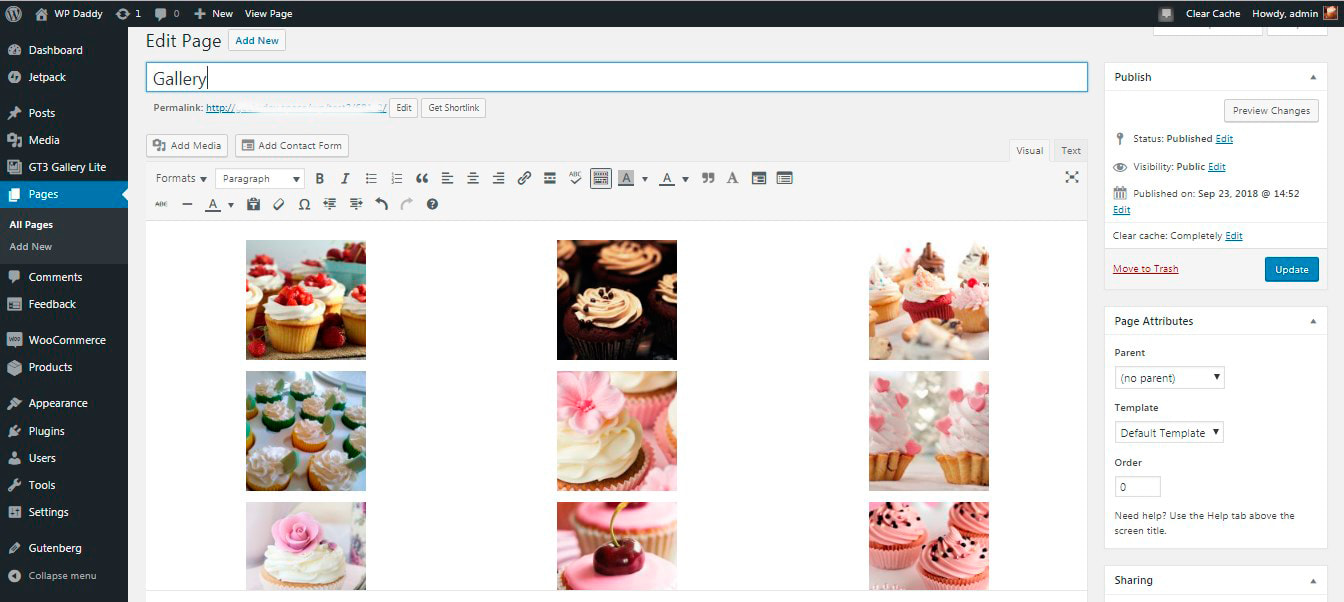
When using a classic WP editor for your post or page,

click the Add Media button
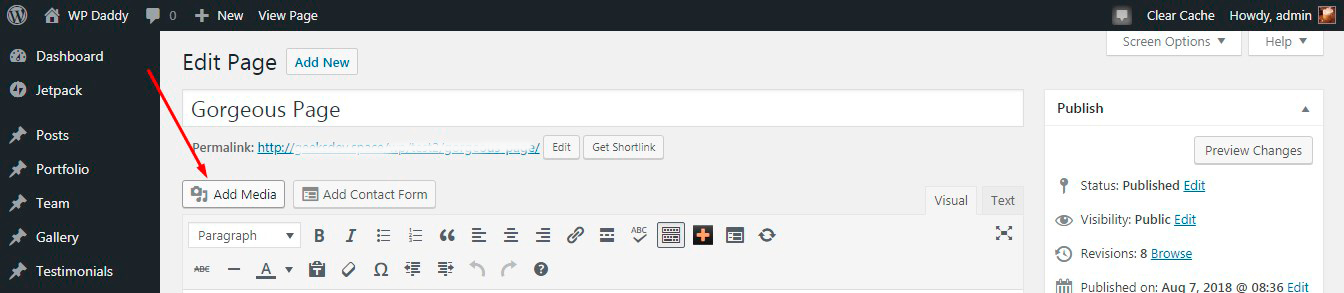
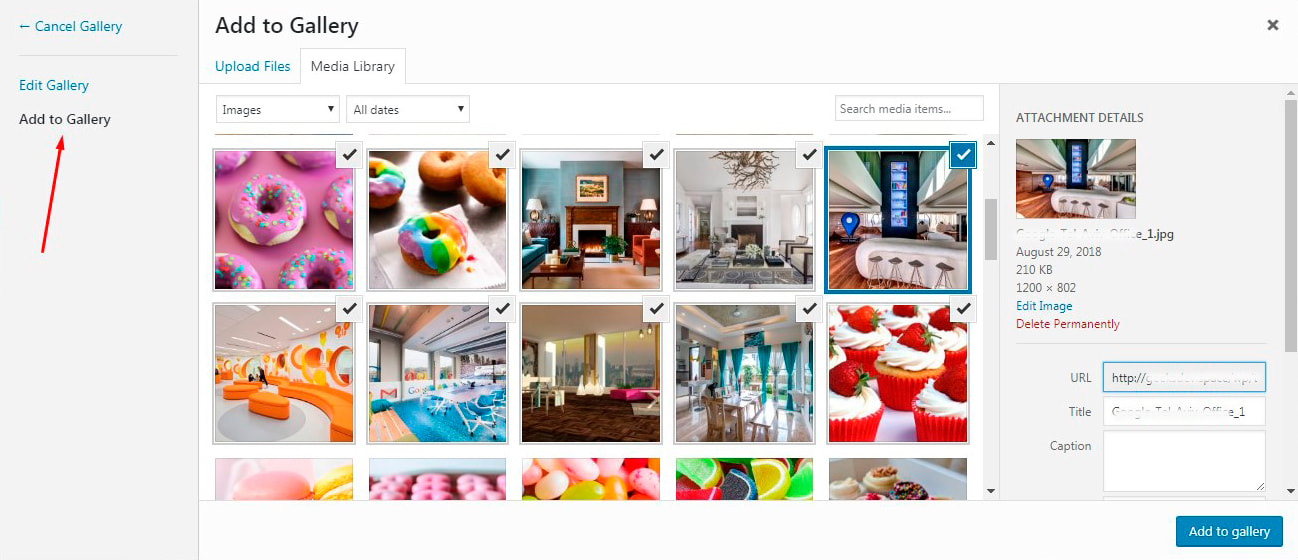
and you will see the ‘Create Gallery’ option. By clicking this option you’ll be able to select a bunch of images for your gallery and then click the ‘Create a new gallery’ button to proceed to Settings.
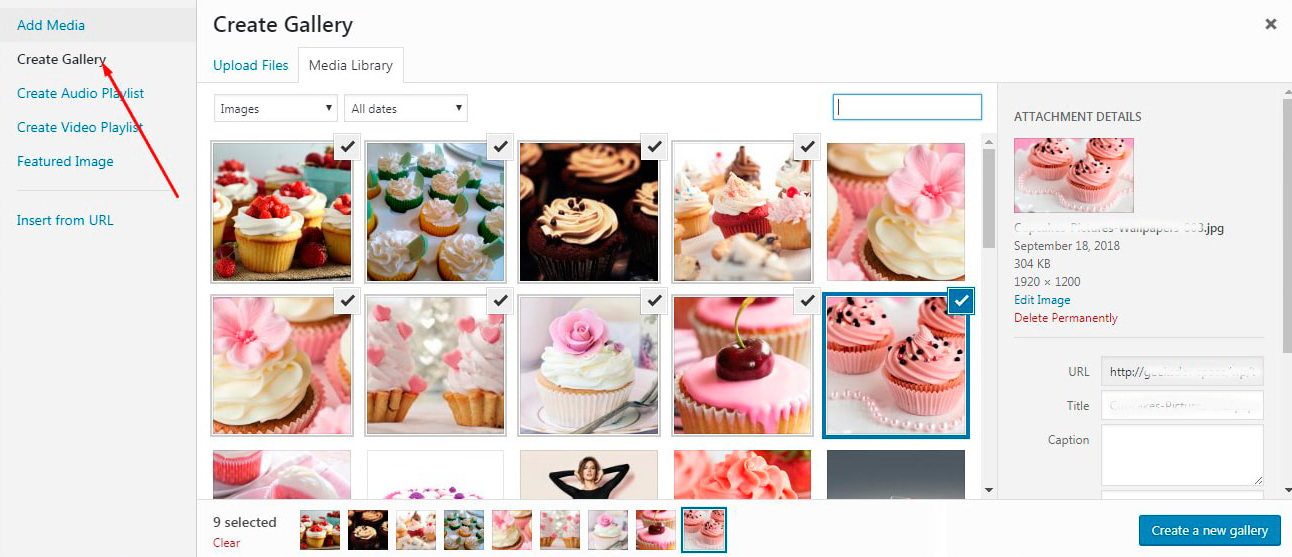
You can leave all settings by default or change image size, a number of columns, margin, etc.
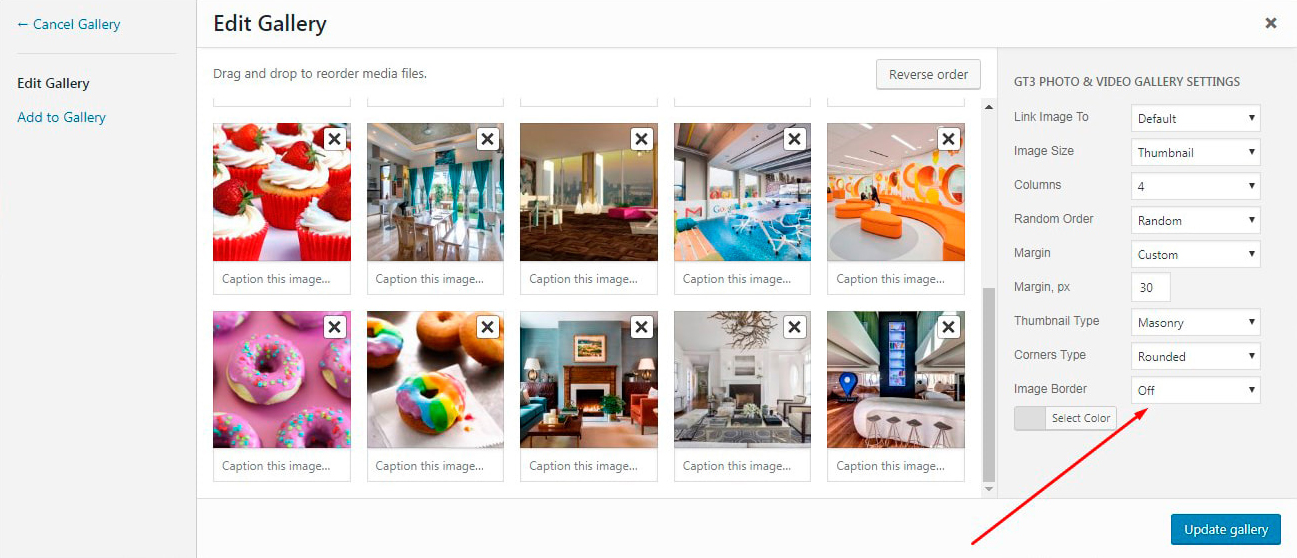
After that, click the ‘Insert gallery’ button (or ‘Update gallery’ button if you edit the gallery you’ve already created)

and now your gallery is ready.
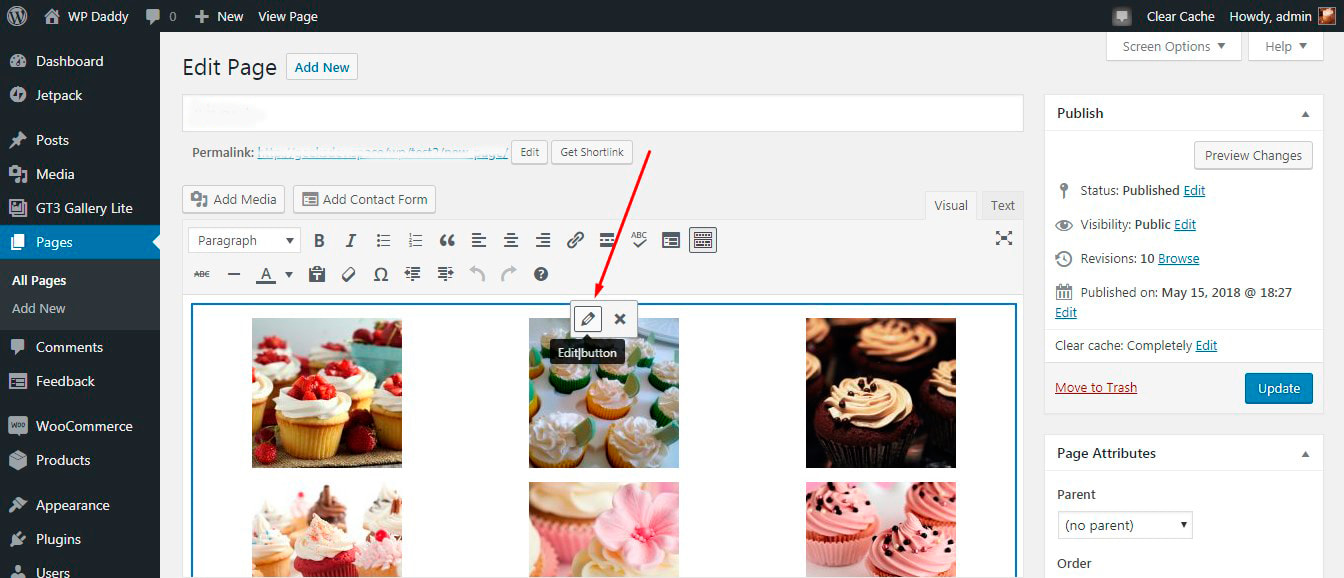
If you wish you can highlight the gallery to edit it.
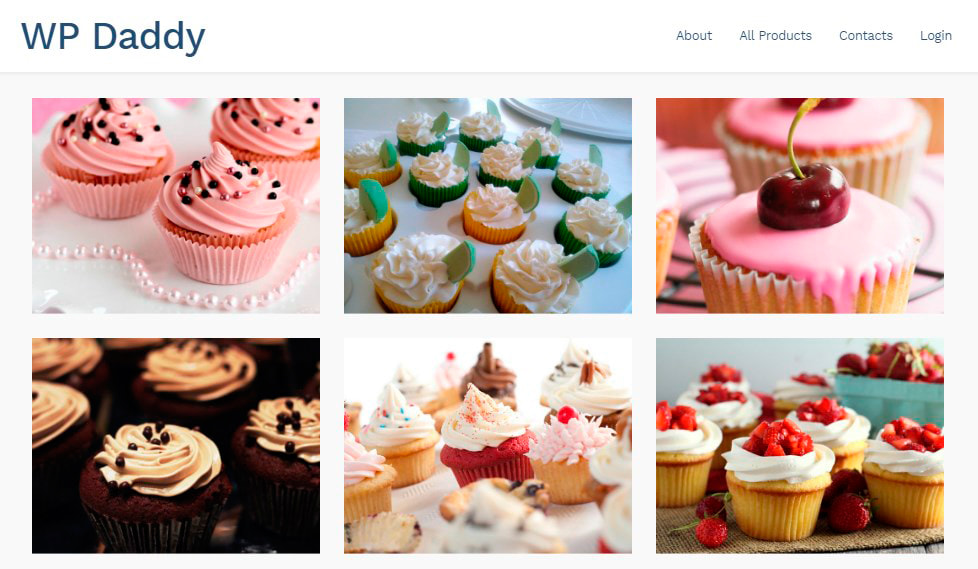
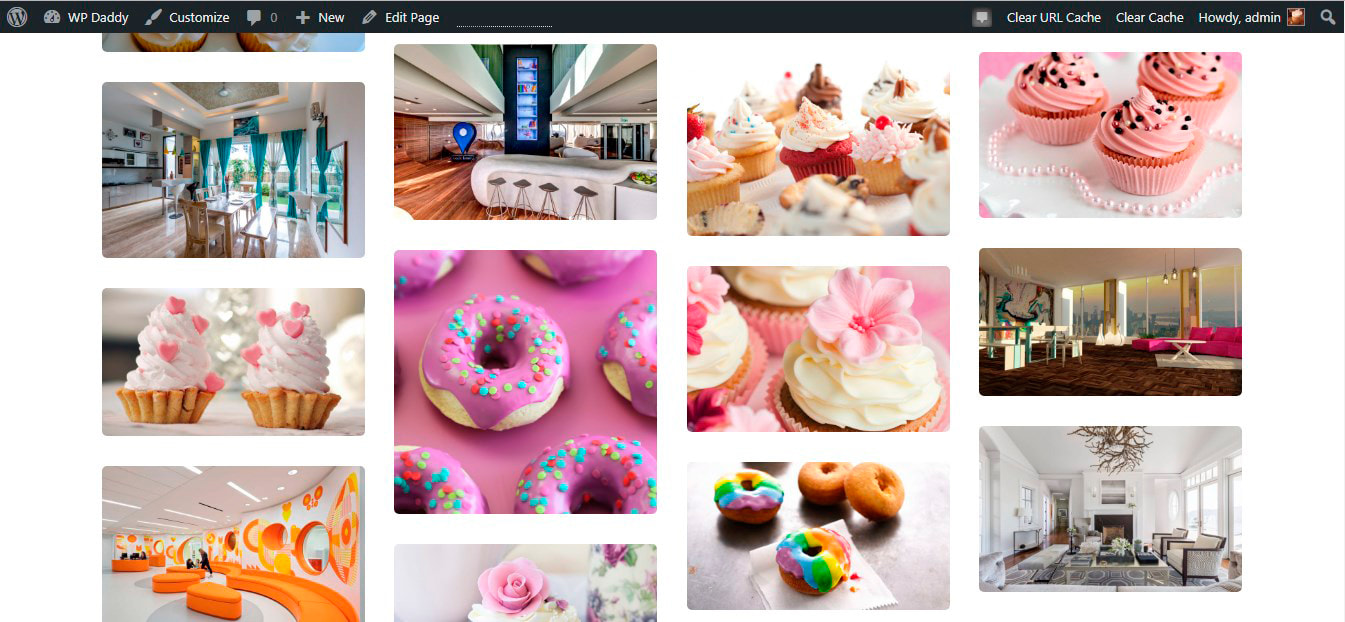
After all is done, observe your gallery live.
It is also possible to change the Thumbnail Type in gallery settings and try another gallery display type, for instance, Masonry.
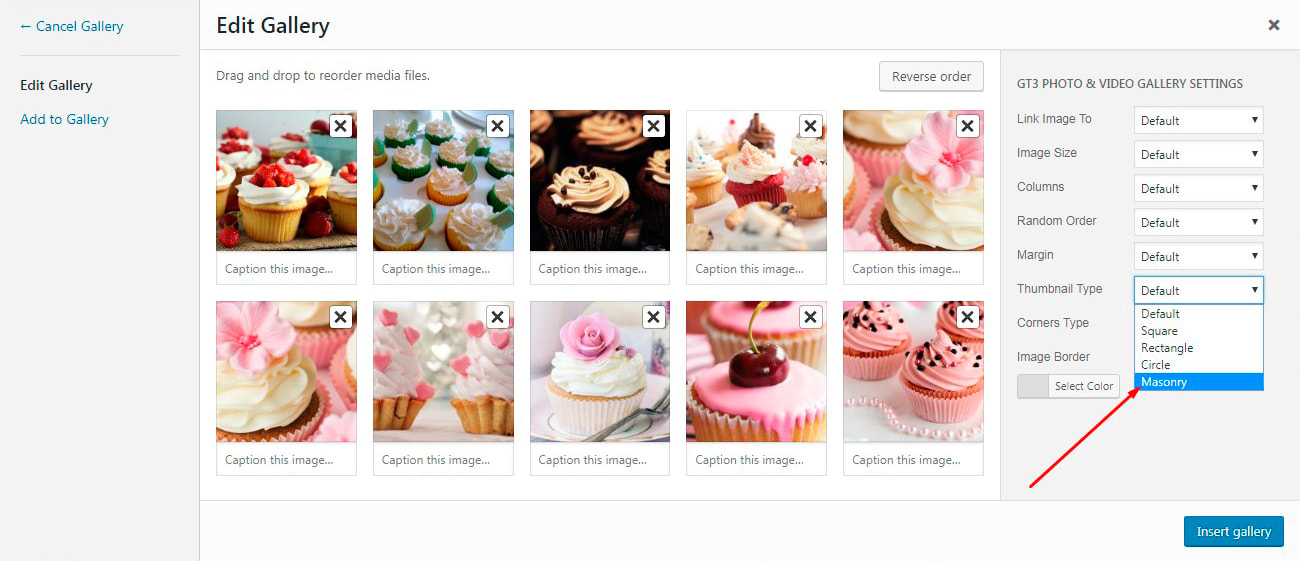
You can add more photos to your gallery when you change the thumbnail.
Just see how a Masonry one looks live.
GT3 Gallery plugin also allows for creating video and audio playlists. Click the ‘Add Media’ button in your classic post or page editor and then click, for instance, the ‘Create Video Playlist’ option.
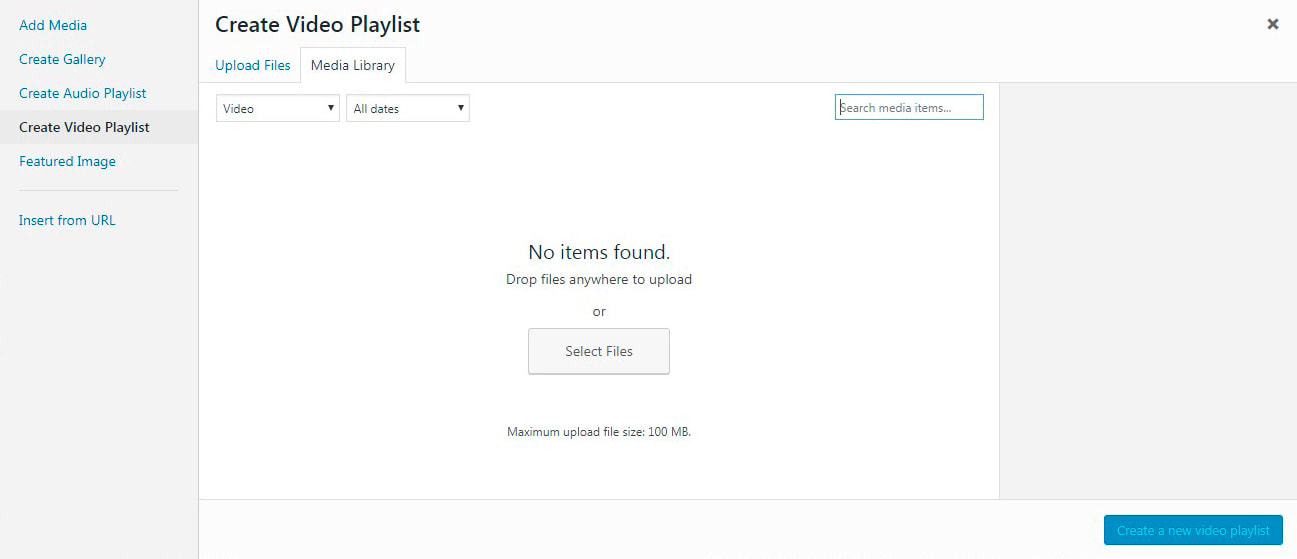
Now you can add videos from your media library or upload them from your PC and easily make a playlist on your any WordPress web-page or post. So I’ve downloaded several short videos from YouTube and uploaded them to the media library.

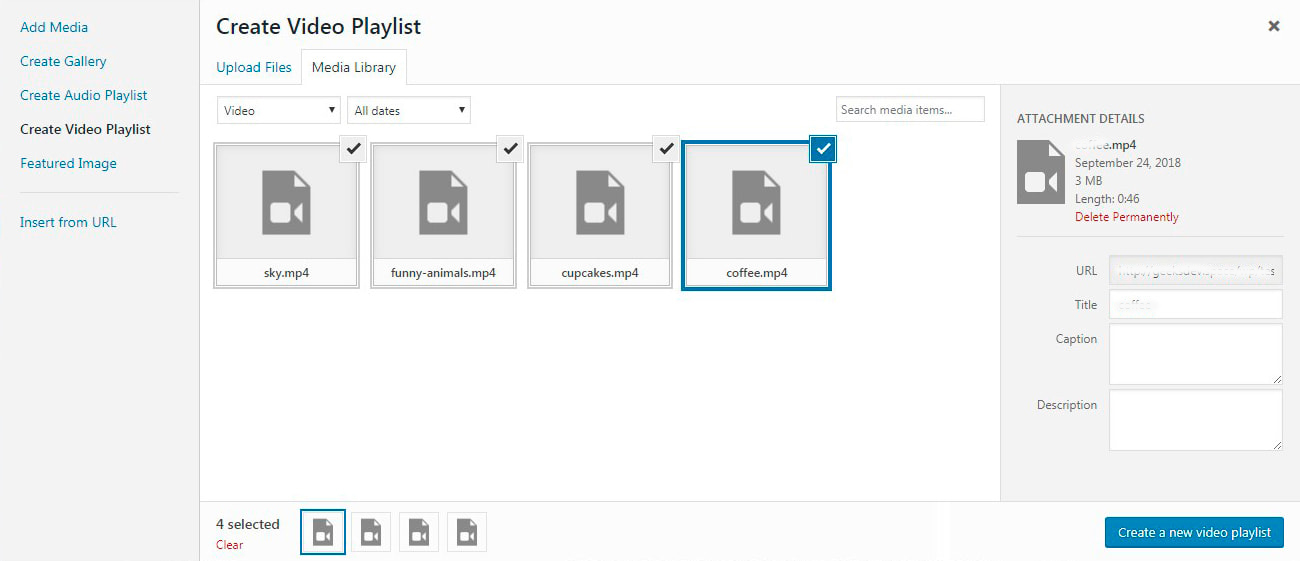
When videos are selected, I click the ‘Create a new video playlist’ button -> manage the settings -> and then click the ‘Insert video playlist’ button.
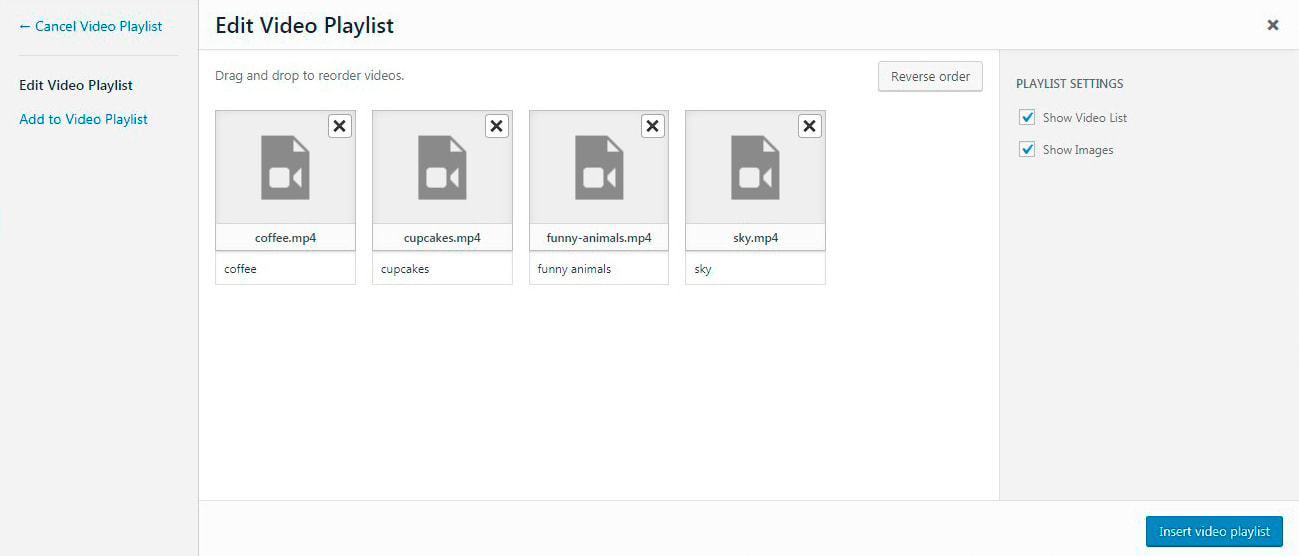
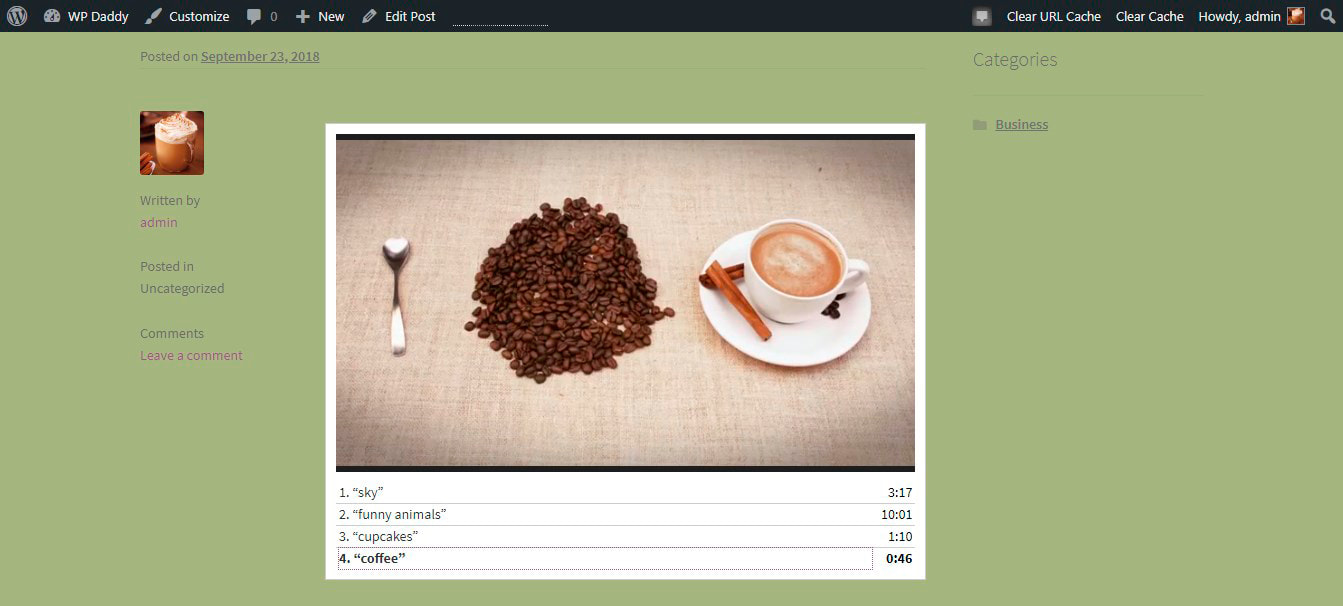
When the playlist is inserted into my post, I can see it live. Videos will be automatically played one by one.
Note: If you need to add “heavy” videos, for instance, movies or clips, it’s better to embed those videos from YoutTube, Vimeo or Facebook and not to upload them into the library. Don’t overload your pages with additional media and keep your website fast and optimized.
GT3 Gallery plugin has the ‘Insert from URL’ option if you want to create a gallery using the media files hosted anywhere else except for your library.
3. Add WP Slideshow Gallery – Revolution Slider
Slider Revolution is one of the most recognized ways to add sliding photos or videos on your pages and posts.
(Please read our step-by-step guide on how to add videos in Revolution Slider). RevSlider is the easiest way to showcase your photography works or represent the promotional material of your product or service.
After the plugin is installed and activated, go to Slider Revolution and click the ‘New Slider’ to start.

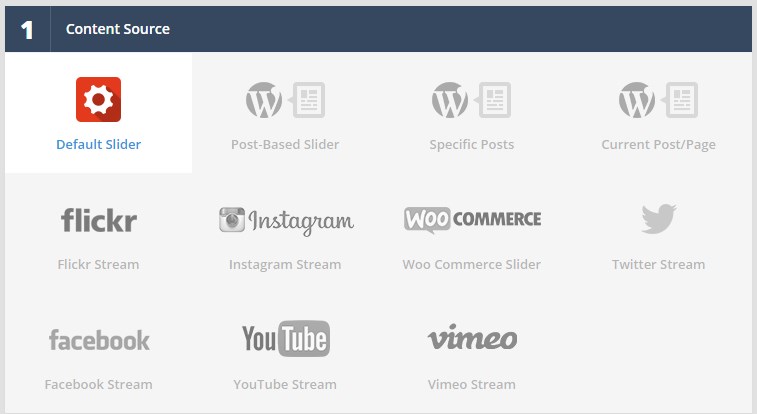
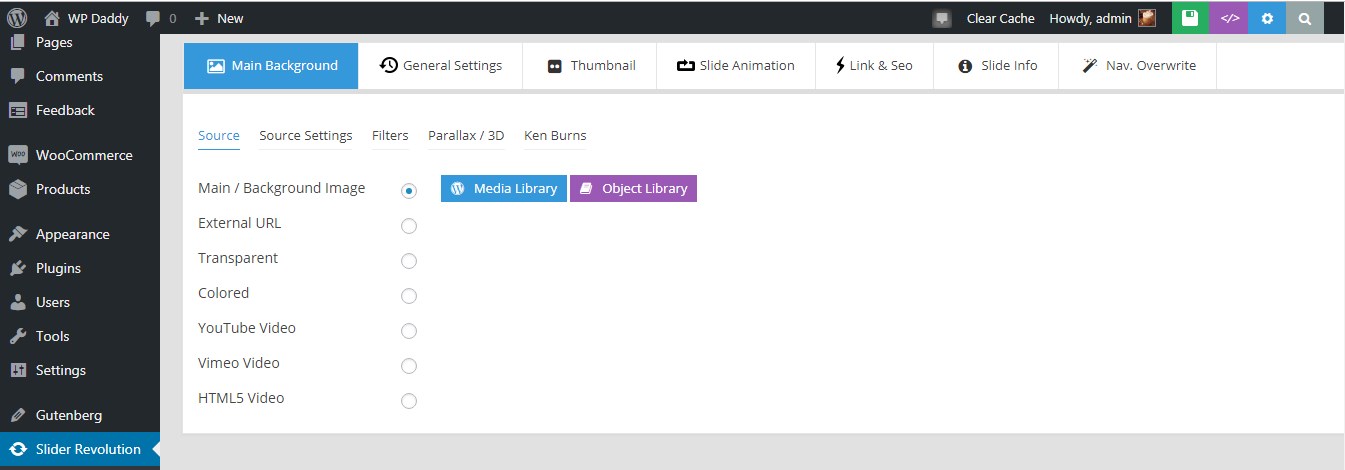
You can select the content source to embed media from YouTube, Vimeo, Flickr, specific posts, etc., or you can opt for a Default Slider.
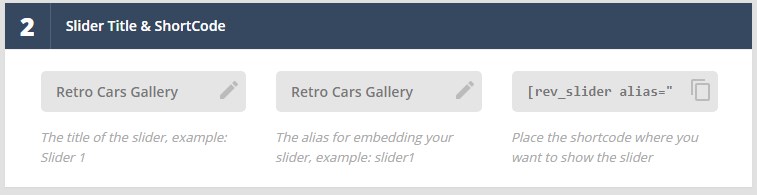
Add a Slider Title and Alias to generate a shortcode which will be added to any post or page you prefer (this is required to add a slider you are currently created).
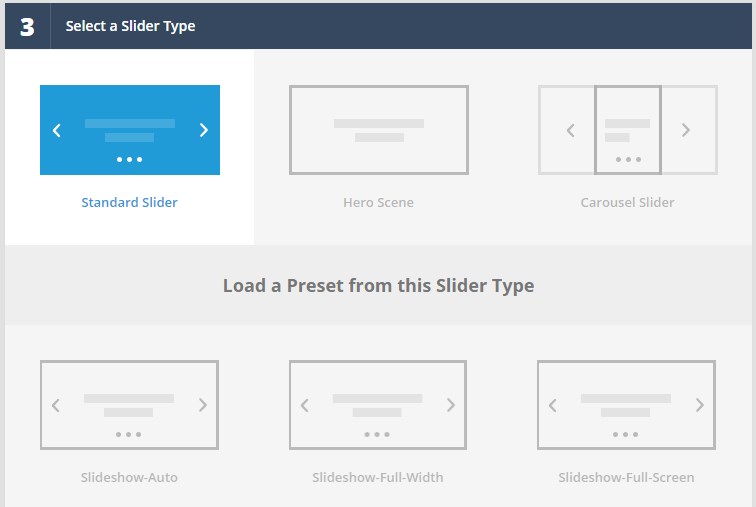
After that, you should select a slider type from Standard, Hero Scene or Carousel ones as well as opt for a Preset from a selected slider type.
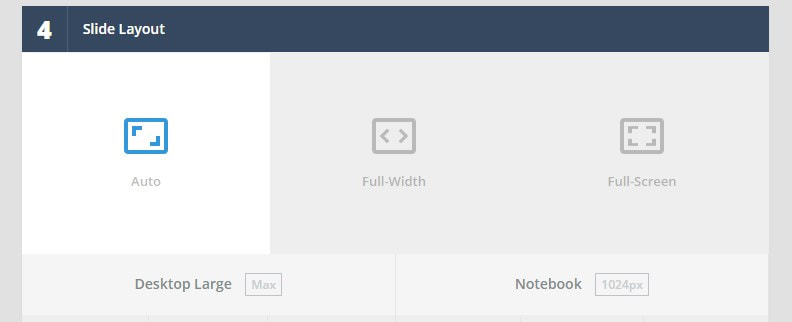
Choose a slide layout from Auto, Full-Width or Full-screen ones, and then save your settings to proceed to the next editing step.
In the Slide Editor, you’ll be able to add slides from your media library
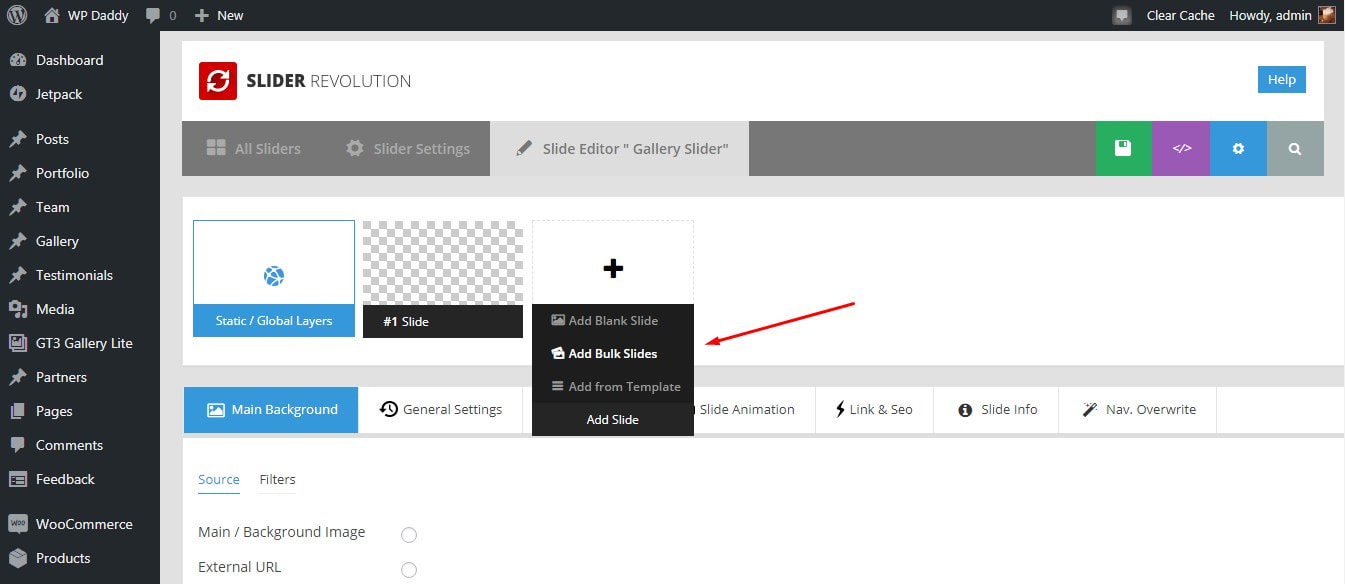
I click the ‘Add Bulk Slides’ option, select images in the media library and click the ‘Insert’ button.

Now my slides are inserted.

Now I can also select the background,
scale my slides, add layers like, for instance, caption

as well as edit the overall duration of my every slide.

After all editing is done, click the green button with a flexible disk icon at the top right above the editing area to save the changes.

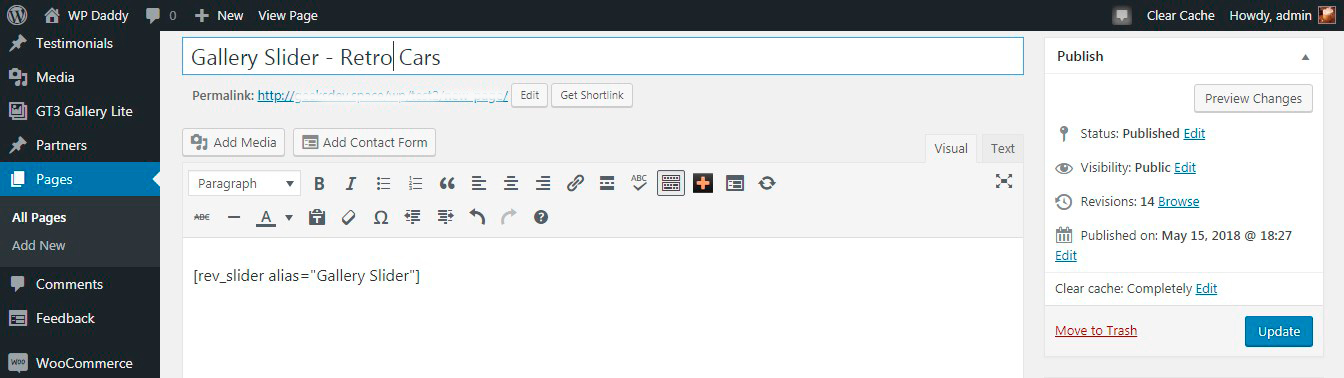
Now go to Pages or Posts -> All Pages or All Posts (or Add New page or post to your taste) -> choose or create any page or post and insert the shortcode copied from the Slider Title & Shortcode section in Slider Settings area of Slider Revolution.
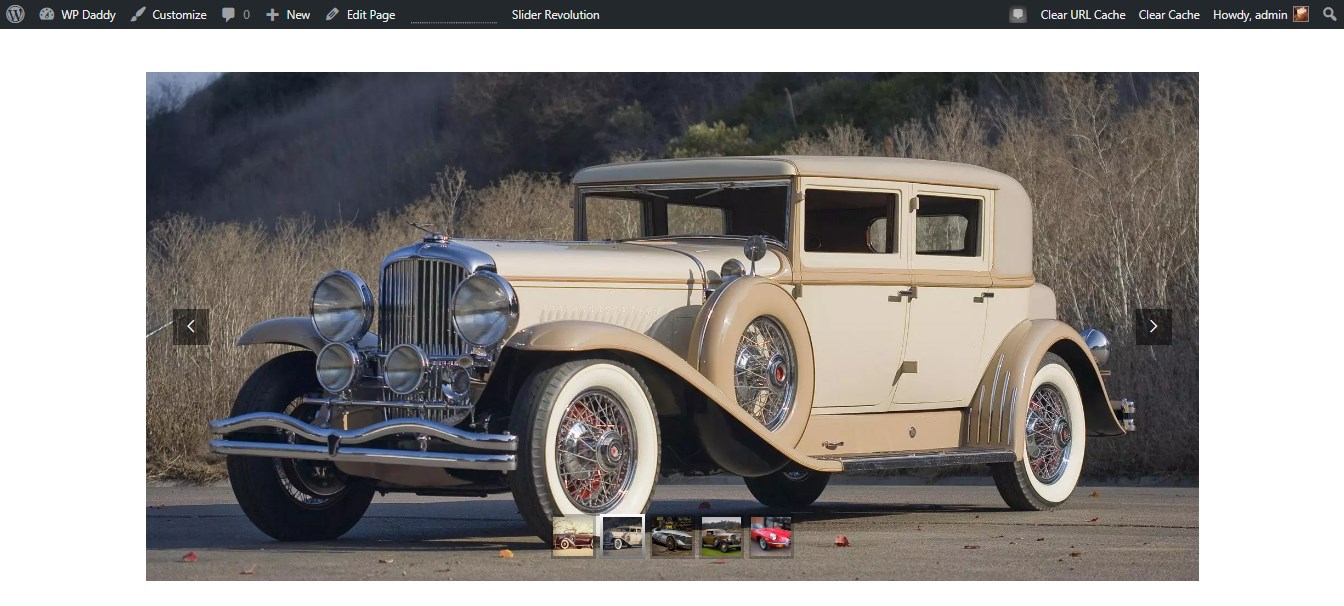
Now you can observe your slider live.
4. Use a Page Builder for a Specific WordPress Theme
I’d like to select a random WP theme from the list of designs made by our friends – GT3 Themes, let it be Canvas Interior & Furniture Portfolio WP Theme. This template comes with GT3 Page Builder which allows to add and manage blocks for adding different content types to your posts or pages, and the gallery is no exception.
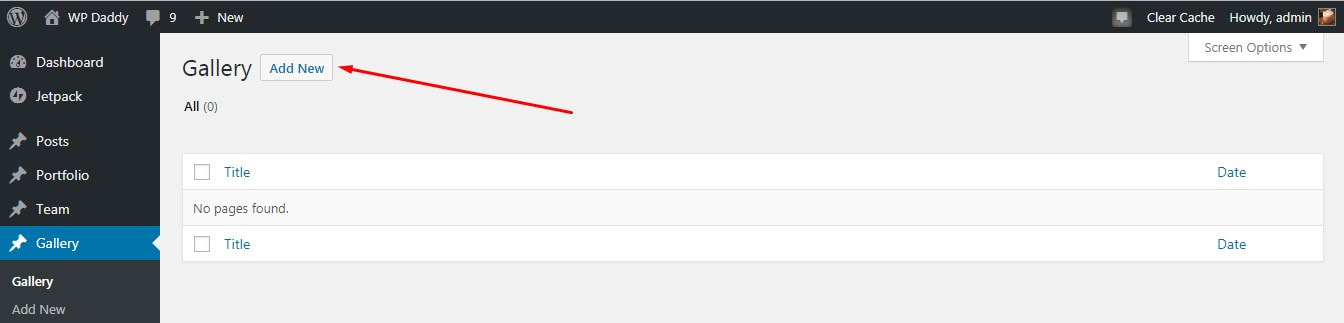
So when the theme is installed and activated, you’ll find the Gallery menu in your admin dashboard. Go to Gallery and click the Add New button.
Now you will be creating a new gallery page. Here you can select the images from your media library right in the page content editing area.
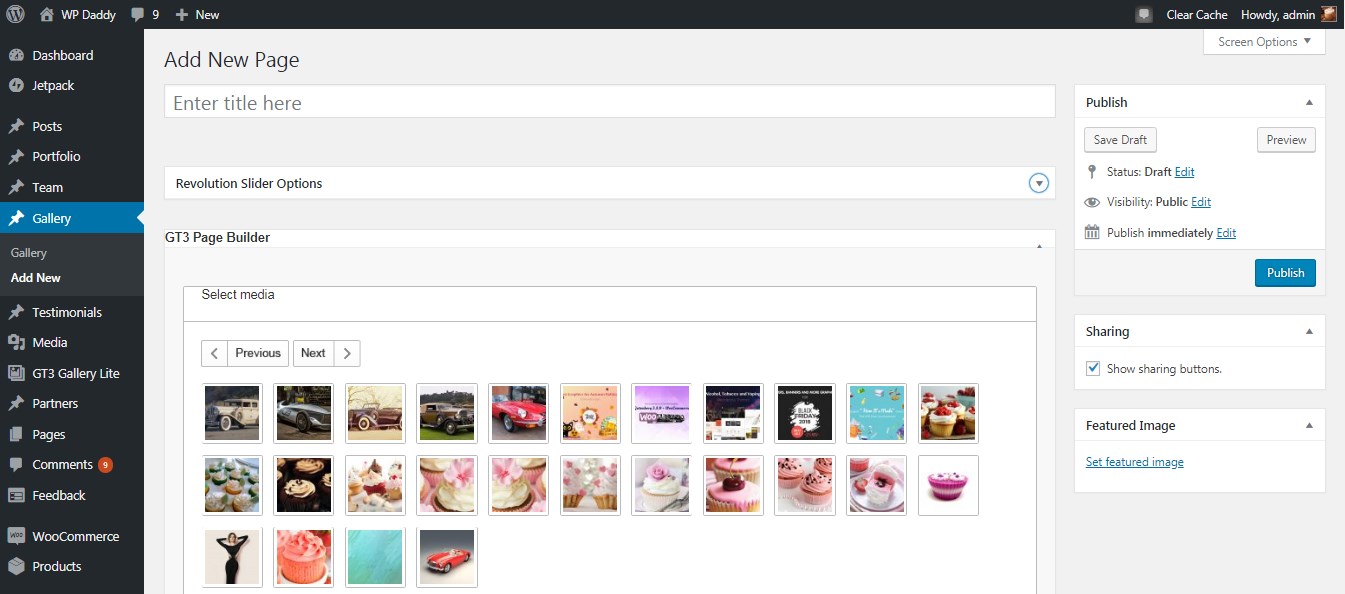
When clicking every image, it will be added to the GT3 Page Builder section.
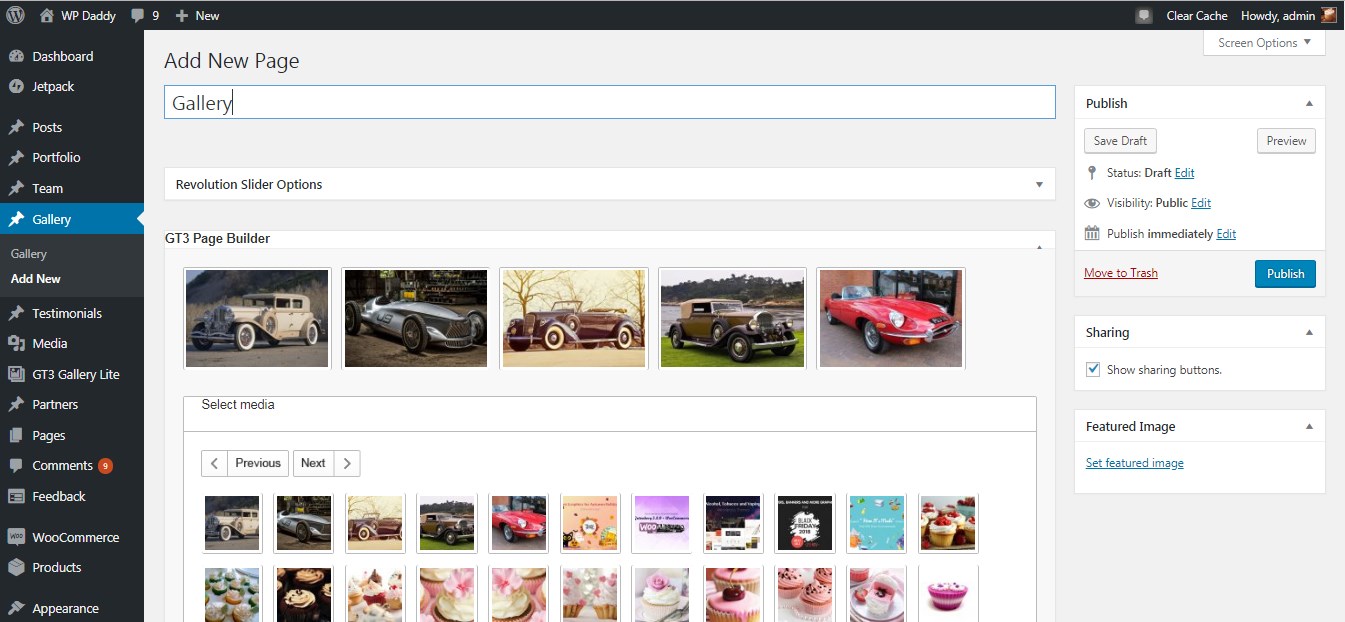
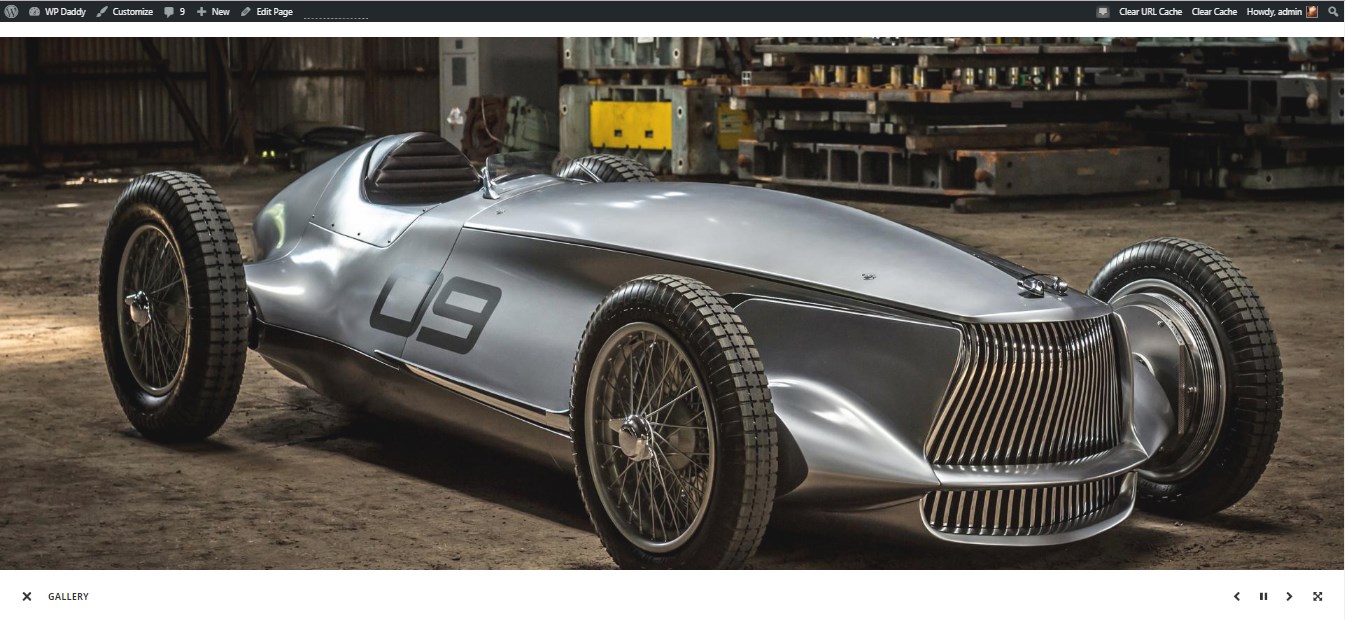
After you are done, click Publish and preview the ready gallery. This is easy!
5. Add a Gallery with NextGen
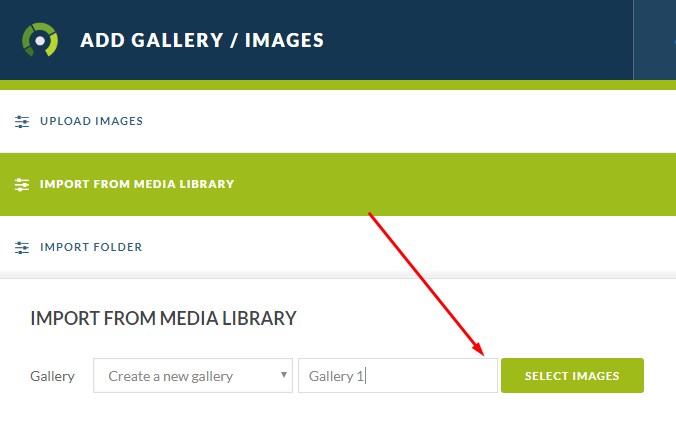
Let’s capture the essence at once. After your NextGen Gallery plugin is installed and activated, go to Gallery (the NextGen one) -> Add Gallery/Images menu in your admin dashboard and you will get to the editing area. Here it will be possible either to upload images from your PC, import them from the media library or import a whole folder with images contained.
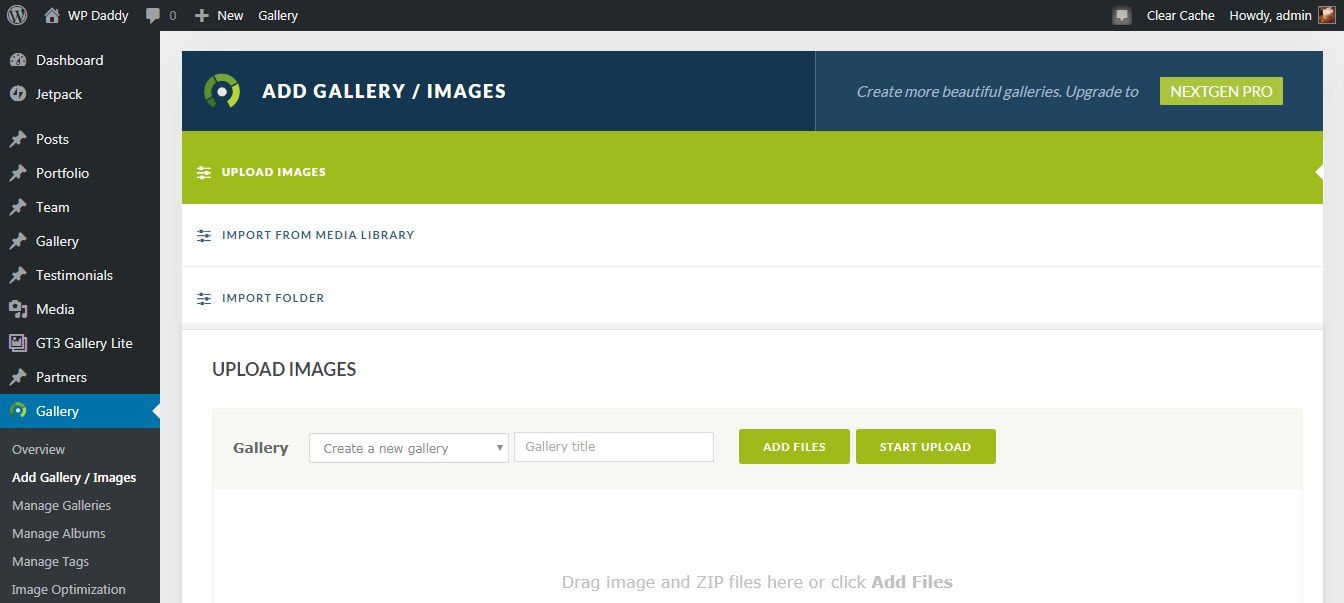
I would better import the files from the media library, so I choose the necessary option –> click the ‘Select Images’ button ->
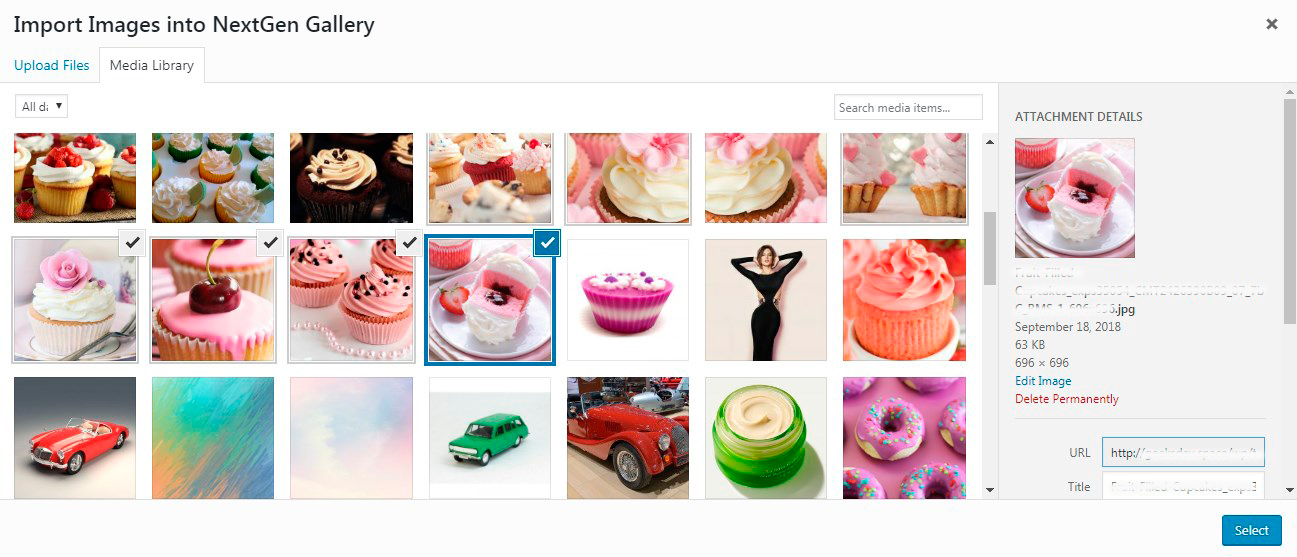
-> select a bunch of images in the media library -> and click another ‘Select’ button again.
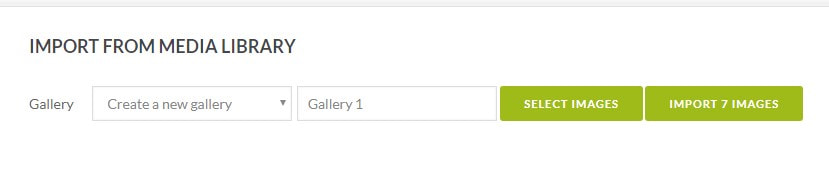
Now I click the ‘Import… images’ button (where the number of selected images is indicated instead of ellipsis),
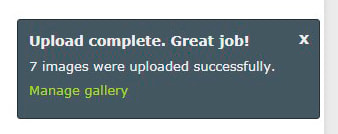
and my images are successfully uploaded.
After that, I go to Gallery -> Manage Galleries and here I can find my newly created one.
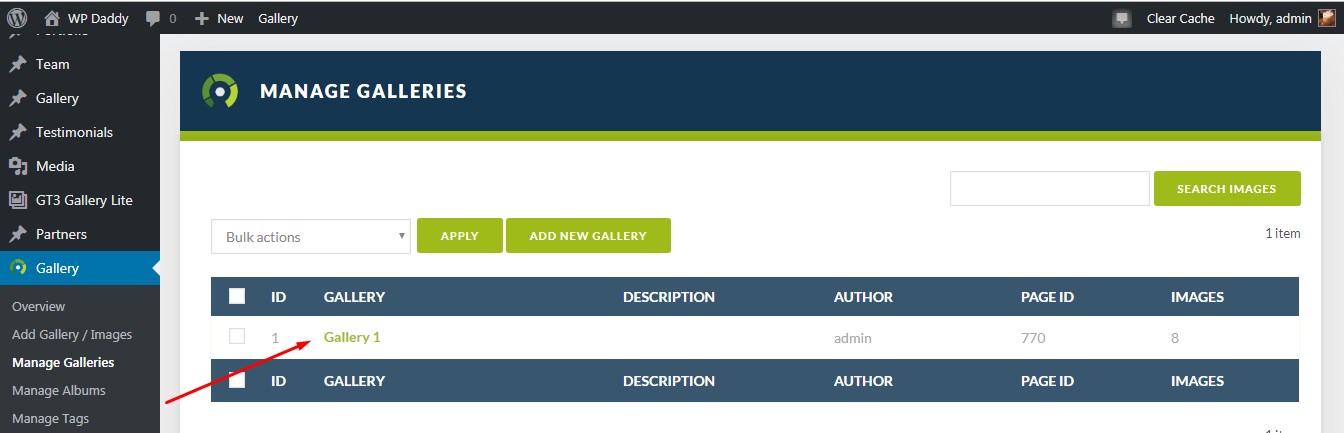
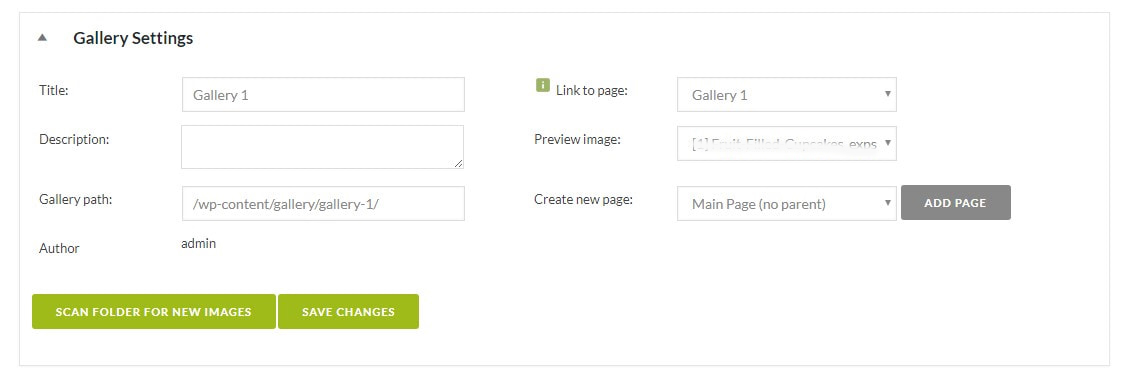
I click the new gallery and get to the settings page. So here I click Gallery Settings either to learn the gallery path, link the gallery to any other page, create a new page to display the gallery on it, etc.
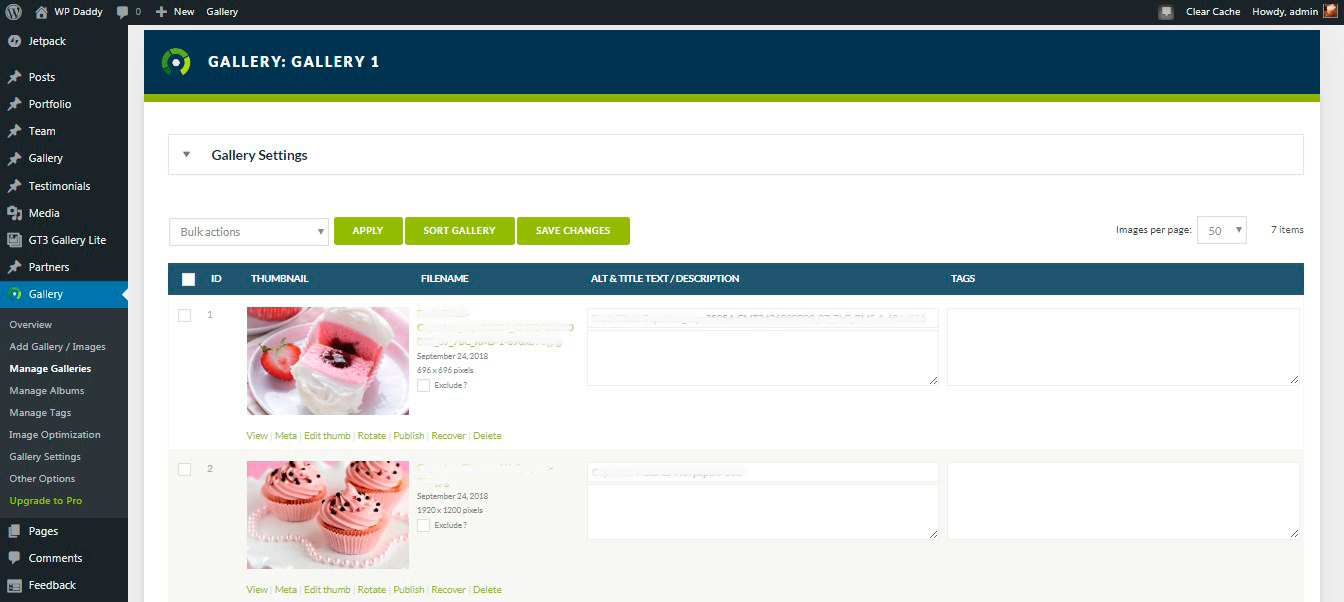
Here I can also manage the options of every image from the gallery (either delete, rotate, publish the image, etc.)
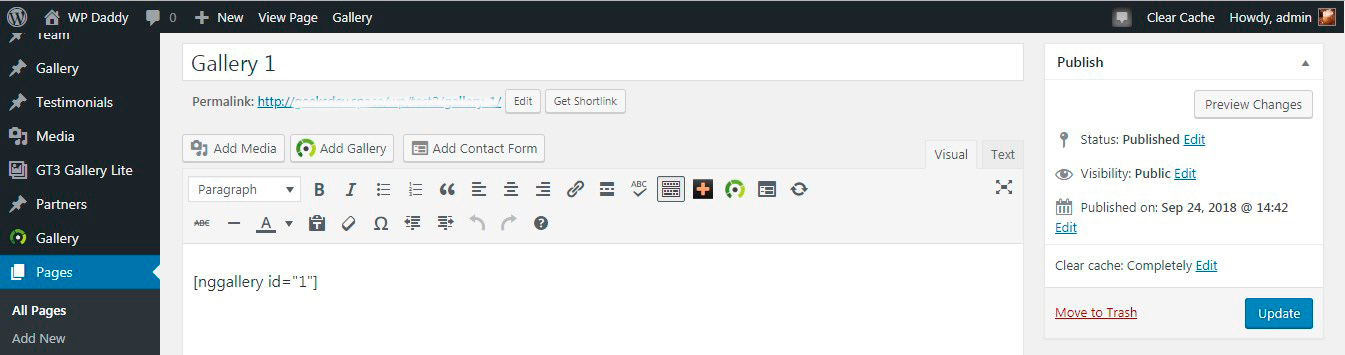
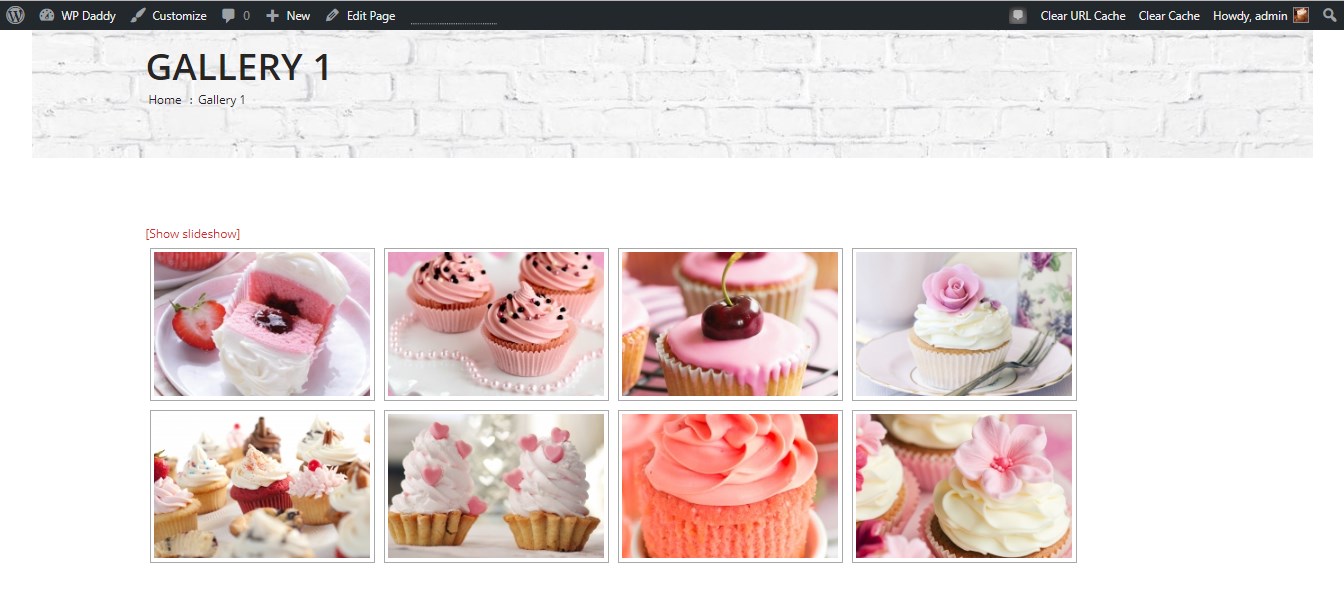
In the visual editor of your page or post a new gallery will be automatically shown as a shortcode.
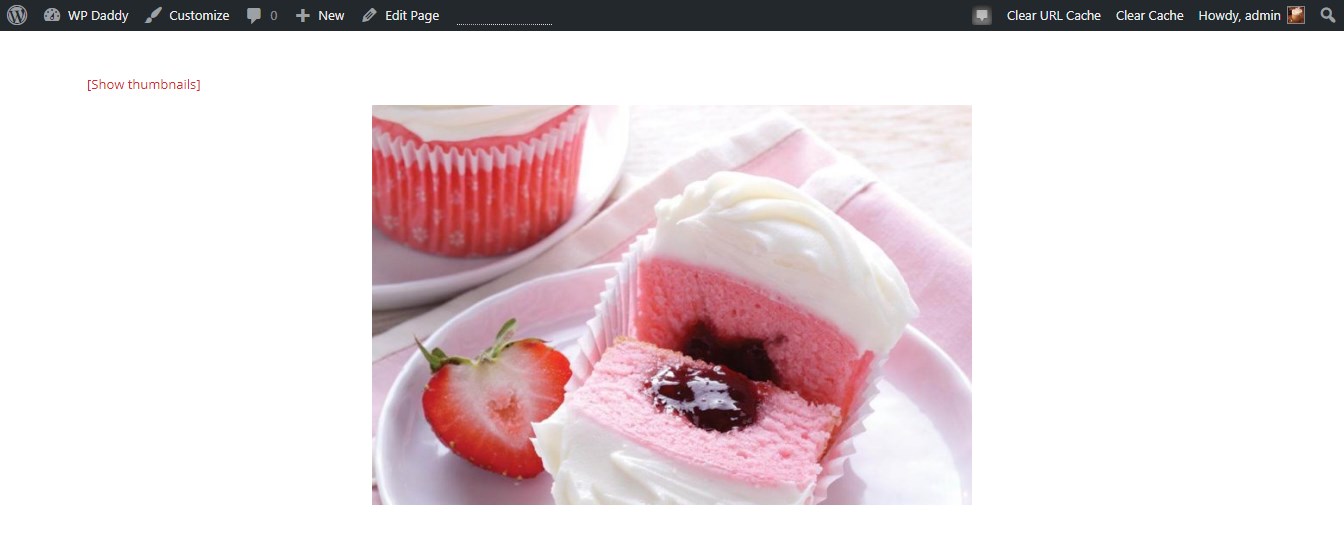
And here’s how it looks live. You can either view it as a slideshow or a bunch of thumbnails. So here you see the thumbs.
And here’s the slideshow.
I hope this tutorial was much helpful and I promise to make more interesting and capturing tuts and reviews to make WordPress clear for you. Thanks for staying with WP Daddy!
Melany H.