Hi, fellows!
Today I’m going to share a bit unusual ideas with you, so just keep reading to learn what they are like…
Every time I browse the Web in search of a certain product or service, I visit some web-pages and always pay attention to how they are designed. It really matters for me when I’m about to resolve whether to order pizza, buy a new mascara or just read an appealing post of a devoted blogger.
If the design is original, interactive and eye-catching, I’d even share the link to that website with friends and I would recommend them to browse the products or services of that certain brand just to make sure “the stuffing is as quality as wrapping”. Yeah, I like beautiful and uncommon designs, so like you, I hope.
But, let’s see, what do all of those designs start from? I guess they appear as follows:
- Someone turns on the heat ->
- -> shares the idea with fellows ->
- -> they develop a concept ->
- -> a designer creates a PSD ->
- -> developers write the code ->
- -> and then this PSD turns into a ready-made theme ->
- -> this theme is uploaded into WordPress (or any other CMS previously set up) ->
- -> and now the web-page is ready for customization.
So all that we see when visiting any websites is the design which has been preliminarily crafted in Photoshop, and then transformed into the “language spoken only by servers and web-browsers”.
Let’s hold forth, if a regular website owner wants to change something really essential in their website’s appearance, they have to take the source (PSD) file, make any changes in the graphic editor, write new code and then upload the updated design to their website.
For instance, I own a website and want to change its look. I’m not skilled in design and I’m not about to hire an expert for this. Will it be possible to create what I want just based on the standard theme I’ve got? Will it be possible to essentially change the web-page and make it look like it is completely redesigned without editing the source file?
The resolution is the proper customization, so today I’m going to try customizing a few absolutely free WP themes to find out what possibilities they bring and what I can get as a result. I’m not going to take premium themes because it is obvious they’ve got much more customization possibilities than free ones. My task is to check if it is possible to get the most out of the free themes, and then share the results of this research with you.
The Algorithm:
1. I’m going to take three design styles:
- Illustration and Cartoon;
- Two-Tone Color;
- Photo Realism.
2. I will select a few live websites to show you an example of each style.
3. I’m going to customize the following elements of a free WP theme:
- logo;
- header;
- menus;
- homepage content;
- background;
- colors;
- widgets;
- additional CSS.
As you’ve probably understood, I will test my own customization from the point of view of a regular user without any specific design or coding skills. So let’s start!
Experimental Customization
I’d love to feel like I am a designer and got the task to transform a simple minimal theme into a bright cartoonish online store specialized in selling dairy products. I’ve created a random brand name, let it be “Happy Cow” and now I’m going to customize my new milk store.
To get an inspiration I browse a few similar sites like these:
Black Moon Design
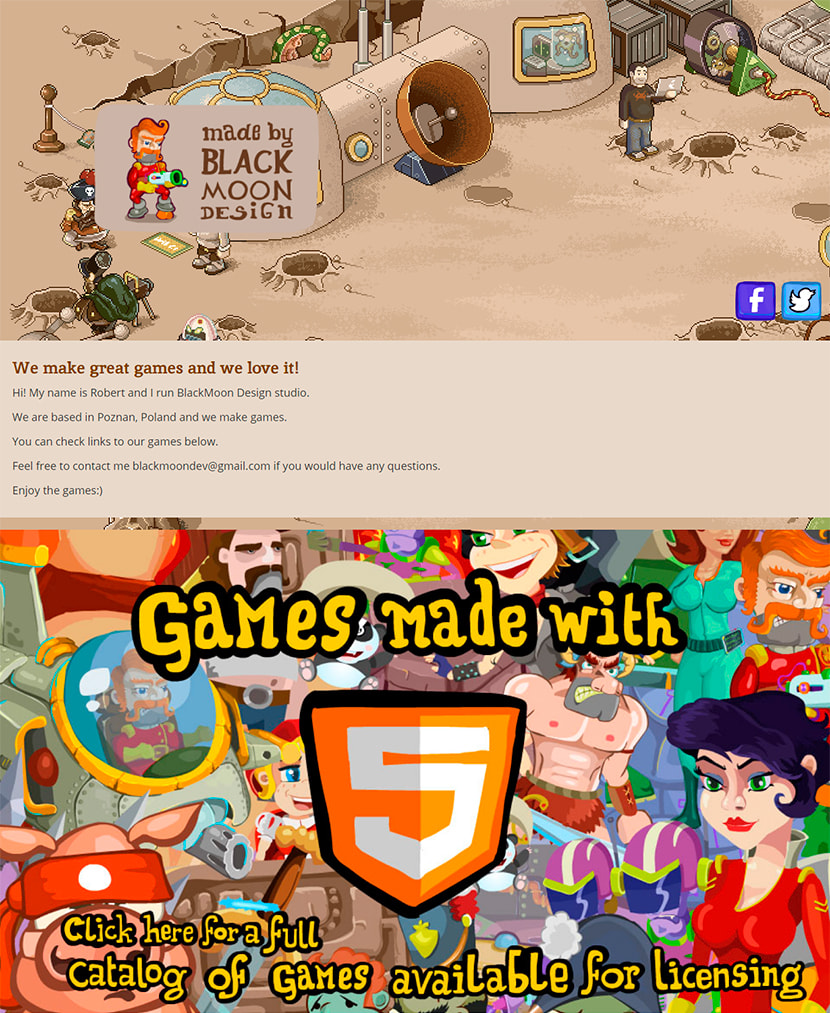
These guys make games and their cartoon-style web-page looks interesting.
Dean Oakley
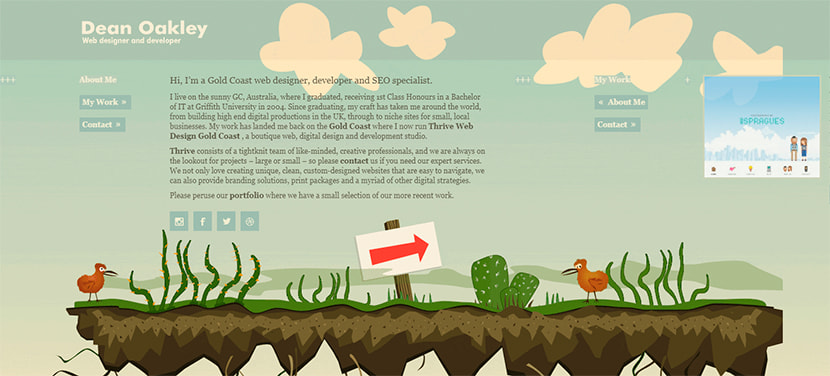
This is a portfolio website with a horizontal scroll – a very creative design idea.
Flourish
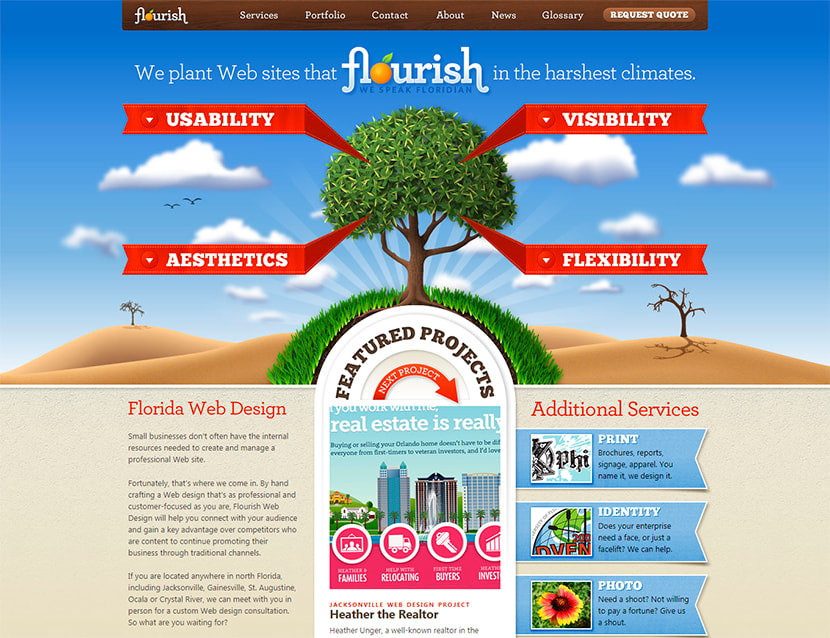
And these guys create websites and brand identity as well as offer marketing services, their website is really bright.
Illustration and Cartoon
So, let’s create a homepage of my “Happy Cow” store.
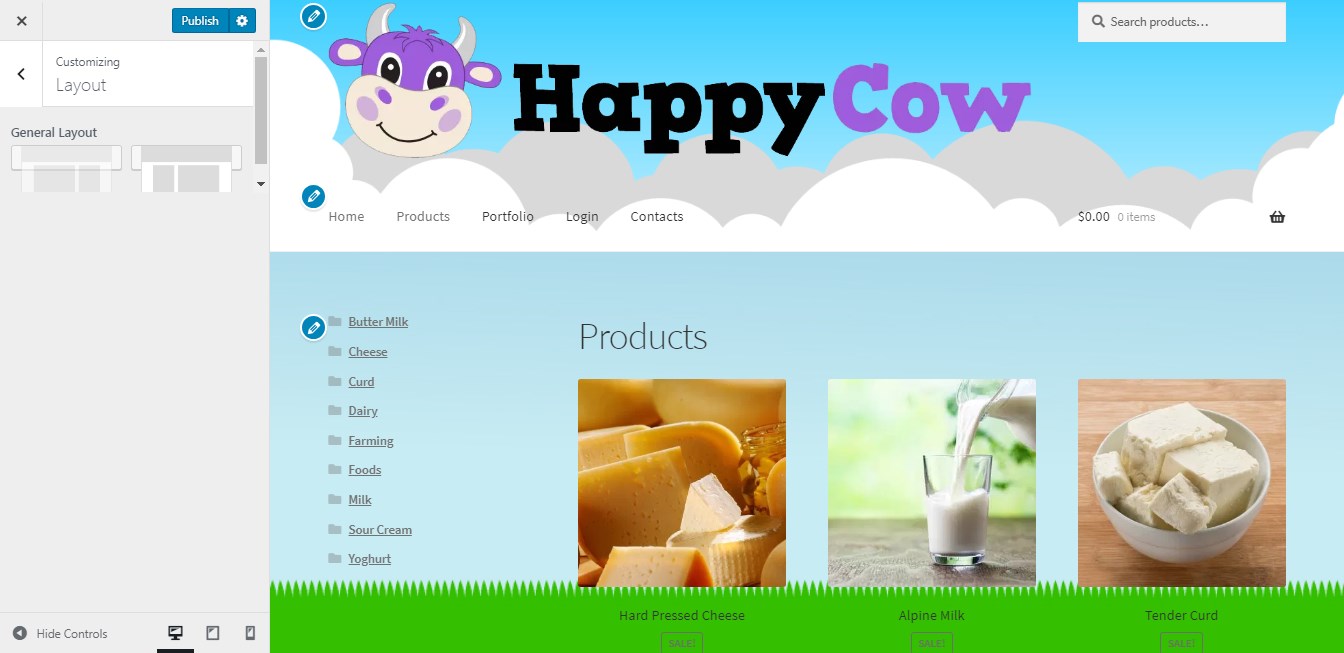
For my cartoonish customization, I’m going to choose Storefront free WordPress theme recommended by WooCommerce. After the theme is installed and activated, I go to Appearance -> Customize and start changing the look of my store.
Let’s start with Site Identity. Here I can add my site title and tagline as well as upload a logo. So I’ve chosen a colorful logo depicting a smiling cow, guess it would be great.
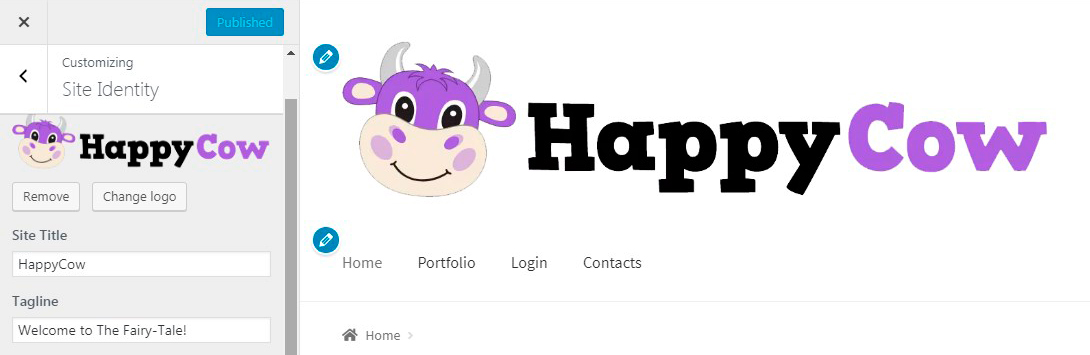
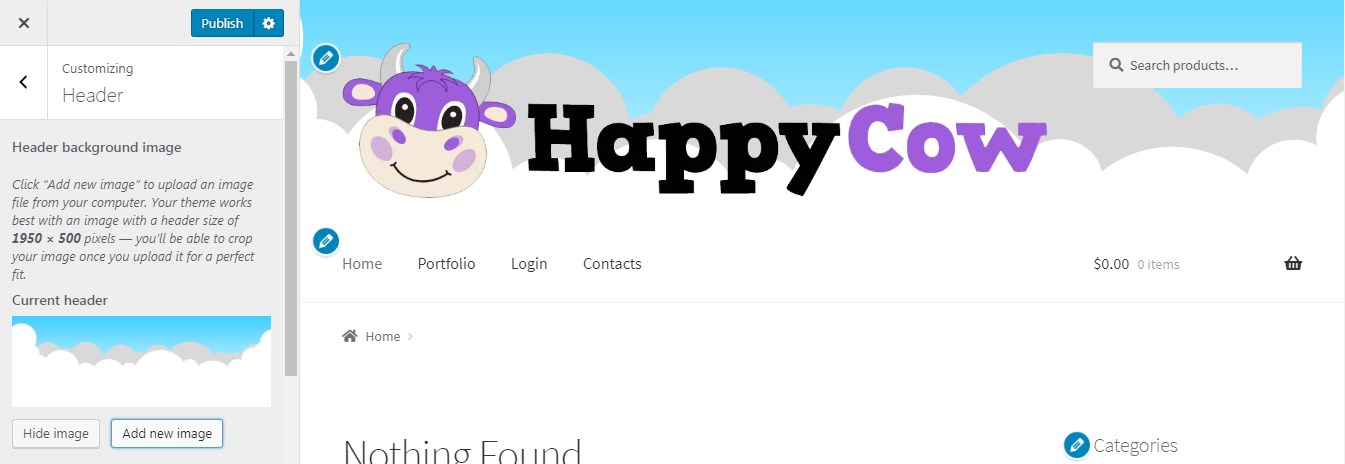
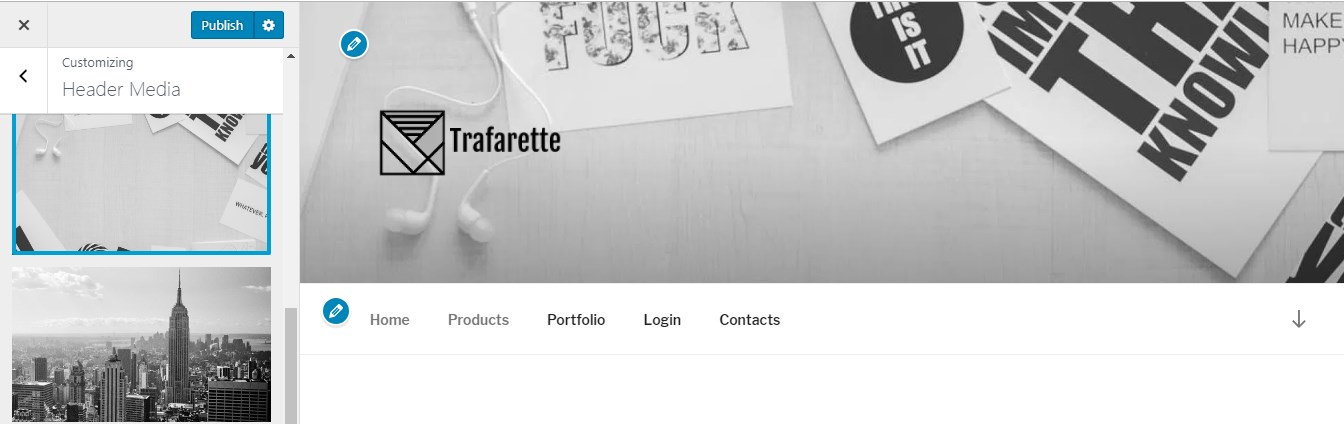
The next step here is changing the header. I’ve chosen the one with cartoonish clouds to make it match the uploaded logo.
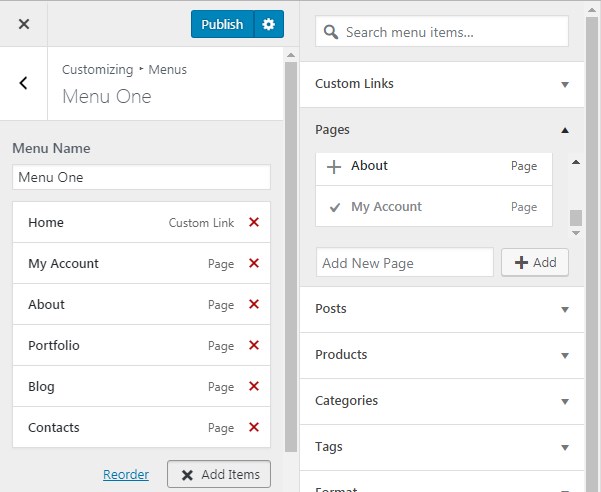
After that I’ve resolved to manage menus, so I’ve selected menu items, and now I can drag-and-drop them to reorder.
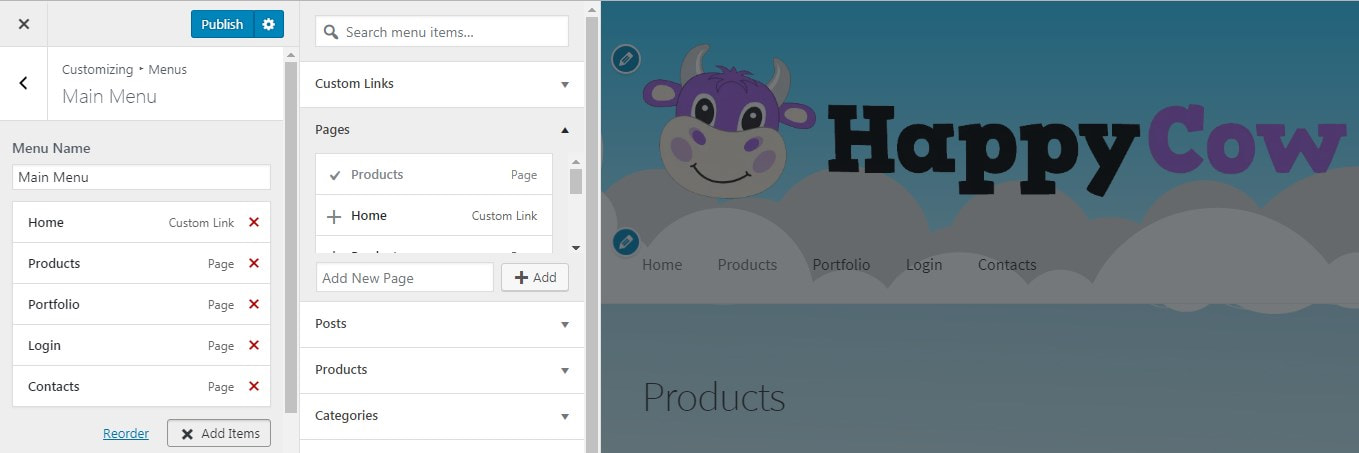
Note: Be sure to create the necessary pages in Pages -> Add New menu of your admin dashboard before creating and arranging the menu items.
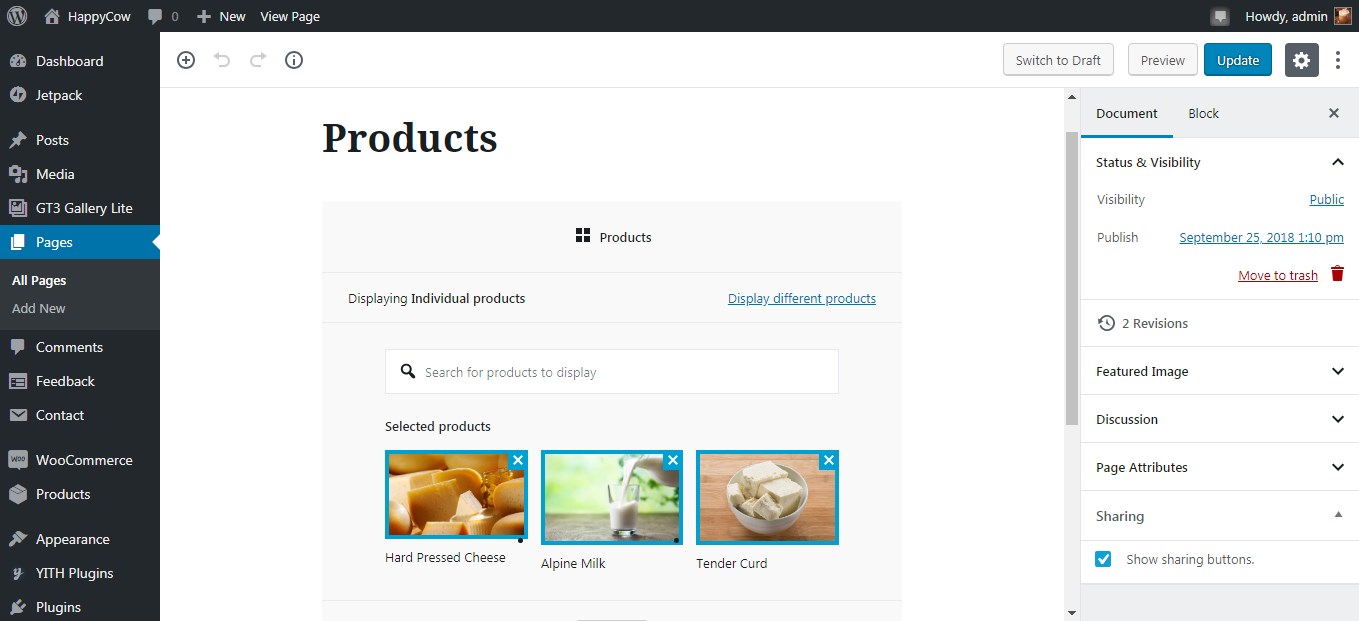
The next step here is selecting the content to be displayed on the homepage. I’ve selected the Products page. So I go to Pages -> All Pages -> Products in my dashboard to add several products to the page. Here I will use a Products block in Gutenberg editor. I can either display products filtered by category
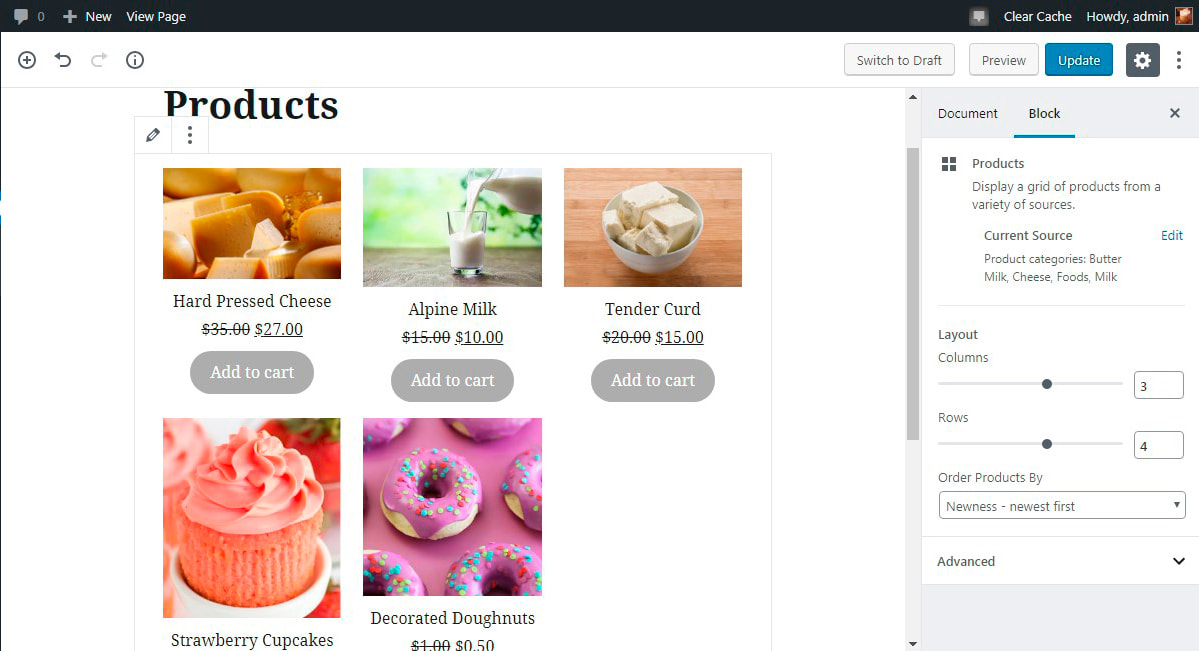
or select Individual Products and display them on a page.
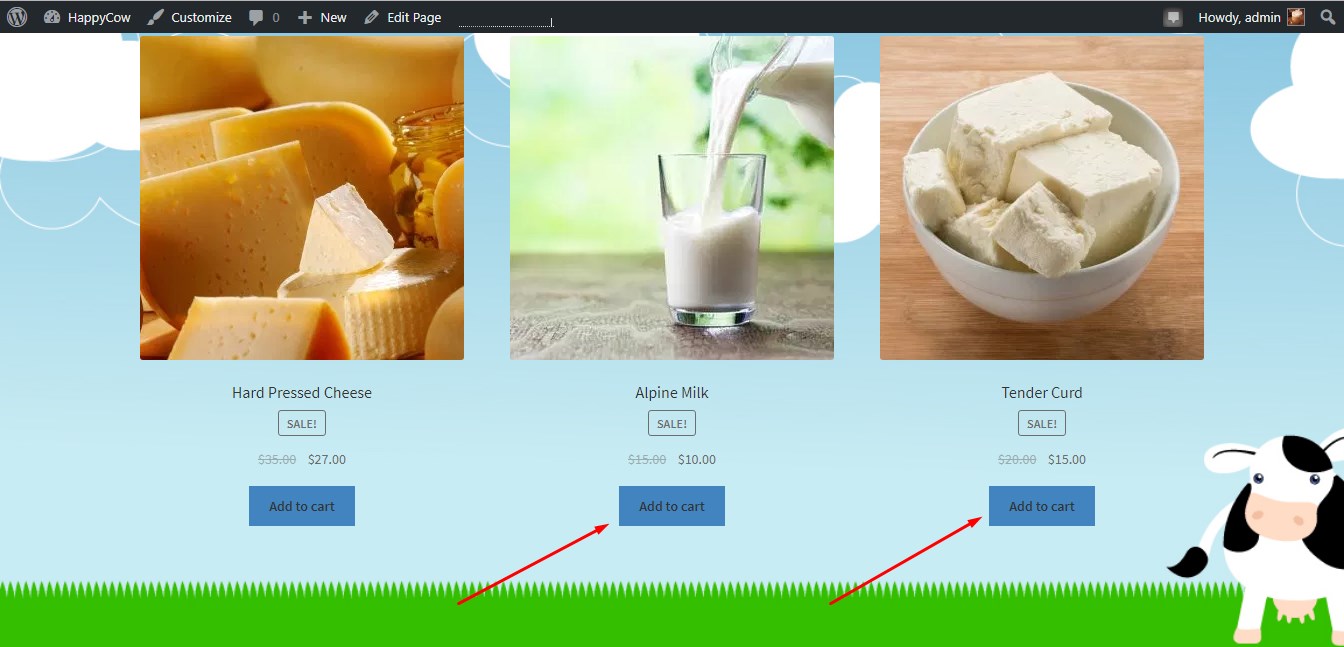
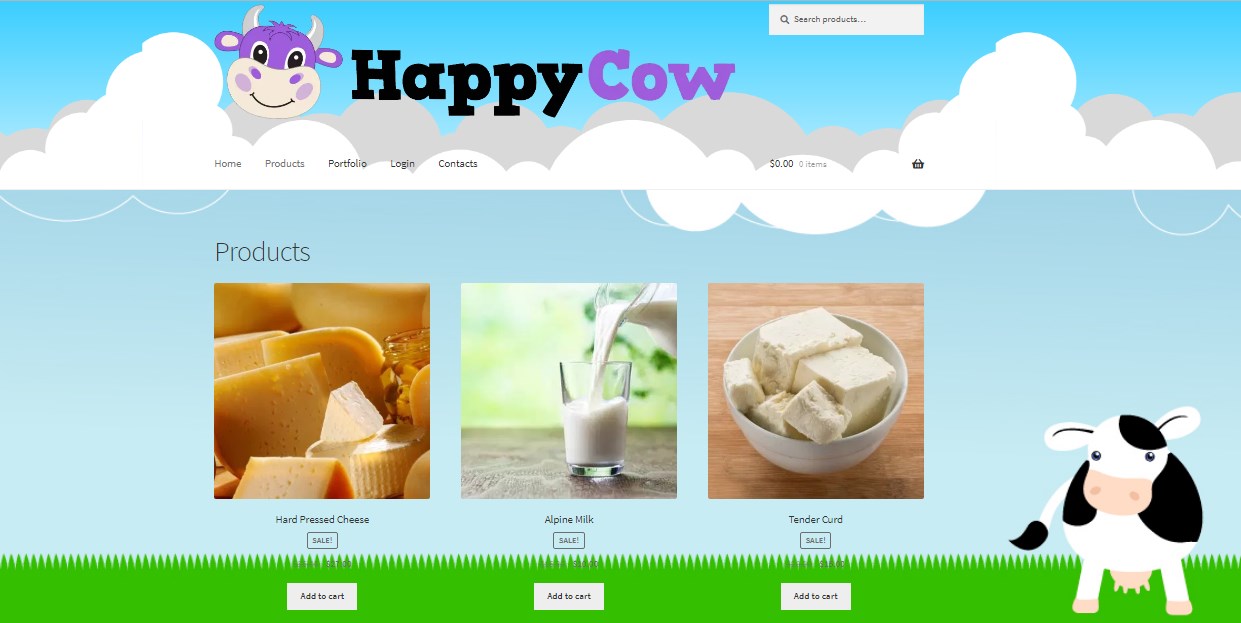
After the page with the content is updated I can observe products on a homepage.
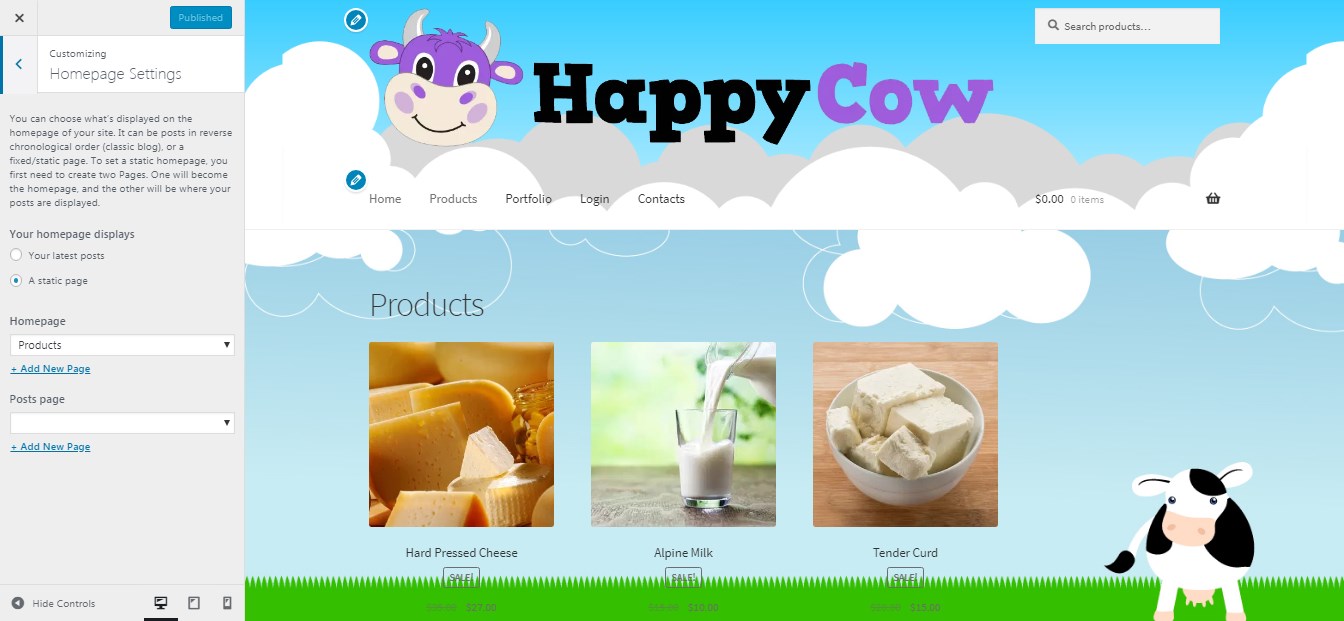
As you see I’ve changed the page background. I’ve uploaded a custom illustration and selected a full-screen display type.
I was trying to choose both header image and background image with the clouds to match each other while scrolling, this was made to create an illusion of consistent design, although both header and background images were absolutely different illustrations from different sources.
If you wish you can change the color of buttons and some other colors of your theme.
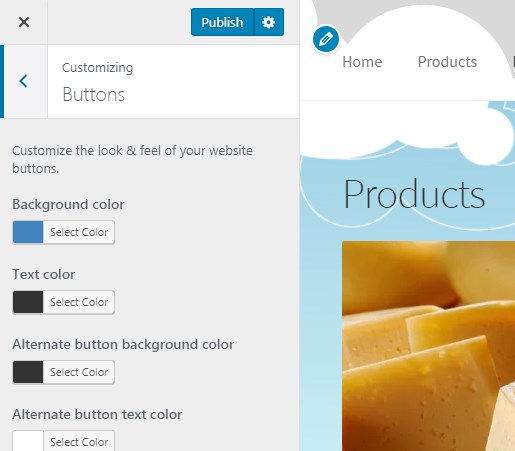
In my case, I was trying to make buttons look brighter (as a variant).
When managing widgets I resolved to add product categories to the sidebar.
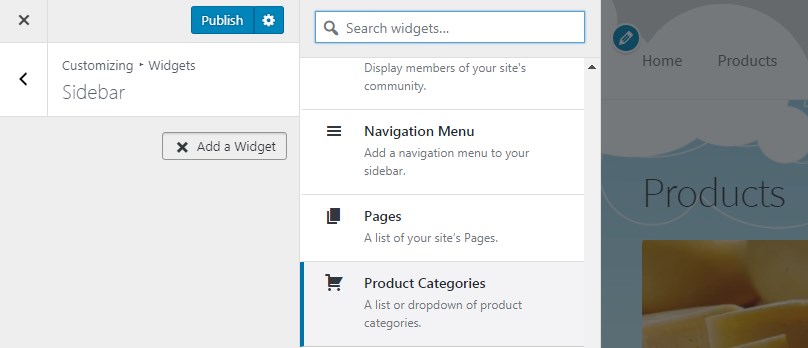
So I found the required widget, made some changes, and now my product categories are displayed in the right sidebar.
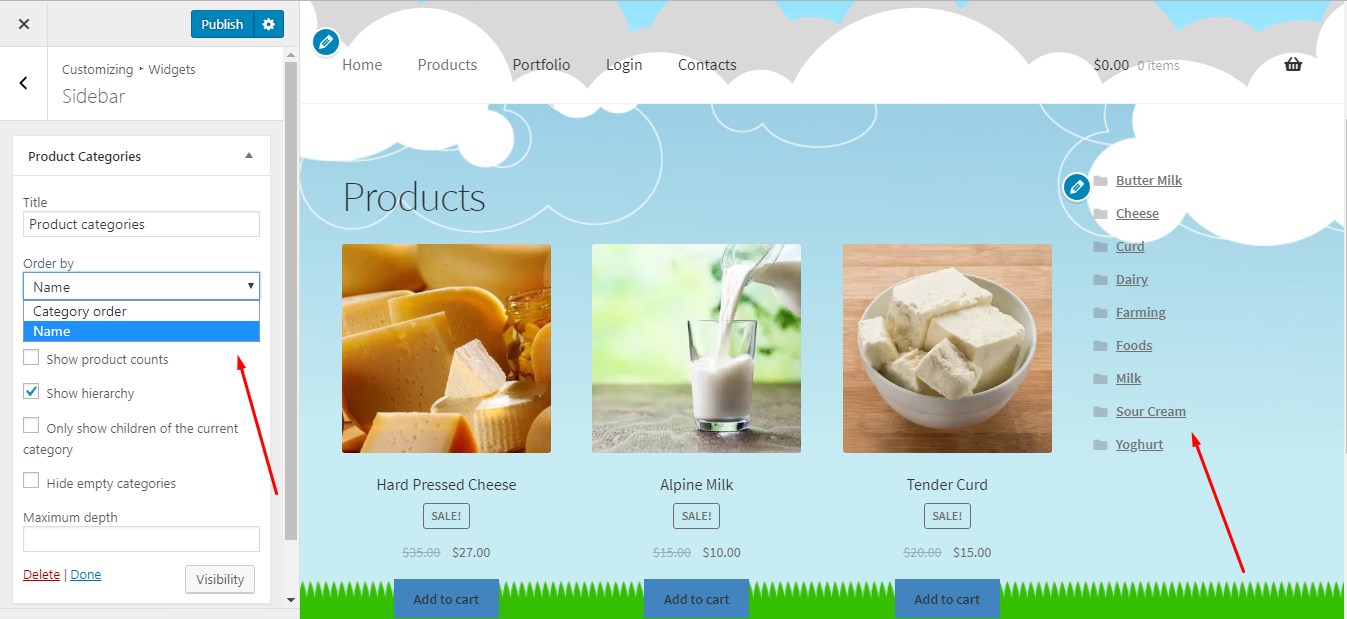
This free WP theme allows choosing another layout if you want your sidebar to be located on the left.
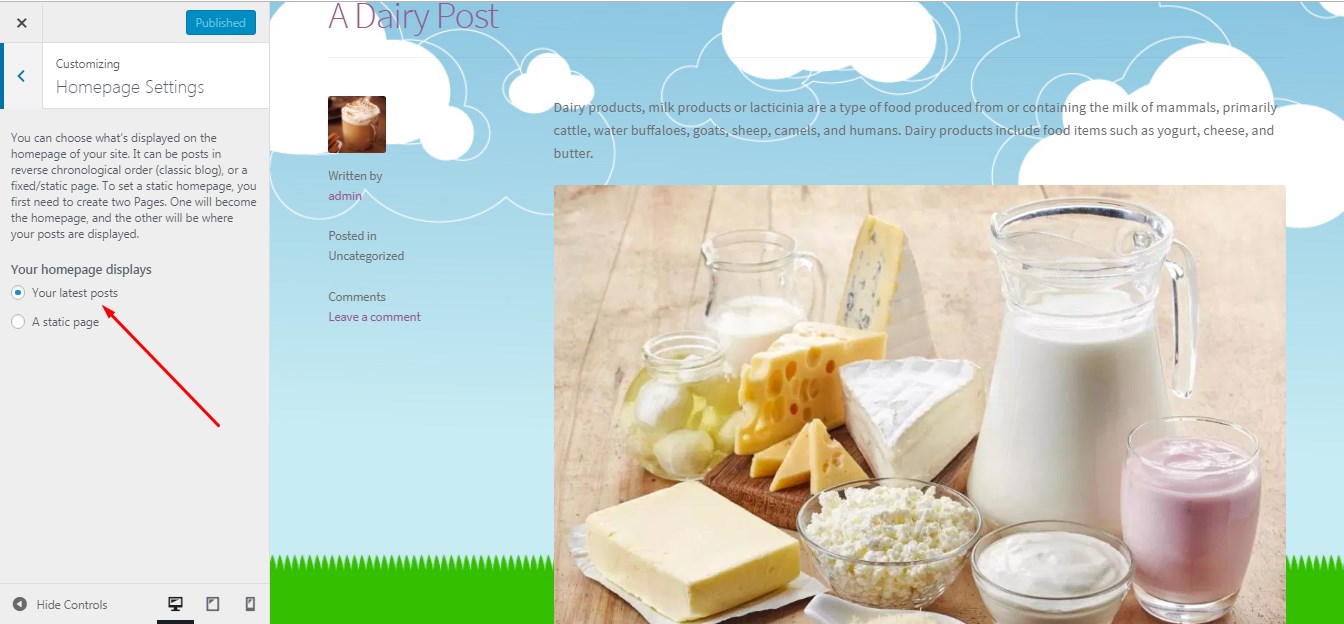
If you’d wish to change the homepage content and would like to display your latest posts instead of a static page, you can differently customize every post to make them look more attractive.
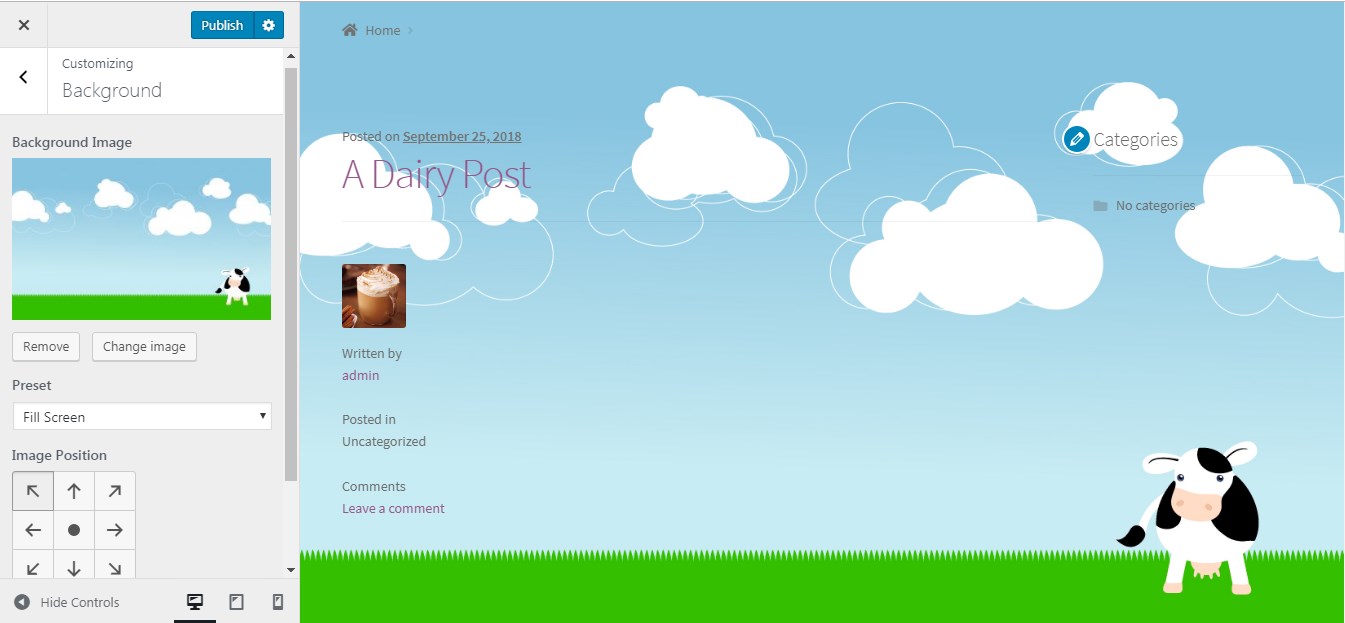
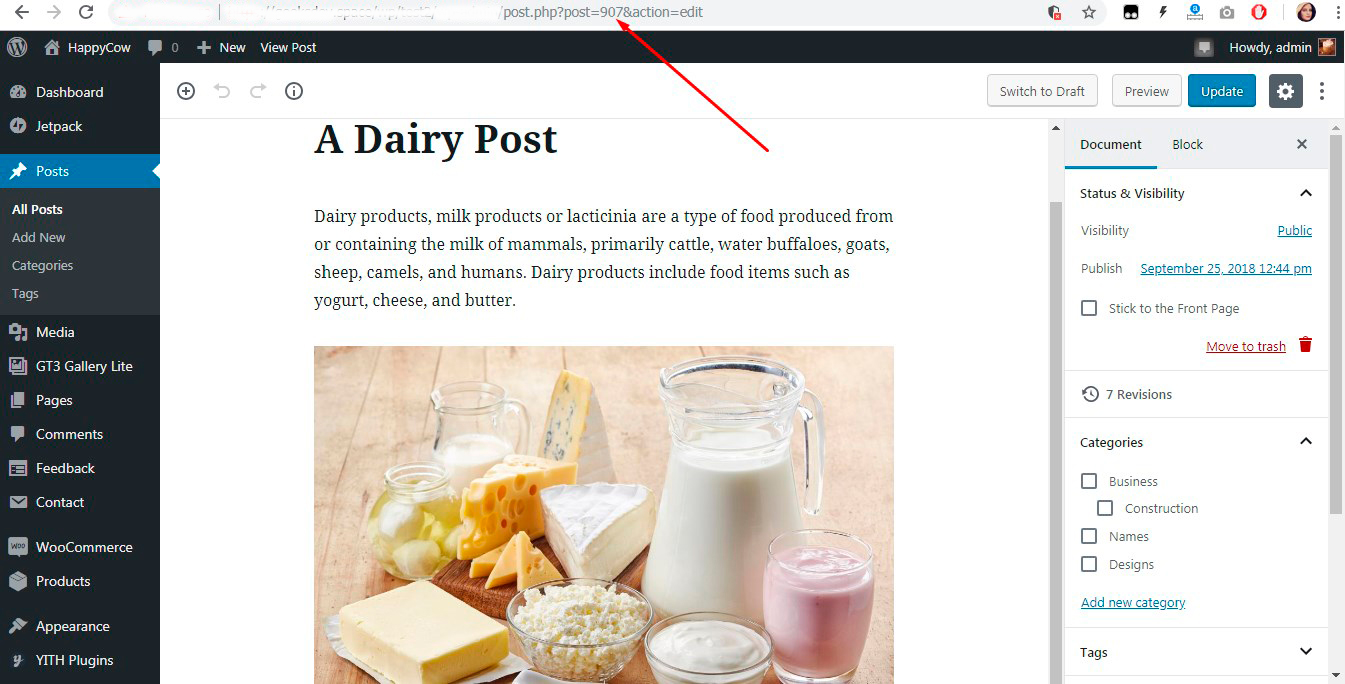
For instance, I’ve resolved to add some CSS to style a post and change its background color.
(Find CSS color codes here.) So I’ve inserted the CSS with the definite post id and the chosen color.
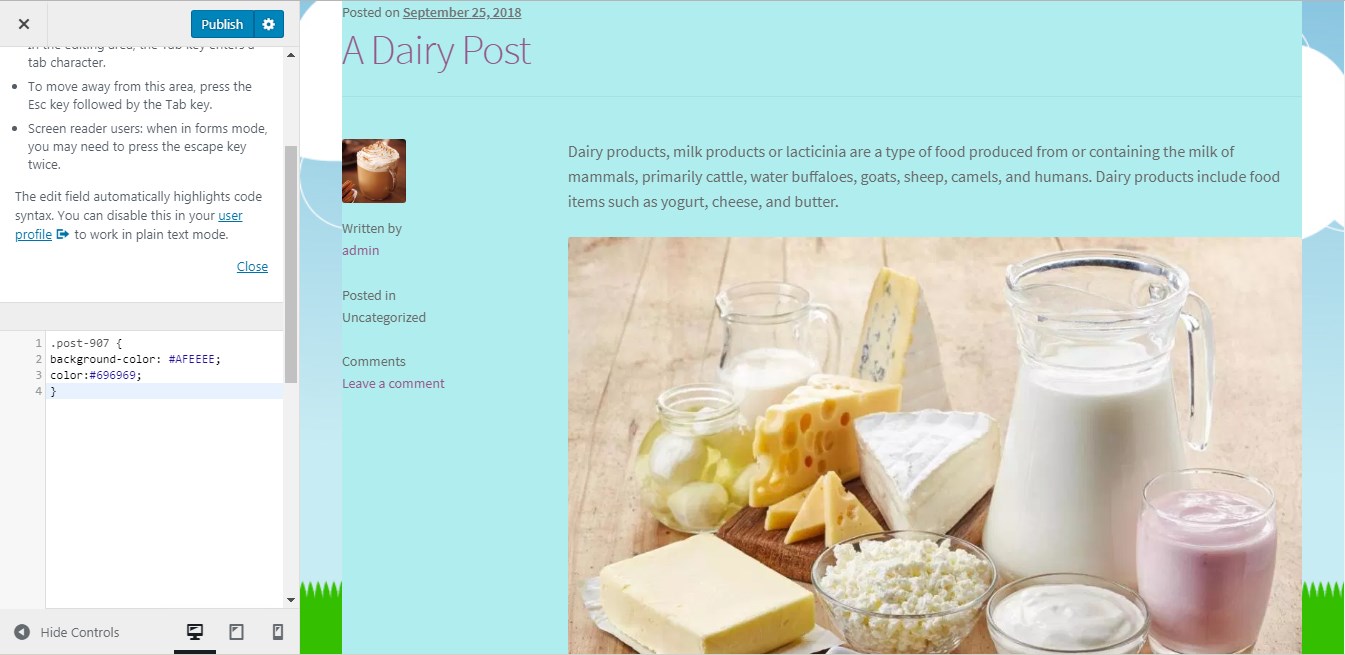
You can find the post id in the URL bar when editing your post.
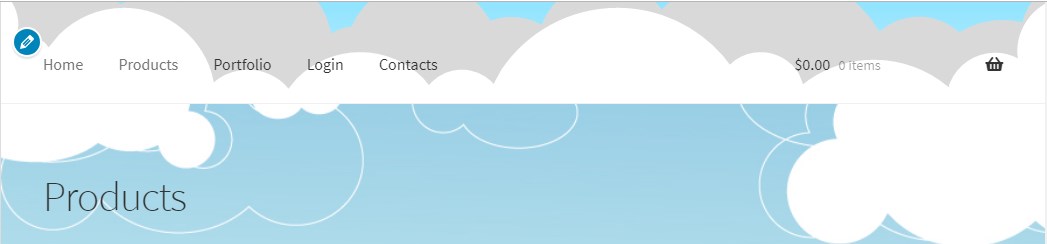
Here’s how my cartoon-styled web-page looks like.
Conclusions on this style:
I’ve realized it’s not possible to get the most out of the website’s appearance when you use a standard free WordPress theme. I’d love to change the style of menu text, its color, and size; I’d like to change the look of the cart and make many more amendments that aren’t possible to make using just the Live Customizer.
However, if you want to create a personal website or a small shop for a certain target audience, you can start from using a free theme and customize it for your needs with the help of custom illustrations, CSS, your own logo, header images, etc.
Two-Tone Color
The next style I’d like to apply will be just a trial. We already know it’s not possible to completely alter a web-page but it’s quite possible to beautifully customize it up to your taste.
I’ve assembled a bunch of examples that present the two-tone color style the best:
Routalempi
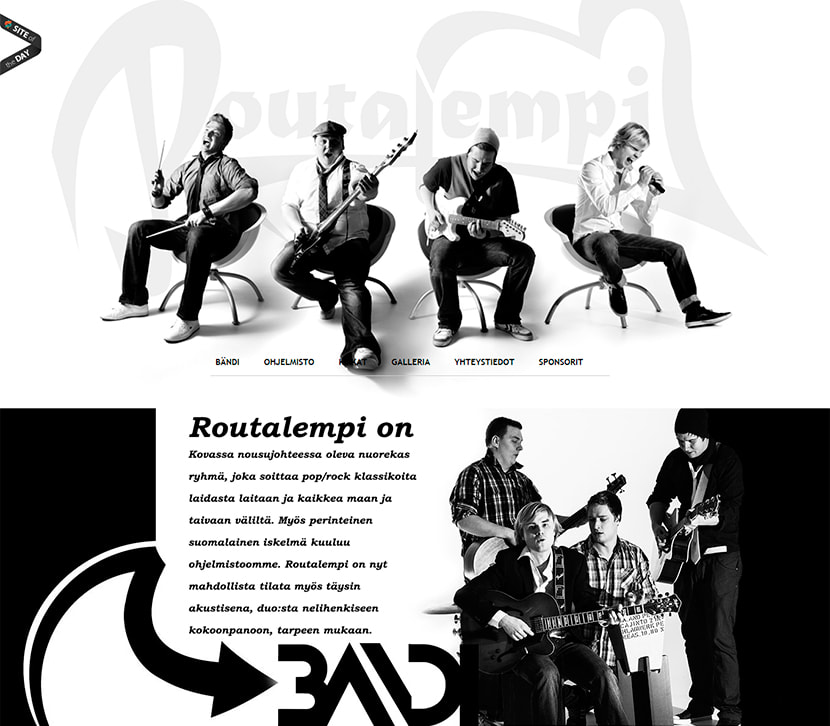
An originally looking website of a music band from Finland.
CrusoVision
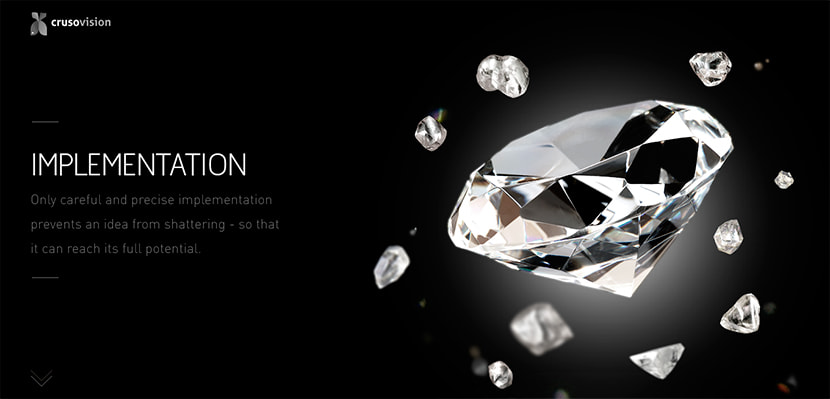
A website of design and programming team from Switzerland.
Chylak
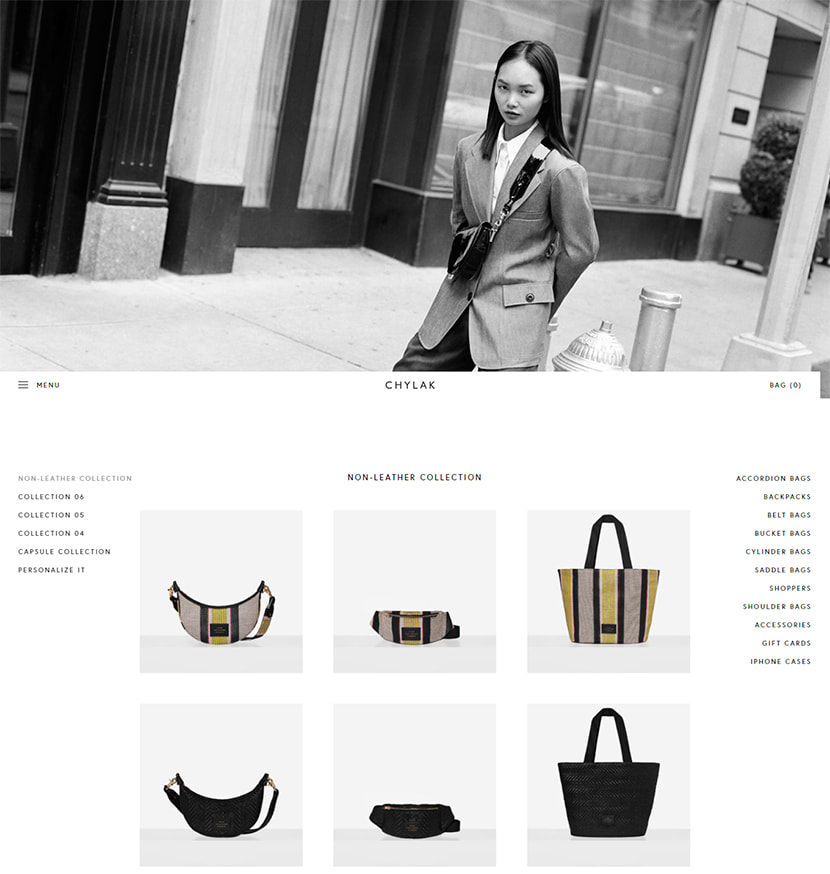
Minimal online-store selling bags and accessories.
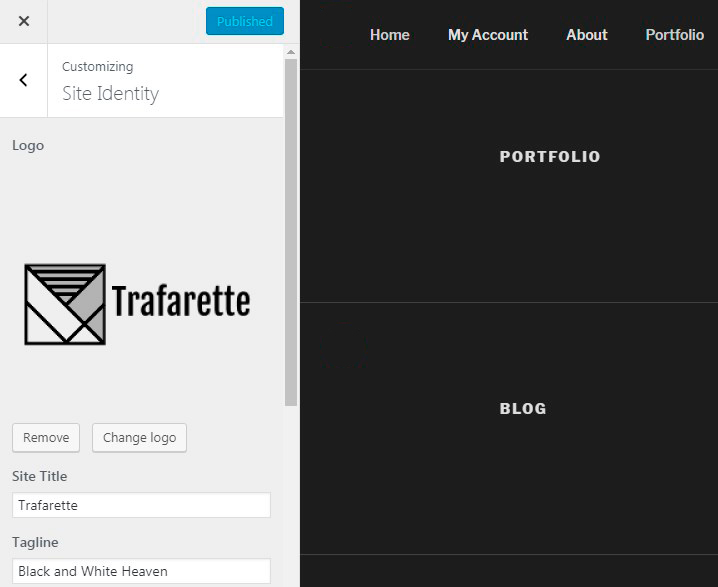
So for my next customization experiment, I will take Twenty Seventeen default WordPress theme – a simple standard solution for beginners. I’d love to create a portfolio website for illustrator and stencil maker.
Here I’ve invented a website title and created a logo myself using a free logo generating service. I can’t edit the logo height here, so I upload it in its original size 200×200 px.
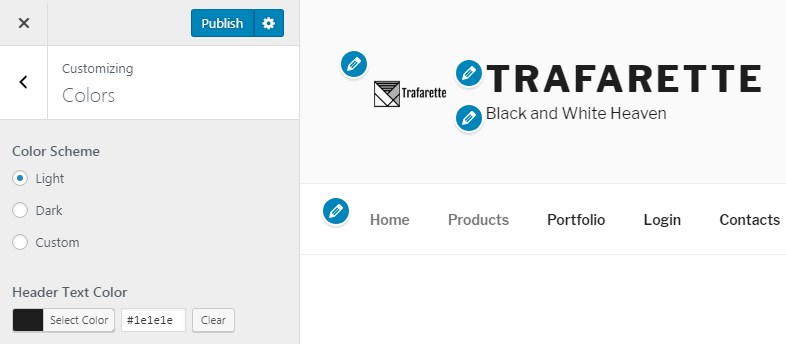
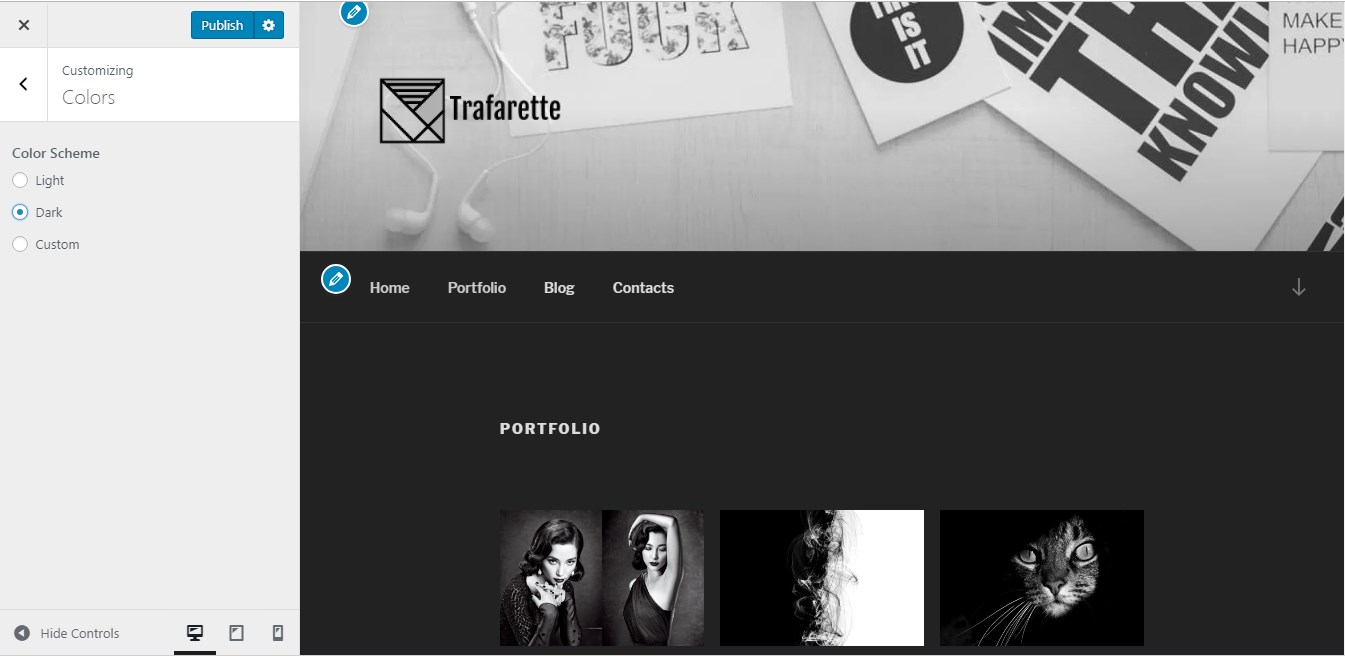
The theme allows selecting either light, dark or custom color schemes for my website.
After that, I try different header media and finally choose the most suitable one.
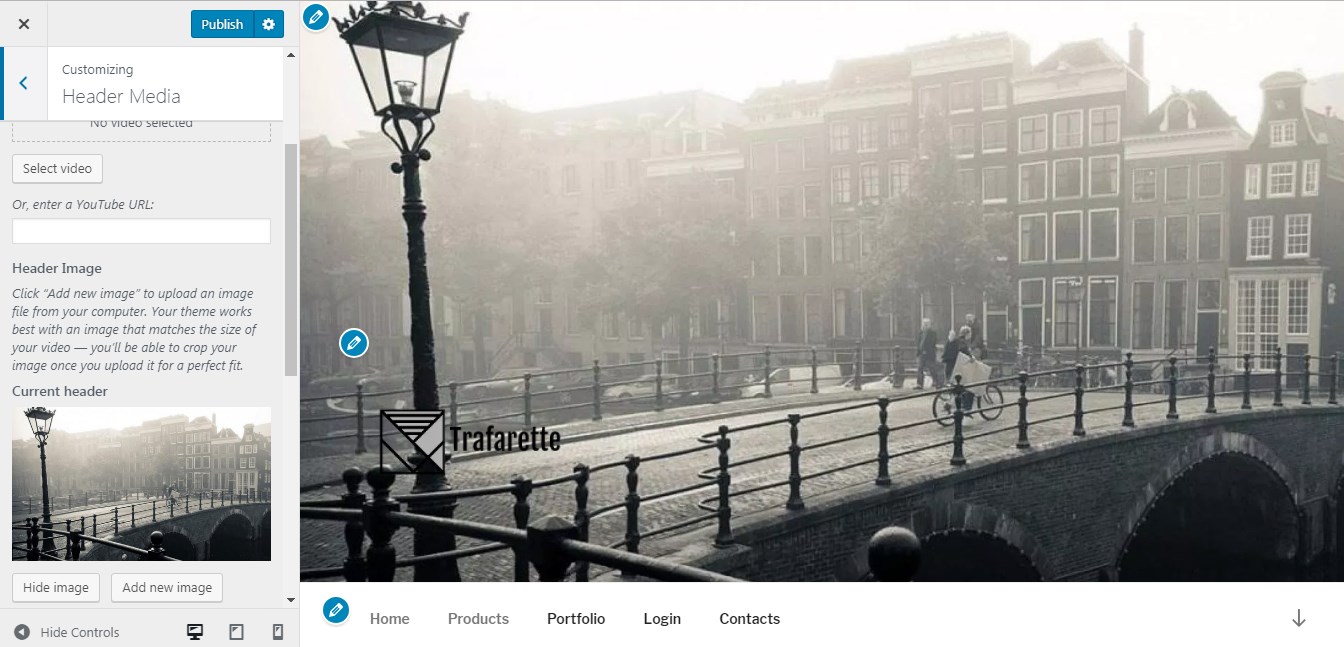
It’s important to select a header that will make my logo clearly visible.
I manage the menus as well as I did with the first theme.
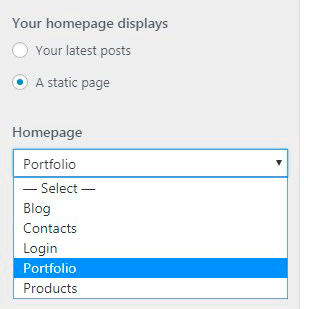
And now I choose the homepage content – I prefer the Portfolio static page.
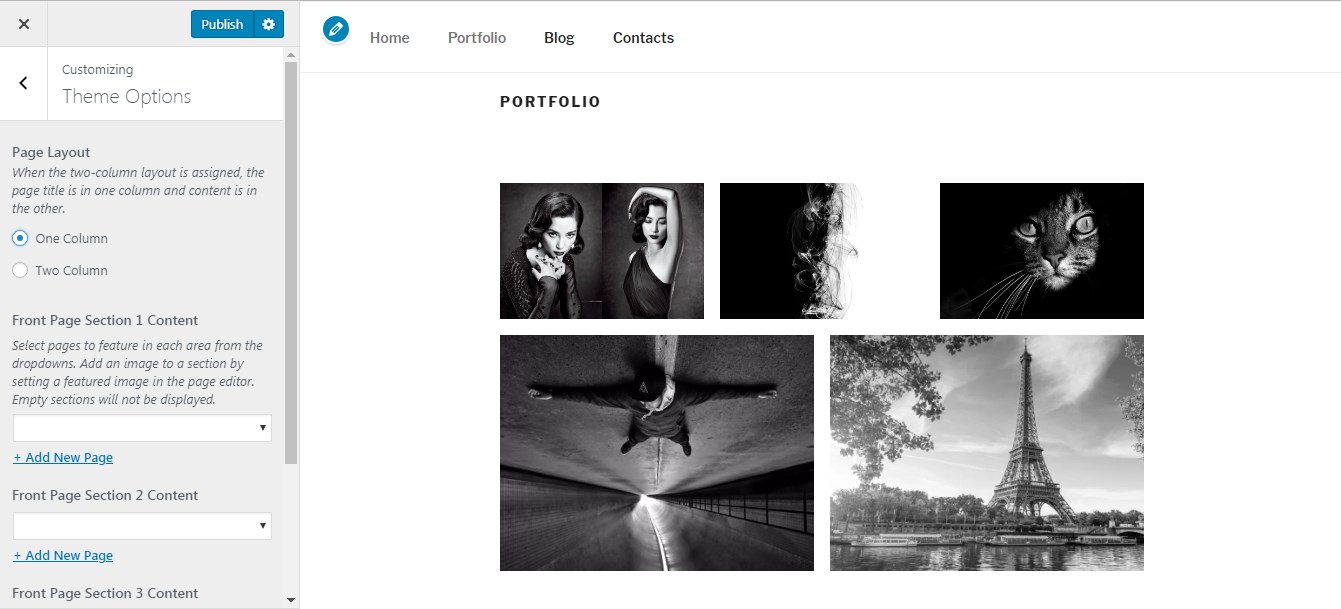
I’ve uploaded a few photos into the gallery to be displayed on the portfolio page, so now I go to the Theme Options in the Customizer and select a One Column page layout to make my portfolio look better.
When it comes to changing the background I just go to the Colors section of the Customizer and choose the dark color scheme. This is all I am allowed to do here.
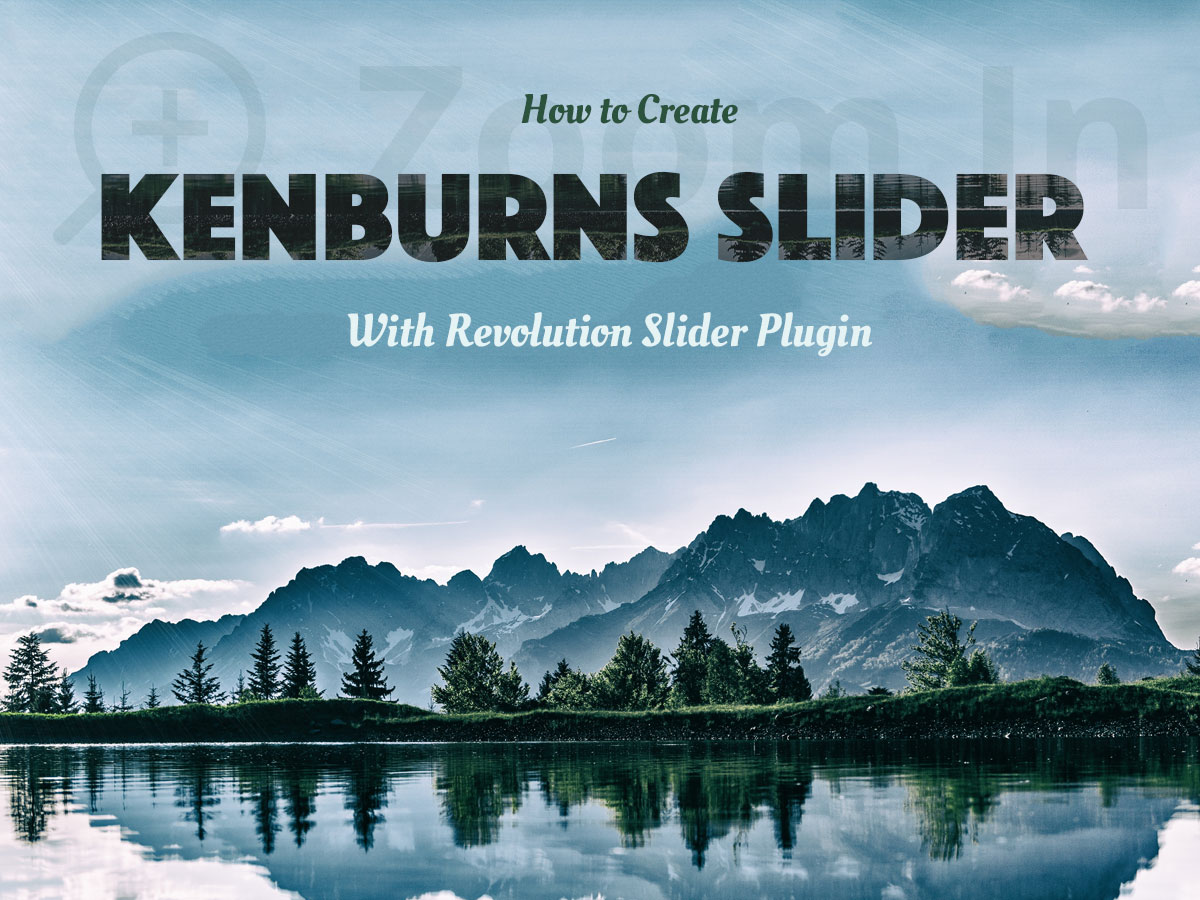
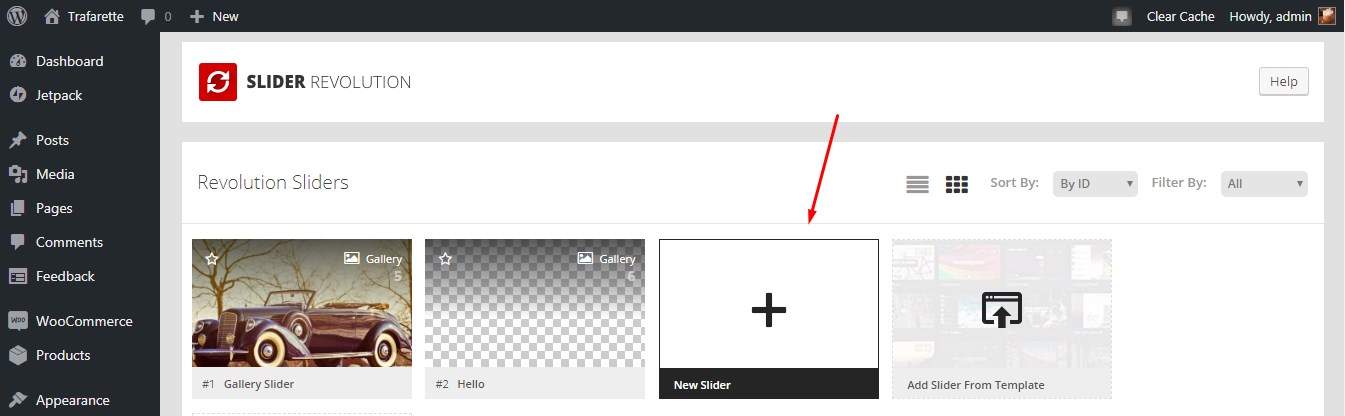
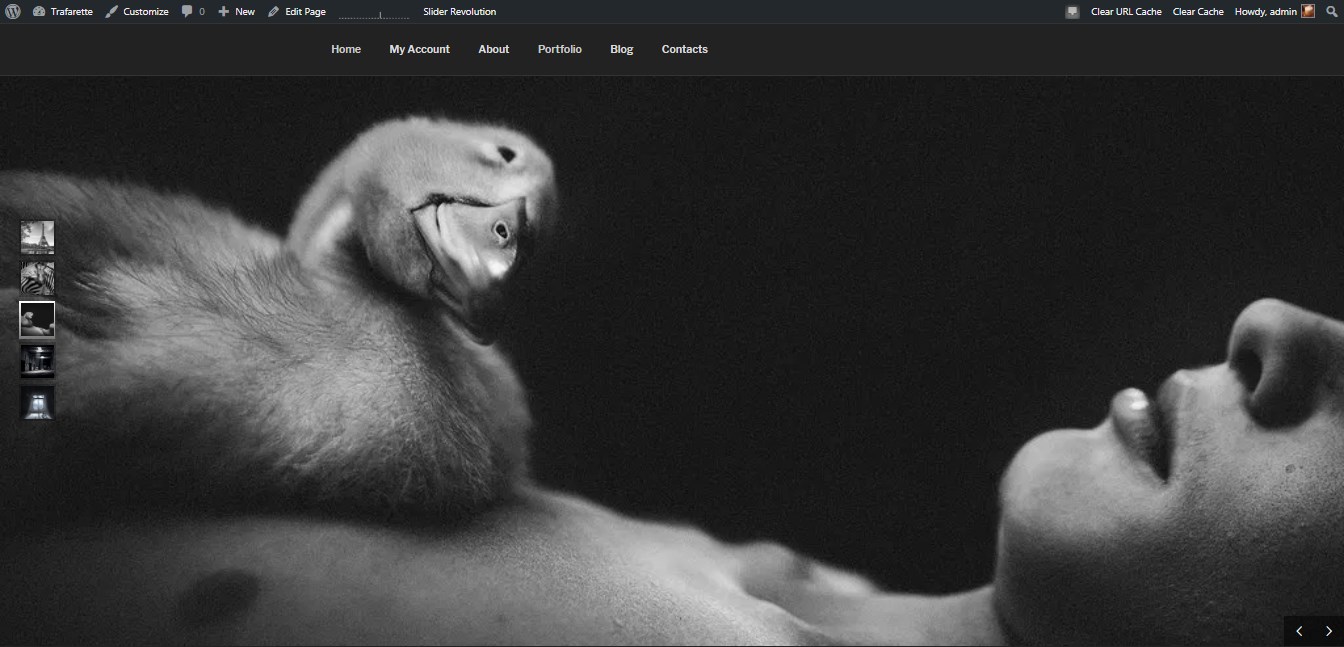
And now I’d like to add a homepage slider to be located above my portfolio. You can read a detailed guide on how to add a slider with the Revolution Slider plugin here.
I just click New Slider
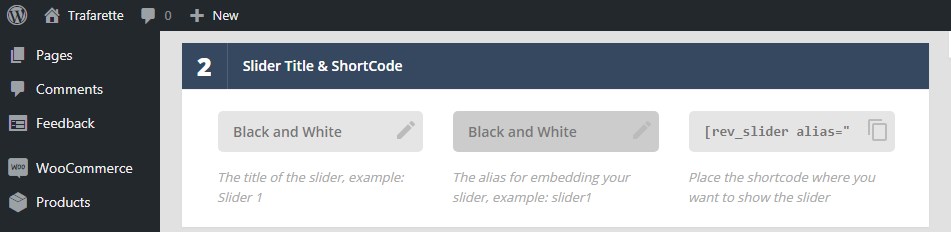
and insert its title and alias to go further.
After selecting a bunch of photos from the media library my slides are finally inserted and ready to be saved.
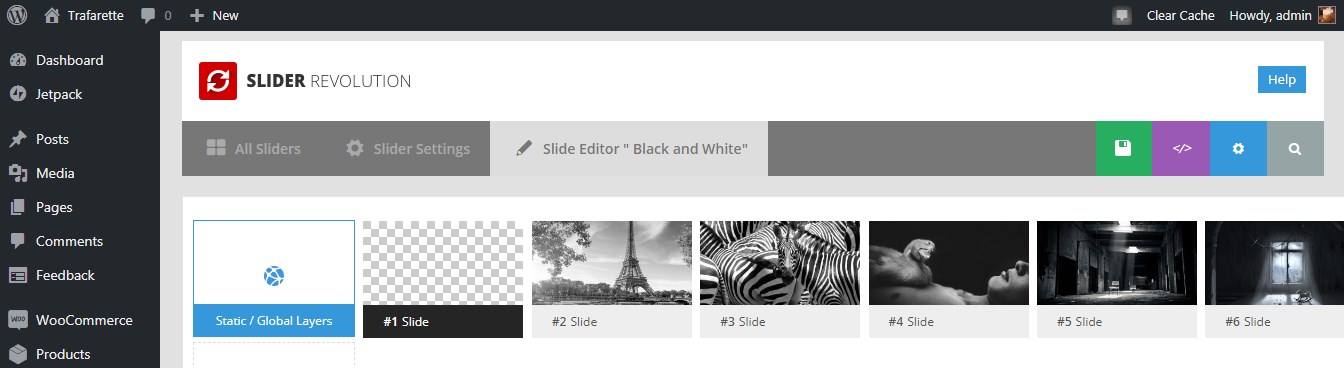
Here’s my slider.
Conclusions:
Two-tone color style is considered to be a minimal one, so you don’t have to “invent the wheel” and create something extraordinary. I guess styling the website, in this case, will be an easy task.
Photo Realism
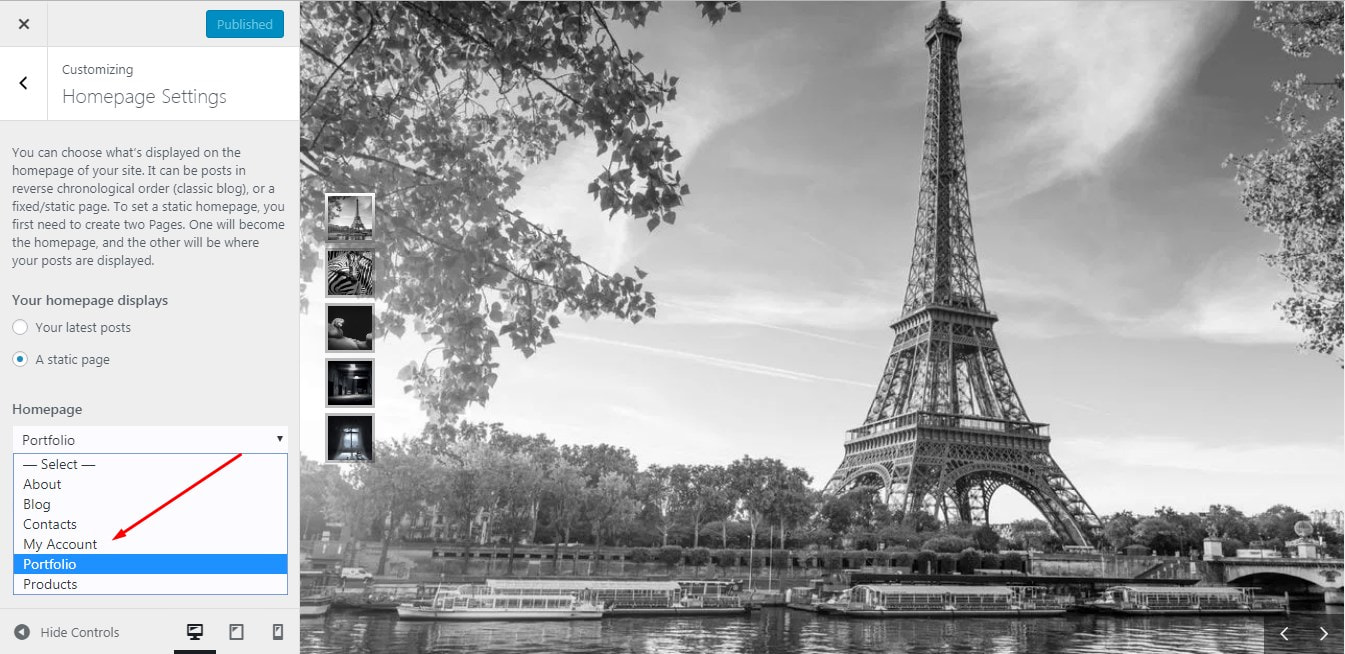
When I activated the third theme for my next customization experiment, of course, I’ve got the settings from the previous theme saved here, so I found that my slider created for the previous design, looks really amazing in the current theme too.
Before we go further, please see some of the most appealing photorealistic websites:
Cupcuff
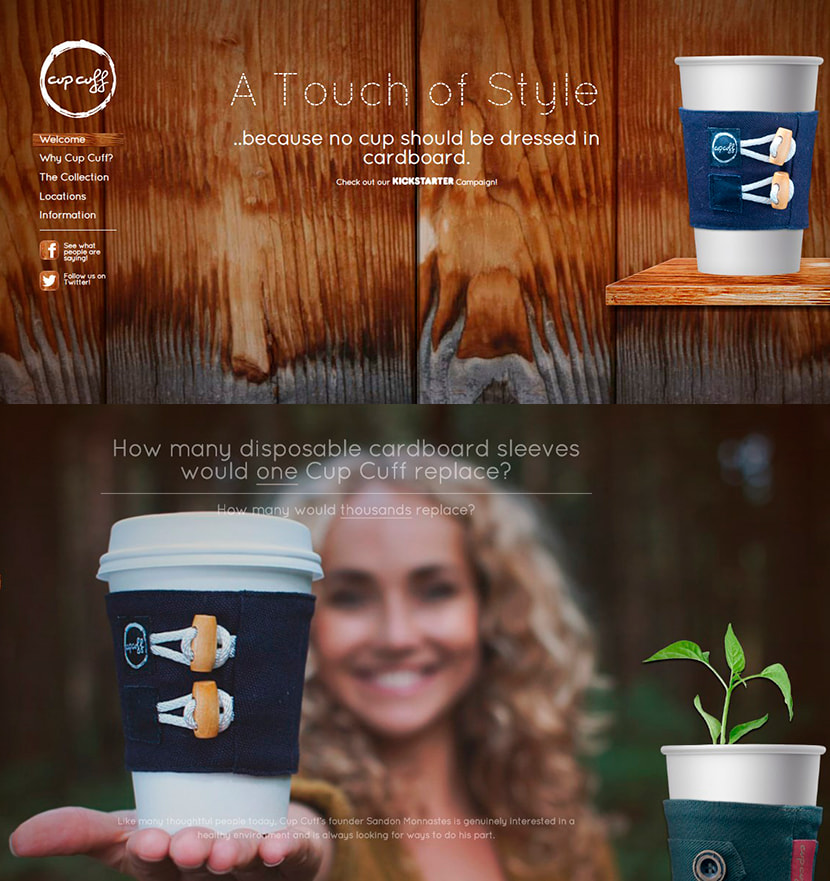
A company specialized in selling cup cuffs that don’t harm the environment.
Yancey’s Fancy
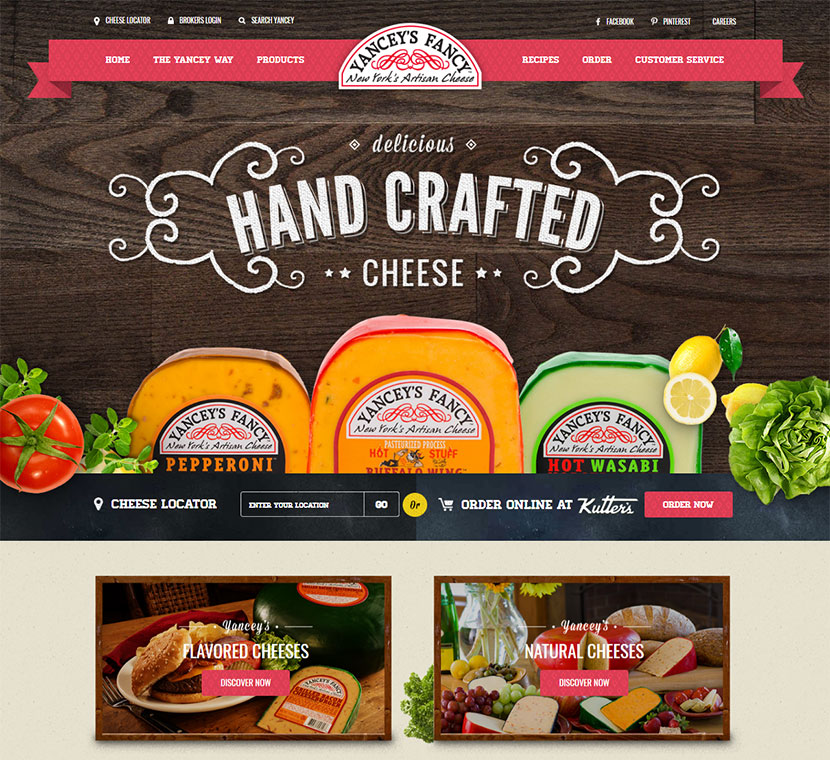
A website of New York’s artisan cheese company.
Pedro Gaspar
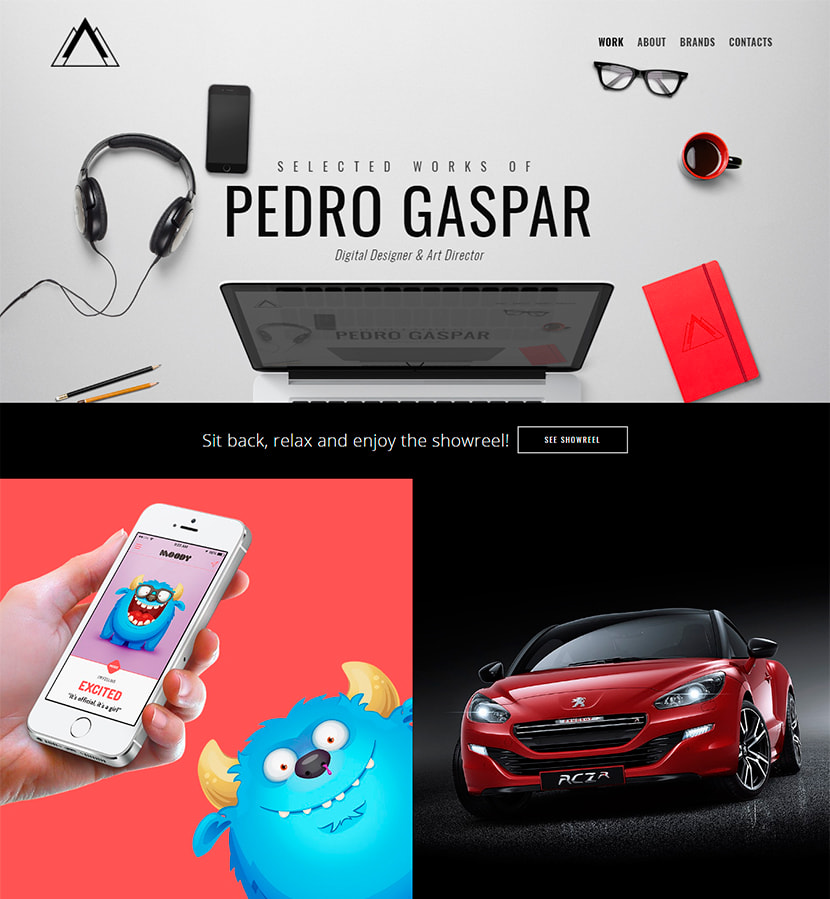
A portfolio of a digital designer and art director.
Now I’m happy to introduce the WP Daddy’s baby – Free Oswald One-Page Creative WordPress Theme. If you’ve already downloaded it from the official WordPress directory, you’ve probably already tried to customize it depending either on your personal or business needs.
You can download and learn the Documentation of the theme to find out what customization possibilities it has. You can either try to customize your website in Photo Realism style or in any other style you prefer. I will just show a few possibilities of customization I’ve used for my “BaseBall Addict” website.
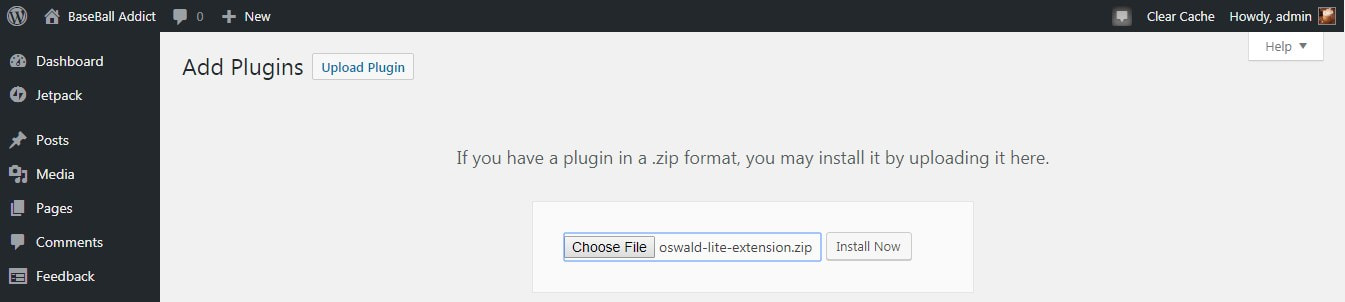
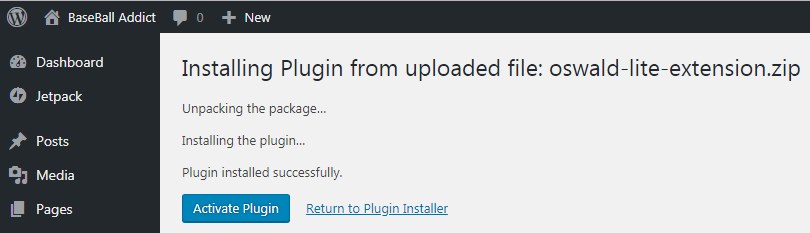
Before you start to customize your Oswald theme, install and activate the Oswald Lite extension to use it for importing the demo content. Go to Plugins -> Add New -> Upload Plugin and upload the zip file to install the extension.
After the installation, activate the plugin.
Now you can go to Appearance -> Customize -> Homepage Settings and select the Custom from Customizer option. After that, you can start editing your website with ease.

I start from Site Identity and I upload a logo for my site. The theme allows to set the logo height, so if a recommended logo size is 265×90, you can easily set the 90 px height for your logo.
![]()
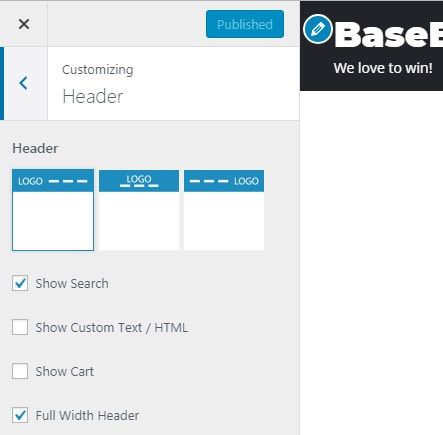
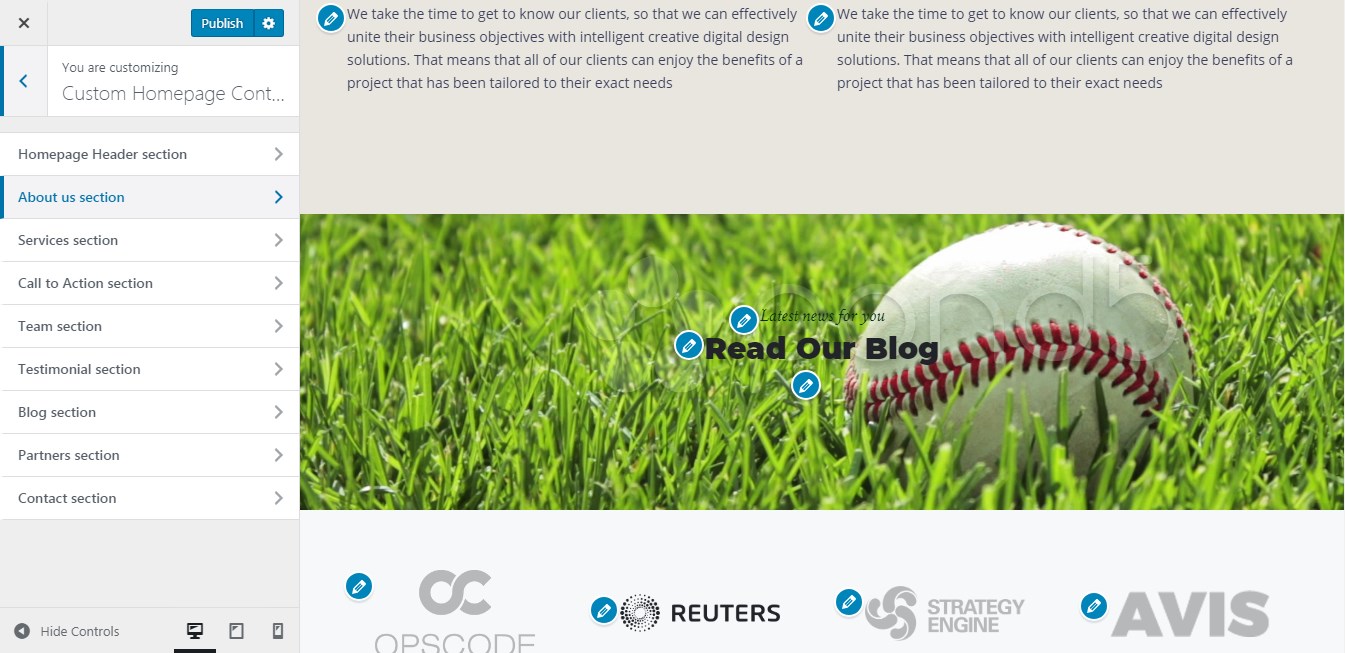
If you go to Custom Homepage Content section in Customizer you will find a Homepage Header section, and here it’s possible to easily upload a header image, change the title, change the main text and its color, select the color and text of buttons, etc.
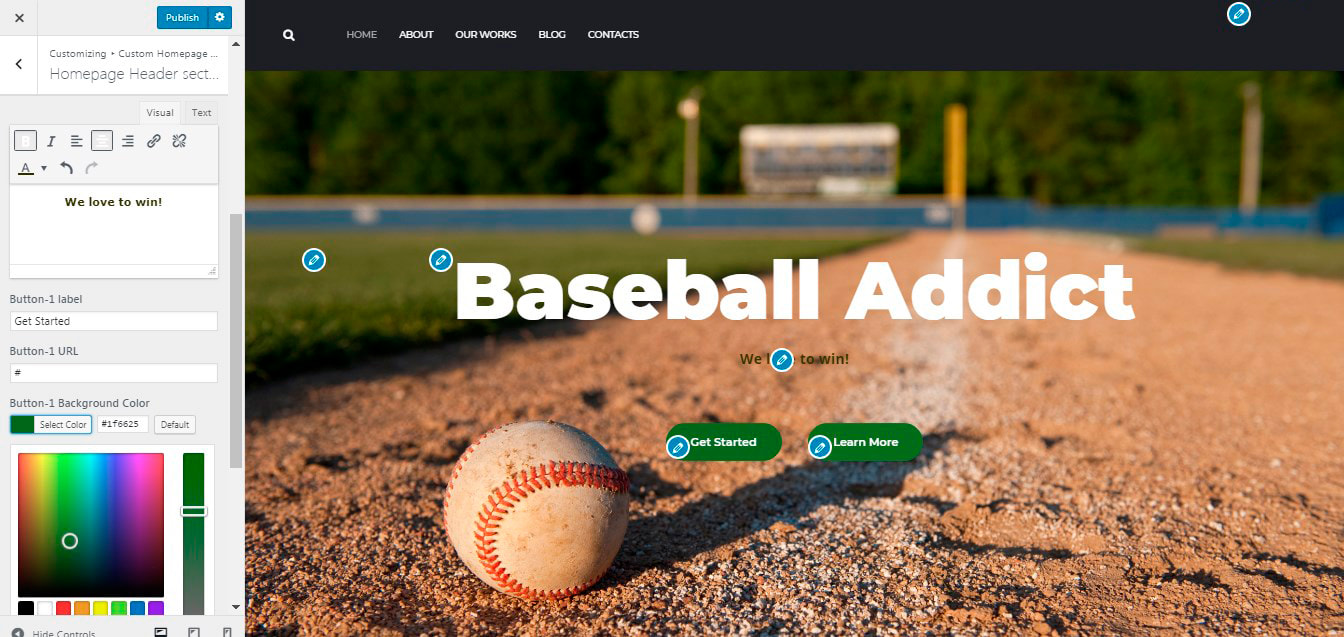
By the way, the Header section in the Customizer allows selecting a header layout that defines the position of logo and menu.
By clicking the editing pencil near every section you can edit either About Us, Services, Team, or any other sections of the website with simplicity.
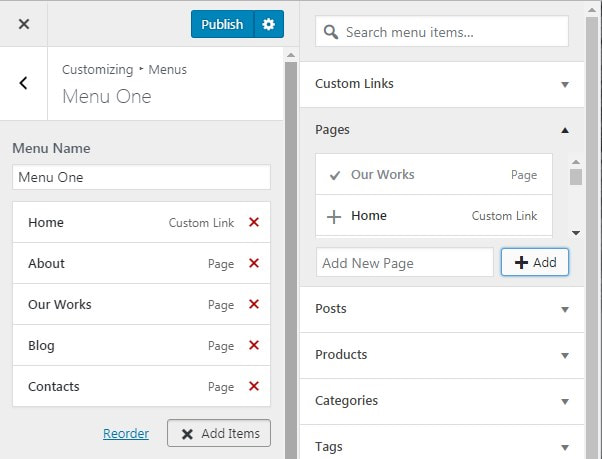
You can also easily edit menus as well as you do it with any other free theme.
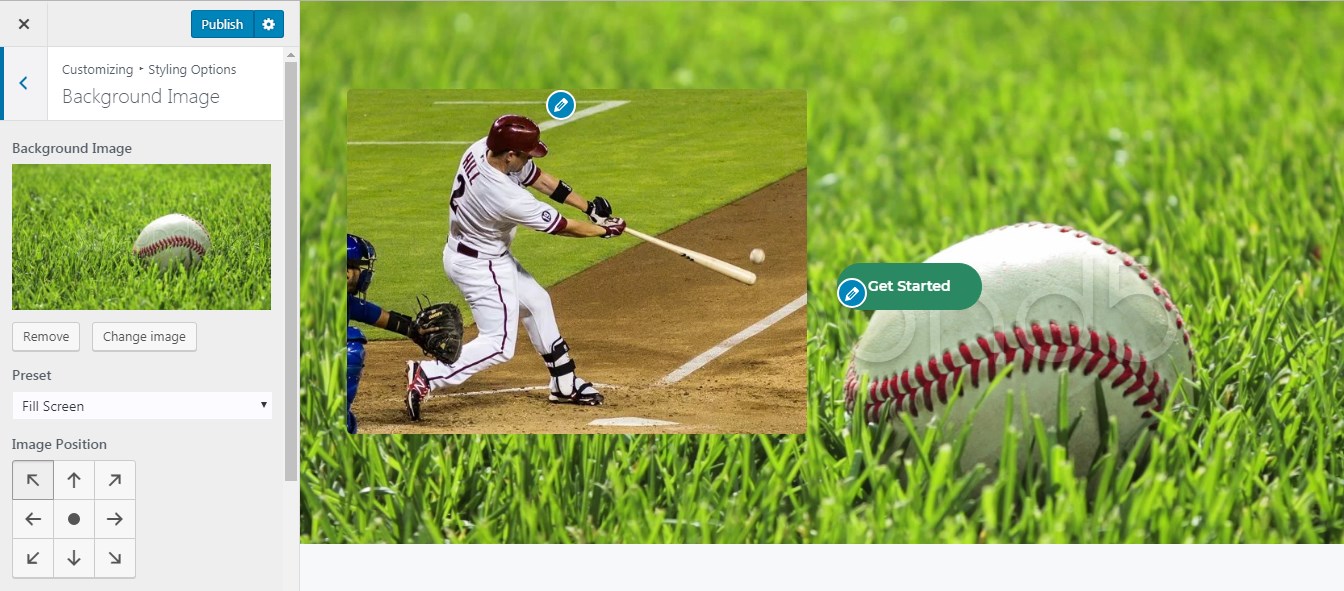
The Styling Options of the Customizer allow to upload the background image, select its preset and position.
Conclusion: So, as you see, I was trying to use Oswald for creating a baseball-oriented website, and I guess I’ve made it pretty successfully. Among all free WordPress themes I’ve ever used, Oswald is the one that gives the biggest amount of customization possibilities. However, it can’t conquer with its premium alternative which has even more features and editing options.
Final Thoughts:
If you need to create an extensive corporate website or a trustworthy business card, then it’s better to have a serious approach to your website creation and choose an impeccable premium design with multiple features and customization opportunities. But if you just want to create a personal blog, a small online store for a limited target audience or a one-page promotional website, then choosing and customizing any free WordPress theme is quite a good idea.
My experiment has shown that essential alteration is impossible without professional redesign, and customization can only help style my website in different ways without changing the essence of the initial template. The more customization possibilities are provided by the theme, the more authentic your custom website can look. That was the experience for me as a regular user without any coding skills. I hope this review was interesting for you as well. See you!
Melany H.