As we know, WordPress is one of the best platforms suitable for creating almost any types of websites, and a membership site is no exception. If the core functionality isn’t enough for you, you can choose among multiple additional plugins regularly developed for WordPress by contributors from all over the world.
It’s easy to find plugins for online commerce, blogging, job boards, directory websites, and plenty of other variants you can install to extend the set of functions available for your website. So today we will speak on how to create a membership website using WordPress as well as some comprehensive solutions especially created for this purpose.
What to start from?
Of course in this post we will speak about the self hosted CMS you can download at WordPress.org. Your future website should have the unique domain name, and you have to choose a reliable hosting provider for it. Please see this list of hosting providers we’ve featured. It includes only the best offers which are going to help you both save your money and make your website work fast and steadily.
To make your membership website work correct, you need to have an SSL certificate installed. Why? There are three main reasons for this:
- If your website supposes any payments, you need to protect credit card information when you take those payments online. SSL protects a credit card processing agreement, so you won’t get any fraudulent charges and a card processing is going to be successful.
- SSL protects sensitive information including private information of members, their passwords, etc.
- The security of your website influences its rankings in Google search results, so if you want to be on top, it’s important to make your website as secure as possible.
You can get SSL certificate from your hosting provider.
What are the types of membership websites?
There are a few types of membership websites that have different functions and purposes. They include:
1. A site which has the registration and login forms as well as allows users submit certain information on the front-end.
2. A site which allows to accept monthly payments, create membership levels, manage access depending on the level, etc.
3. A website which supposes membership subscriptions, online courses selling, etc.
4. An online community with private forums, messaging systems and online groups.
5. A website with protected download or protected online content.
6. A service based membership.
Depending on the type of a website you’d like to create, select the necessary plugin which will provide the functions you need for your membership site.
UltimateMember Plugin for User Registration and Login
For instance, let’s try to work with a membership website where people will be able to register and login into their member area. We will use a free UltimateMember plugin for this purpose.
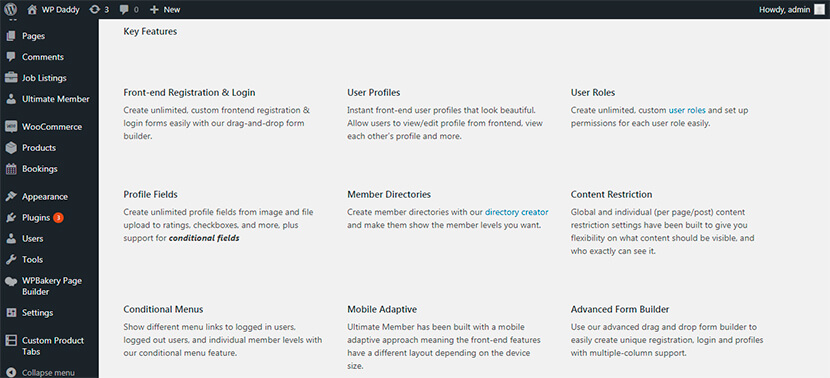
After the plugin is installed and activated, you will probably have to reach out to your WP dashboard to manage General Settings. Here you’ll have to check the Anyone Can Register option in the Membership section to enable the user registration on your website.
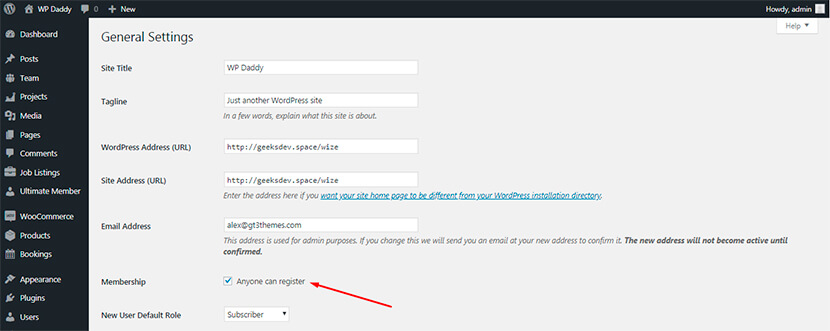
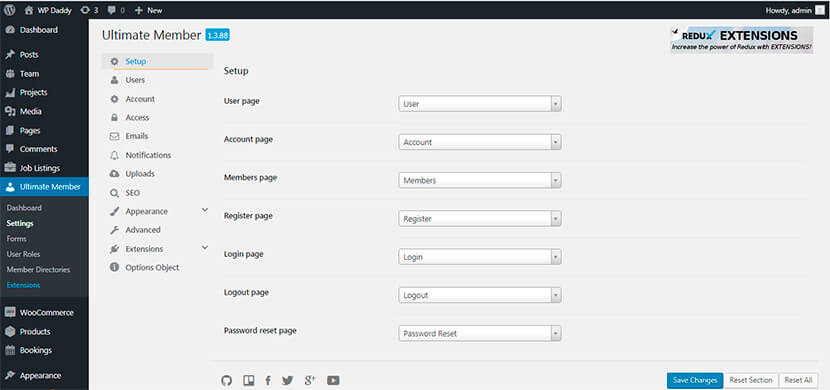
To start configuring the plugin, go to Ultimate Member-> Settings and manage such aspects of the plugin as Setup (where you can set a user, account, members, and other pages), Account (for turning on/off the password account tab, privacy account tab, etc.), Access, Email, Notifications, Uploads, SEO, and more.
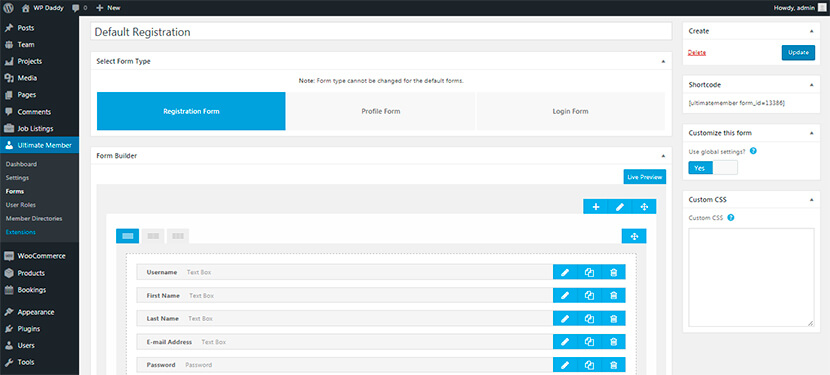
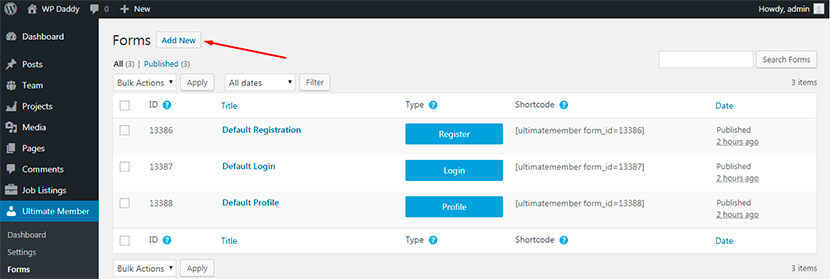
In the Forms section you’ll be able to choose among a few default forms and then create either a Register, Login or Profile form depending on your needs.

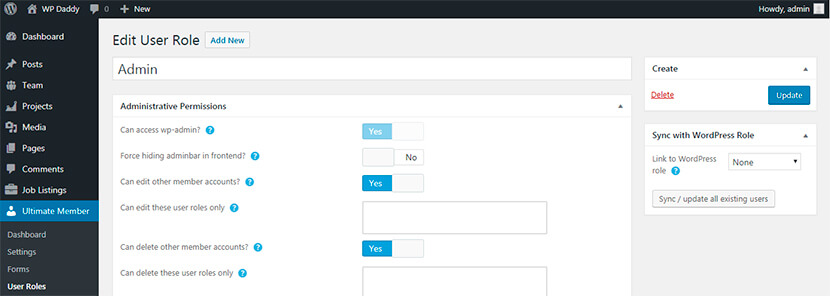
If you go to the User Roles section, you’ll be able to manage the existing user roles, add new roles, and edit any role individually. For instance, you can define whether the chosen member can or can’t access the wp-admin, force hiding adminbar in frontend, edit other member accounts, etc.

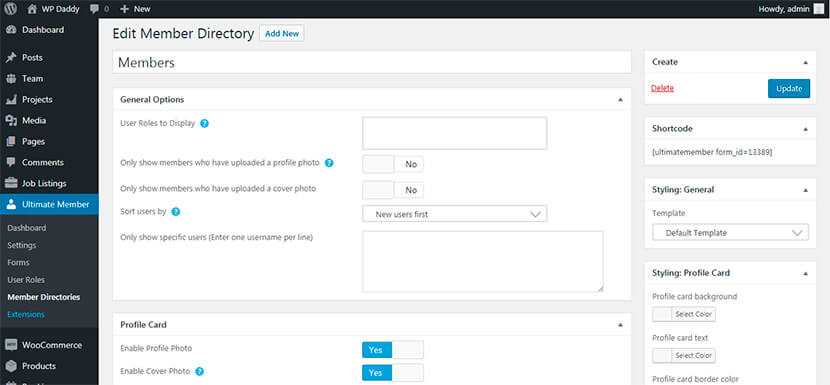
If you go to the Member Directories section, you’ll be able to manage:
- General Options to define the user roles to display, show members who have uploaded a profile photo, etc.;
- Profile Card to enable profile photo, enable cover photo, etc.;
- Search Options to enable the search feature;
- Results and Pagination to define the number of profiles per page, maximum number of profiles, etc.

So let’s add a new registration form:
Go to Ultimate Member -> Forms and click the Add New button.
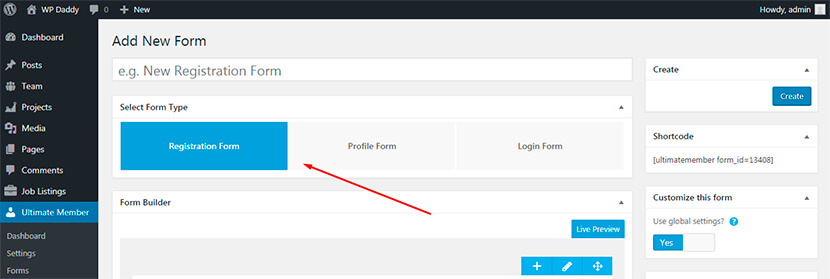
Right here you can instantly add a form’s title and then choose the type of a form you’d like to create. Just click either Registration, Profile or Login form in the Select Form Type section.
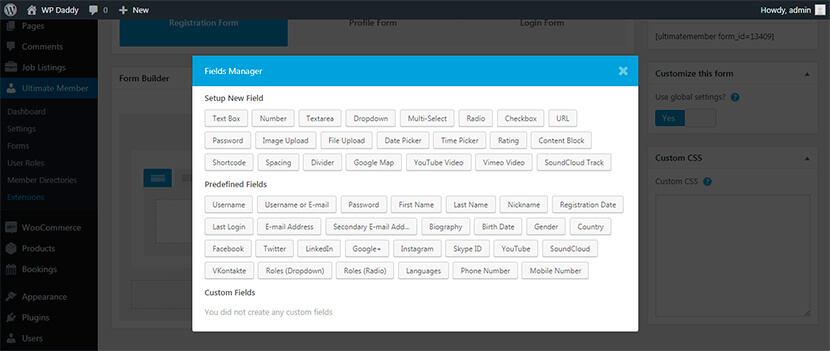
After that you can use the Form Builder to create new fields. Please remember that a big amount of fields to fill in can be frustrating for a user, so leave just the most important ones, for instance Name, Email, and Password.

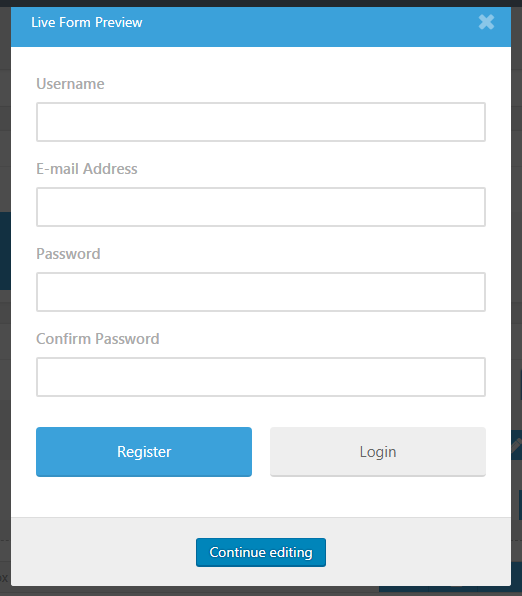
So after the editing, you can preview the register form to see how it looks.
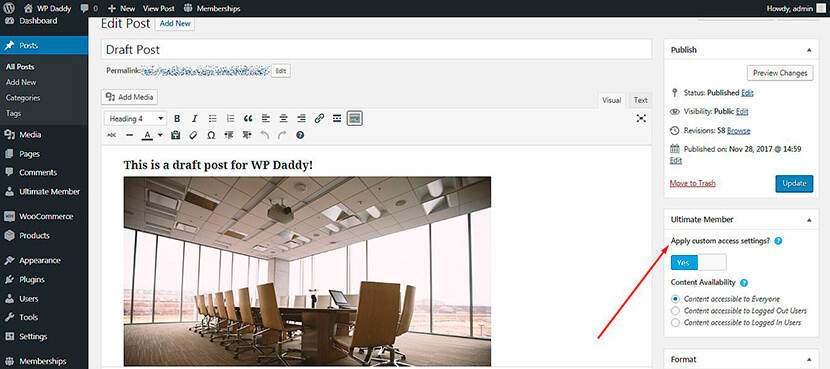
After you’ve provided your users with the ability to register and login, you can decide what users will or will not be able to access a definite type of content. For instance, go to Posts -> Add New, create a post and then go to the Ultimate Member section either to turn on or turn off the ability to apply custom access settings for this particular post.
In the Content Availability section you will be able to decide whether this post will be accessible to everyone, or it will be visible either for logged in or logged out users only.
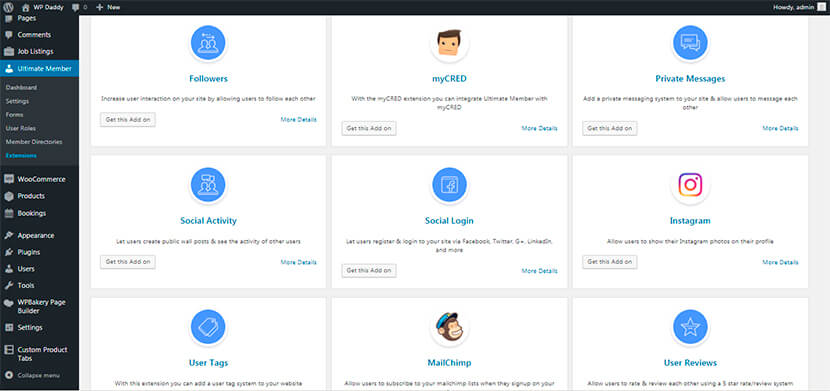
This plugin goes with a number of compatible extensions including Instagram, Mailchimp, WooCommerce, Private Messages, and some others. You can get any of them to use for your membership website.
Paid Memberships Pro to Handle Websites Accepting Payments
Probably you’d like to create a website where users can buy membership levels to get certain privileges. Depending on the level of a member, you can either allow or restrict access to any website areas. Paid Memberships Pro is a good plugin to use for this purpose.
So let’s review its main settings and possibilities.
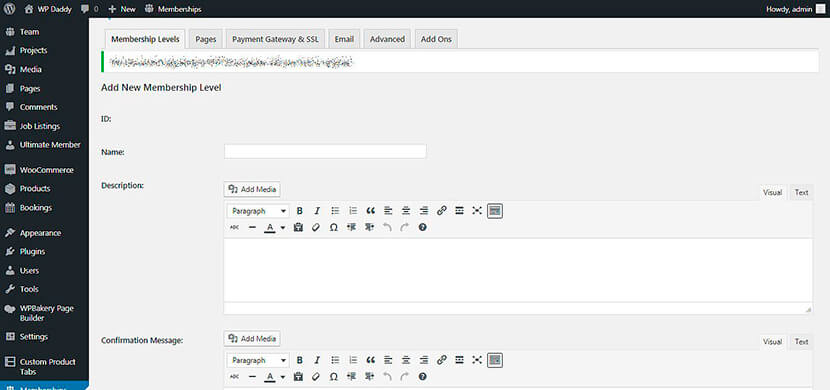
Before managing the settings, you should create a new membership level to start with. For that, go to Memberships -> Membership Levels and click the Add New Level button.

You will have to add a name, a description, a confirmation message, billing details, and manage some other settings.
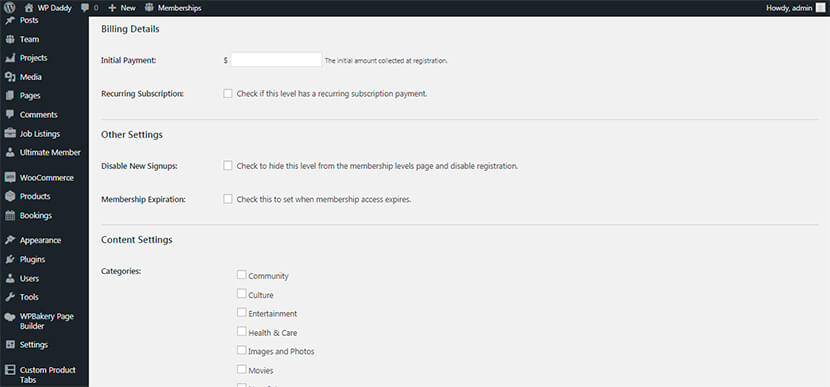
After you are done, click the Save Level button and you will see it ready and available in the Membership Levels list.

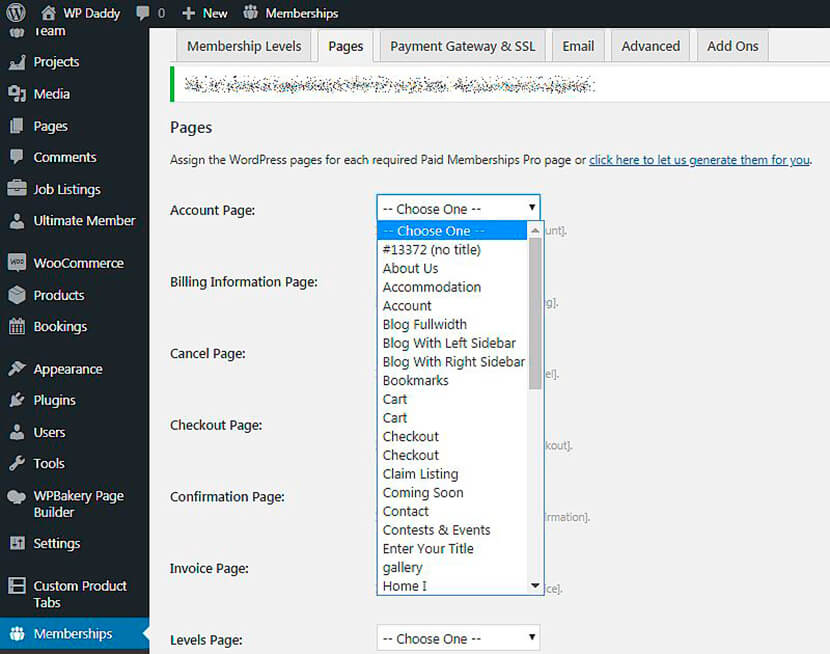
Next, go to the Page settings and configure the pages up to your needs. For instance, you can select the Account page, Billing Information page, Checkout page, and other pages from the list of the existing ones.
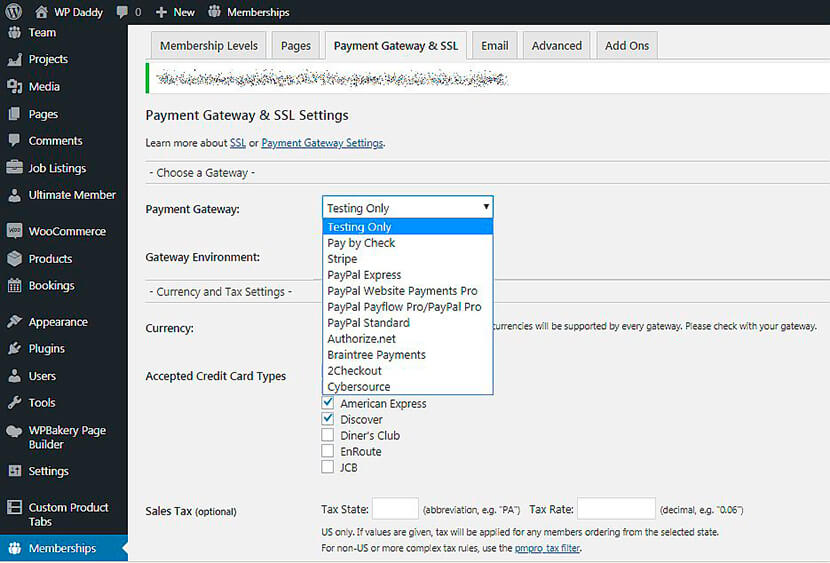
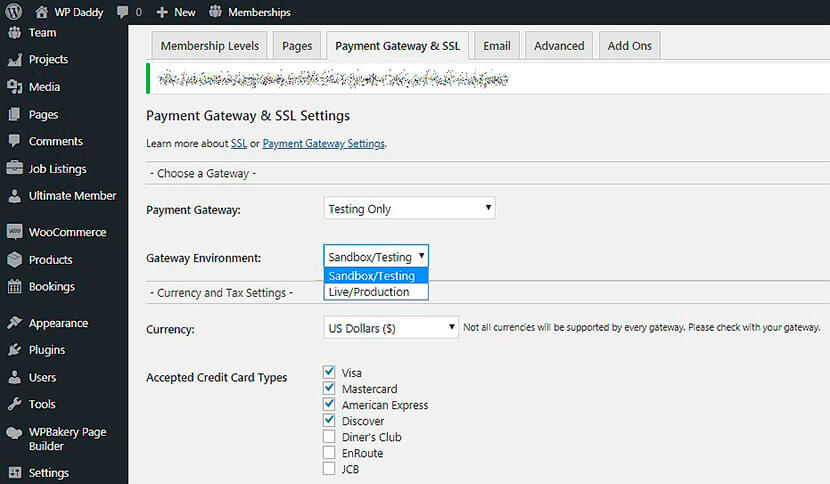
Go to Payment Gateway and SSL settings to choose a gateway, force SSL, select currency, accepted credit card types, etc.
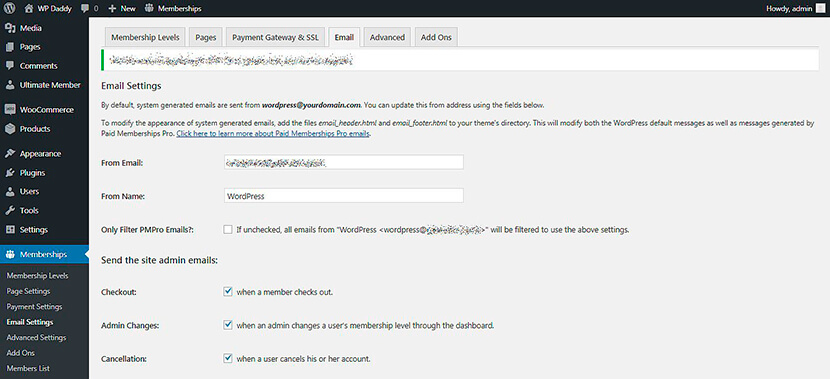
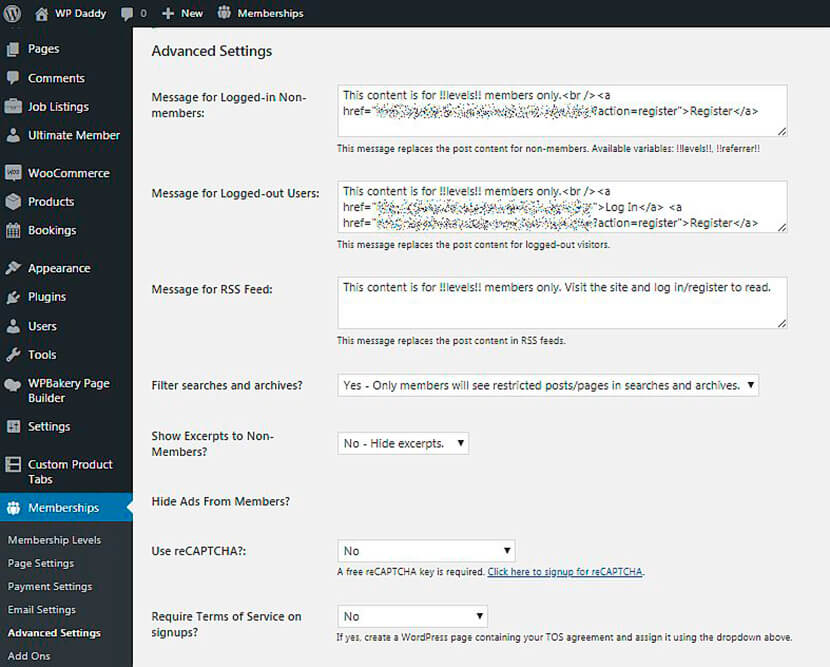
You can also manage the Email and Advanced settings as you require as well as browse and download the available Add-Ons which come compatible with the plugin.
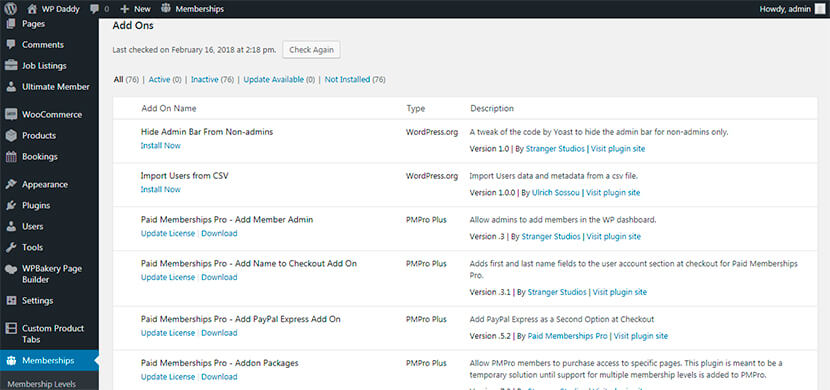
All registered members will be displayed in the Members List. You can export this list to CSV (comma separated values file) on your PC and then monitor every member’s first and last name, email, address, billing information, etc.

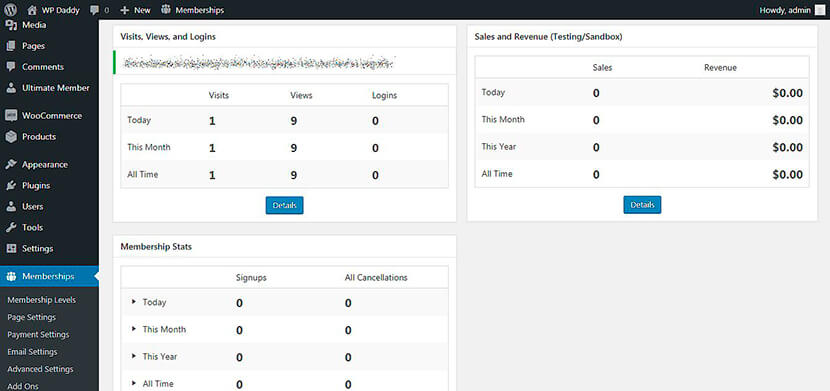
The Reports section allows to review visits, views and logins, sales and revenue as well as membership stats.
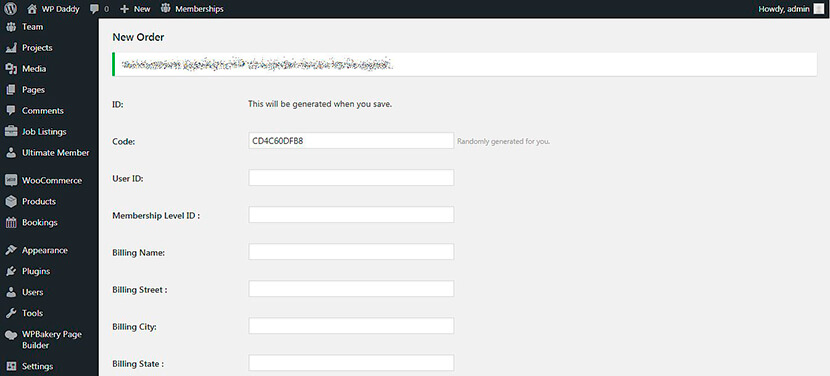
And the Orders section allows to add a new order for a certain user ID and membership level ID. Just click the Add New Order button to start editing the order.

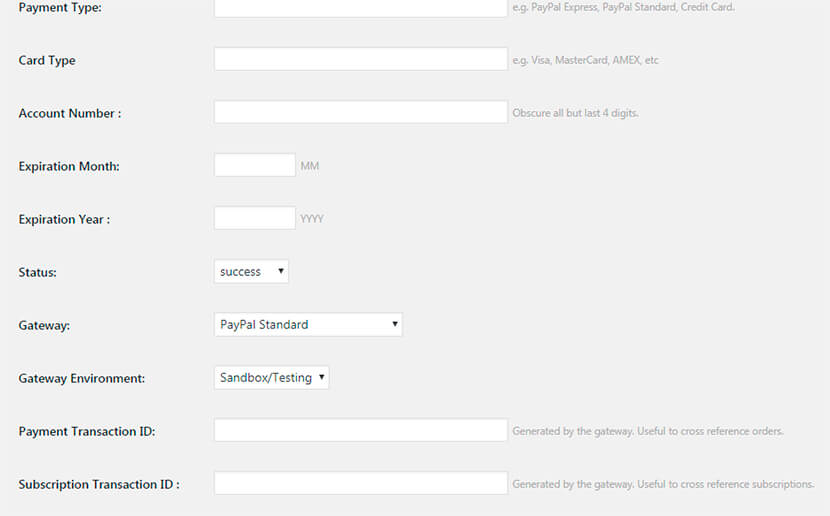
You can also easily create the Discount Codes to apply them to the members of a definite level.
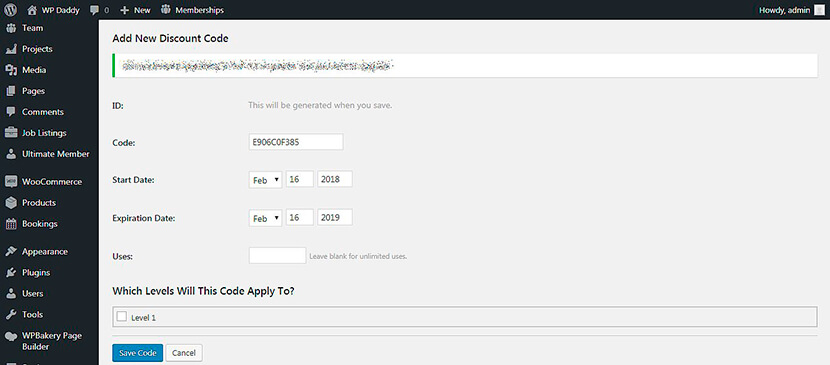
So, after you’ve managed all the settings, go to Posts -> Add New to check out the functionality of the plugin.
For instance, you create a definite content, and you want this content to be available only for the users of a certain membership level. So, when editing the post, scroll down to the Require Membership section and check the level you want this post to be visible to.
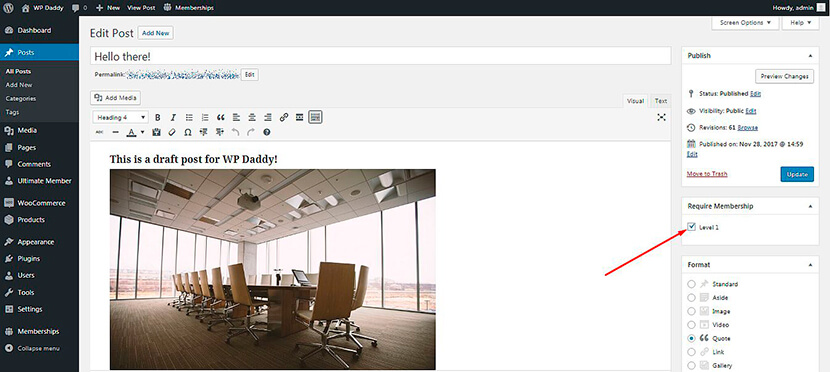
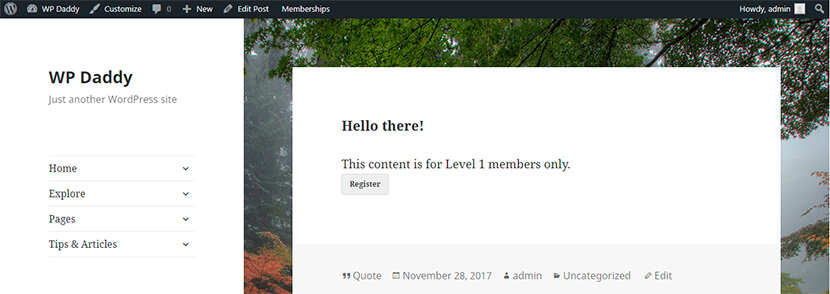
When you go to see this post live, you’ll notice the restriction announcing this content is available for a certain level members only. So users can register and buy the membership level to get access to this content.
Is there anything else to think about?
Of course, the design plays one of the main roles when you launch a membership website. So, it’s important to pay attention at the coolest WordPress themes which both look great and support the membership website functionality.
Such themes should have the front-end submission abilities, login and registration forms, etc. For instance, you can pay attention at some or the following theme collections we’ve recently featured on our website:
Real Estate and House Rent WordPress Themes for Agencies and Single Property Owners
Directory and Listing WordPress Themes to Find Cool Spots in Any Location
Best LMS Education and Teaching Courses WordPress Themes for Students and Teachers
Hope you’ll be able to find the design which best matches your needs.
Conclusion:
If you’d like to create a directory and listing website, a site for realtors and property owners, a forum or social network, or any other related membership website, be sure to choose the right solutions to easily manage their functionality, their appearance and work. We recommend WordPress as one of the best platforms for creating any websites. This CMS is exceptionally easy to use and understandable for non-programmers. So just go ahead and good luck!


