Do you want to run a full-fledged store on WordPress? Or probably you just wish to sell a single product? Then, of course, you need credit card payments functionality to be available on your website.
By default, WordPress doesn’t provide the ability to create an online store and sell products on the Web, so if you want to sell online, it’s easy just to install WooCommerce and configure it for your website.
It’s also obvious that WordPress comes without credit card payment options, so if you want to make it convenient for your customers to place orders, it would be great to use some additional plugins and solutions to make credit card payments possible.
No matter you own a store or you just provide services that customers can order right on your business website, the opportunity to proceed credit card payments is important.
So in this post, we will speak on how to set the ability to accept credit card payments on your website.
SSL and HTTPS
Before we start, please note that you will have to enable HTTPS/SSL on your site. This is required for sharing personal information in a secure manner.
Your customers will sign in, create accounts, make purchases, so they have to be sure that their personal data won’t be stolen. If all of the information they share is not properly encrypted it can be spied upon until easily stolen, so SSL is required to avoid this.
When SSL certificate is installed, your website address will look like https://example.com, so you see that HTTP is replaced with https now. SSL provides the encryption technology for making a connection between your browser and the web server – secure.
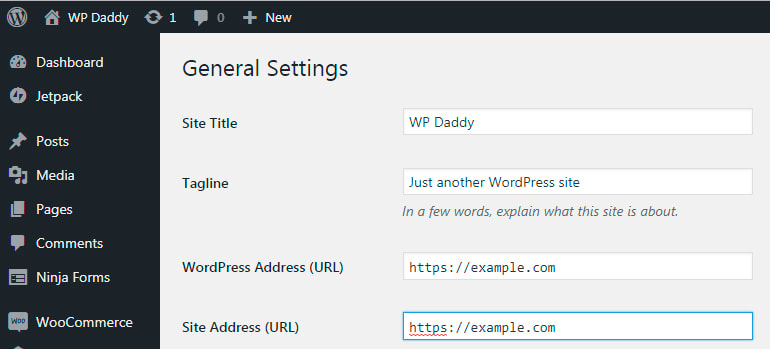
When you browse the websites, you probably sometimes receive a warning message that a certain website is insecure to connect to. This means that the installed certificate doesn’t match or the server is not an https one.
To enable SSL certificate, please address your hosting provider.
Configure WooCommerce
To start selling your products and receiving credit card payments, you can either setup a full-fledged shopping cart or just create an online order form with a credit card payment option. The second variant is preferable if you are either selling a single product or accepting payments for services.
First we will speak on how to accept credit card payments in your completely functional online shop.
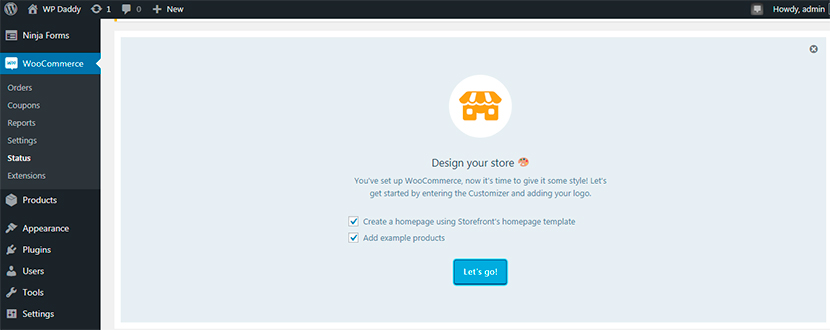
To start selling, you should properly configure your WooCommerce account. So, after WooCommerce has been installed and activated, let’s see how to set WooCommerce for your WP website:
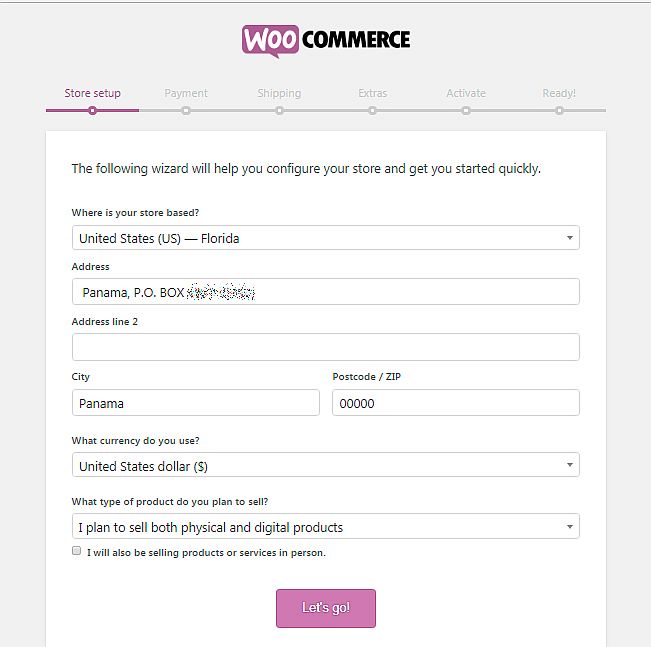
The first step here requires to insert your physical address, your zip postal code, and choose the type of product you want to sell.
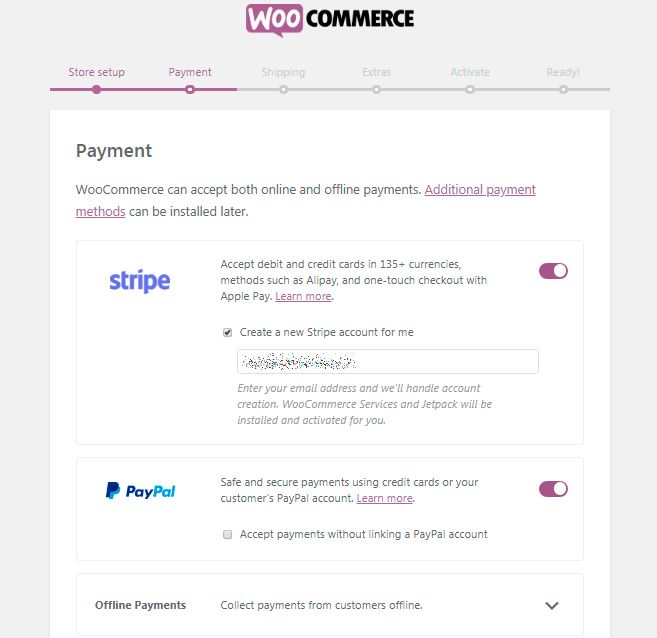
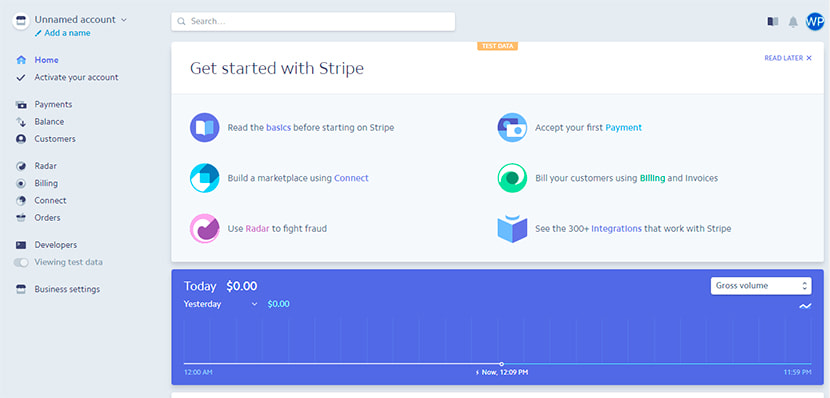
The second step allows selecting payment methods that will be available on your web store. When choosing Stripe for accepting debit and credit cards in 135+ currencies, check the option to create a new Stripe account for yourself and insert your email. Your account will be created automatically.
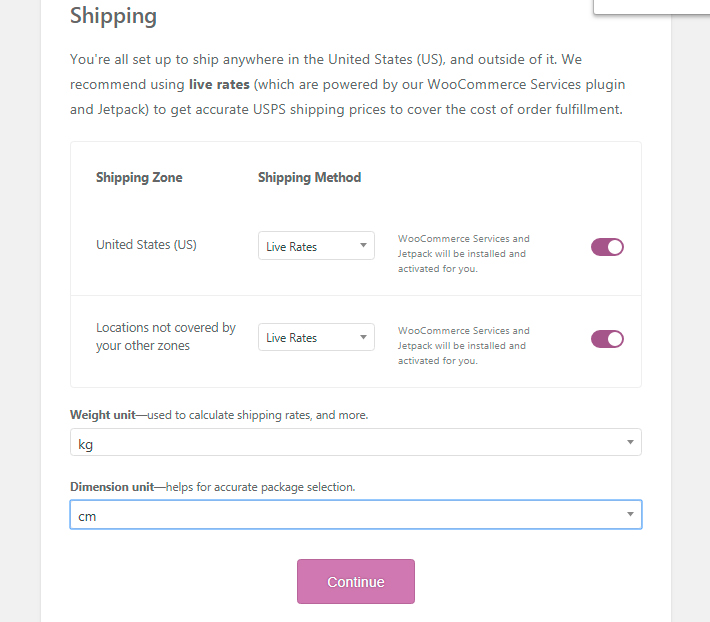
The third step allows to choose a shipping zone, select shipping methods as well as pick the weight and dimension units from the available drop-down list.
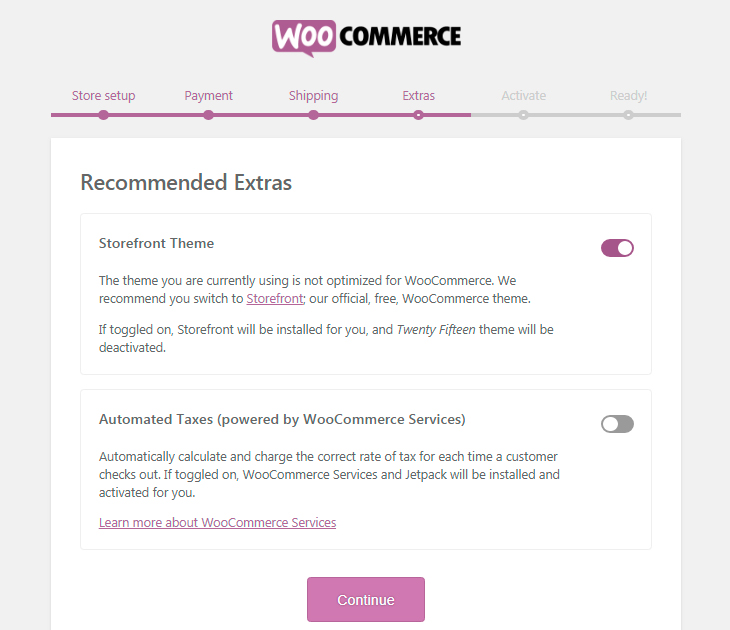
The fourth step is devoted to recommended extras, so you can decide wether to toggle on the option of Storefront theme to be used for your web store or decline this offer. By the way, you can also select the option to automatically calculate and charge the correct rate of tax for each time a customer checks out.
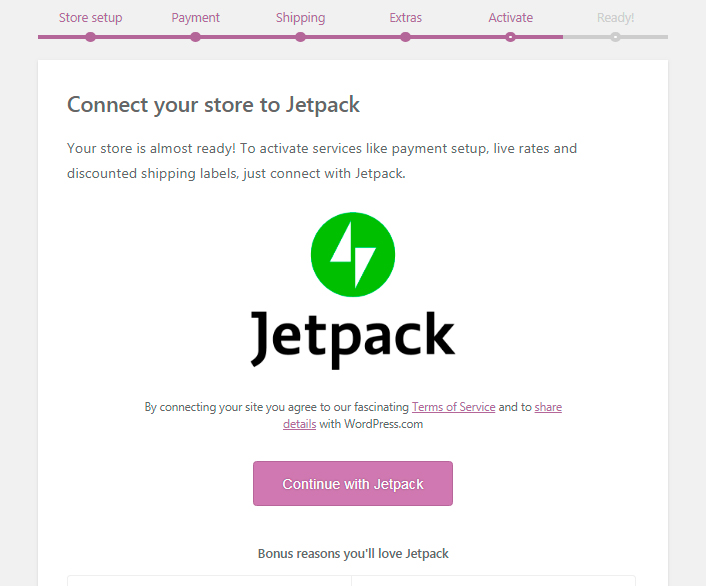
To activate services like payment setup, live rates, and discounted shipping labels, just connect your store to Jetpack. This is an affordable solution to get started with keeping your personal or business website backed up and spam-free.
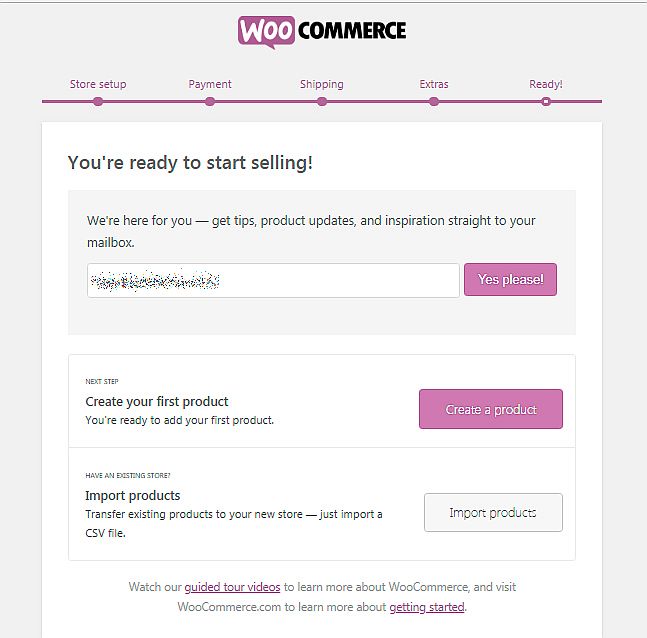
And the last sixth step notifies you now are ready to sell your products with ease. Here you can leave your email to get tips, product updates, and other information if you need it.
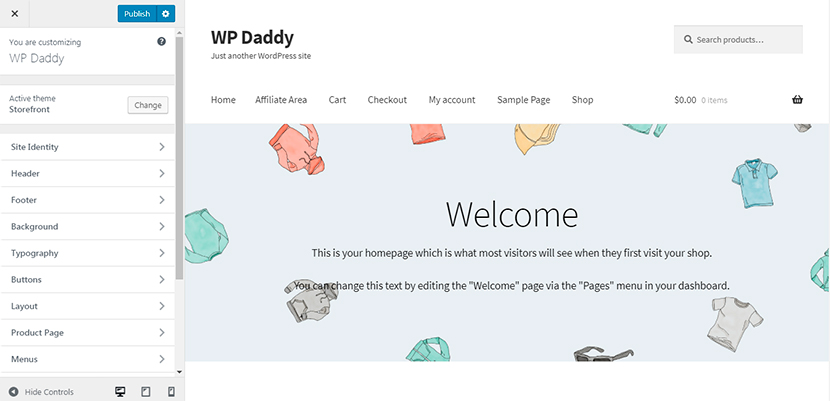
Now design your web store using WP Live Customizer.
Stripe Credit Card Payments
If WooCommerce Stripe Gateway plugin is already installed into your online store, go to WooCommerce -> Settings -> Checkout -> Stripe to set the Stripe account for credit card payments.
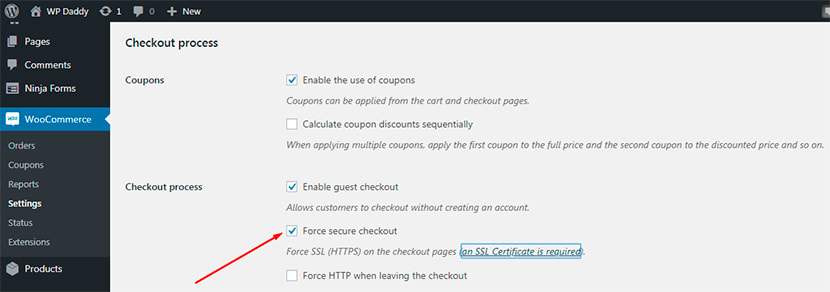
Before you start, go to Checkout Options and check the force secure checkout option to force SSL (HTTPS) on the checkout pages.
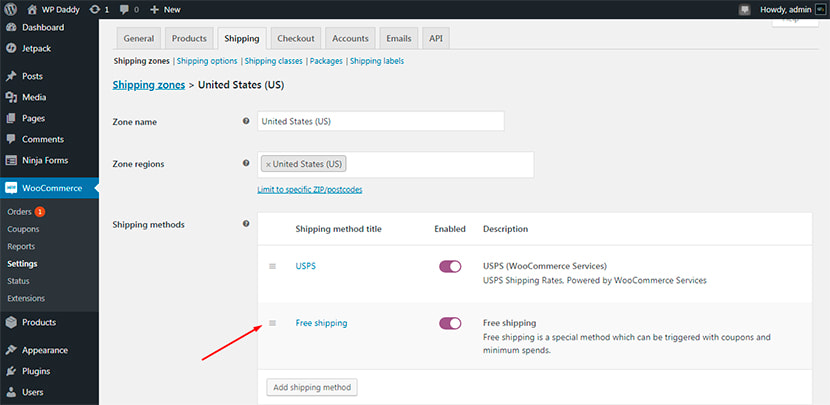
(I will test the Stripe credit card payment availability using the test product. To easily place an order and make the payment possible I go to WooCommerce -> Settings -> Shipping to make sure that there are shipping methods available for a definite shipping zone and create a new shipping method (free shipping).)
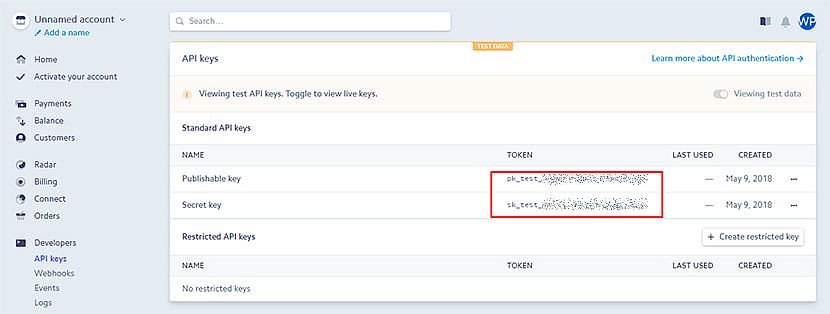
As your Stripe account has already been created, sign in and get your API keys to connect your account to your site.
Go to WooCommerce -> Settings -> Checkout -> Stripe -> Webhook Endpoints, copy the available webhook endpoint URL and add it to your Stripe account settings.

I enable the test mode and copy my publishable and secret keys to insert them into the correspondent fields in my dashboard. And you can copy your publishable (pk_live), secret (sk_live) and restricted key (rk_live) into the correspondent fields in your WP dashboard if you want to run Stripe in the live mode.
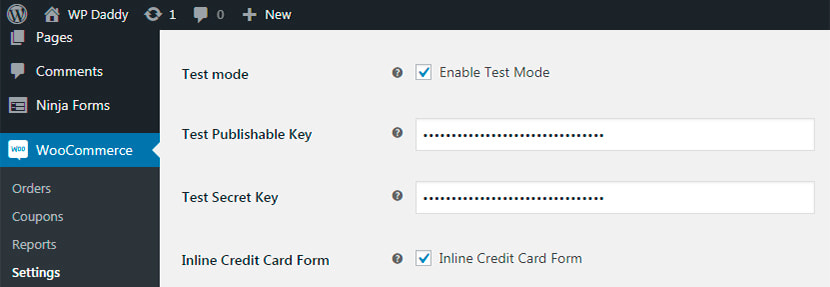
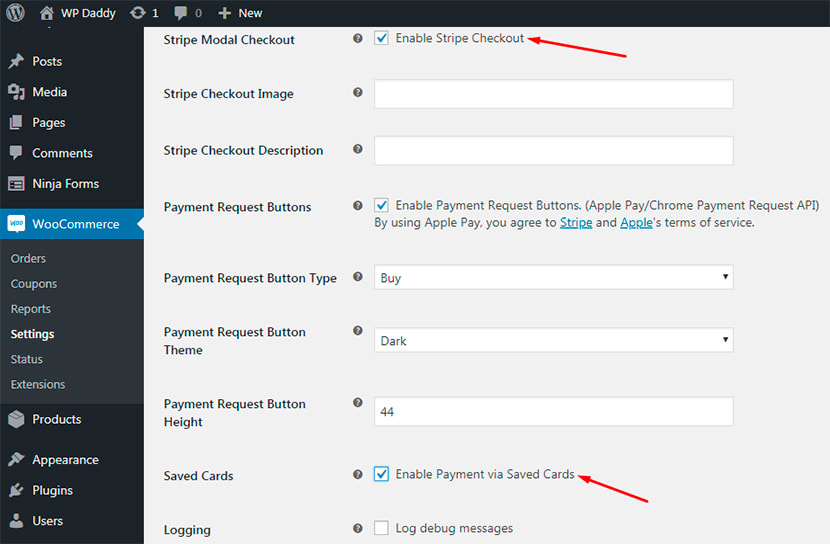
I also check the Enable Stripe Checkout and Enable Payment via Saved Cards Stripe checkout options, and then save the changes.
To make sure that now Stripe credit card payments are available for me, I create a new product to buy it and pay for it via the test credit card.
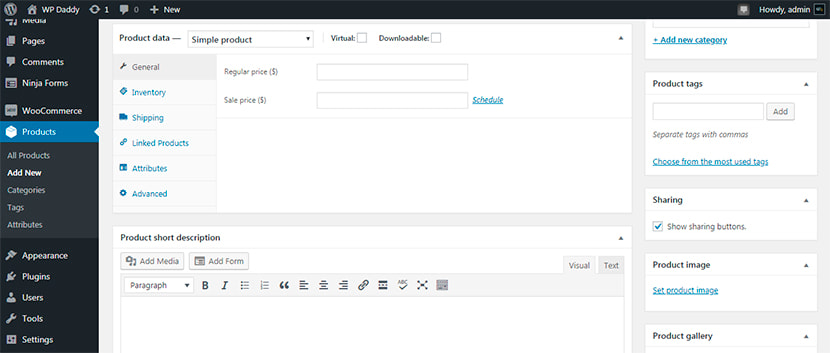
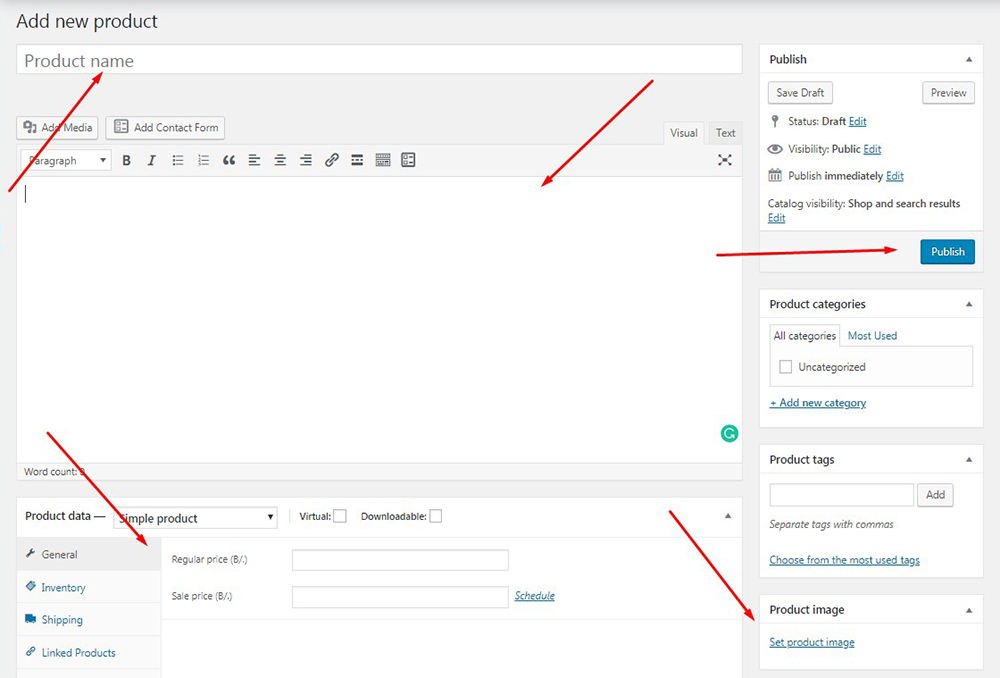
So I go to Products -> Add New, create a product’s title,
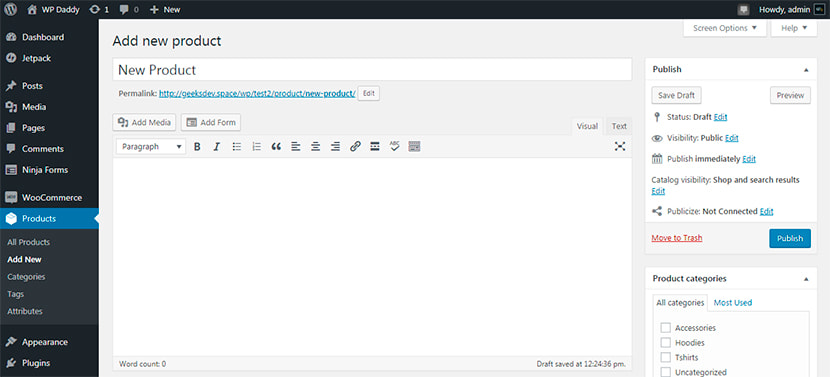
and then I choose the simple product type in the Product Data. I also choose a category, set a regular and sale price, upload a product image and publish a product to make it live.
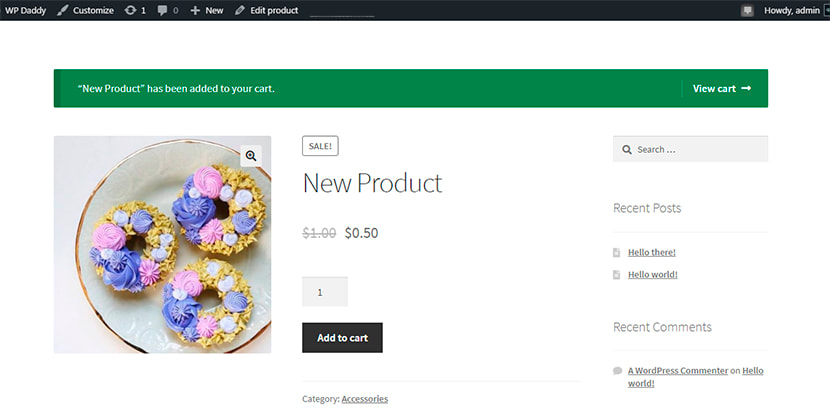
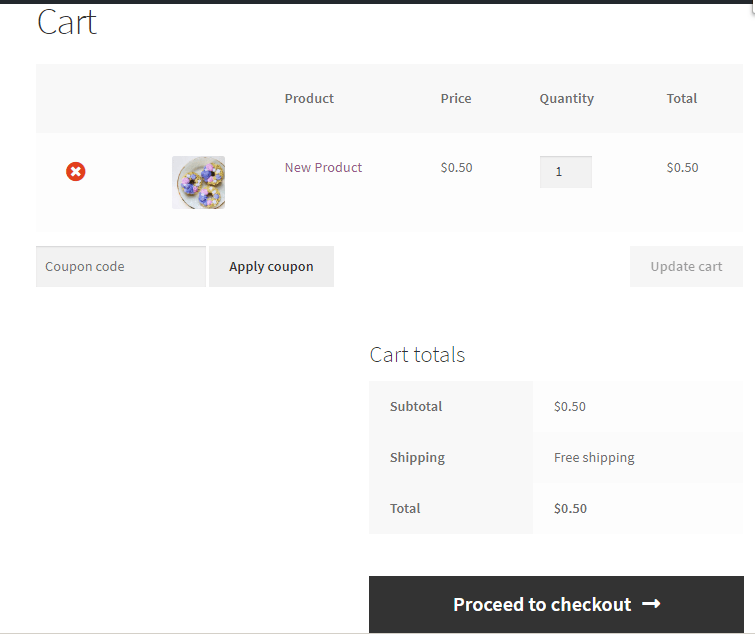
Now a customer can click the Add to Cart button and see their product added to cart to check the details (the amount, price and cart totals). After that, just proceed to checkout.
I insert the billing details, I use the 4242424242424242 VISA card number for a test mode.
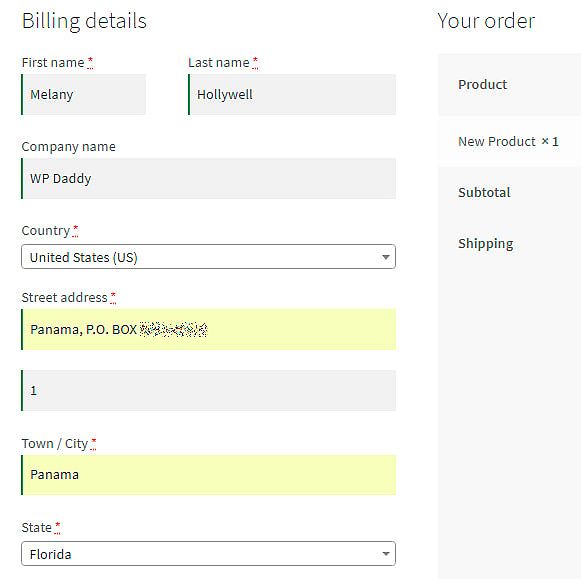
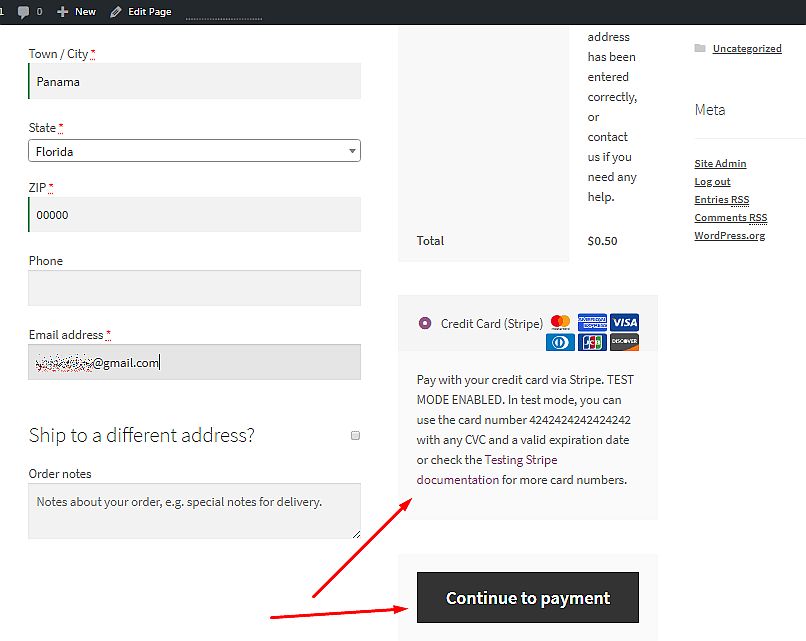
After that, I continue to payment. I insert the test card number, a test CVC and a valid expiration date, click the Pay (the product’s price) button and my order is received.
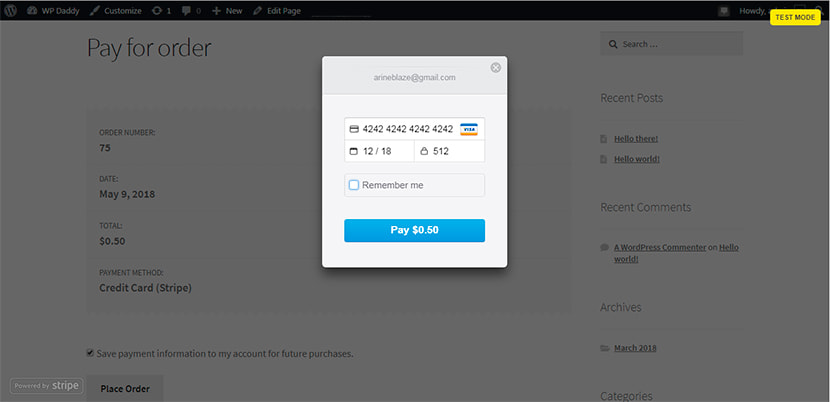
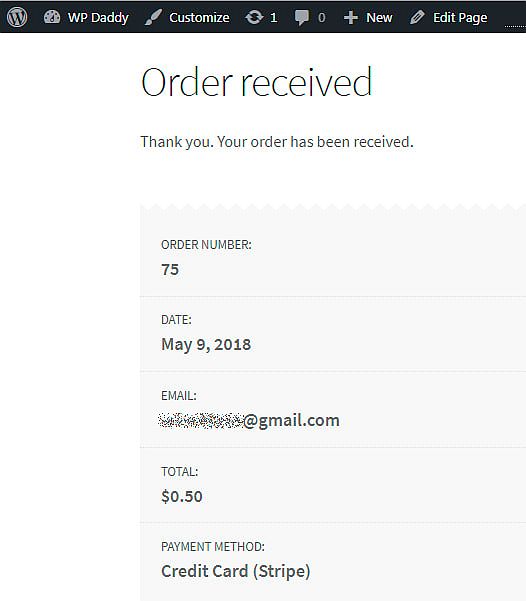
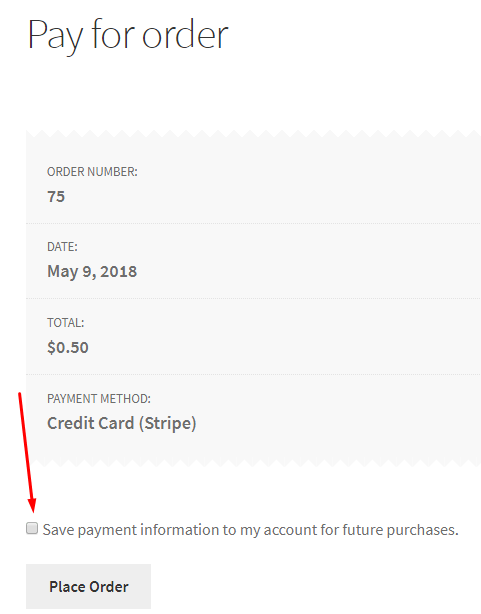
When passing the Pay for Order stage, you can check the “Save payment information to my account for future purchases” option and your payment details will be saved.
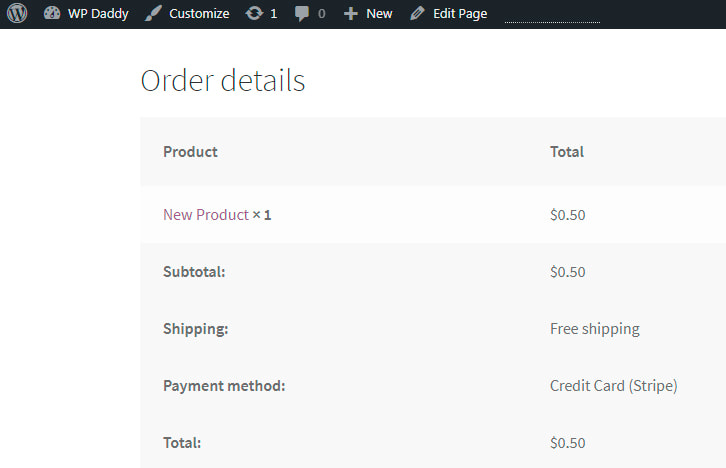
See the order details now.
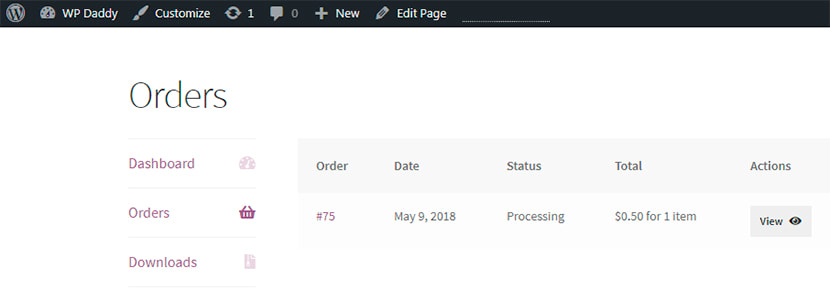
If I go to WooCommerce -> Orders in my dashboard, I will find my complete order there; it is in the processing status now.

Credit Card Payments On a Membership Website
You can also accept credit card payments on your membership website when you sell subscriptions or paid content.
Please read our step-by-step guide on how to create a membership website and start getting your profit with ease.
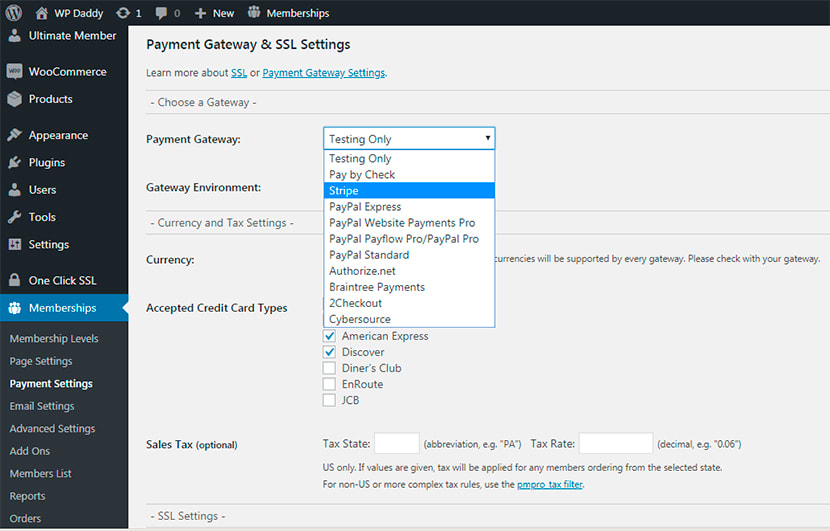
We used Paid Memberships Pro plugin to show you how to handle membership websites accepting payments. It integrates with Stripe, PayPal, 2Checkout, and other popular payment gateways to allow for accepting credit card payments without effort.
Ordering a Single Product or a Service
If you offer a single product or you provide any services and want to receive credit card payments online, you can avoid creating a full-fledged online store with a cart. The order form creation will be enough for that.
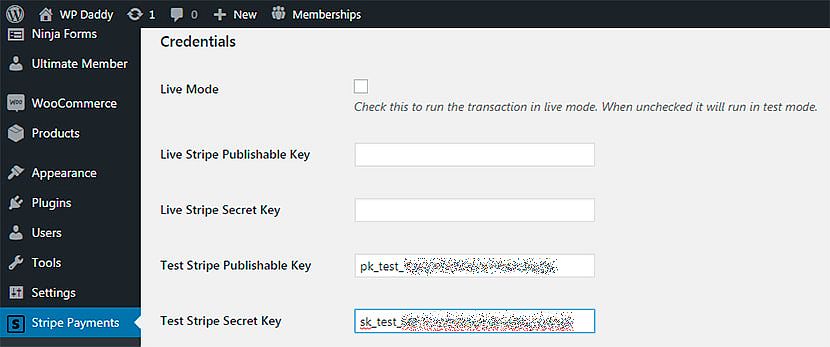
So I use the Stripe Payments plugin for WordPress and I go to General Settings to connect my Stripe account to the website.
I insert the test publishable and secret keys, and leave a test mode available. Just don’t check the Live Mode option to test the credit card payment functionality with a test card number.
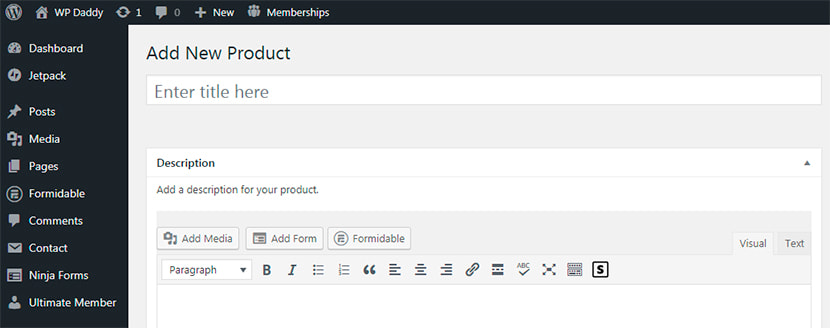
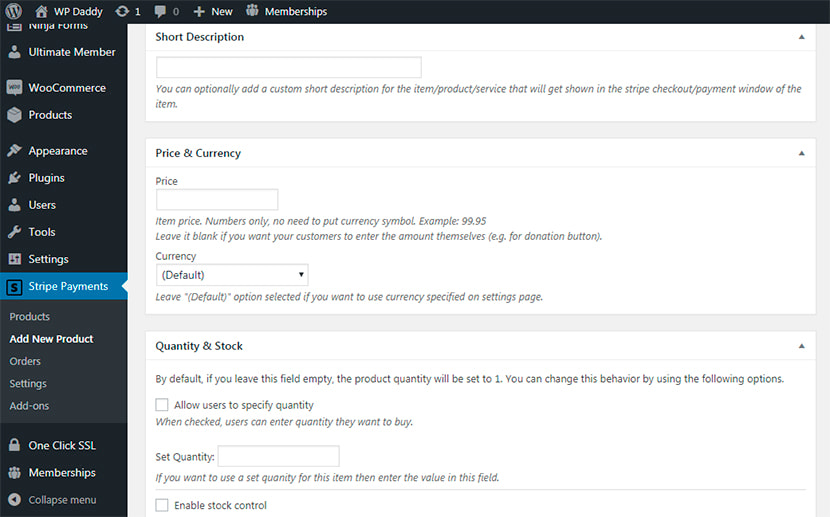
I go to Stripe Settings -> Add New Product, so here I can add its short description, check the specify the quantity on/off option, (insert a download URL for a digital product), specify the shipping cost, etc.
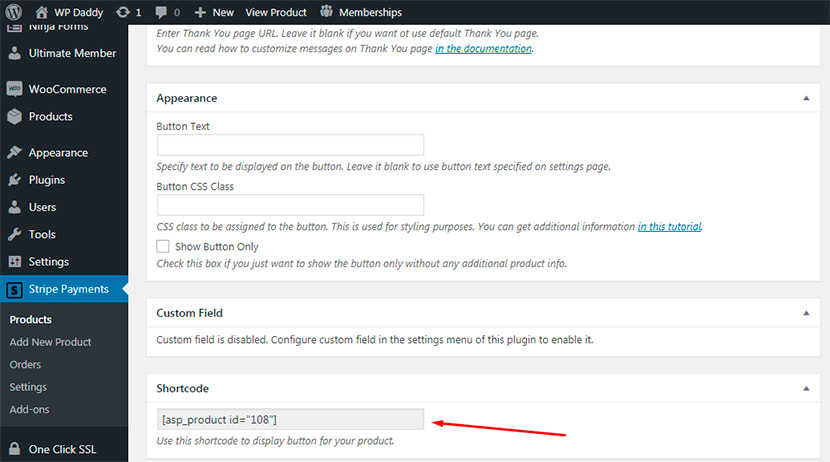
I scroll down and copy the shortcode of the product I’ve created. After that I click the Publish button to complete the product creation process.
The newly created product will be available in the products list.

So, I go to Pages -> Add New and insert this shortcode with a specific product’s name, and then I publish the page.

Now I go live and see that my product is available for ordering.
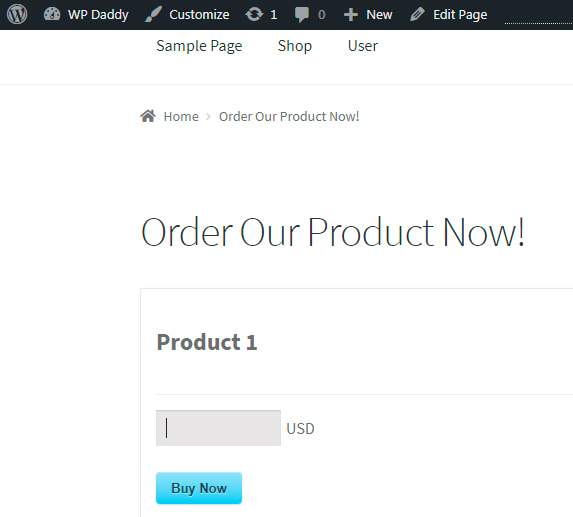
So I specify a price in USD and click the Buy Now button, now I can insert the 4242424242424242 VISA card number with CVC and valid expiration date and voila!..
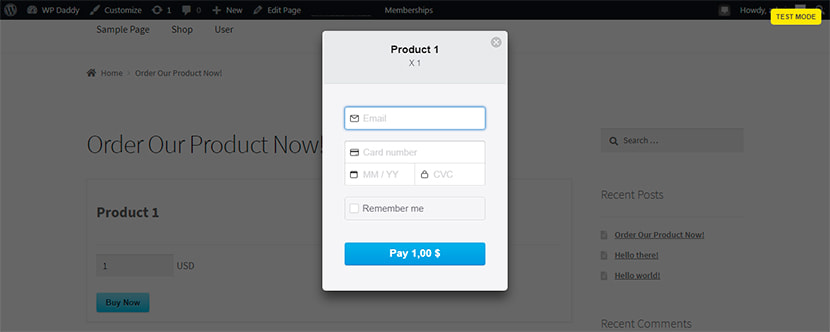
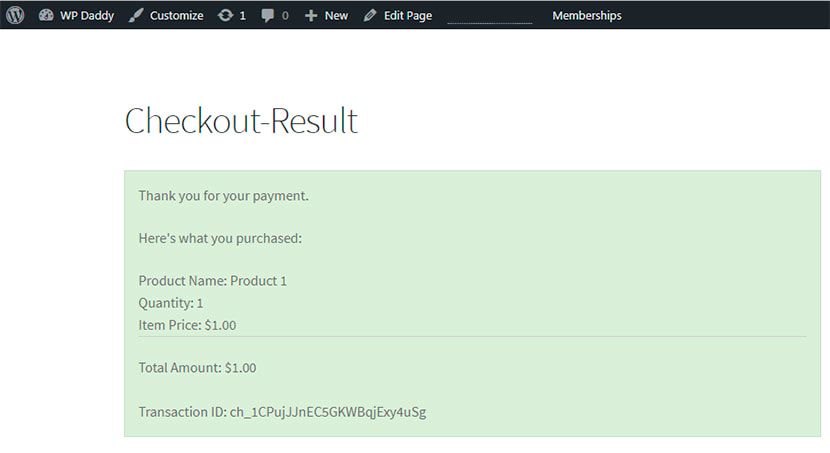
My checkout result is here: I’ve purchased the product for one dollar.
So I go to Stripe Payments -> Orders and I see my order is being processed.

As you see, it is very easy to start accepting credit card payments on your WordPress website. If you’ve got anything to say, got any concerns, statements or questions, let’s discuss.


