Every type of a website including online store, blog, corporate one, or any other variant, usually has a certain structure consisting of a number of key pages. A regular business site typically has a homepage, about page, team or staff section, blog, and of course, the contact page where visitors can find the email address, phone number or physical address to be able to get in touch with the website owner.
Every ‘Contact’ page usually includes a contact form with a standard number of required fields to fill out, and a ‘Submit’ button to send the query. The amount and types of these fields can vary depending on the preferences of a website owner.
Someone wants to learn the location of a visitor who gets in touch, so they place the necessary checkboxes into the contact form, others want to learn the age, sex, occupation, the reason of contacting, or some other data, so they add the required fields for a visitor to fill them out with their personal information before clicking the ‘Send’ button.
In this post I will show you how to create a contact form with the help of 2 different solutions. I will use a traditional Contact Form 7 plugin which is included into the pack of the most modern premium WP themes and WP Forms plugin available in the official WordPress repository.
Creating a ‘Get in Touch’ Form with Contact Form 7
So, as always we start with installing and activating both plugins. Start from installing the first one, then go to Contact –> Add New to create a new contact form.
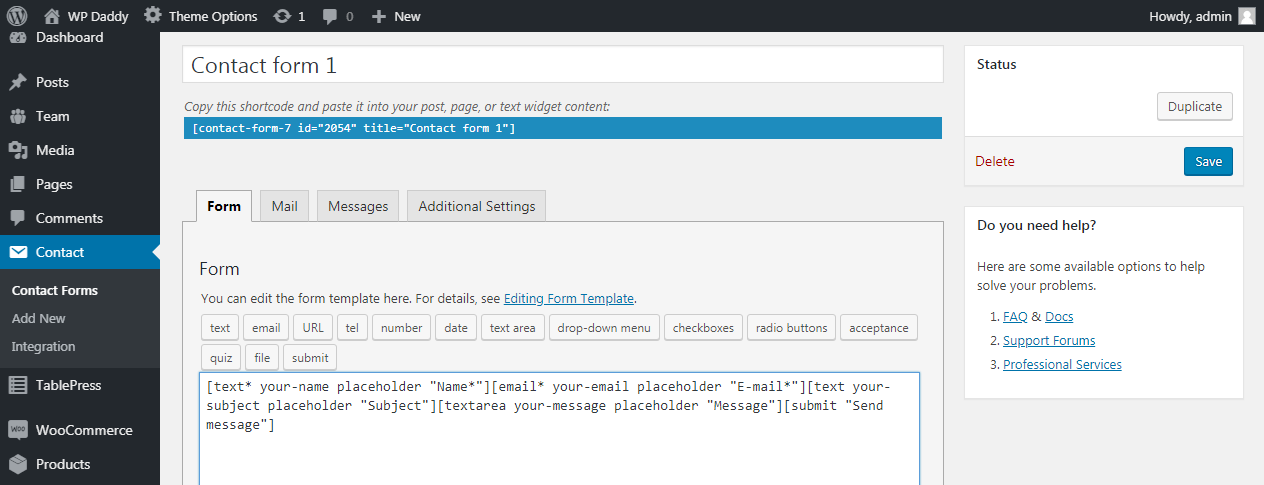
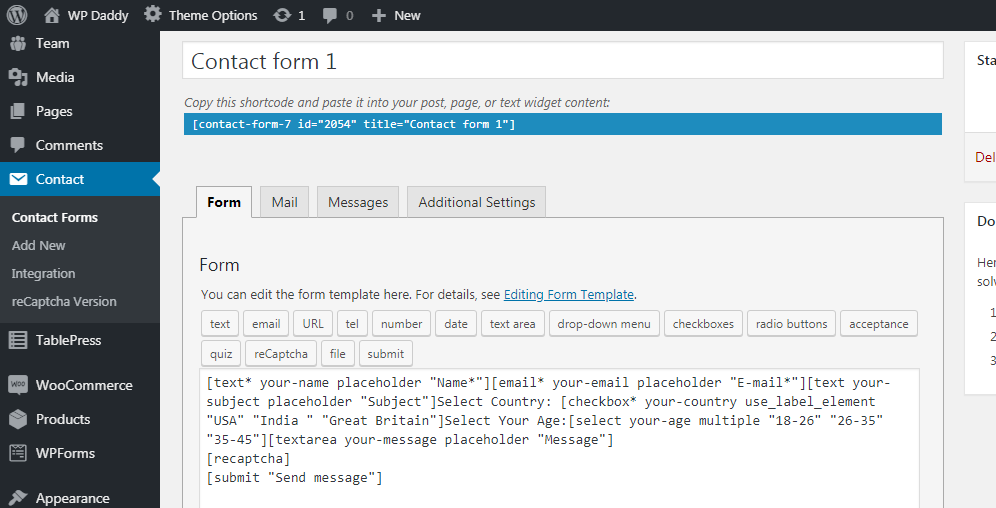
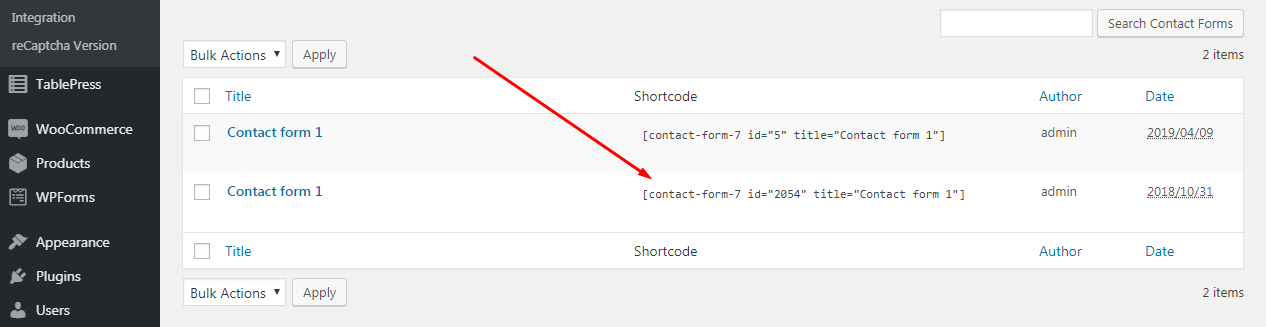
By default, you already have two sample contact forms in Contact –> Contact Forms menu available. Here’s how a standard contact form looks like: this is the set of shortcodes which creates the structure of the form you usually see on the Contacts page.
Here is this contact form live. It includes the fields like Name, Email, Subject, Message and a ‘Send Message’ button. Such short contact form is the easiest way to get in touch with you.
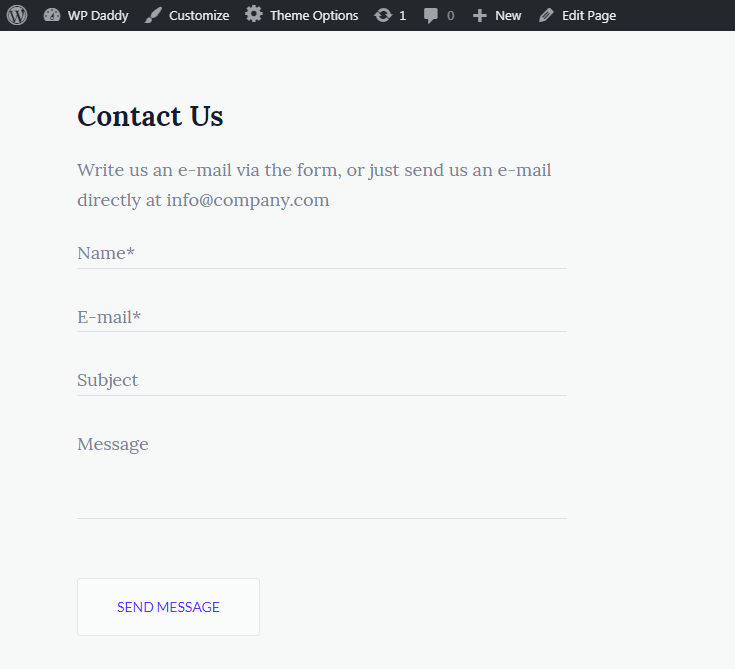
A visitor is not required to fill out a lot of fields which can be pretty boring for them. So they can easily and quickly get in touch with you just by filling out a few required contact form fields within a few minutes.
As we’ve already mentioned, sometimes more fields are required, so you can easily add them in your contact form with the help of additional shortcodes of the Contact Form 7.
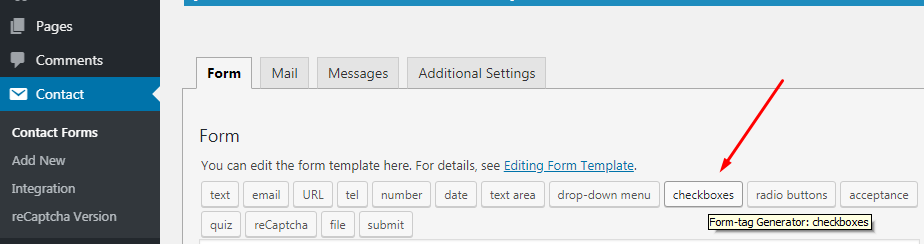
Adding Checkboxes in Your Contact Form
For instance, I want to add a country selection checkbox into my contact form. So I pick a checkboxes shortcode, and now the Form-tag generator is open.
I check the ‘Required field’ checkbox to make this field be compulsory to fill out before sending a message. Then I select a name of my checkbox like “your-country” and I put 3 options into the ‘Options’ window to allow my visitors select the correct variant from the 3 available ones (I expect my visitors to be from the USA, India or Great Britain).
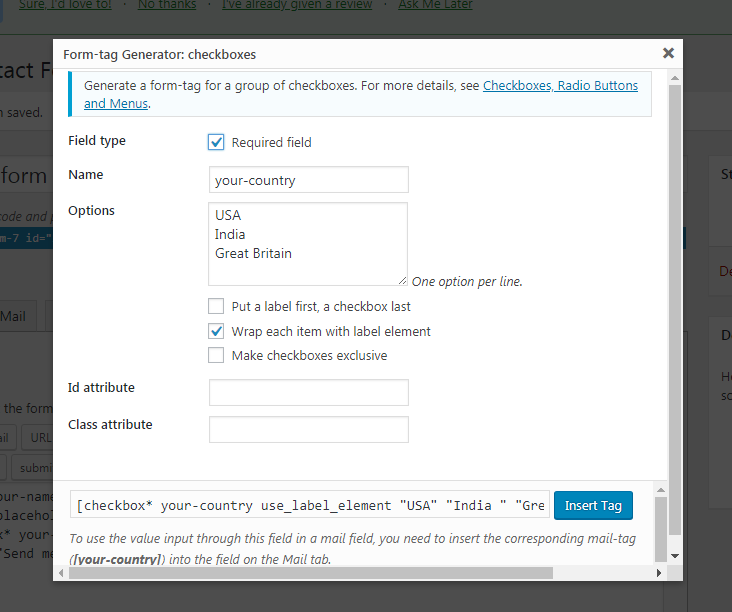
Of course, you can add more options to select from as well as insert the “Other” option instead of the definite country name.
After that I pick the ‘Wrap each item with label element’ option and, as a result, I get a shortcode like that: [checkbox* your-country use_label_element “USA” “India ” “Great Britain”]. As you see, this checkbox is a required one (its tag is marked with *), it includes the name and three options to choose from.
Adding Drop-Down Menu
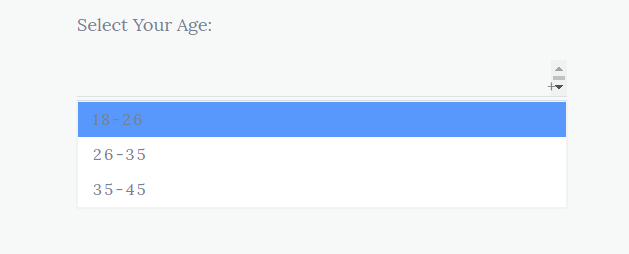
If you’d like to find out the age of users that get in touch with you, you can pick the drop-down menu shortcode which starts with the ‘select’ tag.
Its form-tag generator also contains the name of your menu, its options, and some attributes you can choose.
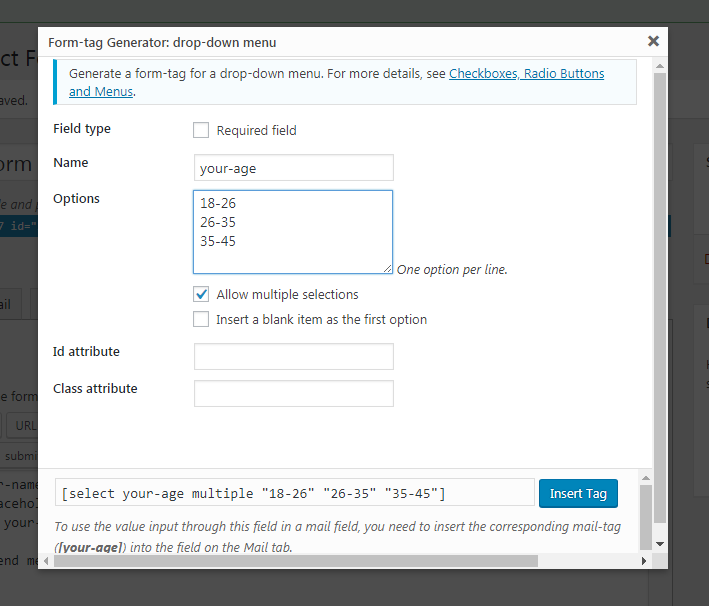
I add a name, some options to choose from and click the “Allow multiple selections” option. This is how my drop-down menu shortcode looks like [select your-age multiple “18-26” “26-35” “35-45”].
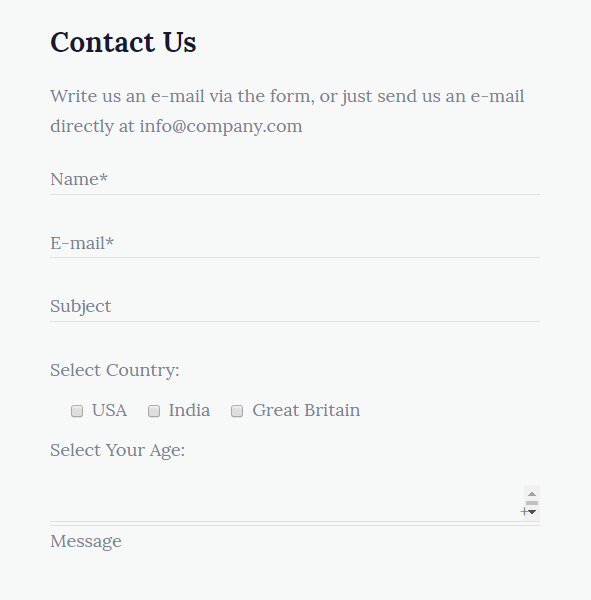
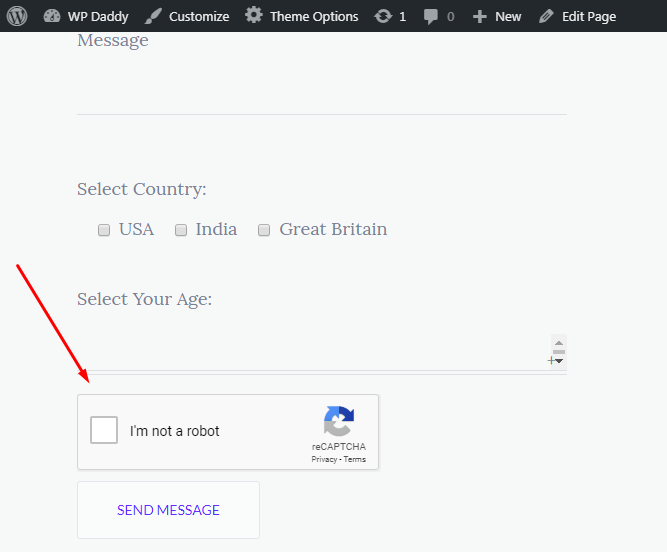
And this is how my contact form looks with additional checkboxes that I’ve just created. If you want to add a radio button, or some more additional fields into your contact form, please read more details here.
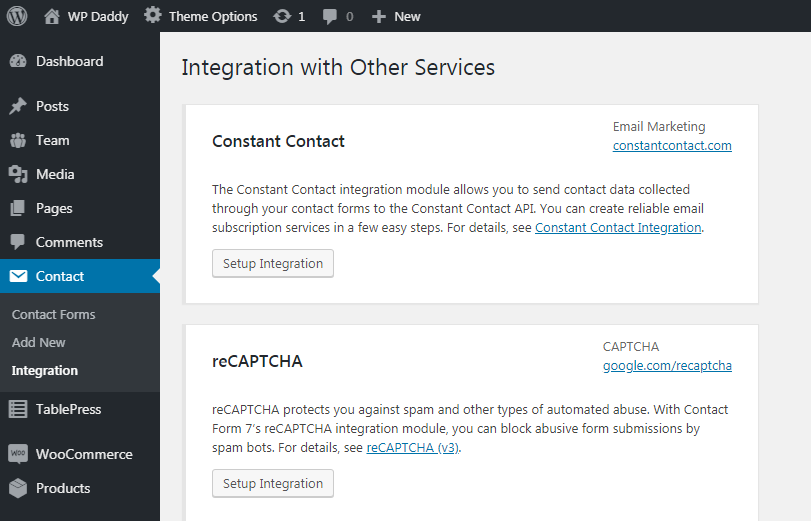
Adding a reCaptcha
When creating a contact form, of course, you want to protect your website from fake registrations and the activity of robots. This is when reCaptcha comes in handy.
Feel free to install and activate Contact Form 7 – reCaptcha v2 plugin, and then go to Contact -> Integration and click the ‘Setup Integration’ button.
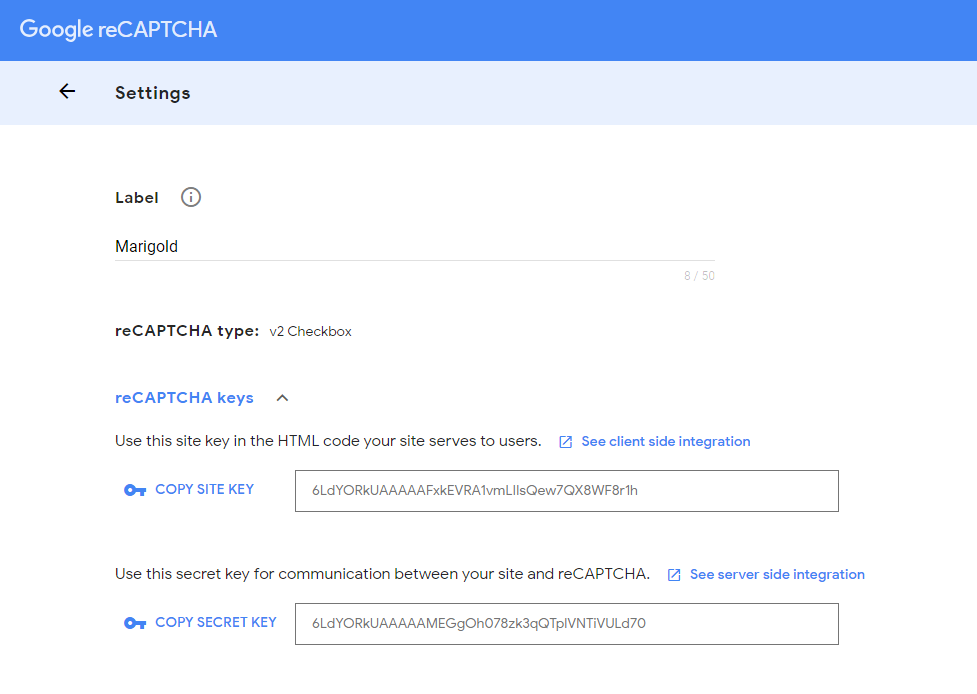
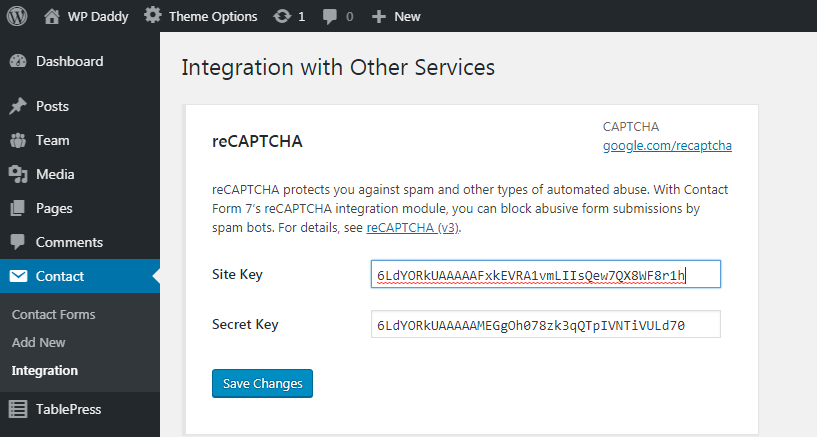
Now go to your Google Console -> Settings to find the Site and Secret Keys for reCaptcha.
If you haven’t yet added your WP website into Google and you’ve got no account in Google Console, please see the details on how to register your website in Google here.
Copy the keys and paste them into the correspondent fields in your dashboard. Click the Save Changes button to make your reCaptcha work.
Now, when the integration is set, go to Contact -> reCaptcha version and select the reCaptcha Version 2 instead of Default Usage.
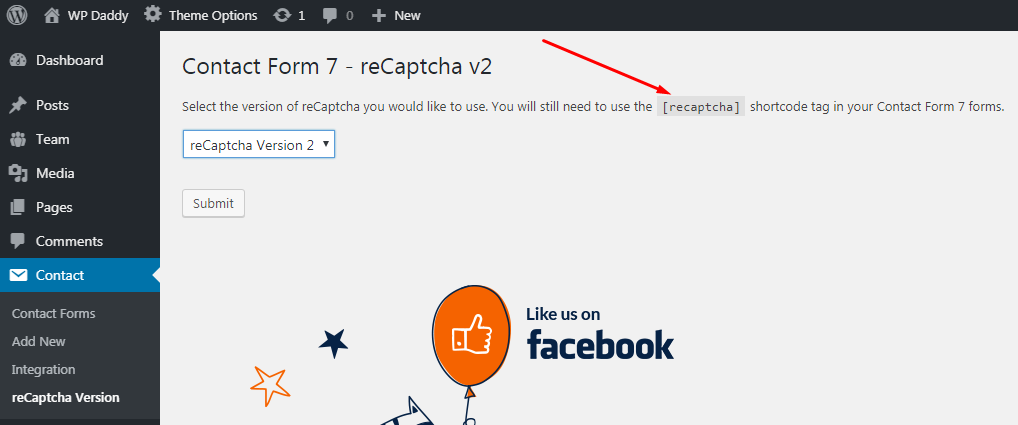
Here you’ll find the reCaptcha shortcode which you should use to insert your reCaptcha where required. This is also managed through Form-tag generator.
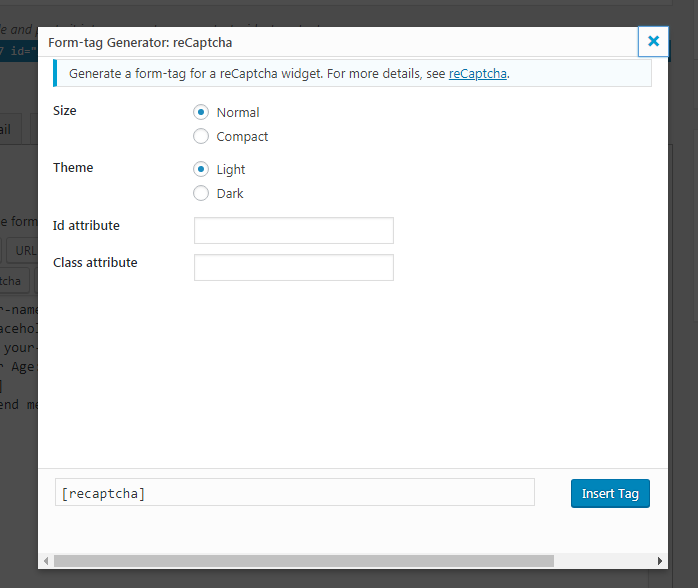
So, now when you go to your recently created contact form in the Contact -> Contact Forms list and click a selected form to open it,

you will see the reCaptcha shortcode appeared.

You can now insert it before the ‘Send’ button to let your visitors confirm they are humans before they submit a message.
This is how your reCaptcha looks live.
Now when you’ve finished editing your contact form, you can copy its shortcode and paste it on your Contacts page using the Pages -> All Pages menu or Pages -> Add New menu if your contacts page hasn’t yet been created.
Building a Contact Form with WP Forms
The principle of building a contact form with WP Forms WordPress solution is a bit similar, though it is a slightly easier one, to my mind.
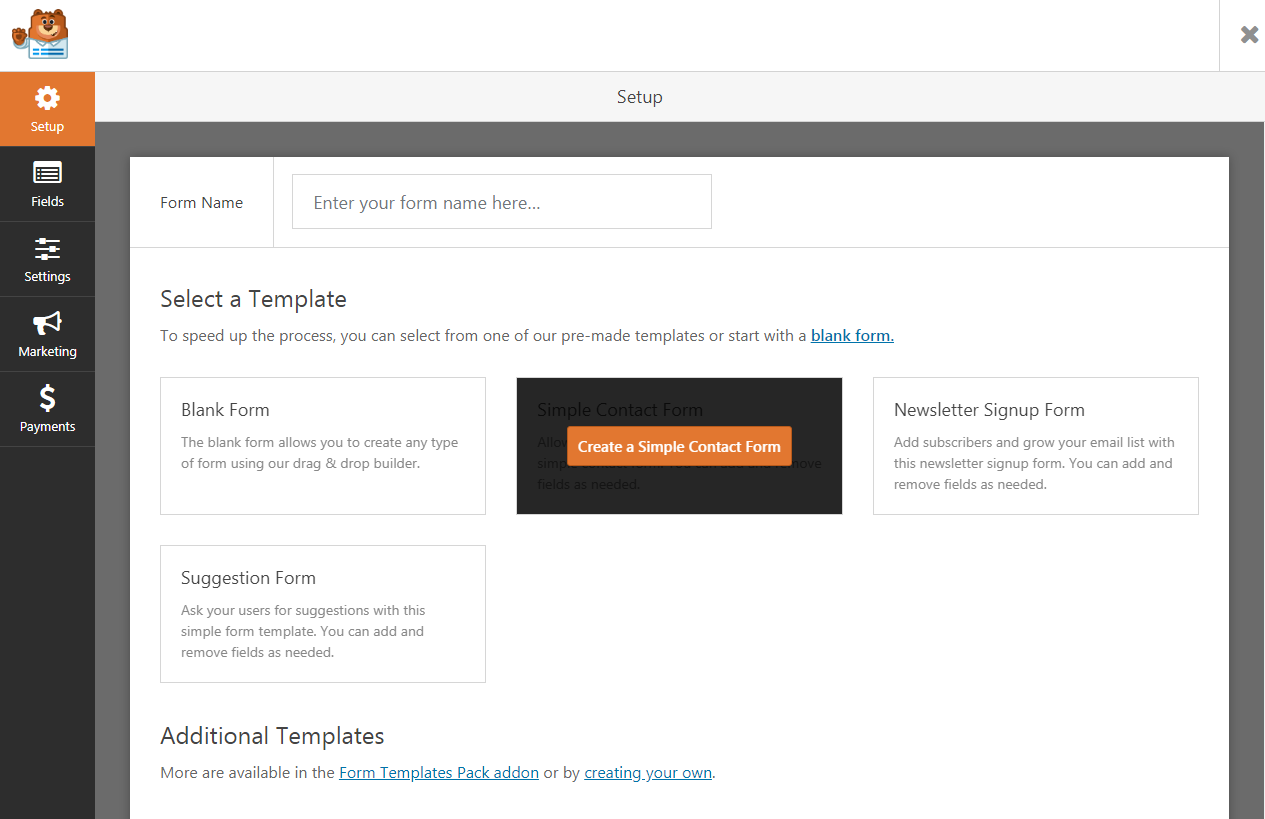
Go to WP Forms -> Add New and select a form from the available variants. Thus you can choose a blank form, a simple contact form, a newsletter signup form or a suggestion form. I select a simple contact form to proceed.
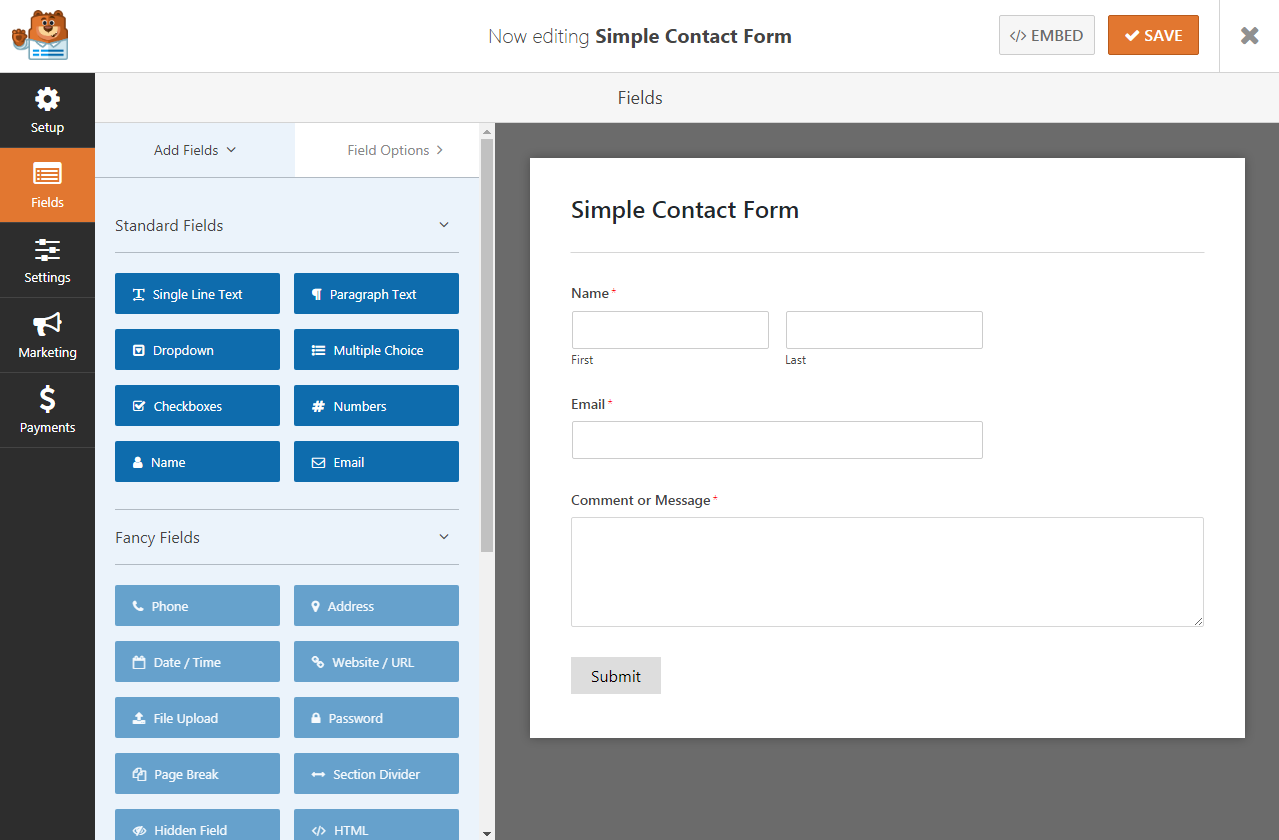
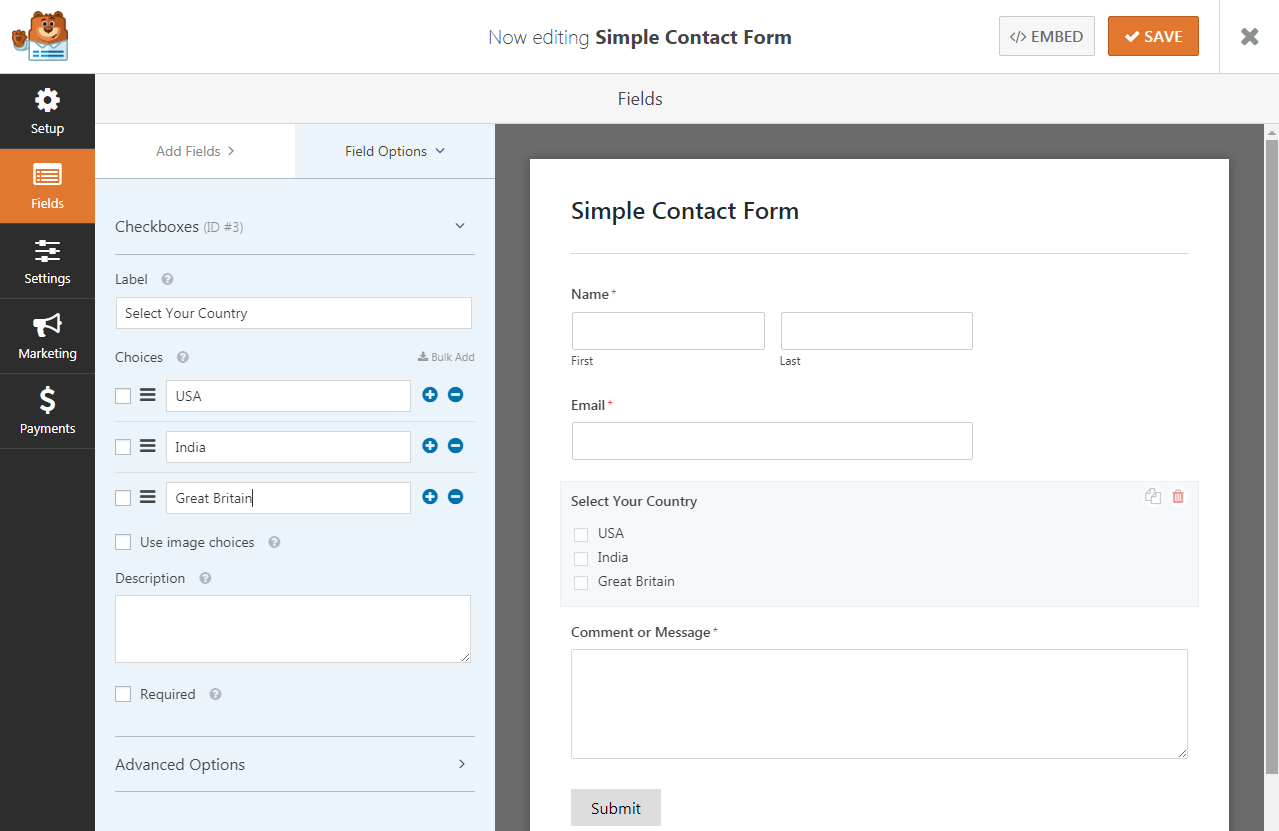
As you see, the simple contact form consists of the fields for first and last names, a field for email, a field for a message and a ‘Submit’ button. You can complement your contact form with checkboxes, drop-down menu selection, and many more options.
Just pick the required module and drag-and-drop it to put into your contact form where required.
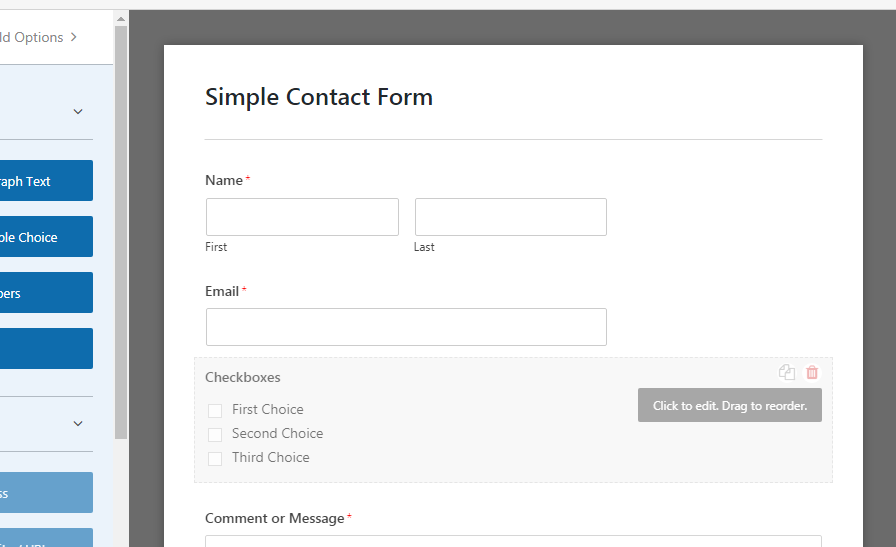
This is how my country selection checkbox looks like.
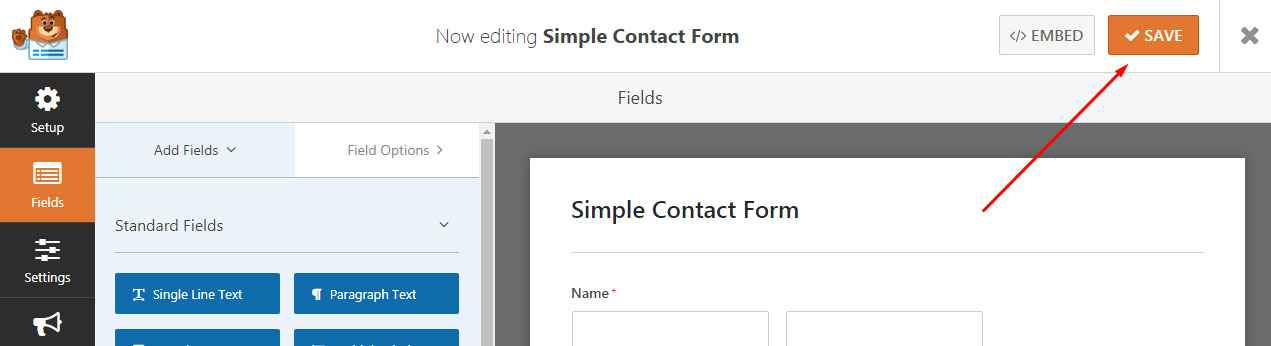
When all the changes are made, click the ‘Save’ button to keep them
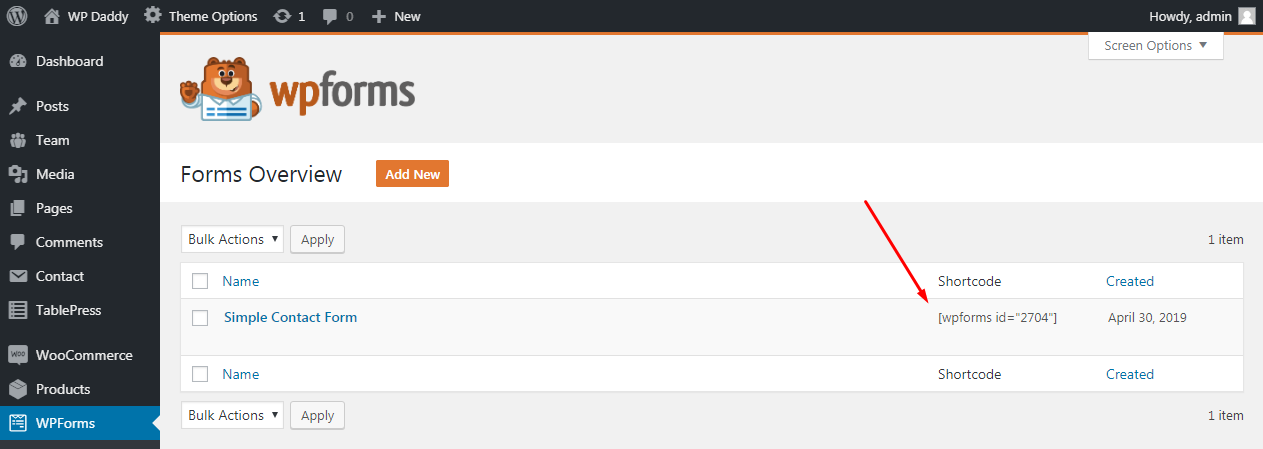
and copy the shortcode of your newly created contact form to put it on any page you prefer.
As you see, all is pretty easy.
If you’ve got any concerns, please leave them in the comments.
Hope this was helpful,
Melany H.